Long story short, Recently I was assigned to a project in my work where I have to create a lot of bash scripts. I am from a python background and using Jupyter Notebook for all my development work. The problem with bash scripts for me is its confusing bracket usage and repetitive block of codes across all my scripts.
Till that point, I was using Nano editor to create bash scripts. Nano provides some basic features as a terminal editor but not beyond a point. So I did my research and selected “SUBLIME TEXT 3” as my go-to editor for bash and other programming languages. I created a lot of snippets for repetitive functions, one-liners, and control blocks for bash scripts which not only saved time but also improved my productivity.
What is Snippet?
Snippets are a popular programming feature/functionality that ships with many modern text editors or IDE editors. You can think of snippets as a template that can be reused whenever required. Snippets are not restricted to particular programming languages. You can simply create a new snippet, add any text you want to be inserted and assign a trigger word. We will see all these features in the upcoming section.
To List Defined Snippets in Sublime Text
By default sublime text ships with some predefined snippets for the bash. It will smartly display the snippets based on the current file we are searching for the snippet from. I am inside a shell script and when I invoke the command pallet and type snippet, it automatically provides a list of defined snippets for the bash.
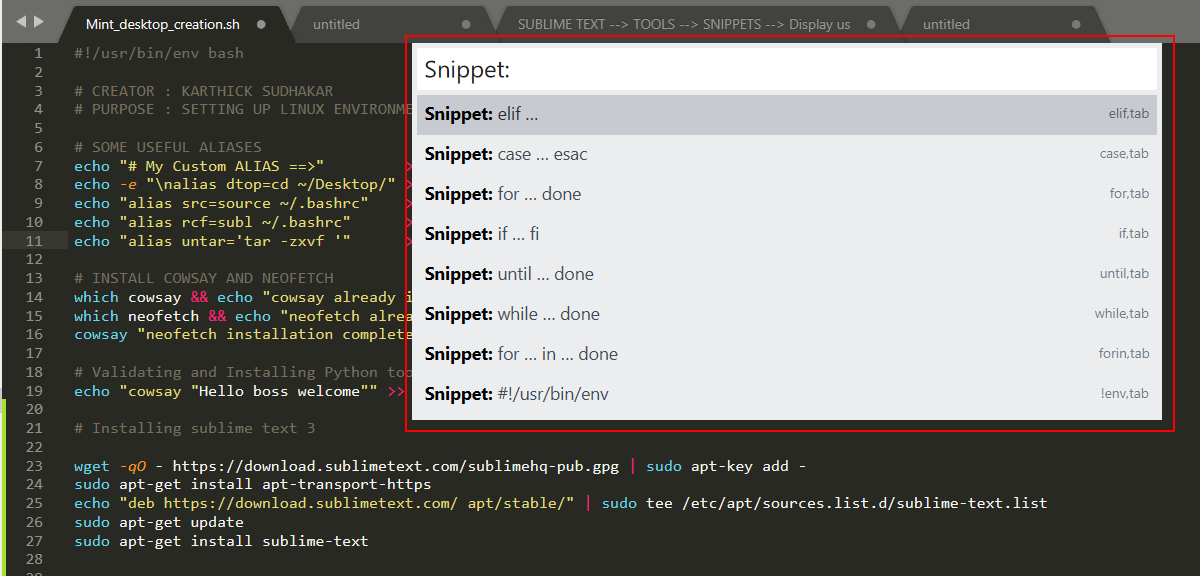
There are two ways you can access snippets in Sublime Text.
- MENU DRIVEN ⇒ SUBLIME TEXT → TOOLS → SNIPPETS
- COMMAND PALETTE ⇒ SUBLIME TEXT → COMMAND PALETTE (CTRL+SHIFT+P) → TYPE SNIPPETS
Create a New Snippets in Sublime Text
Sublime text provides a default template in XML format when we create a new snippet. To create the template got to SUBLIME TEXT → TOOLS → DEVELOPER → NEW SNIPPET.

Let’s understand the template definition and modify the parameters.
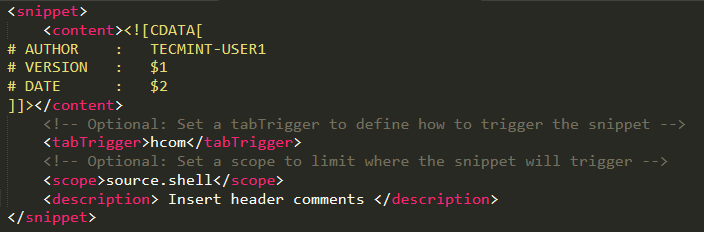
- The actual content or block of code to be inserted should be placed within
<content><![CDATA[ ]]></content>. I am going to create a snippet for “header comment“. Every script you create will have a header comment defining the information about the script like author name, created date, version number, deployment date, etc.. - Tabtrigger (Optional) which binds a “TEXT” that acts as a trigger for the snippet. When the trigger name is typed and you press the “TAB“, the snippet will be inserted. It is commented by default, remove the comment, and add some text for the trigger. Choose a descriptive and short name. For Ex: I am choosing “hcom” for inserting header comments. It can be anything of your choice.
- Scope (Optional) defines to which language you snippets are bonded to. You may work with 2 or 3 different programming languages at a time and you might use the same name for different snippets across different programming languages. In that case scope controls to which language you snippet should be inserted to thus avoiding the collision. You can get the list of scopes from Link. Alternatively, you can go to TOOLS → DEVELOPER → SHOW SCOPE NAME or Press
<CTRL+ALT+SHIFT+P>to get the scope name of the language you are using. - Description (Optional) will not be available in the default template but you can use it to define some context on what this snippet does.
Now we have done some basic stuff. We have defined a snippet that will insert a simple header comment which binds with the “hcom” tab trigger and sourced to shell script.
Now let’s open a new bash file and “type hcom“. If you look at the below image when I “type h” my snippet definition just pops up with the description we gave. All I have to do is press the <tab> key to expand it.

Fields
Fields are denoted using $1, $2, $3 and so on. With the help of the field, you can jump to the position where the field marker is placed by simply hitting <tab> key.
If you take a look at my snippet I have added two field markers $1 and $2, what it does is when I insert my snippet the cursor will be placed at $1 so I can type something at that position.
Then I have to press the <tab> key to jump to the next marker $2 and type something. It is to be noticed that when you have any identical marker say $1 in this case at 2 positions, updating the field at one position will update the identical fields ($1).
<tab>key → Jump to the next field marker.<shift+tab>key → Jump to previous field marker.<Esc>key → Break out of field cycle.$0→ Controls the exit point.
Place Holder
Place holders are like a key-value pair defined within curly braces ${0:<Default value>}; the field marker will be tagged with a default value. You can either change the value or leave it as it is. When the snippet is inserted and if you press the tab the cursor will be placed at the default value.
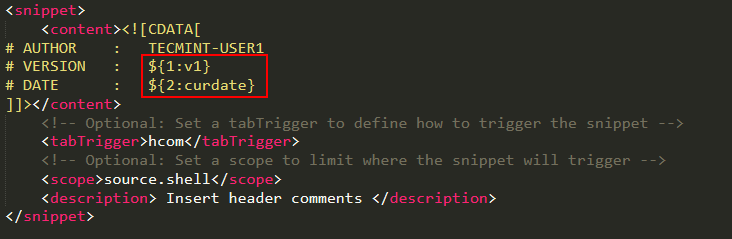
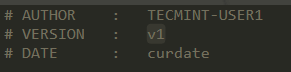
Now the snippet is inserted with the default value and the mouse is placed at $1 which is v1 in this case. Either I can modify the value or just press <tab> the key to move to the next marker.
The only drawback with Sublime Text snippets are, you cannot group all the snippets in a single file. Only one snippet per file is allowed which is cumbersome. But there are other options like creating .sublime-completion files. To know more about this, take a look at the documentation.
Where is My Snippet File Stored?
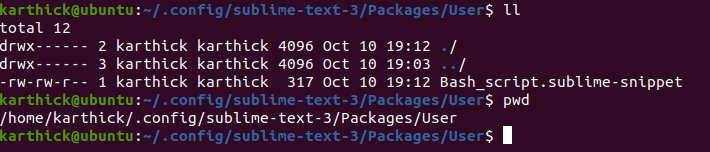
The snippet files should be saved with the suffix .sublime-snippet. Go to PREFERENCES → BROWSE PACKAGES. It will open the directory where user-defined settings are stored. Go to the directory “User” where your snippet file will be saved.
Snippet Generator
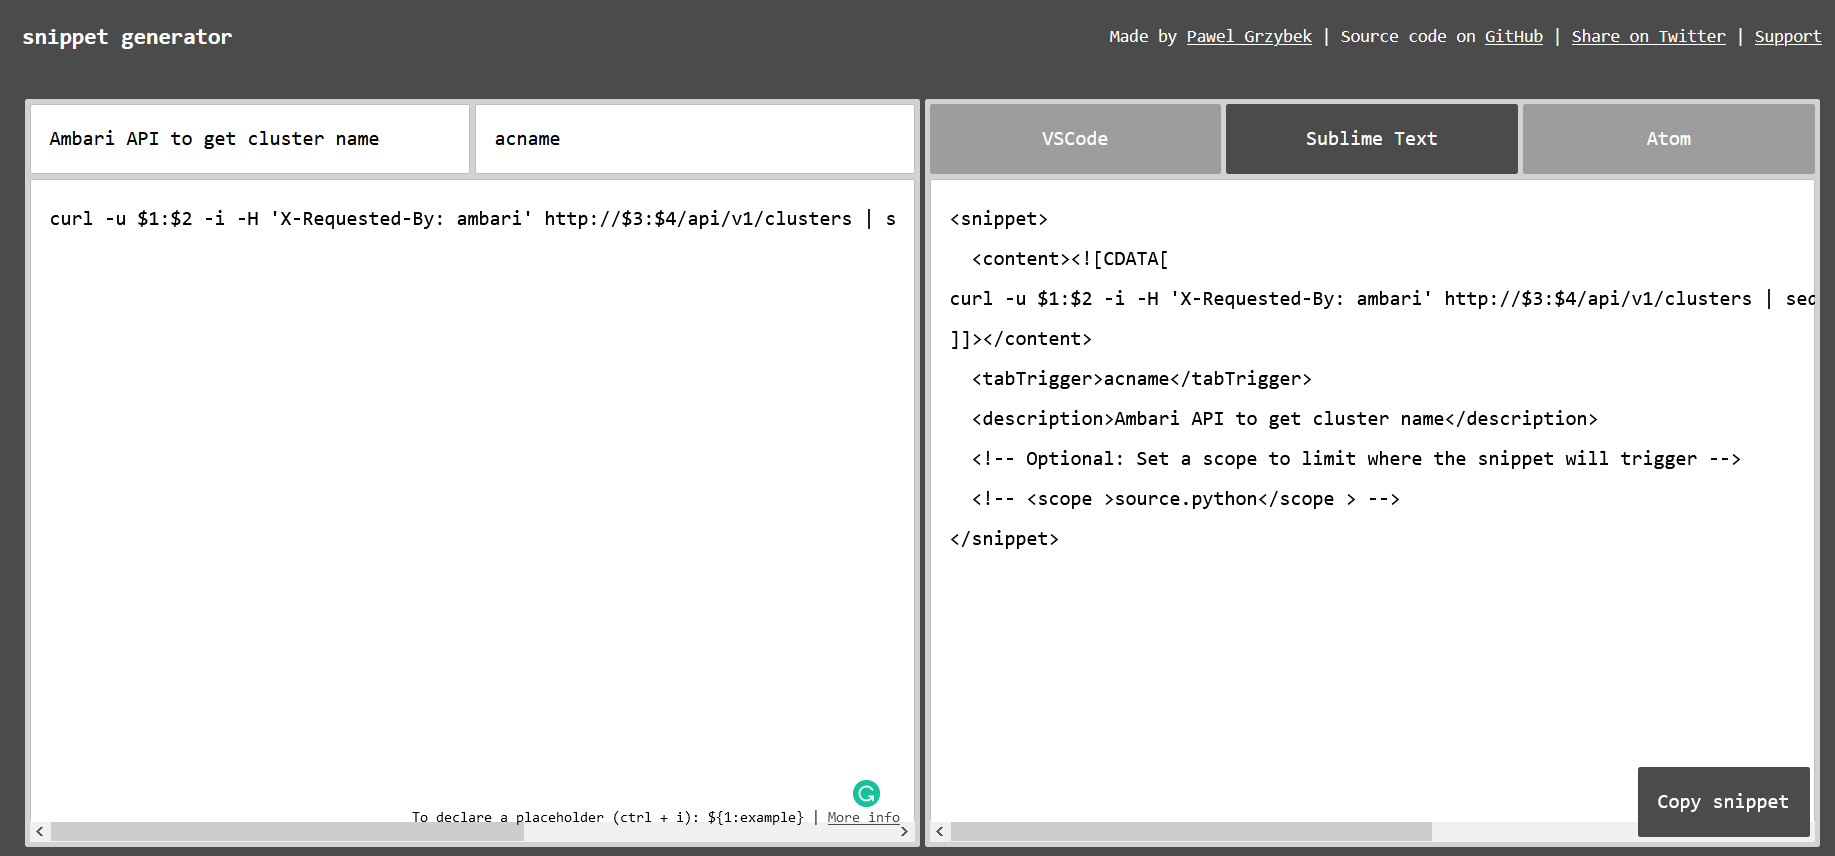
Snippet-generator-app provides web-based automatic snippet generation based on our input. It is available for Sublime Text, Atom, and VSCode. Type the description, tab trigger, and content on the left side which will generate live code at the right side of the page.
Sample snippet that will get Cluster name from Ambari API.

That’s all for today. We have seen the advantages of using snippets in sublime text. I have just used a simple pseudo text as an example to demonstrate the snippets feature but there is a lot more to it. I would also point out this feature is available in all the editor/IDE like Vim, Atom, Eclipse, Pycharm, Vscode, etc.


Thank you for using your remarkable talents and skills to fuel our mutual efforts
@sam
Thanks for the feedback :)
Code snippets are really useful for daily coding.
I created time ago a “serverless” cms (all code is javascript executing in client) that among others, I used to write down code snippets.
It is no so fast as having it embedded in a text editor since it requires copy and pastes from the browser, but it is editor-neutral and allows for many more things than just code snippets.
@Enrique
Thanks for sharing the information :)