Apache Guacamole is a clientless open-source web-based gateway that provides remote access to servers and even client PCs via a web browser using protocols such as SSH, VNC and RDP.
Apache Guacamole comprises 2 main components:
- Guacamole Server: This provides all the server-side and native components required by Guacamole to connect to remote desktops.
- Guacamole Client: This is an HTML 5 web application and a client that allows you to connect to your remote servers/desktops. This is underpinned by the Tomcat server.
In this article, we will walk you through the installation of Apache Guacamole on Ubuntu 20.04.
Prerequisites
Before you start, ensure that you have the following:
- An instance of Ubuntu 20.04 LTS with sudo user configured.
- Minimum 2GB RAM
Let’s now delve in and install Guacamole on Ubuntu 20.04 LTS.
On this page
Step 1: Installing Apache Guacamole in Ubuntu Server
1. The installation of Apache Guacamole is done by compiling the source code. For this to be achieved, some build tools are required as a prerequisite. Therefore, run the following apt command:
$ sudo apt-get install make gcc g++ libcairo2-dev libjpeg-turbo8-dev libpng-dev libtool-bin libossp-uuid-dev libavcodec-dev libavutil-dev libswscale-dev freerdp2-dev libpango1.0-dev libssh2-1-dev libvncserver-dev libtelnet-dev libssl-dev libvorbis-dev libwebp-dev
2. Once the installation of the build tools is complete, proceed and download the latest tarball source file from Guacamole’s release page. At the time of penning down this guide, the latest release is Guacamole version 1.2.0. To download the latest tarball file, just run the wget command below.
$ wget https://downloads.apache.org/guacamole/1.2.0/source/guacamole-server-1.2.0.tar.gz
3. Next, extract the Guacamole tarball file and navigate into the uncompressed folder.
$ tar -xvf guacamole-server-1.2.0.tar.gz
$ cd guacamole-server-1.2.0
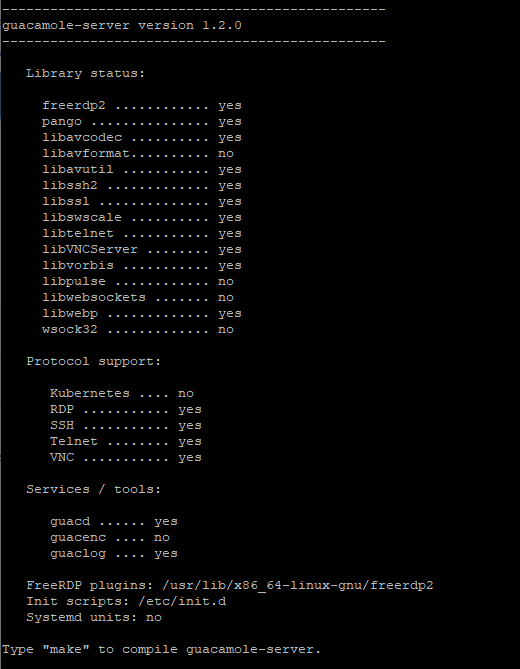
4. Thereafter, execute the configure script to verify if there are any missing dependencies. This usually takes two minutes or so, so be patient as the script performs the dependency check. A barrage of output will be displayed including details about the server version as shown.
$ ./configure --with-init-dir=/etc/init.d
5. To compile and install Guacamole, run the commands below, one after the other.
$ sudo make
$ sudo make install
6. Then run the ldconfig command to create any relevant links and cache to the most recently shared libraries in the Guacamole server directory.
$ sudo ldconfig
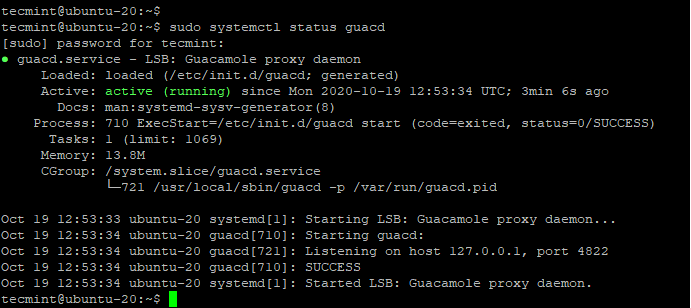
7. To get the Guacamole server running, we will start the Guacamole Daemon – guacd – and enable it on boot-up and verify the status as shown.
$ sudo systemctl start guacd
$ sudo systemctl enable guacd
$ sudo systemctl status guacd
Step 2: Installing Tomcat on Ubuntu Server
8. Tomcat server is a requirement as it will be used to serve the Guacamole client content to users who connect to the server through a browser. Therefore, run the following command to get Tomcat installed:
$ sudo apt install tomcat9 tomcat9-admin tomcat9-common tomcat9-user
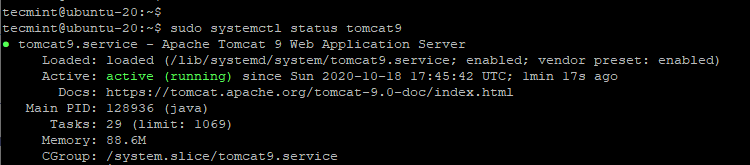
9. Upon installation, the Tomcat server should be up and running. You can confirm the status of the server as shown:
$ sudo systemctl status tomcat
10. If Tomcat is not running, start and enable it on boot:
$ sudo systemctl start tomcat
$ sudo systemctl enable tomcat
11. By default, Tomcat runs on port 8080 and if you have the UFW running, you need to allow this port as shown:
$ sudo ufw allow 8080/tcp
$ sudo ufw reload
Step 3: Installing Guacamole Client in Ubuntu
12. With the Tomcat server installed, We will proceed to install the Guacamole client which is a Java-based web application that allows users to connect to the server.
First, we will create a configuration directory as shown.
$ sudo mkdir /etc/guacamole
13. We are going to download the Guacamole client binary to the /etc/guacamole directory using the command as shown.
$ sudo wget https://downloads.apache.org/guacamole/1.2.0/binary/guacamole-1.2.0.war -O /etc/guacamole/guacamole.war
14. Once downloaded, create a symbolic link to the Tomcat WebApps directory as shown.
$ ln -s /etc/guacamole/guacamole.war /var/lib/tomcat9/webapps/
15. To deploy the web app, restart both the Tomcat server and the Guacamole daemon.
$ sudo systemctl restart tomcat9
$ sudo systemctl restart guacd
Step 4: Configuring Guacamole Client in Ubuntu
There are 2 major configuration files associated with Guacamole; the /etc/guacamole and the /etc/guacamole/guacamole.properties file which is used by Guacamole and it’s extensions.
16. Before proceeding, We need to create directories for the extensions and libraries.
$ sudo mkdir /etc/guacamole/{extensions,lib}
17. Next, configure the home directory environment variable and append it to the /etc/default/tomcat9 configuration file.
$ sudo echo "GUACAMOLE_HOME=/etc/guacamole" >> /etc/default/tomcat9
Step 5: Configuring Guacamole Server Connections in Ubuntu
18. To determine how Guacamole connects to the Guacamole daemon – guacd – we will create the guacamole.properties file as shown.
$ sudo vim /etc/guacamole/guacamole.properties
Add the content below and save the file.
guacd-hostname: localhost
guacd-port:     4822
user-mapping:   /etc/guacamole/user-mapping.xml
auth-provider:  net.sourceforge.guacamole.net.basic.BasicFileAuthenticationProvider
19. Next, we will create the user-mapping.xml file that defines the users that can connect and login to Guacamole via the web interface on a browser.
Before doing so we need to generate a hashed password for the login user as shown. Be sure to replace your strong password with your own password.
$ echo -n yourStrongPassword | openssl md5
You should get something like this.
(stdin)= efd7ff06c71f155a2f07fbb23d69609
Copy the hashed password and save it somewhere as you will need this in the user-mapping.xml file.
20. Now create the user-mapping.xml file.
$ sudo vim /etc/guacamole/user-mapping.xml
Paste the content below.
<user-mapping>
    <authorize
            username="tecmint"
            password="efd7ff06c71f155a2f07fbb23d69609"
            encoding="md5">

        <connection name="Ubuntu20.04-Focal-Fossa">
            <protocol>ssh</protocol>
            <param name="hostname">173.82.187.242</param>
            <param name="port">22</param>
            <param name="username">root</param>
        </connection>
        <connection name="Windows Server">
            <protocol>rdp</protocol>
            <param name="hostname">173.82.187.22</param>
            <param name="port">3389</param>
        </connection>
    </authorize>
</user-mapping>
We have defined two connection profiles that allow you to connect to 2 remote systems which are online:
- Ubuntu 20.04 Server – IP: 173.82.187.242 via SSH protocol
- Windows Server – IP: 173.82.187.22 via RDP protocol
21. To effect the changes, restart the Tomcat server and Guacamole:
$ sudo systemctl restart tomcat9
$ sudo systemctl restart guacd
To this point, the Guacamole server and client has been configured. Let’s now access Guacamole web UI using the browser.
Step 6: Accessing Guacamole Web UI
22. To access the Guacamole web UI, open your browser and browse your server’s address as shown:
http://server-ip:8080/guacamole
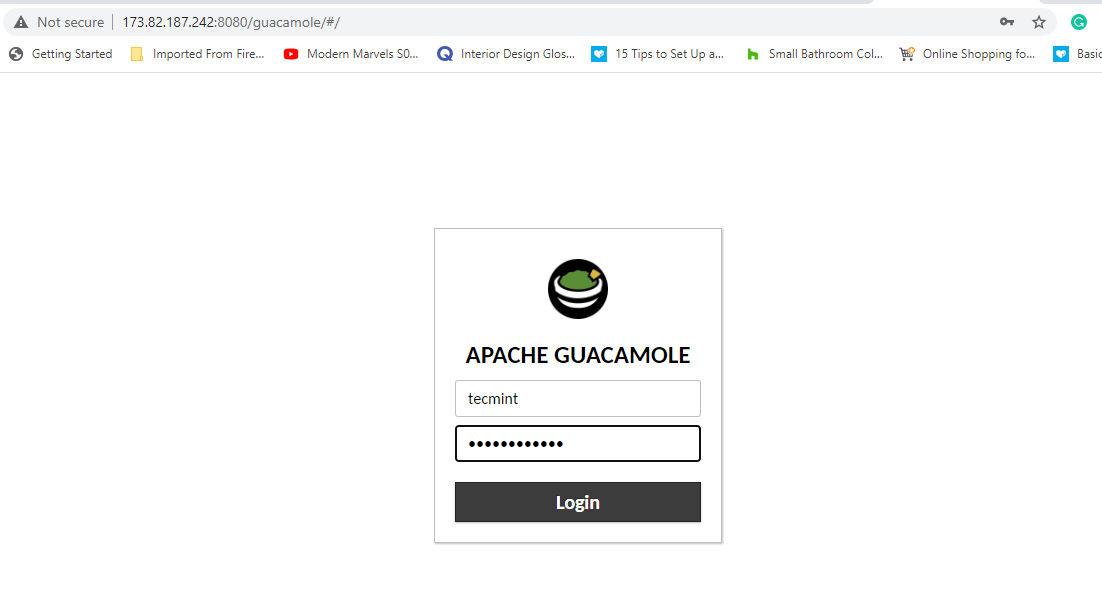
23. Login using the credentials that you specified in the user-mapping.xml file. Upon logging in, you will find the server connections that you defined in the file listed at the button under the ALL CONNECTIONS section.
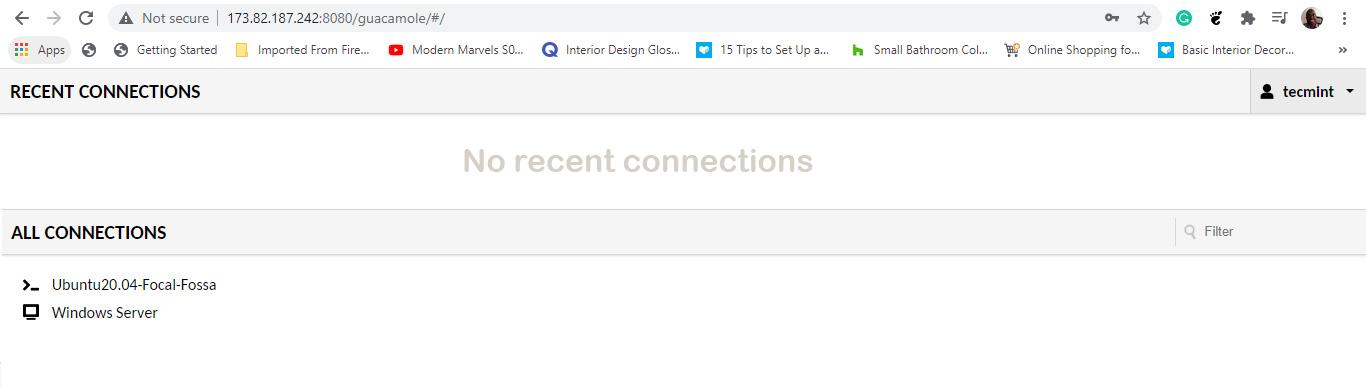
24. To access the Ubuntu 20.04 LTS server, click on the connection and this initiates an SSH connection to the remote Ubuntu server. You will be prompted for the password and once you type it in and hit ENTER, you will be logged in to the remote system as shown.
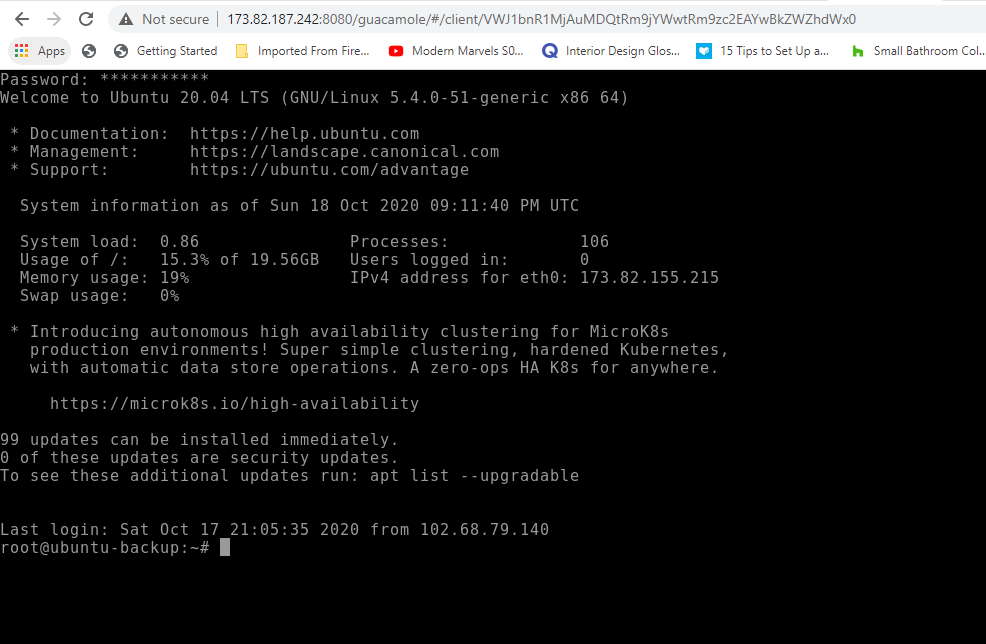
For the Windows server machine, click on the respective server connection and provide the password to log in to the server via RDP.
And this wraps up our guide where we showed you how to install and configure Guacamole on Ubuntu 20.04 LTS.


Ubuntu20.04-Focal-Fossa>causes login problems, it should be
Ubuntu20.04-Focal-Fossa">there is a missing end quote at the end.
@Eric,
Thanks, corrected the connection name in the article as suggested by you…
lcladm@Guac:$ echo “GUACAMOLE_HOME=/etc/guacamole” >> /etc/default/tomcat9
-bash: /etc/default/tomcat9: Permission denied
Can’t login.. with the user in the user-mapping.xml
Got that working, now I need to create an admin user?
How you make it work?
Nevermind. it worked with root user.
James, I’m not sure I saw many say thanks in the comments! So … Thank you! Saved me quite a bit of time to get my environment running. I had a couple of challenges after the installation but googled the solutions.
1) Newer Windows (>7/2012r2) systems use NLA security. Adding “nla” to your RDP protocol block will help with that.
2) Adding true to your RDP protocol block will also make your life a little easier.
Thank you again for your awesome instructions!!!
Hi Admin,
Thanks for this post. In this case, I want to create more users (than 2), how to do this?
Many Thanks
Hi,
I am able to get to the webpage of guacamole , but the login fails. What gives? i have same probleme i cannot log in to my page guacamole i followed all the steps and i can open the page guacamole but cant’t login on it. Can someone explain to me why? the usrename I use guadmin and password guacadmin also my version is ubuntu 20.0.4.
@Claire,
Have you defined your user credentials in the user-mapping.xml file? Please follow the point 20.
Hi,
In my server it didn’t find on the systemd on this step:
7. To get the Guacamole server running, we will start the Guacamole Daemon – guacd – and enable it on boot-up and verify the status as shown.
===
ubuntu@faizal-ubuntu-1804:~/guacamole-server-1.2.0$ sudo /etc/init.d/guacd status
guacd is not running.
===
is there any step missing?
Thank you.
Hey Faizal, kindly follow all the steps outlined in the guide. Also, I hope you are using Ubuntu 20.04 and later versions?
Hi,
I am able to get to the webpage, but the login fails. What gives?
Thanks,
Bud
Hey Bud, kindly ensure that you’ve specified the correct username and password. The password, in this case, should be the password you hashed in Step 5, point no. 19.
Yes, it is.
ssh 192.168.0.164 22 rootI also am having this issue, I have retired the steps many times.
I have the same problem.
I am finding this in logs when trying to log in:
/var/log/tomcat9/localhost_access_log.2021-08-01.txt <==
192.168.178.56 – – [01/Aug/2021:22:38:54 +0200] "POST /guacamole/api/tokens HTTP/1.1" 403 279
192.168.178.56 – – [01/Aug/2021:22:40:30 +0200] "POST /guacamole/api/tokens HTTP/1.1" 403 279
by the way, I m using Linux Mint.
4.15.0-54-generic #58-Ubuntu SMP Mon Jun 24 10:55:24
I found the problem should be there is a missing end quote to the server name here. once fixed I got in.
Why is there a ‘sudo make’ in step 5? There should be no need for sudo there.
I’m using sudo since I’m creating a configuration file in the /etc directory which can only be done using elevated privileges. In other words, that’s a reserve for the root user, hence the use of sudo.
I used docker. It’s a much better way to go for ease of upgrade and no changes to the actual system. The guacamole system consists of a database, guacd, and the guacamole server. I recommend docker and don’t try to install this all on your primary system. It’s messy.
Hi Adam N Outler,
Please help me with the steps for docker-based installation.
Hello,
Can you protect it with fail2ban?
I have tried many regex without success.