While you can always have a peek at Apache log files to get information about your webserver such as active connections, you can get a very detailed overview of your web server’s performance by enabling the mod_status module.
What is the mod_status module?
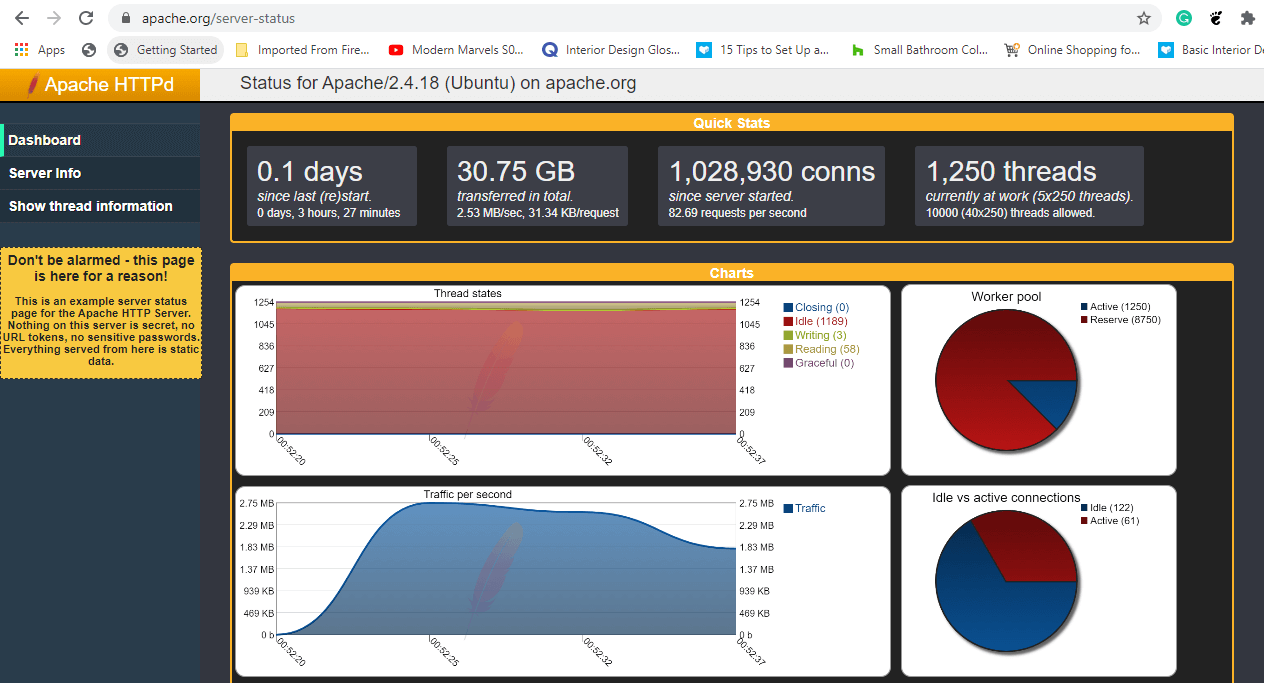
The mod_status module is an Apache module that allows users to access highly detailed information about Apache’s performance on a plain HTML page. In fact, Apache maintains its own server status page for general public viewing.
You can view status for Apache (Ubuntu) by heading over to the address below:
The Apache mod_status makes it possible to serve a plain HTML page containing information such as:
- Server version
- Current day and time in UTC
- Server Uptime
- Server load
- Total traffic
- Total number of incoming requests
- The webserver’s CPU usage
- PIDs with the respective clients and so much more.
Let’s now shift gears and see how you can get up-to-date statistics about Apache web server.
Testing Environment
Operating System: 	Ubuntu 20.04
Application:            Apache HTTP server
Version:                2.4.41
IP address:             34.123.9.111
Document root:          /var/www/html
Enable mod_status in Apache Ubuntu
By default, Apache ships with the mod_status module already enabled. You can verify this by checking the mods_enabled directory by running ls command as shown:
$ ls /etc/apache2/mods-enabled

Ensure that the status.conf and status.load files are present. If not, you need to enable mod_status module by invoking the command:
$ sudo /usr/sbin/a2enmod status
Configure mod_status in Apache Ubuntu
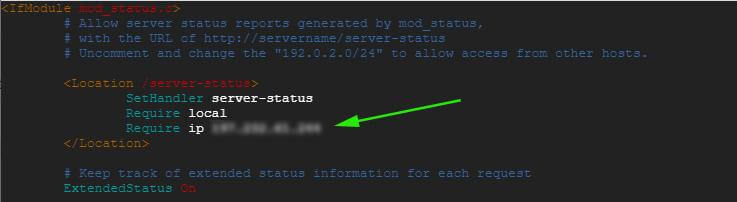
As stated earlier, the mod_status is already enabled. However, additional tweaks are required for you to access the server-status page. To do so, you need to modify the status.conf file.
$ sudo vim /etc/apache2/mods-enabled/status.conf
Set the Require ip directive to reflect the IP address of the machine that you will be accessing the server from.
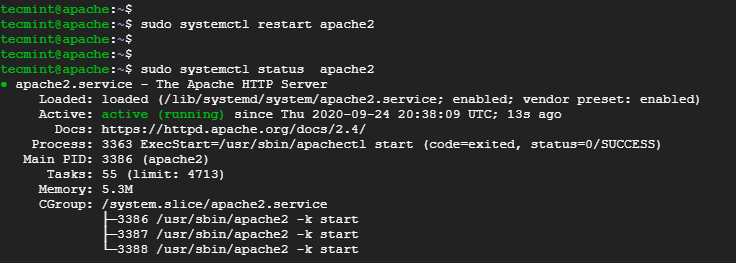
Save the changes and restart Apache for the changes to take effect to confirm the status as shown:
$ sudo systemctl restart apache2
Then verify the status of Apache and ensure it up and running.
$ sudo systemctl status apache2
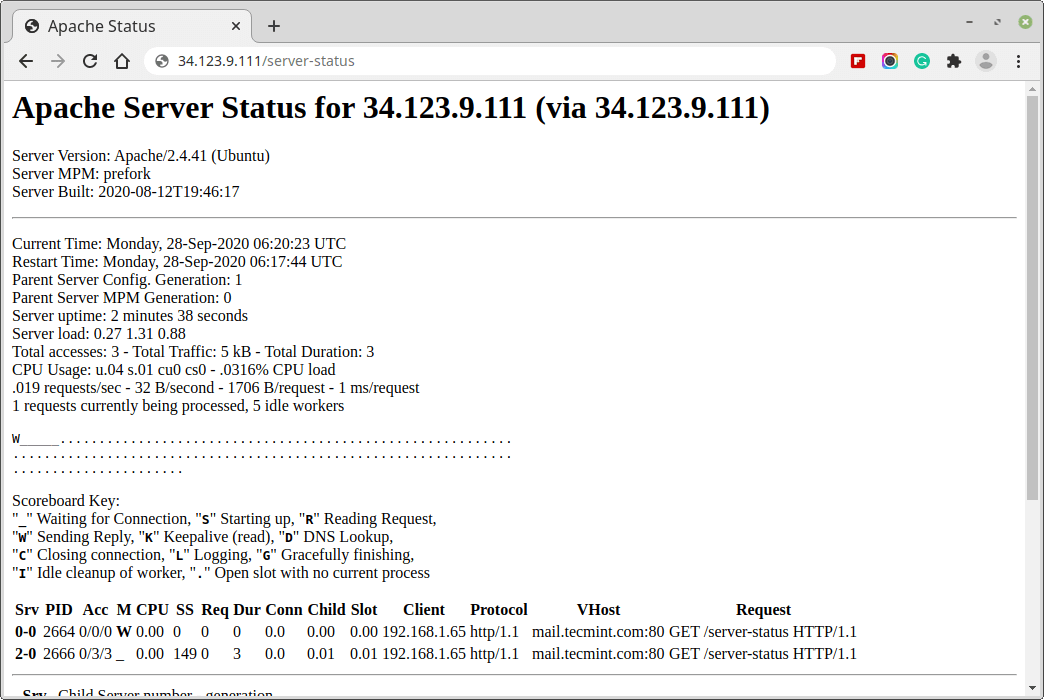
Thereafter, browse the web server’s URL as shown.
http://server-ip/server-status
You will get a status HTML page displaying a host of Apache’s information and an array of statistics as shown.
NOTE: To have the page refresh after every a given time interval, for example, 5 seconds, append the “?refresh=5” at the end of the URL.
http://server-ip/server-status?refresh=5
This provides a better monitoring capacity of your server’s performance than the plain static HTML page earlier on.
That’s all for now about the mod_status module. Stay Tuned to Tecmint for so much more.


Why am I getting a 404 error when trying to access “
https://ip-addr/server-status“?@James,
First confirm that the mod_status module is enabled in your Apache configuration by running:
Next, add your IP address in Apache configuration file as shown.
<Location /server-status>
    SetHandler server-status
    Require ip your_ip_address
</Location>
Replace your_ip_address with the IP address from which you want to access the server status page. You can also use Require all granted to allow access from all IP addresses, but this is less secure.
Restart the Apache service to apply the changes and access the page again.
Thank you for the tutorial.
I followed your steps and got the 403 error, I try many things but 403 is not resolved can you please help me?
Thank you for the tutorial.
I followed your steps and got the status page in text mode, like the last picture of the article.
What is the graphical interface like the one in the first picture?
I got my answer – https://github.com/Humbedooh/server-status
Which is the actual info mod_status display, the illustration on top of the post, or the text of the bottom?
Text on the bottom.
I managed to get the graphical display following instructions on https://github.com/Humbedooh/server-status
For Ubuntu:
First, you need to enable Lua module.
Download server-status.lua from the Github link above and save it somewhere.
Then edit /etc/apache2/mods-enabled/status.conf and add somewhere (I added it just below “require local“)
Finally restart Apache.
Hey Luis, The first screenshot is the status page for Apache’s site -apache.org. For the guide, I was using a Ubuntu VM whose server status is illustrated in the last image.