How to Upgrade to Linux Mint 20 Ulyana

Linux Mint 19.3 receives support until April 2023, but you may want to upgrade to the latest version of Mint – Linux Mint 20 – to enjoy the numerous enhancements and cool features.

In this guide, you will learn how to Upgrade Linux Mint 19.3, codenamed Tricia, to Linux Mint 20 which is based on Ubuntu 20.04.

NOTE: This guide applies ONLY to 64-bit systems.

Check Linux Mint Architecture

If you are running a 32-bit instance of Linux Mint 19.3, then a fresh installation of Linux Mint 20 is recommended, otherwise, this procedure won’t work.

To verify your system’s architecture, run the command:

$ dpkg --print-architecture

If you are running a 64-bit system your output should give you 'amd64' as shown.

Check Linux Mint System Architecture

However, if you get 'i386' as the output, then you are running a 32-bit version on Linux Mint 19.3 and you cannot upgrade to Linux Mint 20. You should either stick to Linux 19.3 or perform a fresh installation of Linux Mint 20.

Upgrade all the Packages on Linux Mint

To start off, apply all the package updates by running the command:

$ sudo apt update -y && sudo apt upgrade -y
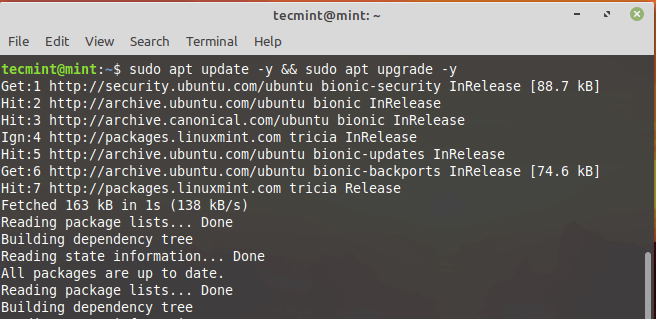
Upgrade Linux Mint
Upgrade Linux Mint

Alternatively, you can use the Update Manager to apply all the system & package updates. Simply navigate to Menu > Administration then select ‘Update Manager’.
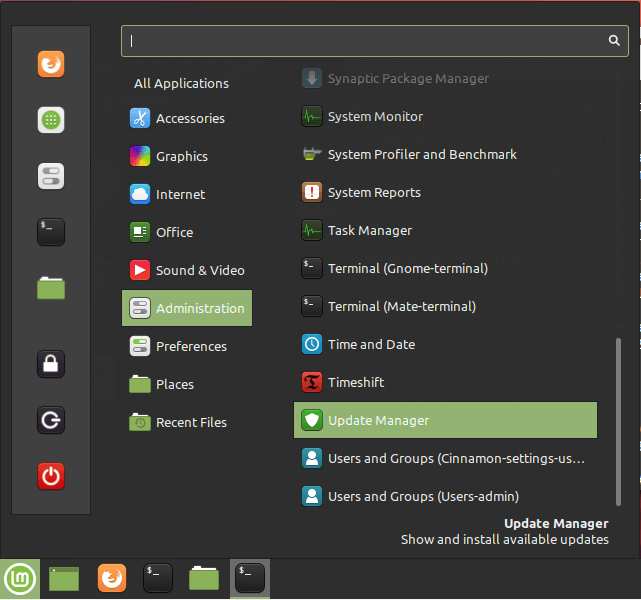
Linux Mint Update Manager

On the Update Manager Window, click on the ‘Install Updates’ button to upgrade the packages to their latest versions.
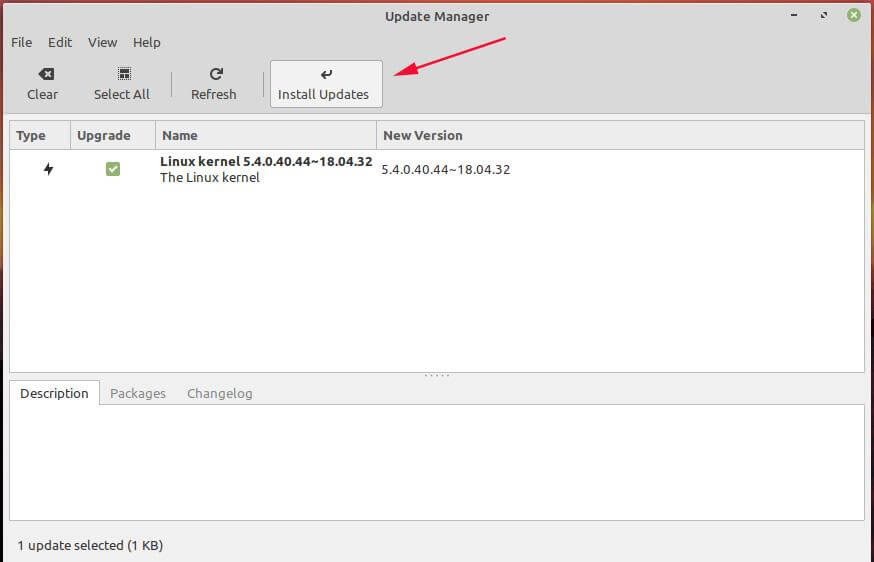
Install Linux Mint Updates

Provide your password and hit ENTER or click on the ‘Authenticate’ button to authenticate and proceed with the upgrade.
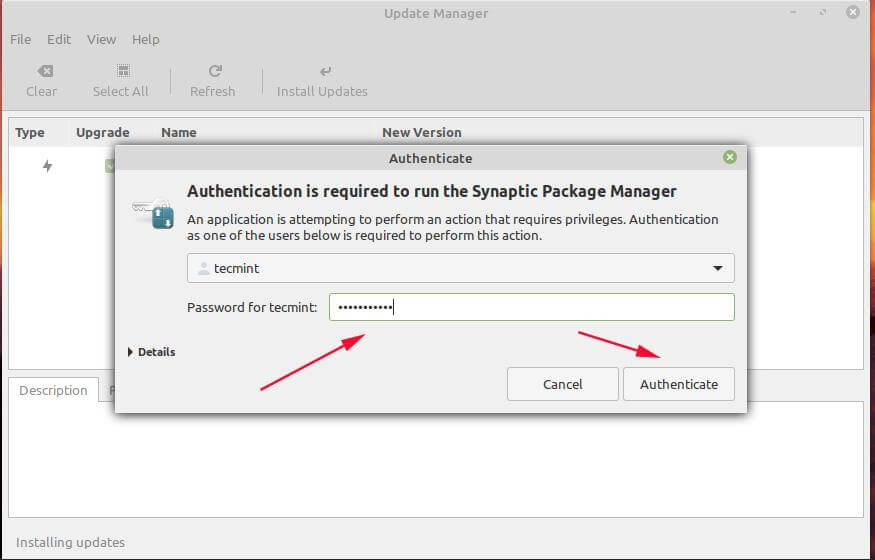
Linux Mint Authentication

If it’s been a while since you last upgraded your packages, this might take quite a while to complete and some patience will do.
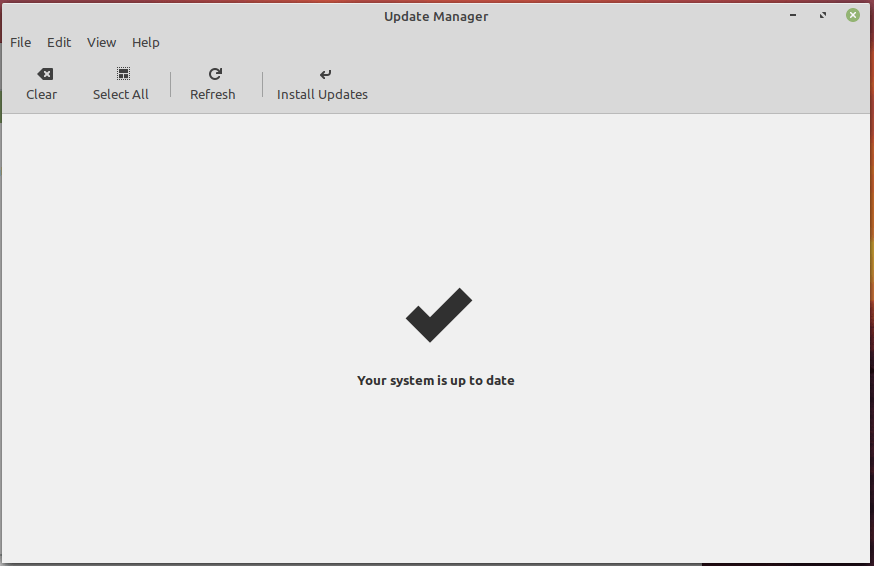
Linux Mint Updated
Linux Mint Updated

Backup Linux Mint Files

We cannot stress enough the importance of taking a backup copy of all your files. A backup will save you the agony of losing your crucial files in the event that something goes wrong during the system upgrade.

Additionally, you can create a snapshot of your system files and settings using the Timeshift tool. This will make a backup copy of all your system files and help you to restore your system using the latest snapshot in case anything goes wrong.

Be advised that this does not back up your user data such as movies, images, audio files, etc. This, therefore, informs the need to have a backup of your personal files.

Install the Mintupgrade Utility in Linux Mint

The next step will require you to install the mintupgrade utility. This is a command-line tool provided by Linux Mint solely for upgrading from one Mint release to another.

Therefore, run the following command:

$ sudo apt install mintupgrade 
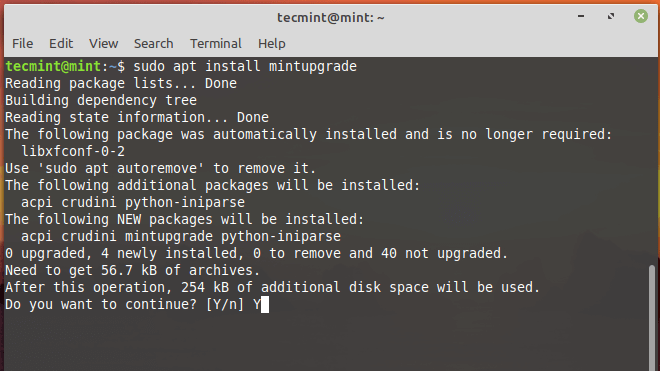
Install Mintupgrade in Linux Mint

Check Linux Mint Upgrade

With mintupgrade installed, you can simulate the upgrade to Linux Mint 20 Ulyana by running the command:

$ sudo mintupgrade check

Since it’s a simulation, the command won’t upgrade your system, but will temporarily point your current system to Linux Mint 20 repositories and thereafter restore your repositories back to Linux Mint 19.3. It’s basically a dry run that gives you a peek on what will happen during the upgrade including the packages to be upgraded and installed or removed.
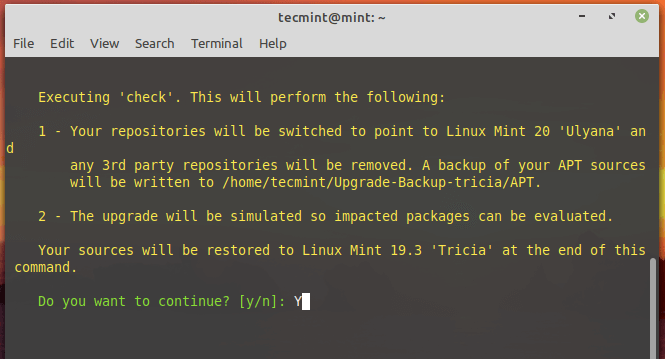
Check Linux Mint Upgrades

Download Linux Mint Upgrades

After the simulation is complete, initiate the download of packages required for the upgrade using the mintupgrade command shown:

$ sudo mintupgrade download

Bear in mind that this command only downloads the packages meant for upgrading your system and doesn’t perform the upgrade itself. Once done, you should get the notification that ‘Command ‘download’ has completed successfully’.
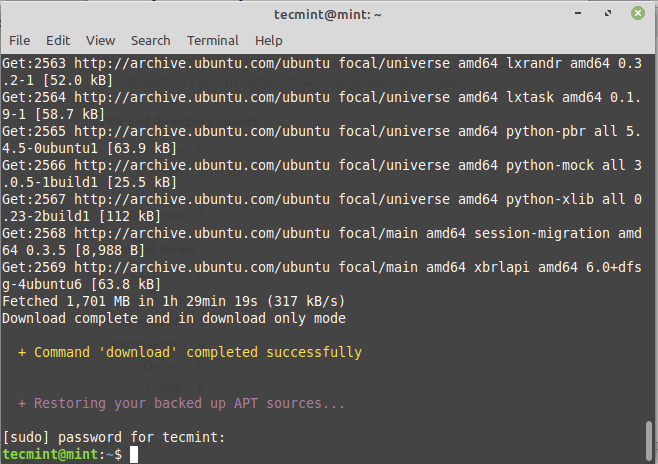
Download Linux Mint Upgrades

Upgrade to Linux Mint 20

Finally to upgrade to Linux Mint 20, execute:

$ sudo mintupgrade upgrade

Before you proceed, kindly note that this process is irreversible and should not be interrupted. The only way to go back is to restore your system using the snapshot you created earlier on.
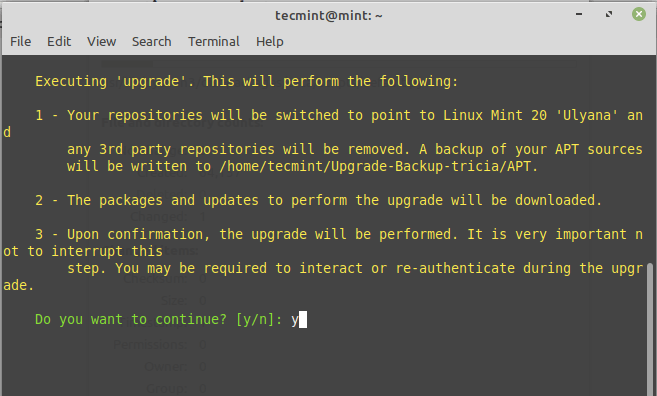
Upgrade to Linux Mint 20

The upgrade is quite massive and intensive and will take roughly 2-3 hours. Also, during the upgrade process, you will be required to re-authenticate a couple of times and interact with any prompts on the terminal. For example, you will be required to choose between restarting services during the upgrade or not as shown.
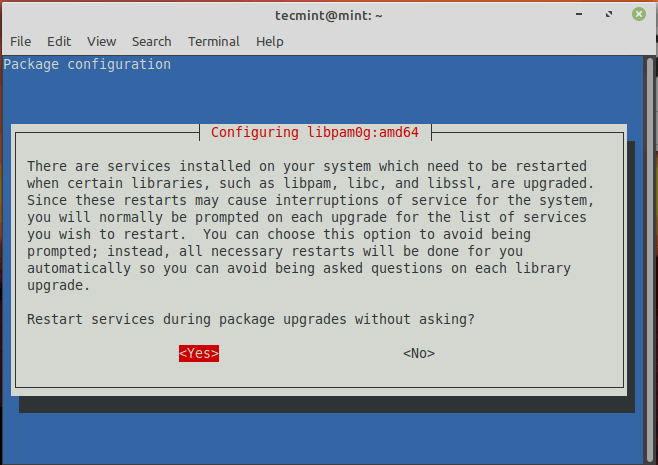
Configure Linux Mint Services

If you have multiply display managers, you will come across this prompt. Simply hit ENTER to proceed.
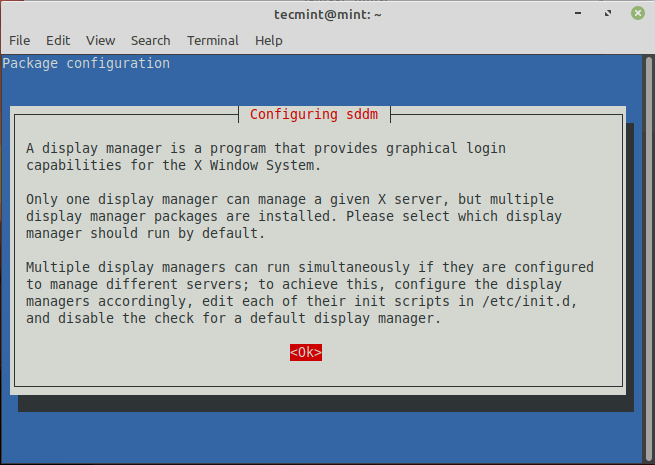
Configure Linux Mint Display Manager

Then select your preferred display manager. In my case, I chose ‘Lightdm’.
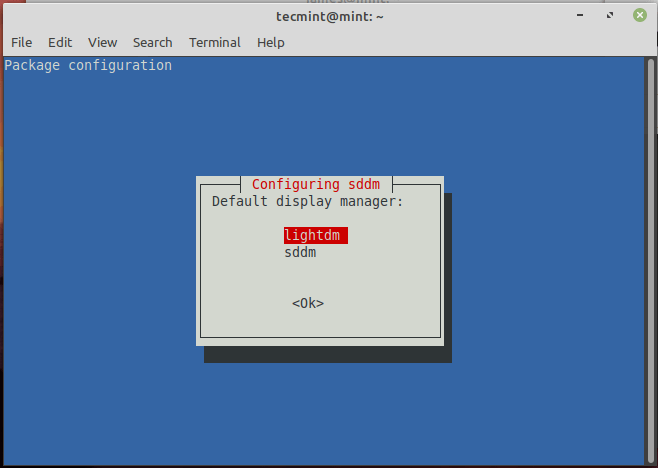
Set Linux Mint Display Manager

The entire upgrade took about 3 hours for my case. It may take longer or shorter for your case, but one thing’s for sure – it’s quite time-consuming.

After the upgrade, you can verify your system’s version by running the command:

$ cat /etc/os-release
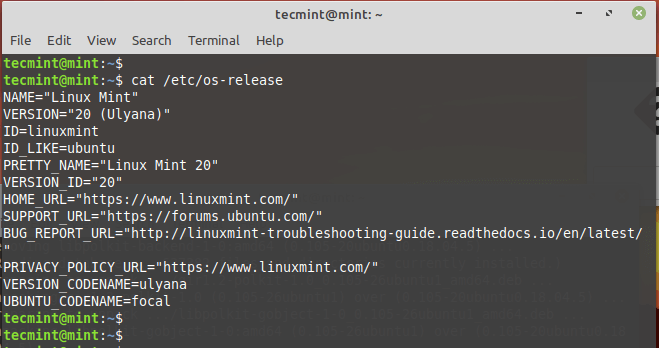
Verify Linux Mint Version

Additionally, you can use the Neofetch command-line utility to display system information as shown.

$ neofetch
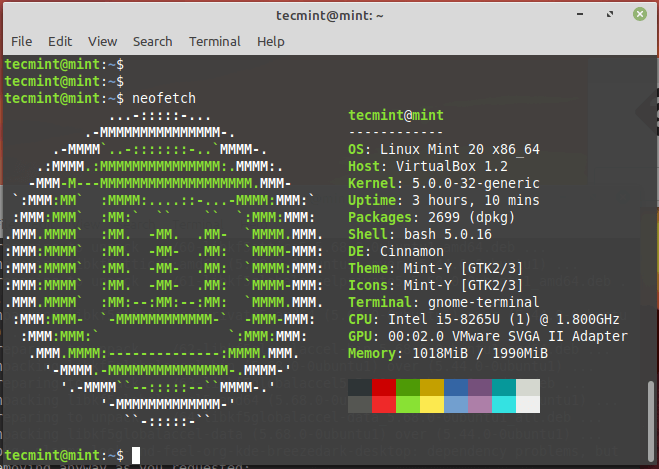
Show Linux Mint 20 Information

NOTE: The upgrade will overwrite the default configuration files in the /etc directory. To restore the files, use the snapshot you created earlier before upgrading.

If you wish not to use the Timeshift tool, you can instruct the upgrader to ignore it by running the command.

$ sudo touch /etc/timeshift.json

Again, the upgrade takes a while. If you are busy elsewhere, It’s advisable to keep checking your terminal every now and then for any prompts that might require your intervention.

If you read this far, tweet to the author to show them you care. Tweet a thanks
James Kiarie
This is James, a certified Linux administrator and a tech enthusiast who loves keeping in touch with emerging trends in the tech world. When I'm not running commands on the terminal, I'm taking listening to some cool music. taking a casual stroll or watching a nice movie.

Each tutorial at TecMint is created by a team of experienced Linux system administrators so that it meets our high-quality standards.

Join the TecMint Weekly Newsletter (More Than 156,129 Linux Enthusiasts Have Subscribed)
Was this article helpful? Please add a comment or buy me a coffee to show your appreciation.

101 thoughts on “How to Upgrade to Linux Mint 20 Ulyana”

  1. Hi, I get this error list.

    Can I no longer use all these apps with V 20? I work with Brave and do not want to have to do without them.

    !! ERROR: The following 3rd party repositories were detected. Disable them and refresh your APT cache.

    – . stable (. stable) – repo.skype.com
    – . xenial (. xenial) – updates.signal.org
    – Brave Browser (Brave Software) – brave-browser-apt-release.s3.brave.com
    – DEB (obs://private/DEB/xUbuntu_18.04) – mega.nz
    – Google (Google LLC) – dl.google.com
    – Official Vivaldi package repository (Vivaldi Technologies) – repo.vivaldi.com
    – TeamViewer (TeamViewer GmbH) – linux.teamviewer.com
    – f.lux GUI (LP-PPA-nathan-renniewaldock-flux) – ppa.launchpad.net
    – slack (packagecloud.io/slacktechnologies/slack) – packagecloud.io
    – winehq (dl.winehq.org) – dl.winehq.org

    Reply
  2. cat /etc/os-release shows “version 19.3 tricia“, however sudo apt install mintupgrade shows “mintupgrade is already the newest version (2020.07.18.1)” – why?
    sudo mintupgrade check gives “please don`t run this command as root or with elevated privileges”.

    19.3 is up to date.

    Reply
    • Since my earlier comment, I was able to continue with the upgrade after opening software sources, maintenance, and downgrade foreign packages.

      Reply
    • Hey Michael, the output “mintupgrade is already the newest version (2020.07.18.1)” shows that you previously installed mintugrade or upgraded it from an earlier version assuming it was already existing on your system. The error you are getting when performing a dry run is quite baffling. Usually, the command should allow a simulation of the upgrade. Can you give your system a reboot and try it later?

      Reply
  3. Guys, I am new to the scene but I’m the one friends and family look to fix their Windows machines over the years and I would like to say how painless this was thanks to the easy of copy& paste and your clear guidance. Tip of the hat and a wink in thanks, I will be sticking around no going back for me

    Reply
  4. I was able to successfully upgrade to Linux Mint 17 from 16 through aptitude safe-upgrade command. Is this right?

    Reply
    • Hey Lee, there are quite a number of ways of checking system info. That is one of them, so you are good to go :-)

      Reply
  5. This is the most detailed article Ive seen about migrating to a new OS. I started building mint17.1-KDE and got it to point I was having fun with it. I was considering mingrating it over to my Petra machine when suddenly the unthinkable happened and my HD-died. It started with a simple chkdsk error and progressed from there. I had made an image of my Petra disk so I wasn’t worried. Later I tried to restore it using my archive image and my disk-flash-image. Neither of whiched worked out because as soon as I run update the system tells me that the Ubuntu-saucy archives are NOT reachable. Can anyone tell me whom is the keeper of the Petra-archives? I’ve been forced over to run solely on mint17.1-kde and it is just too buggy to use as a primary machine. Werid things happen on Mint17.1 like browsers falling over, connection to remote disk failing, network popping in and out. I just want my Petra-back. wheres the Archives cos I didn’t know about backing up sources before reading this.

    Reply
  6. Just for your information, I was using mint mate petra/saucy KDE and used this guide to update to Quiana, all went well until reboot.
    Just prior to reboot; issue, issue.net, etc showed the new Ubuntu / Mint versions. After reboot, startkde could not be found.
    After installing and using apt-file from the root terminal (in safe mode with networking) I installed the missing startkde file but too much was missing and cluttered in KDE so I decided to just install the latest mint using the USB (mintstick).

    Reply

Got something to say? Join the discussion.

Thank you for taking the time to share your thoughts with us. We appreciate your decision to leave a comment and value your contribution to the discussion. It's important to note that we moderate all comments in accordance with our comment policy to ensure a respectful and constructive conversation.

Rest assured that your email address will remain private and will not be published or shared with anyone. We prioritize the privacy and security of our users.