Xubuntu is a popular lightweight Linux distribution that is based on Ubuntu. It ships with an Xfce desktop environment which is light, stable, and highly configurable.
Being a lightweight distribution, Xubuntu is a perfect choice for users who are running modern PCs with low RAM and CPU resources. It also works quite well on older hardware.
Xubuntu 20.04 is an LTS release that is based on Ubuntu 20.04, codenamed Focal Fossa. It was released in April 2020 and will be supported up to April 2023.
In this guide, we will walk you through the installation of the Xubuntu 20.04 Desktop.
Prerequisites
Before getting started out, ensure your system meets the following minimum requirements:
- 1.5 GHz dual-core Intel or AMD processor with at least 1 GB RAM (2 GB is Recommended).
- 9 GB of free hard disk space (20 GB is recommended).
Download Xubuntu 20.04 ISO Image
Additionally, you need an ISO image of Xubuntu 20.04. You can download it from the Official Xubuntu download page. You also need a 16GB USB drive which will be used as a bootable installation medium.
Installation of Xubuntu 20.04 Desktop
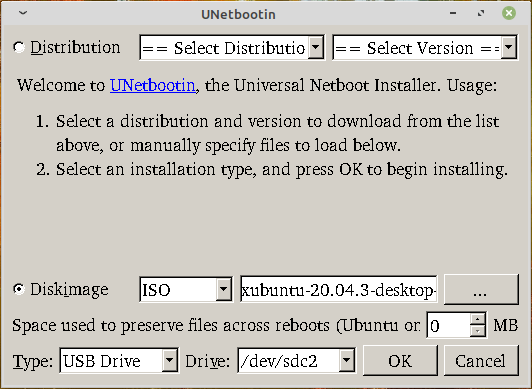
The first step is to create a bootable USB drive for installing Xubuntu using the downloaded Xubuntu ISO image. There are a couple of ways of doing this.
Create a Xubuntu USB Bootable Image
You can use the UNetBootin tool or the dd command. If you have downloaded the ISO from a Windows machine, you can use the Rufus utility to make the USB drive bootable.
Begin the Xubuntu Installation
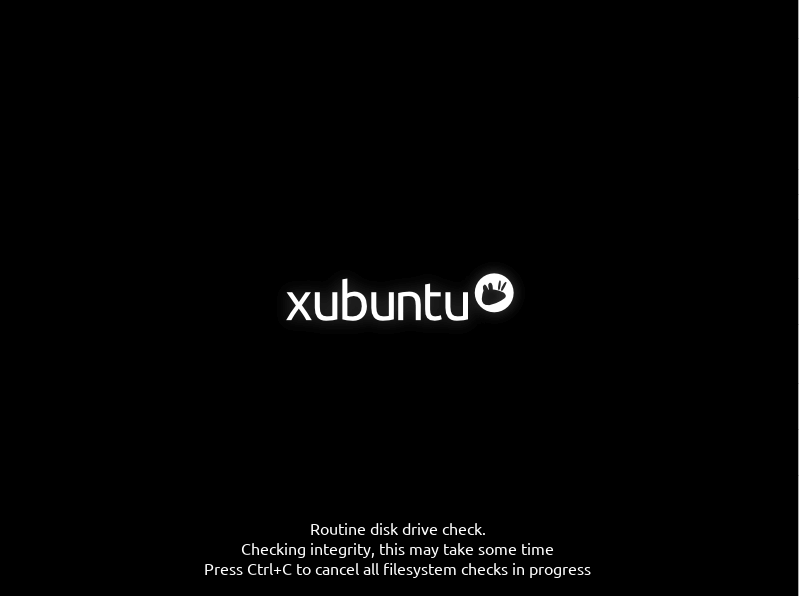
Now plug in the bootable USB drive into your PC and reboot it. Just to be sure that your PC boots from the USB drive, head over to the BIOS settings, and set the boot order with your USB drive at the very top of the boot priority. Then save the changes and exit.
On startup, you will see a Xubuntu log splash on the screen. The installer will perform some filesystem integrity checks. This can take a while, so just be patient.
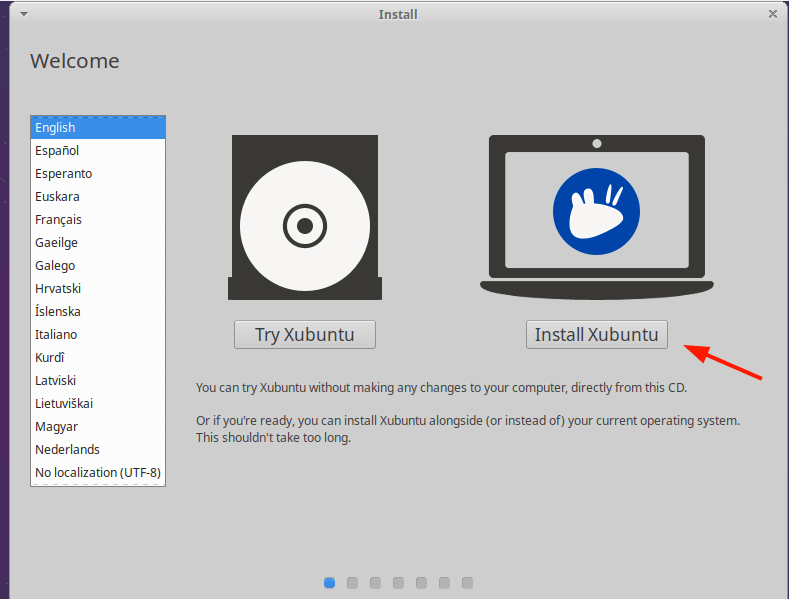
Shortly after, the Graphical installer will pop up and present you with two options. To try out Xubuntu without installing, click on ‘Try Xubuntu’. Since our goal is to install Xubuntu, click on the ‘Install Xubuntu’ option.
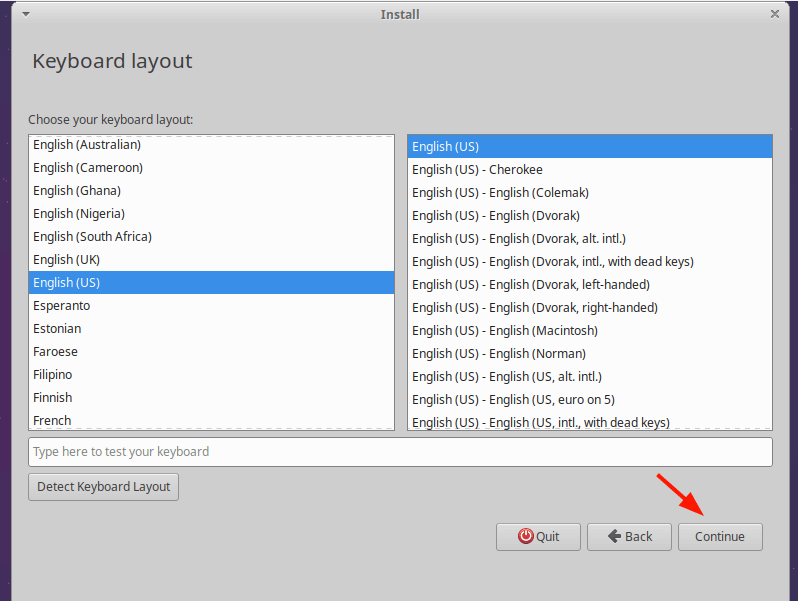
Select Keyboard Layout
Next, choose your preferred keyboard layout and click ‘Continue’.
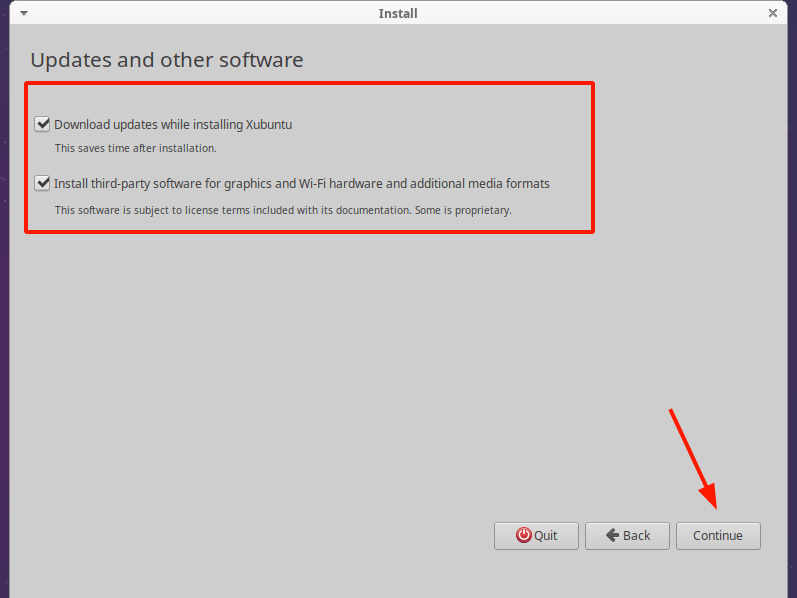
Install Xubuntu Updates
In the next step, you are provided with the option of downloading updates and other third-party software packages for graphics, WiFi, and other media formats. In my case, I selected both options and pressed ‘Continue’.
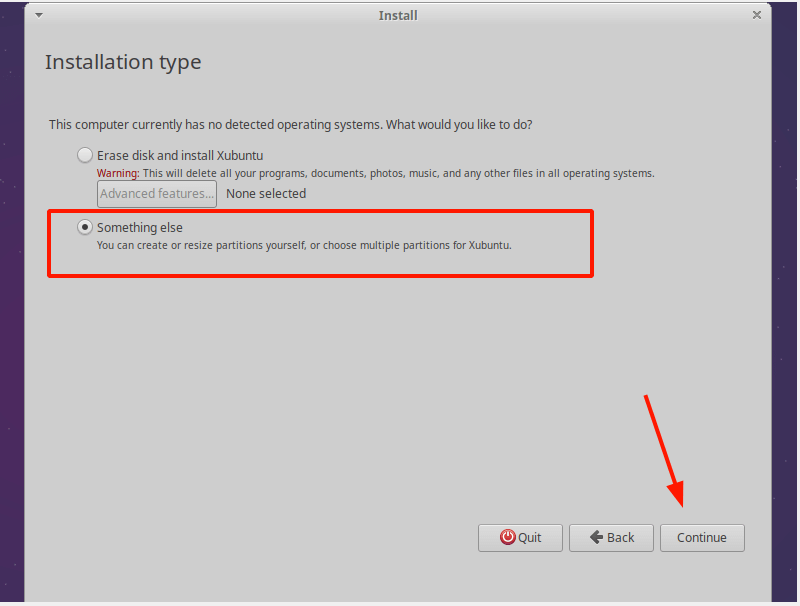
Create Xubuntu Disk Partitions
The installer provides two options for Installing Xubuntu. The first option – Erase disk and install Xubuntu – wipes out your entire disk along with any files and programs. It also automatically partitions your disk and is recommended for those who are unfamiliar with the manual partitioning of a hard drive.
The second option allows you to manually partition your hard drive. You can explicitly specify which partitions you want to create on your hard disk.
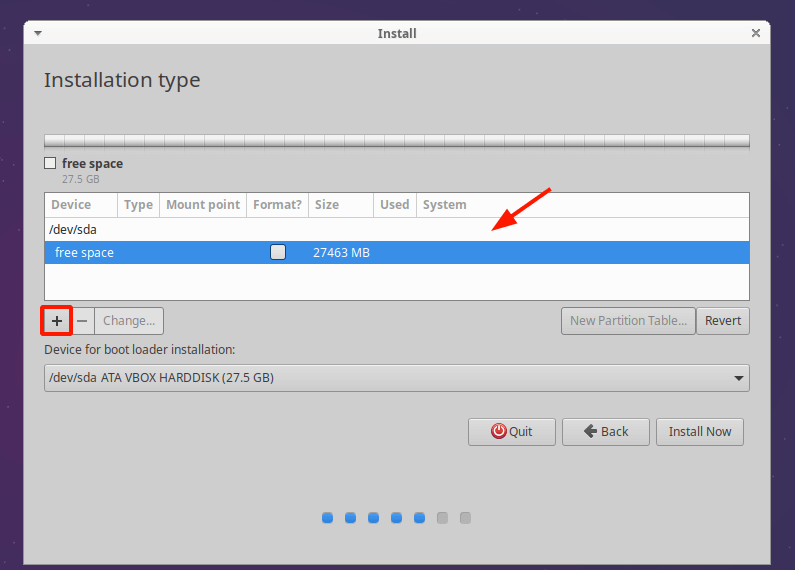
For this guide, we will click on ‘Something Else’ so that we can manually define the partitions to be created.
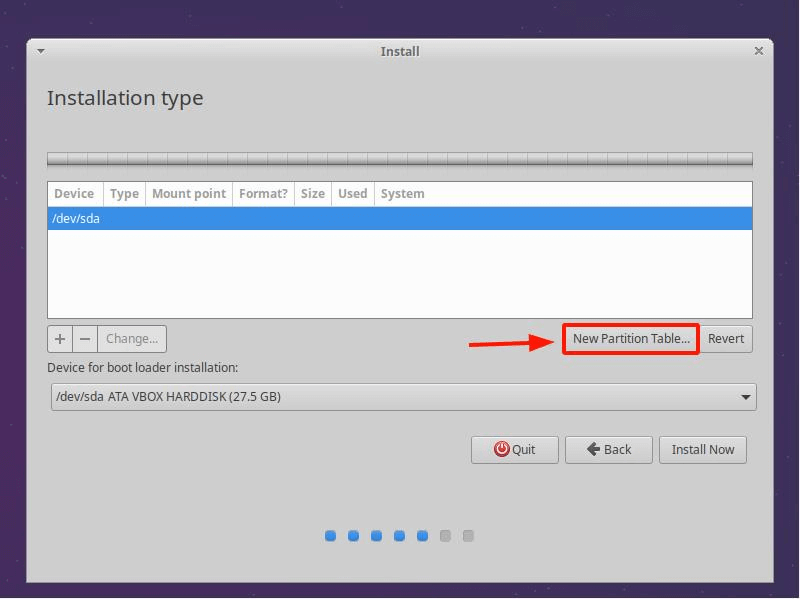
In the next step, your drive will be highlighted as /dev/sda (for SATA hard drives) or /dev/hda (for the old IDE hard drives). You need to create a partition table for the drive before proceeding further.
We have a 27.5 GB hard drive and we will partition it as follows:
/boot		- 	1024 MB
swap		-	4096 MB
/ ( root )	-	The  remaining disk space ( 22320 MB )
To proceed, click on the ‘New Partition Table’ button.
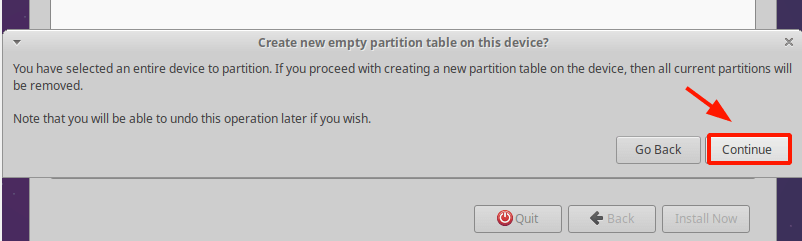
On the pop-up dialogue click on ‘Continue’.
A free space will be created equivalent to the size of your hard drive. To begin partitioning, click on the plus sign (+) button directly below.
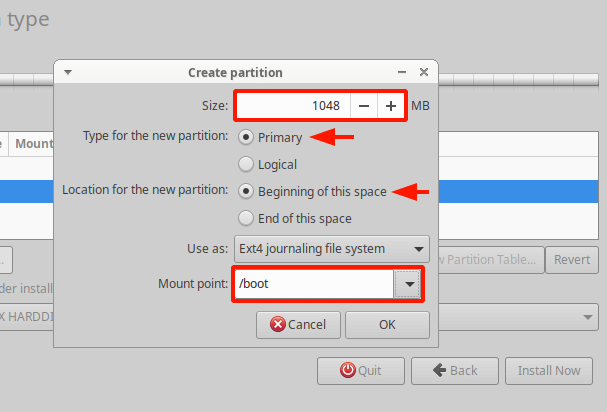
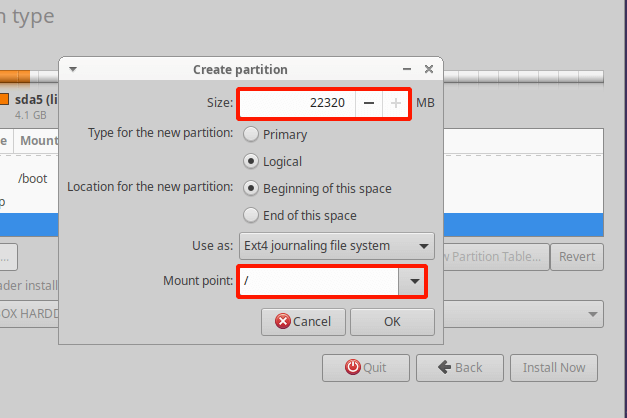
We will start off with the boot partition. Specify the size in MB and mount point as /boot. Then click ‘OK’.
This takes you back to the partition table and as you can see, our boot partition has been created.
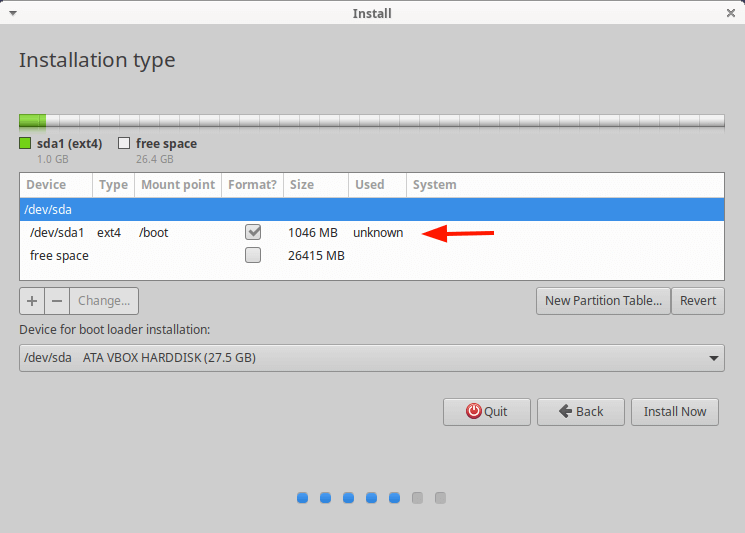
Next up, we will create the swap area. So, once again, click on the remaining free space entry and click on the plus sign (+) and fill in the swap details as indicated. Take note that you should click on the “Use as” label and select swap area then click ‘OK’.
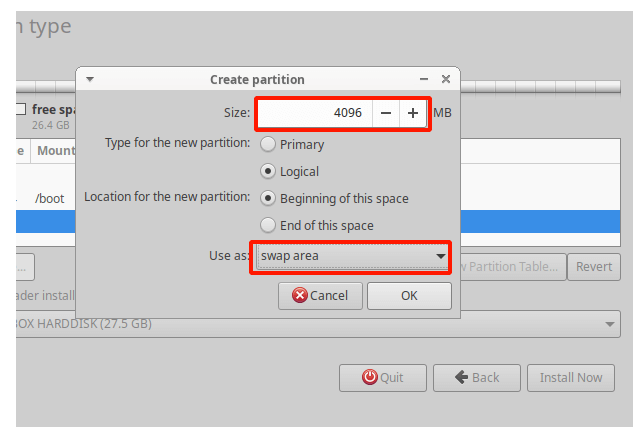
The remaining space will be reserved for the root partition (/). Repeat the drill and create the root partition.
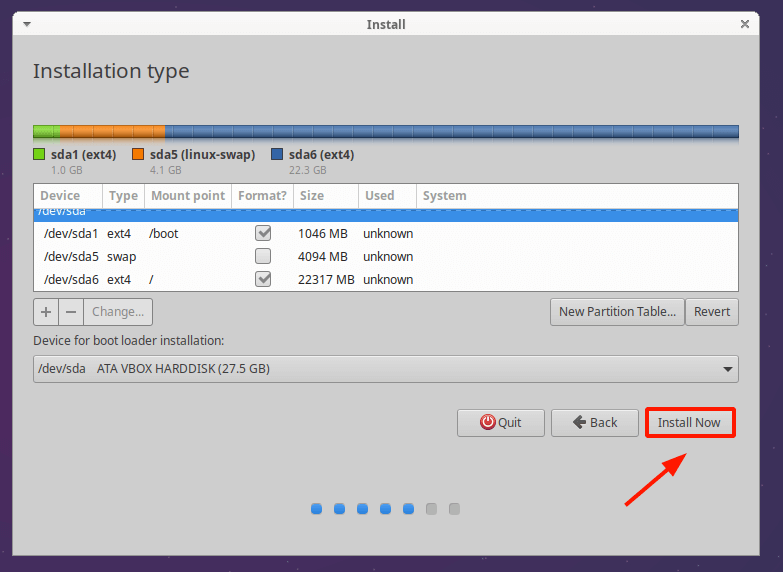
Here is our partition table with all the partitions. To proceed with the installation of Xubuntu, click ‘Install Now’.
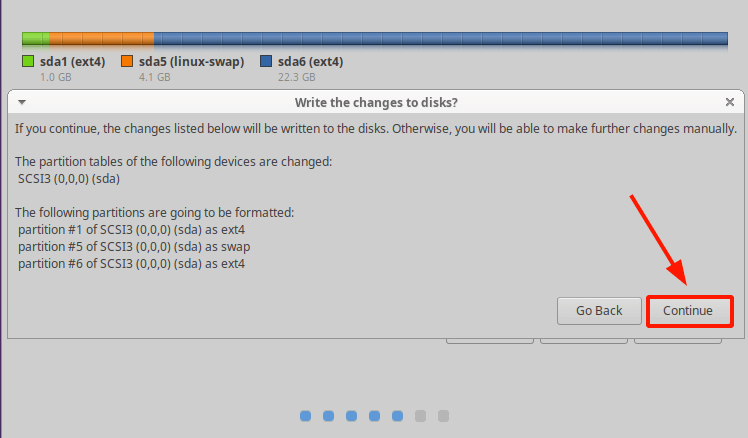
Click ‘Continue’ on the pop-up dialogue to write changes to the disk and proceed with the installation.
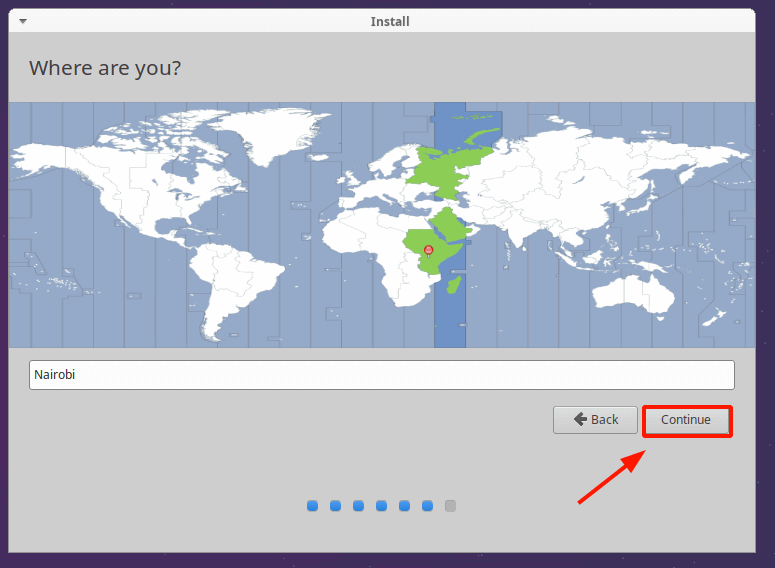
In the next step, specify your geographical location. If you are connected to the internet, the installer will automatically detect your region.
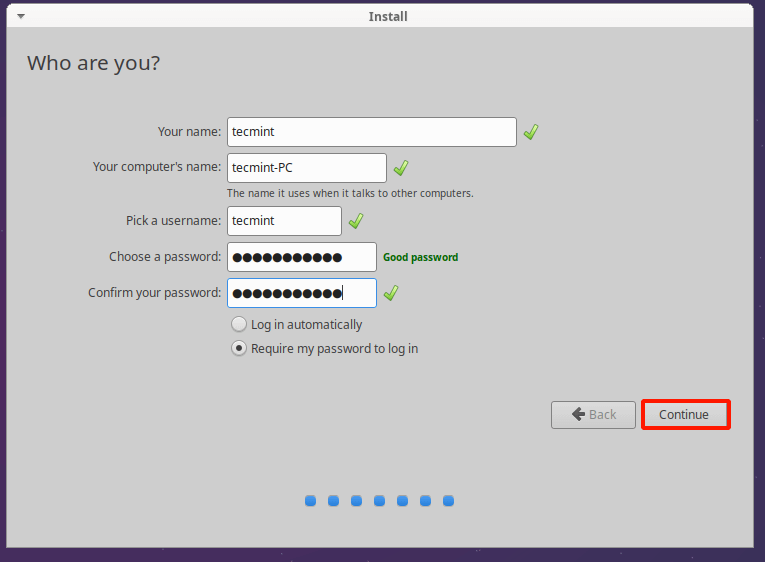
Create a Regular User
Next, create a login user by filling in your user details such as your PC’s name, username, and password and click on ‘Continue’.
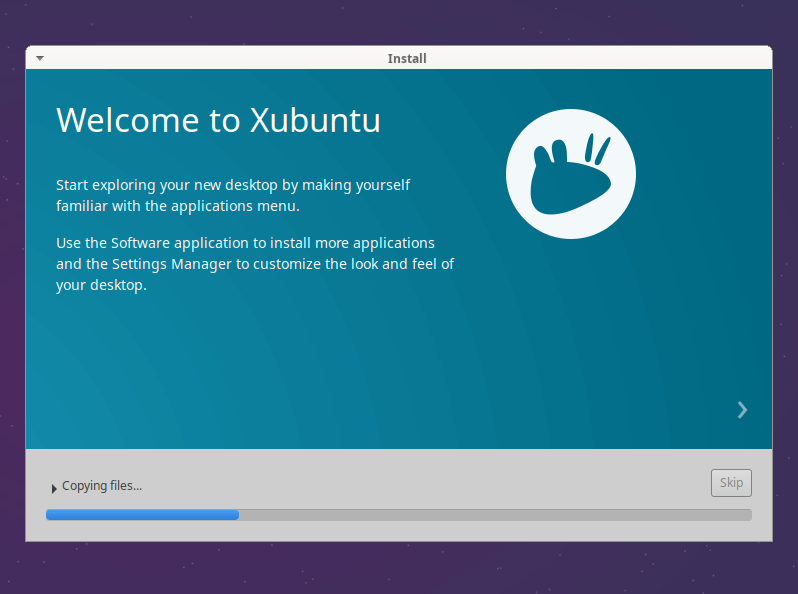
Installing Xubuntu System
The installer will begin by copying all the files required by Xubuntu. It will then install and configure all the software packages from the installation media.
This can take a while. It took around 30 min in my case.
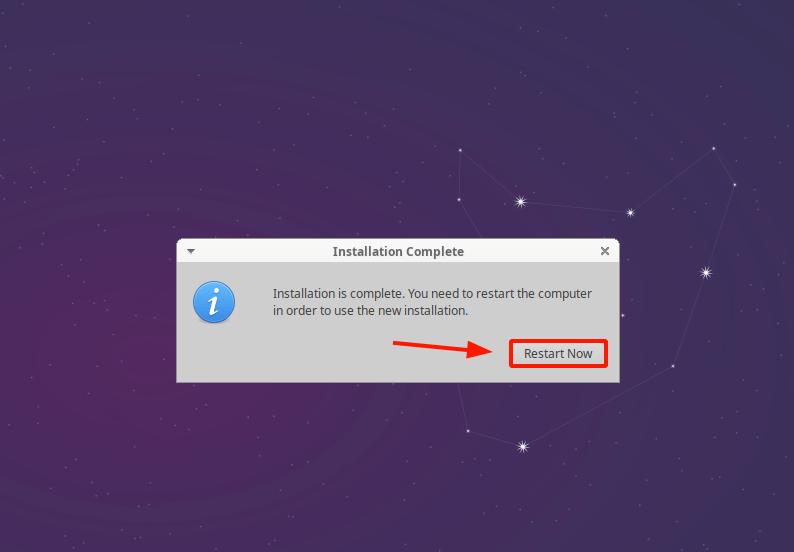
Once the installation is complete, click on the ‘Restart Now’ button to restart the system.
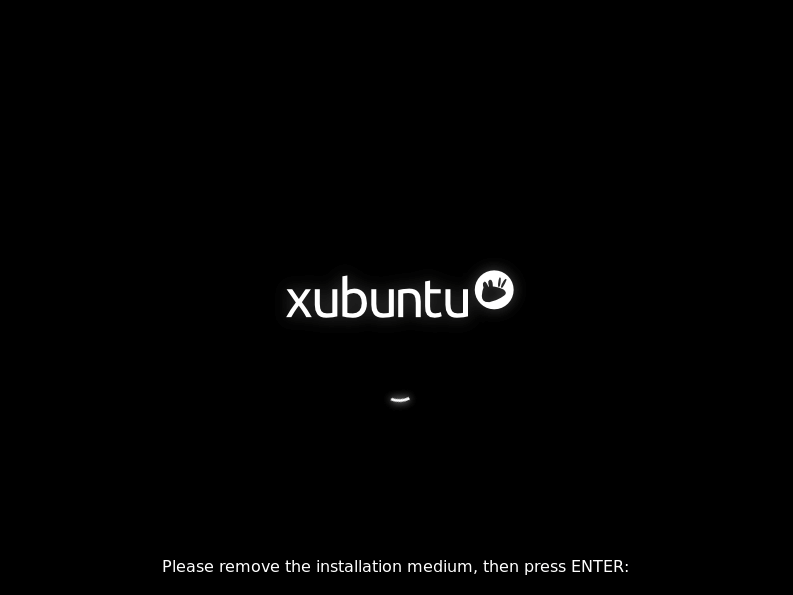
Remove the bootable USB drive and press ENTER.
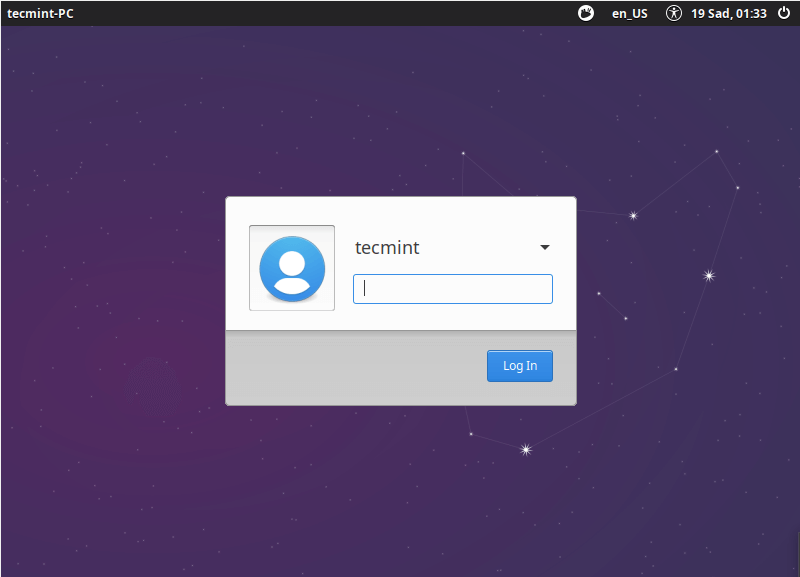
Once the system reboots, a login GUI will be displayed whereupon you will be required to provide your password to access the desktop.
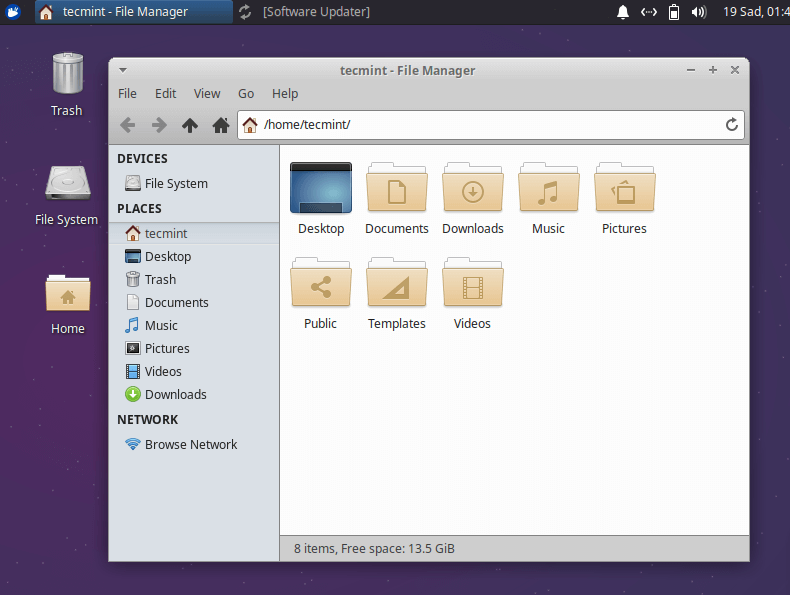
Once logged in, you will be ushered to the Xfce desktop environment. From here you can explore your new system and try out a couple of tweaks to enhance the look and feel and performance.
This sums up this instructional guide. We have successfully walked you through the installation of Xubuntu 20.04.
I created a USB boot drive with the ISO. When I boot my laptop with the USB drive I do not get the same splash and Welcome screens that you show here. I get a DOS-looking screen with 4 or so options.
The top two options are Try xUbuntu and Install xUbuntu. I’ve tried both options and they both give me a black screen with a blinking cursor in the upper left corner. I left them like that for a day and nothing happened. I tried to install it from DVD too and get the same results.
I don’t install pinguy builder to create an iso file when installing some applications on Xubuntu 20.04. Please help me. Thanks!
Since Xubuntu 18.04 there is no need for a swap partition anymore if your main partition is ext4. Swap just uses a swap file on your main partition.
Greetings
Thank you for this article with its visual walk-through. It’s useful to see what’s involved BEFORE I take the plunge with the product.
Thank you for your feedback BobbieCB. We wish you an eventful time as you get started out.