Amazon Simple Storage Service (S3) allows modern businesses to store their data, collect it from a wide variety of sources, and easily analyze it from anywhere. With its robust security, compliance capabilities, management and native analytics tools, Amazon S3 stands out in the cloud storage industry.
On top of this, data is stored redundantly in multiple, physically-separate data centers with independent power substations. In other words, S3 gets you covered no matter what.
What can be more perfect than that? CloudBerry, the #1 cross-platform cloud backup software, can be seamlessly integrated with Amazon S3. This gives you the experience, support, and functionality of 2 heavy weights in one place. Let’s take a few minutes to discover how you can harness the power of these solutions to backup your files in the cloud.
Installing and Activating CloudBerry License
In this article we will install and configure CloudBerry on a CentOS 7 desktop system. The instructions provided in CloudBerry Backup for Linux: Review and Installation should apply with minimal (if any) modifications on other desktop distributions such as Ubuntu, Fedora, or Debian.
The installation process can be summarized as follows:
-
- Download the free trial from the CloudBerry Linux Backup Solution page.
- Double click on the file, and choose Install.
- Remove the installation file.
- To activate the trial license, open a terminal and run the following commands (note the pair of single quotes around CloudBerry Backup in the first one):
# cd /opt/local/'CloudBerry Backup'/bin
# ./cbb activateLicense -e "[email protected]" -t "ultimate"
- Go to the Internet or Office section under your Applications menu.
- Choose CloudBerry Backup and Continue trial, then click Finish.
That’s all – now let’s configure CloudBerry to use Amazon S3 as our cloud storage solution.
Configuring CloudBerry + Amazon S3
Integrating CloudBerry and Amazon S3 is a walk in the park:
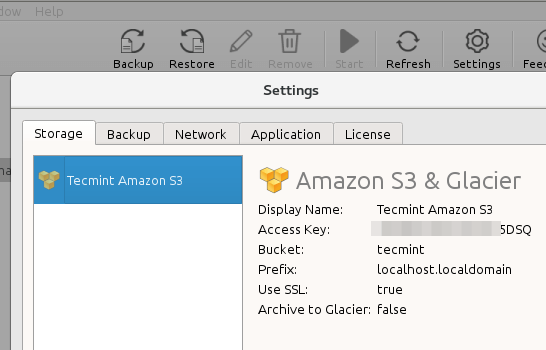
To begin, click the Settings menu and choose Amazon S3 & Glacier from the list. You will also need to choose a descriptive Display Name, and enter your Access and Secret keys.
These should be available from your Amazon S3 account, as is the Bucket where you will be storing your data. When you’re done, look under Backup Storage to find the newly created backup solution:
Hint: You can now go to the Backup tab to indicate how many versions of files you want to keep, and whether you want to follow soft links or not, among other settings.
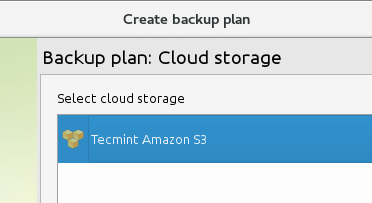
Next, to create a backup plan, choose the Backup menu and the cloud storage we created earlier:
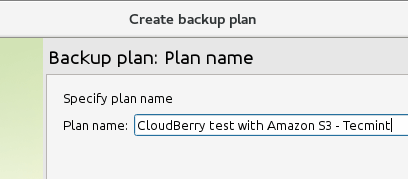
Now specify a plan name:
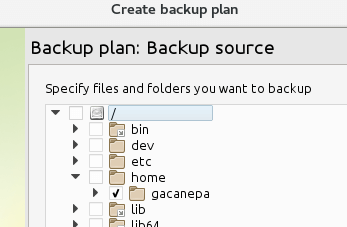
and indicate the location you want to backup:
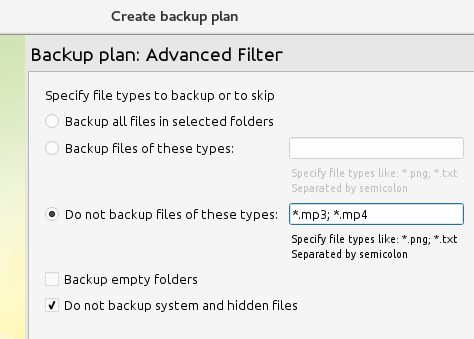
Do you want to exclude certain types of files? That’s not a problem:
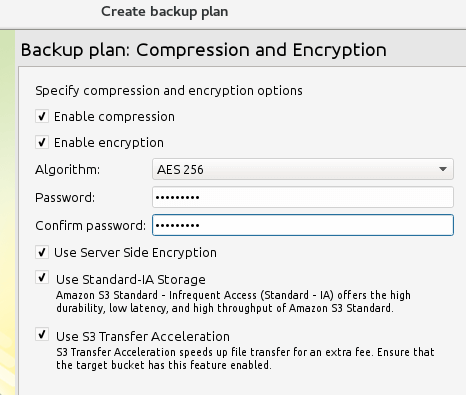
Encryption and compression to increase data transfer speeds and security? You bet:
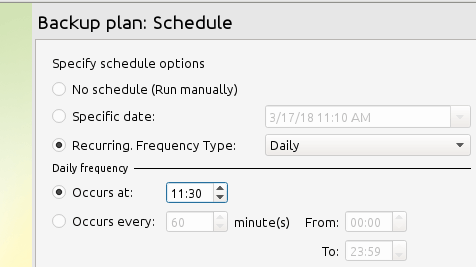
You can either use the backup retention policy defined for the whole product, or create one specifically for the current plan. We will go with the first here. Finally, let’s specify the backup frequency or method that best suits our needs:
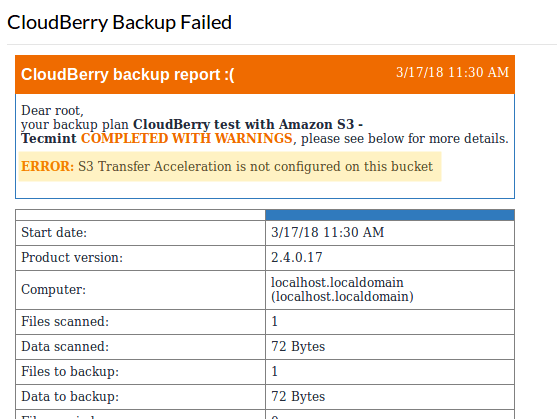
At the end of the plan creation, CloudBerry lets you run it. You can either do that or wait until the next scheduled backup to happen. If any errors happen, you will get a notification at the registered email address prompting you to correct what’s wrong.
In the following image we can see that S3 Transfer Acceleration is not enabled in the tecmint bucket. We can either enable it following the instructions provided in Amazon S3 Transfer Acceleration page or remove this feature from our plan’s current configuration.
After we have corrected the above issue, let’s run the backup again. This time it succeeds:
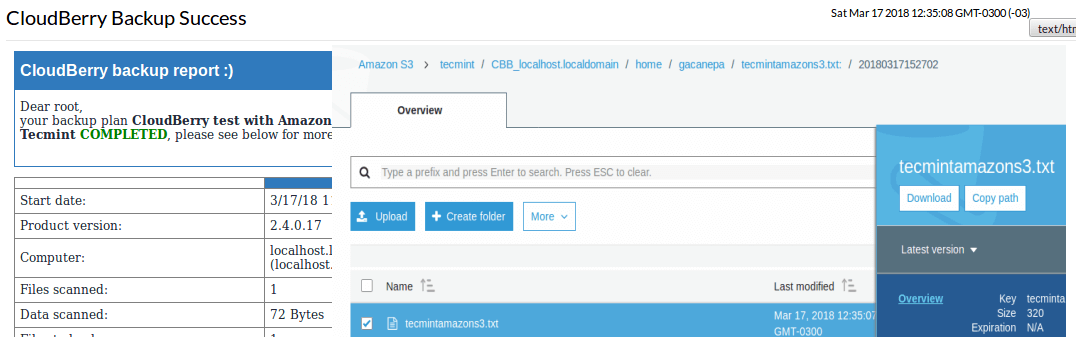
Note that you can store multiple versions of the same file(s) as indicated earlier. To distinguish one from another, a timestamp is added at the end of the path (20180317152702) as you can see in the above image.
Restoring Files from Amazon S3
Of course, backing up our files would be useless if we can’t restore them when we need them. To set up a restoration process, click the Restore menu and choose the plan you will be using. Since the steps involved are pretty straightforward, we will not go into detail here. However, let’s summarize the steps as a quick reference:
- Indicate restore method: restore once (when you press Finish in the last wizard step) or create a Restore plan to run at a specified time.
- If you are storing multiple versions of your file(s), you will need to tell CloudBerry if you want to restore the latest version or the one at a specific point in time.
- Specify the file(s) and directories you want to restore.
- Enter the decryption password. This is the same that was used to encrypt the file(s) in the first place.
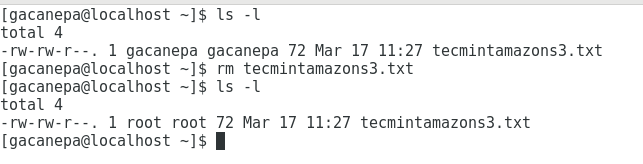
Once done, the restore will be performed automatically. As you can see in the following image, the file tecmintamazons3.txt was restored after being deleted manually from /home/gacanepa:
Congratulations! You have set up a complete backup and restore solution in less than 30 minutes.
Summary
In this post we have explained how to backup your file(s) to and from Amazon S3 using CloudBerry. With all the features offered by these 2 tools, you don’t need to look any further for your backup needs.
If you have any questions, feel free to reach us using the comment form.