One of the well-known and generally accepted OpenSSH best security practices is to configure and use public key authentication a.k.a passwordless authentication. Although this approach is fundamentally for security, on a lighter note, it also allows for ease of use because of not having to type a password every time you attempt to log on to your server.
This guide will walk you through the required steps to configure SSH passwordless authentication as well as disable password authentication on openSUSE 15.3.
Testing Environment:
- Local Ubuntu with ssh client – 192.168.56.1
- Remote openSUSE 15.3 server – 192.168.56.101
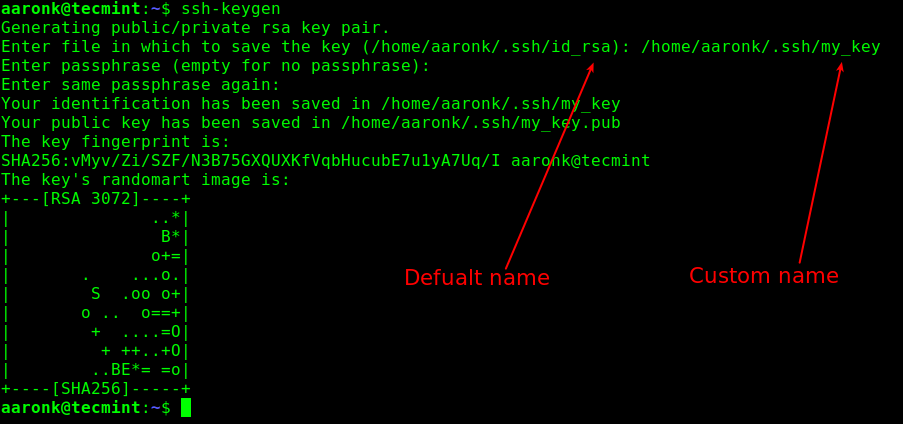
Step 1: Generate SSH Public/Private Key Pair
To create the key pair, use the ssh-keygen command with the -t flag to specify the key type. If used without any arguments, a 2048-bit RSA key will be generated. By default, the private key will be stored under the ~/.ssh/id_rsa directory and the public key under ~/.ssh/id_rsa.pub.
Note that you can generate a key pair with a custom name. Additionally, if you intend to use the key pair for interactive login, you can set a passphrase (synonymous with a password for accessing and using the key) while generating the key pair.
$ ssh-keygen
Now confirm that the key pair has been generated under the ~/.ssh directory using the ls command as shown.
$ ls -la .ssh/my_key*

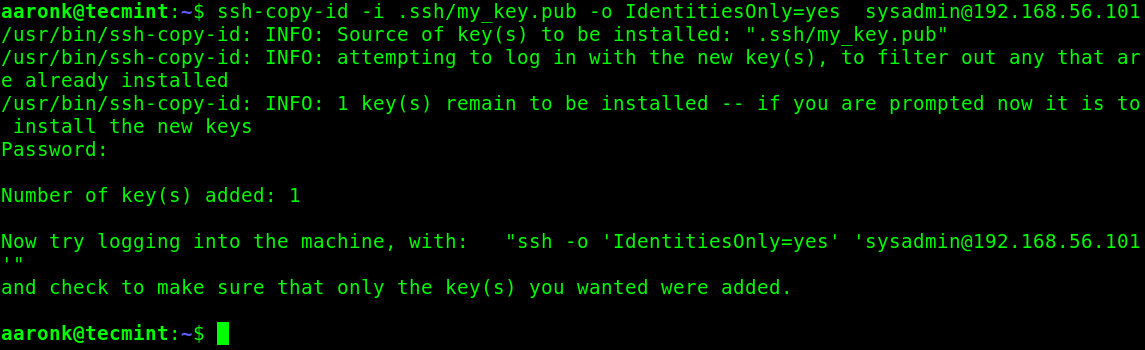
Step 2: Upload SSH Key to Remote openSUSE Server
Next, upload the public key to the remote openSUSE server using the ssh-copy-id command as follows. Use the -i flag to specify the path to the public key and enter your ssh password when prompted:
$ ssh-copy-id -i .ssh/my_key.pub [email protected]
Tip: If you get the “Received disconnect from 192.168.56.101 port 22:2: Too many authentication failures, Disconnected from 192.168.56.101 port 22” error, use the IdentitiesOnly=yes option as described in the following command.
$ ssh-copy-id -i .ssh/my_key.pub -o IdentitiesOnly=yes [email protected]
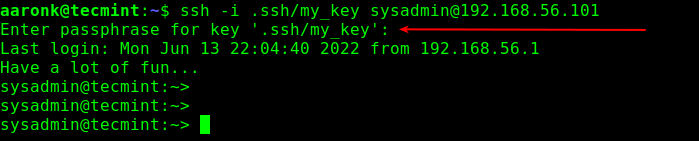
Step 3: Connect to openSUSE Without SSH Passwordless
Now verify remote passwordless login to the openSUSE server. Try to log on with your private key as follows. Enter your passphrase whenever you are prompted to provide it.
$ ssh -i .ssh/my_key [email protected]
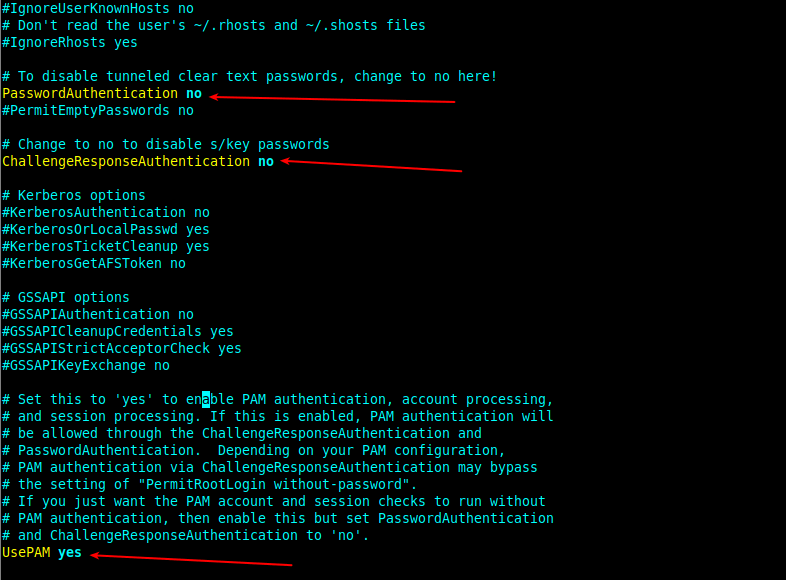
Step 4: Disable SSH Password Authentication
Caution: Ensure that you have set up and successfully tested passwordless authentication before disabling password authentication, otherwise you risk locking yourself out of the openSUSE server.
To disable password authentication, make sure the PasswordAuthentication and ChallangeResponseAuthentication configuration directives are set to no and UsePAM is set to yes as shown in the following screenshot.
Save the recent settings and restart the sshd daemon/service as shown.
$ sudo systemctl restart sshd
From now on, any user on the openSUSE server who tries to log on with password authentication will encounter the error shown in the following screenshot.

That’s all for now. To seek more information about this subject, reach us via the feedback form below.