PostgreSQL (commonly known as Postgres) is a powerful, free and open source, fully-featured, highly extensible and cross-platform object-relational database system, built for reliability, feature robustness, and high performance.
PostgreSQL runs on all major operating systems including Linux. It uses and extends the SQL language combined with many features that safely store and scale the most complicated data workloads.
PhpPgAdmin is a tool used for administering PostgreSQL database over the web. It allows for administering multiple servers, managing various different aspects of PostgreSQL, and supports easy manipulation of data.
It also supports dumping of table data in a variety of formats: SQL, COPY, XML, XHTML, CSV, Tabbed, pg_dump and importing of SQL scripts, COPY data, XML, CSV, and Tabbed. Importantly, it is extendable with the use of plugins.
In this article, we will explain how to install PostgreSQL 10 and PhpPgAdmin 5.6 in openSUSE server edition.
Installing PostgreSQL Database Server
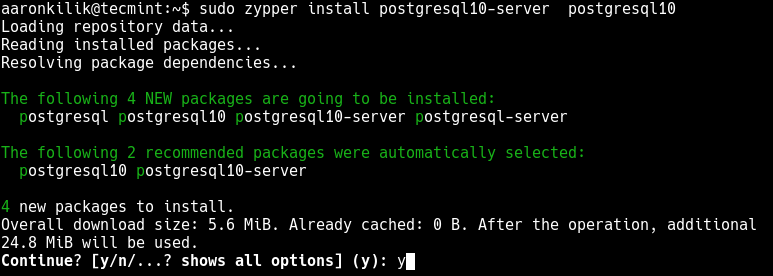
PostgreSQL 10 is available to install on openSUSE from default repositories using following zypper command.
$ sudo zypper install postgresql10-server postgresql10
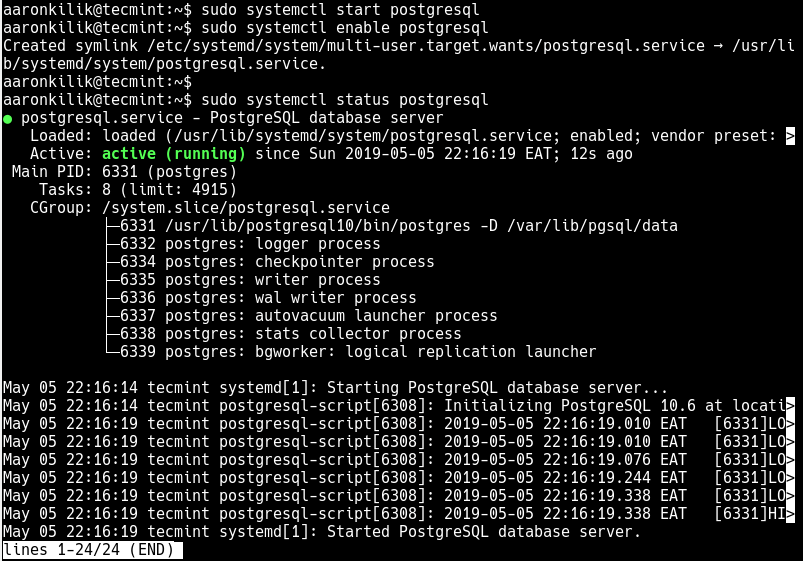
When the installation process is complete, start the Postgres service, enable it to auto-start at system boot and verify its status using following commands.
$ sudo systemctl start postgresql
$ sudo systemctl enable postgresql
$ sudo systemctl status postgresql
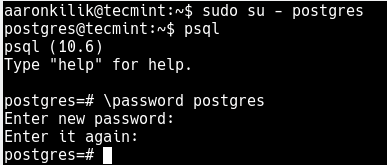
During the installation, Postgres creates an administrative database user named "postgres" without a password to manage the PostgreSQL server. The next important step is to secure this user account by setting a password for it.
First switch to the postgres user account, then access the postgres shell and set a new password for the default user as follows.
$ sudo su - postgres
$ psql
# \password postgres
Configuring PostgreSQL Database Server
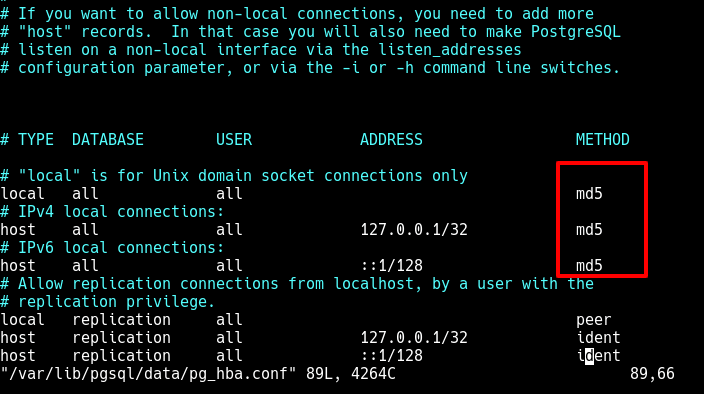
At this point, we need to configure access to PostgreSQL server from clients by editing the client authentication configuration file /var/lib/pgsql/data/pg_hba.conf.
$ sudo vim /var/lib/pgsql/data/pg_hba.conf
Look for the following lines and change the authentication method to md5 as shown in the screenshot (refer to the official PostgreSQL 10 documentation to understand the different authentication methods).
# "local" is for Unix domain socket connections only
local   all             all                                     md5
# IPv4 local connections:
host    all             all             127.0.0.1/32            md5
# IPv6 local connections:
host    all             all             ::1/128                 md5
Then restart the postgres service for the changes to take effect.
$ sudo systemctl restart postgresql
Installing and Configuring PhpPgAdmin
As described earlier, phpPgAdmin is a web-based administration tool for PostgreSQL. By default, openSUSE has phpPgAdmin 5.1 which doesn’t support postgresql10. Therefore we need to install phpPgAdmin 5.6 as shown.
$ wget -c https://github.com/phppgadmin/phppgadmin/archive/REL_5-6-0.zip
$ unzip REL_5-6-0.zip
$ sudo mv phppgadmin-REL_5-6-0 /srv/www/htdocs/phpPgAdmin
After installing phpPgAdmin, you need to create the phpPgAdmin central configuration file from the provided sample file. Then open and edit the created file using your favorite text editor, for example:
$ cd /srv/www/htdocs/phpPgAdmin/conf/
$ cp config.inc.php-dist config.inc.php
$ sudo vim config.inc.php
Then look for the line host configuration parameter and set its value to “localhost” to enable TCP/IP connections on the localhost.
$conf['servers'][0]['host'] = 'localhost';
In addition, look for the extra login security parameter and change its value to from “true” to “false” to allow logins via phpPgAdmin using certain usernames such as pgsql, postgres, root, administrator:
$conf['extra_login_security'] = false;
Save the changes to the file and exit.
Next, enable Apache PHP and version modules required by phpPgAdmin and restart the Apache2 and postgresql services with the following commands.
$ sudo a2enmod php7
$ sudo a2enmod version
$ sudo systemctl restart postgresql
$ sudo systemctl restart apache2
Accessing PhpPgAdmin Dashboard
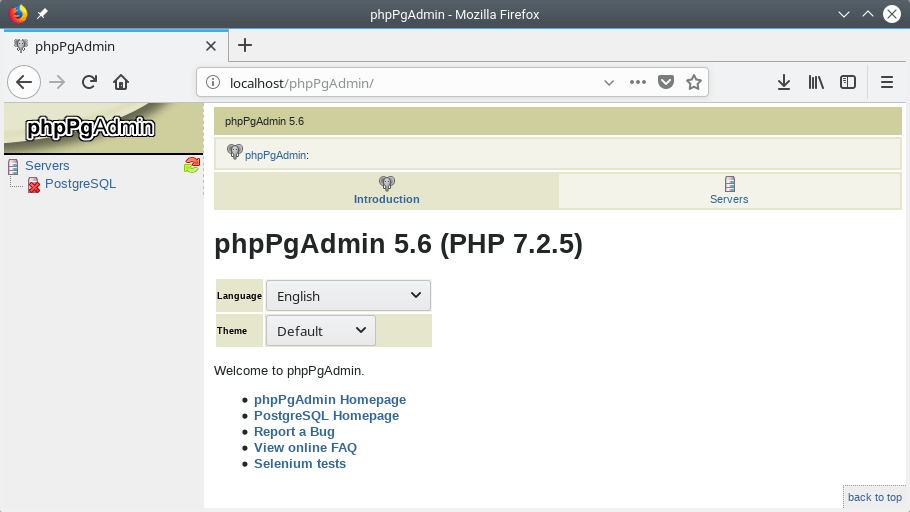
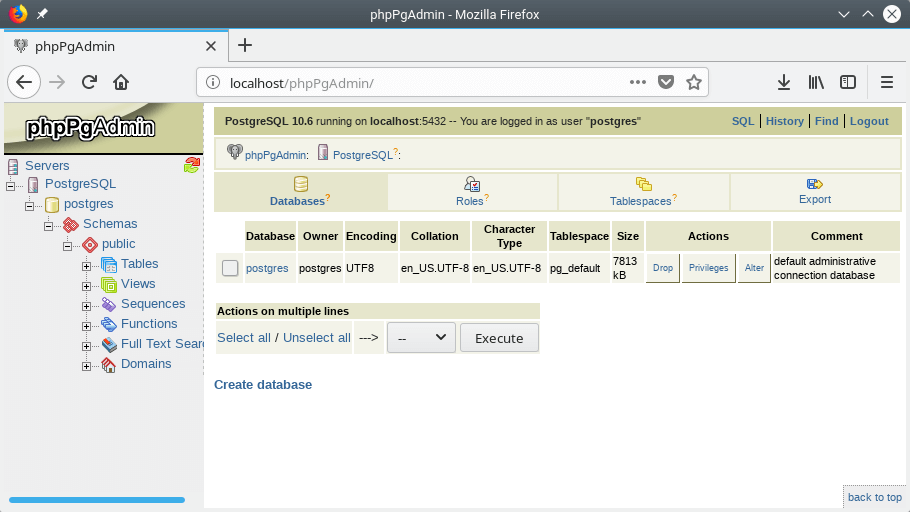
The final step is to access phpPgAdmin from a web browser and test connectivity to the database server. Use the address http://localhost/phpPgAdmin/ or http://SERVER_IP/phpPgAdmin/ to navigate.
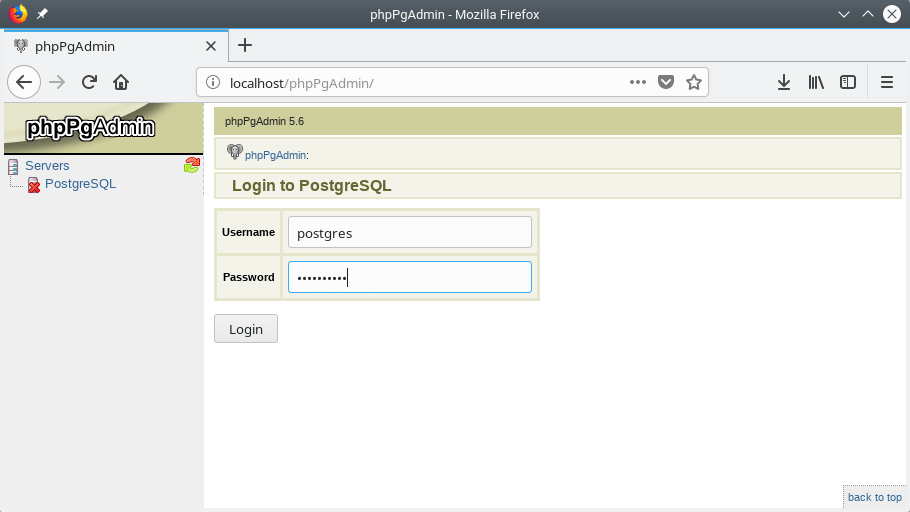
The phpPgAdmin default interface should appear as shown. Click PostgreSQL to access the Login interface.
At the login interface, enter the postgres as the usernames and provide the password you set earlier on for the default database user and click Login.
Congratulations! You have successfully installed PostgreSQL 10 and phpPgAdmin 5.6 in openSUSE. For any questions or comments, use the feedback form below.