In a prior article, a firewall solution known as PfSense was discussed. In early 2015 a decision was made to fork PfSense and a new firewall solution called OpnSense was released.
OpnSense started its life off as a simple fork of PfSense but has evolved into an entirely independent firewall solution. This article will cover the installation and basic initial configuration of a new OpnSense installation.
Like PfSense, OpnSense is a FreeBSD-based open-source firewall solution. The distribution is free to install on one’s own equipment or the company Decisio, sells pre-configured firewall appliances.
OpnSense has a minimal set of requirements and a typical older home tower can easily be set up to run as an OpnSense firewall. The suggested minimum specifications are as follows:
Hardware Minimums
- 500 Mhz CPU
- 1 GB of RAM
- 4GB of storage
- 2 network interface cards
Suggested Hardware
- 1GHz CPU
- 1 GB of RAM
- 4GB of storage
- 2 or more PCI-e network interface cards.
If the reader wishes to utilize some of the more advanced features of OpnSense (Suricata, ClamAV, VPN server, etc) the system should be given better hardware.
The more modules the user wishes to enable, the more RAM/CPU/Drive space should be included. It is suggested that the following minimums be met if there are plans to enable advanced modules in OpnSense.
- Modern multi-core CPU running at least 2.0 GHz
- 4GB+ of RAM
- 10GB+ of HD space
- 2 or more Intel PCI-e network interface cards
Installation and Configuration of OpnSense Firewall
Regardless of which hardware is chosen, installing OpnSense is a simple process but does require the user to pay close attention to which network interface ports will be used for which purpose (LAN, WAN, Wireless, etc).
Part of the installation process will involve prompting the user to begin configuring LAN and WAN interfaces. The author suggests only plugging in the WAN interface until OpnSense has been configured and then proceeding to finish the installation by plugging in the LAN interface.
Downloading OpnSense Firewall
The first step is to obtain the OpnSense software and there are a couple of different options available depending on the device and installation method but this guide will utilize the ‘OPNsense-18.7-OpenSSL-dvd-amd64.iso.bz2’.
The ISO was obtained using the following command:
$ wget -c http://mirrors.nycbug.org/pub/opnsense/releases/mirror/OPNsense-18.7-OpenSSL-dvd-amd64.iso.bz2
Once the file has been downloaded, it needs to be decompressed utilizing the bunzip tool as follows:
$ bunzip2 OPNsense-18.7-OpenSSL-dvd-amd64.iso.bz2
Once the installer has been downloaded and decompressed, it can either be burned to a CD or it can be copied to a USB drive with the ‘dd’ tool included in most Linux distributions.
The next process is to write the ISO to a USB drive to boot the installer. To accomplish this, use the ‘dd’ tool within Linux.
First, the disk name needs to be located with ‘lsblk‘ though.
$ lsblk
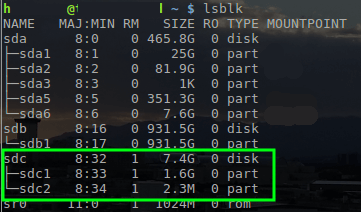
With the name of the USB drive determined as ‘/dev/sdc’, the OpnSense ISO can be written to the drive with the ‘dd’ tool.
$ sudo dd if=~/Downloads/OPNsense-18.7-OpenSSL-dvd-amd64.iso of=/dev/sdc
Note: The above command requires root privileges so utilize ‘sudo’ or log in as the root user to run the command. Also, this command will REMOVE EVERYTHING on the USB drive. Be sure to back up the needed data.
Installation of OpnSense Firewall
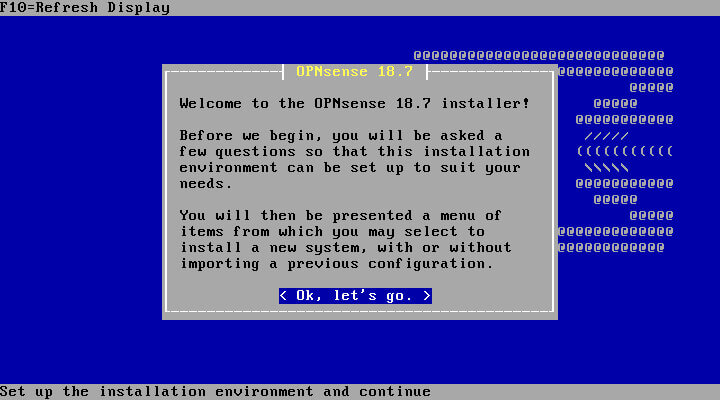
Once dd has finished writing to the USB drive, place the media into the computer that will be set up as the opnsense firewall. Boot that computer to that media and the following screen will be presented.
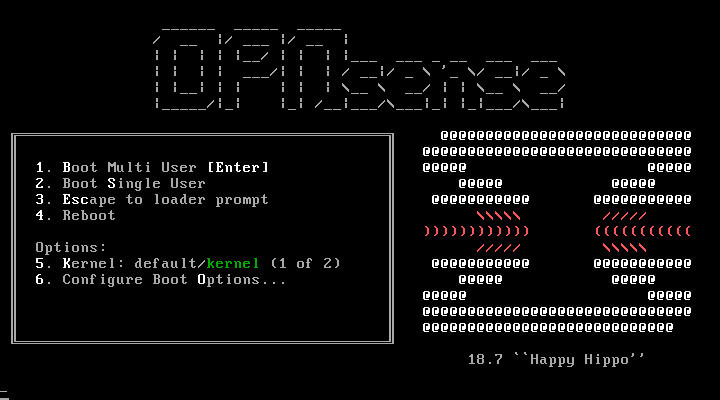
To continue to the installer, simply press the ‘Enter’ key. This will boot OpnSense into the Live mode but a special user exists to install OpnSense to local media instead.
When the system boots to the login prompt use the username of ‘installer’ with a password of ‘opnsense’.
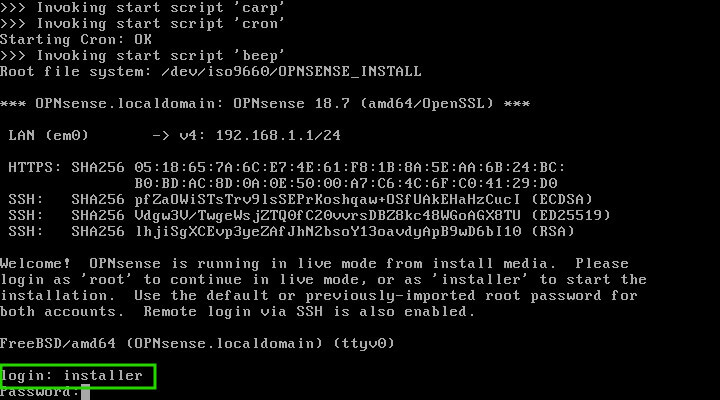
The installation media will log in and launch the actual OpnSense installer. CAUTION: Continuing with the following steps will result in all data on the hard drive within the system being erased! Proceed with caution or exit the installer.
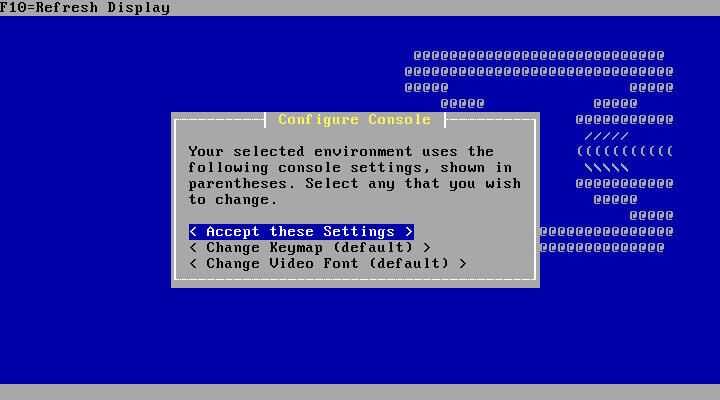
Hitting the ‘Enter’ key will start the installation process. The first step is to select the keymap. The installer likely will detect the proper keymap by default. Review the selected keymap and correct it as needed.
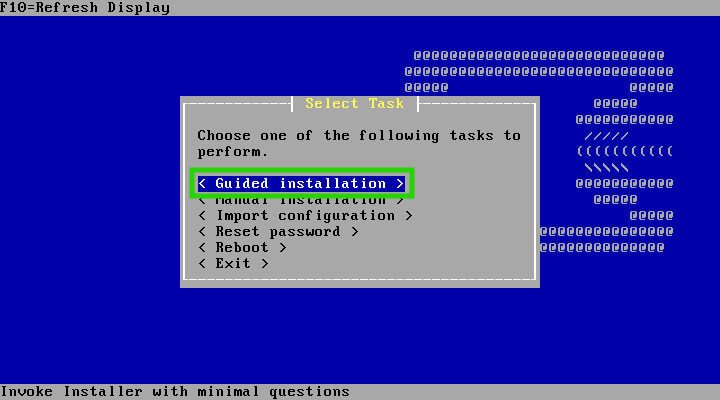
The next screen will provide some options for the installation. If the user wishes to do advanced partitioning or import a configuration from another OpnSense box, this can be accomplished at this step. This guide is assuming a fresh installation and will select the ‘Guided Installation’ option.
The following screen will display the recognized storage devices for installation.
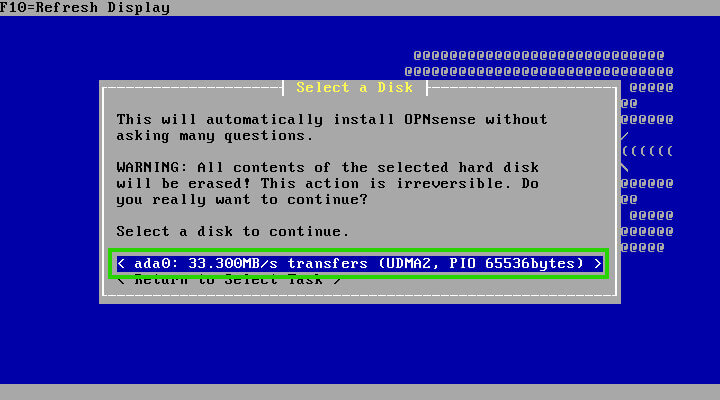
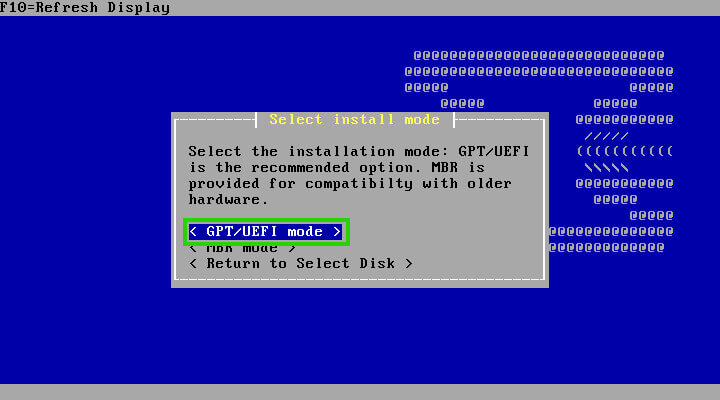
Once the storage device is selected, the user will need to decide on which partitioning scheme is used by the installer (MBR or GPT/EFI).
Most modern-day systems will support GPT/EFI but if the user is re-purposing an older computer, MBR may be the only option supported. Check within the BIOS settings of the system to see if it supports EFI/GPT.
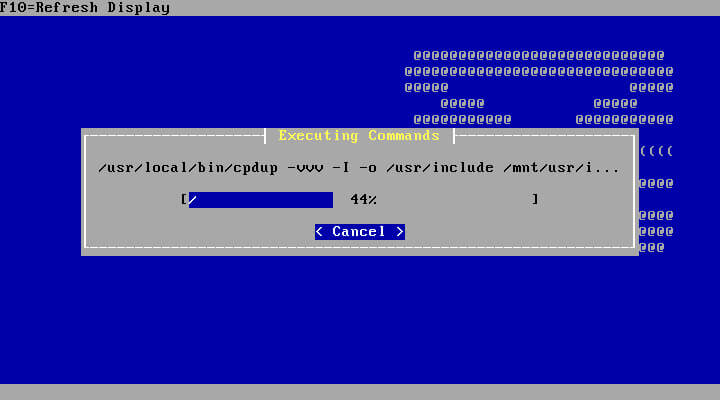
Once the partitioning scheme is chosen, the installer will begin the installation steps. The process doesn’t take a particularly long time and will prompt the user for information periodically such as the root user’s password.
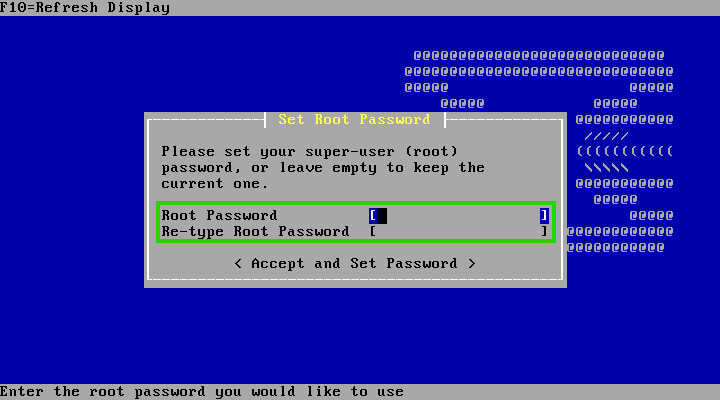
Once the user has set the root user’s password, the installation will be complete and the system will need to restart in order to configure the installation. When the system reboots, it should automatically boot into the OpnSense install (make sure to remove the installation medium as the machine restarts).
When the system reboots, it will stop at the console login prompt and await for the user to log in.
Now if the user was paying attention during the installation they might have noticed that they could have pre-configured the interfaces during installation. However, let’s assume for this article that the interfaces weren’t assigned at installation.
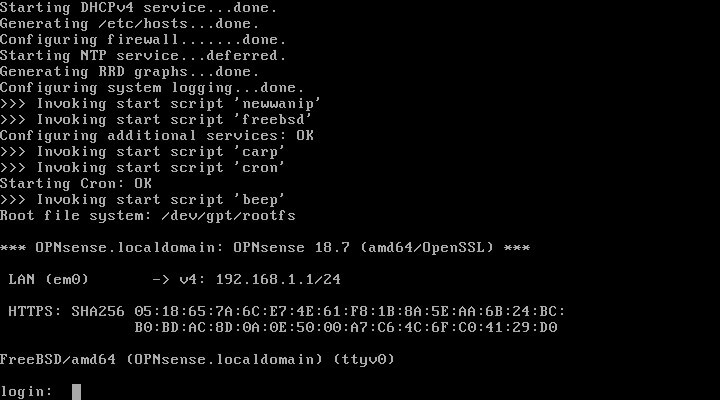
After logging in with the root user and password configured during installation, it can be noted that OpnSense only utilized one of the network interface cards (NIC) on this machine. In the image below it is named “LAN (em0)”.
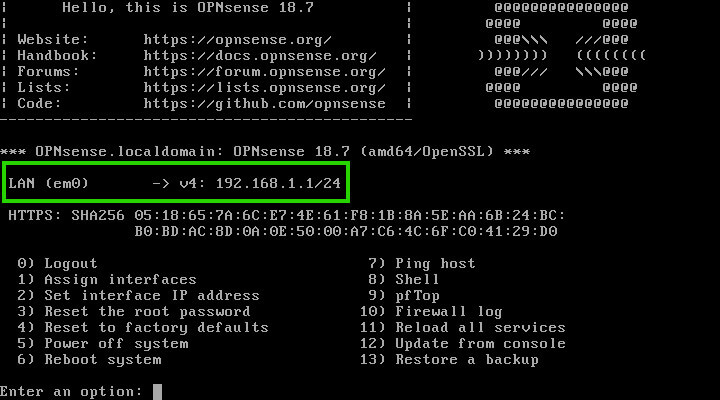
OpnSense will default to the standard “192.168.1.1/24” network for the LAN. However, in the above image, the WAN interface is missing! This is easily corrected by typing ‘1’ at the prompt and hitting enter.
This will allow for the re-assignment of the NICs on the system. Notice in the next image that there are two interfaces available: ‘em0’ and ‘em1’.
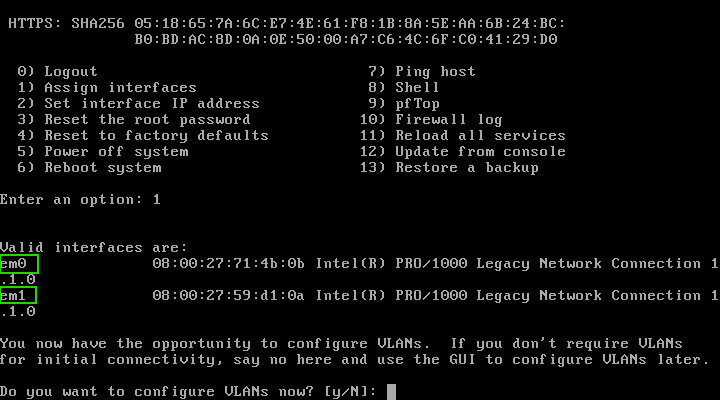
The configuration wizard will allow for very complex setups with VLANs as well but for now, this guide is assuming a basic two-network setup; (ie a WAN/ISP side and a LAN side).
Enter ‘N’ to not configure any VLANs at this time. For this particular setup, the WAN interface is ‘em0’ and the LAN interface is ‘em1’ as seen below.
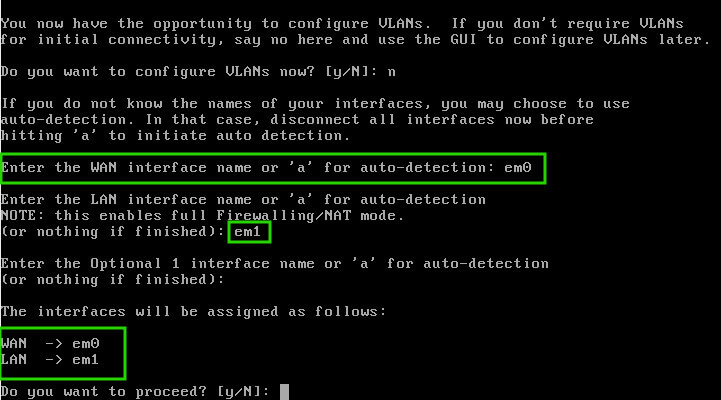
Confirm the changes to the interfaces by typing ‘Y’ in the prompt. This will cause OpnSense to reload many of its services to reflect the changes to the interface assignment.
Once done, connect a computer with a web browser to the LAN side interface. The LAN interface has a DHCP server listening on the interface for clients so the computer will be able to obtain the necessary addressing information to connect to the OpnSense web configuration page.
Once the computer is connected to the LAN interface, open a web browser and navigate to the following url: http://192.168.1.1.
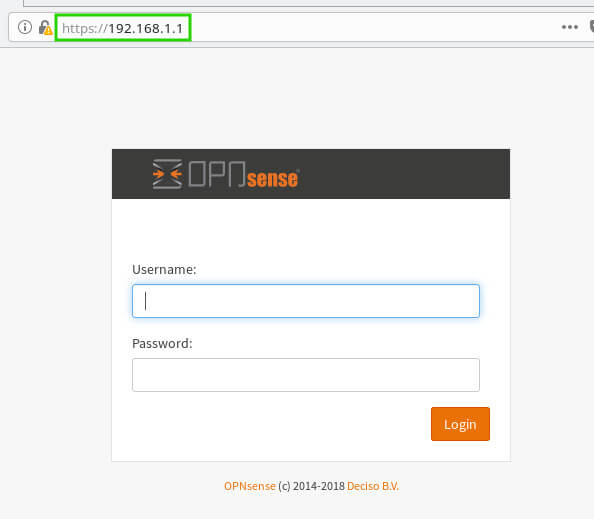
To log into the web console; use the username ‘root’ and the password that was configured during the installation process. Once logged in, the final part of the installation will be completed.
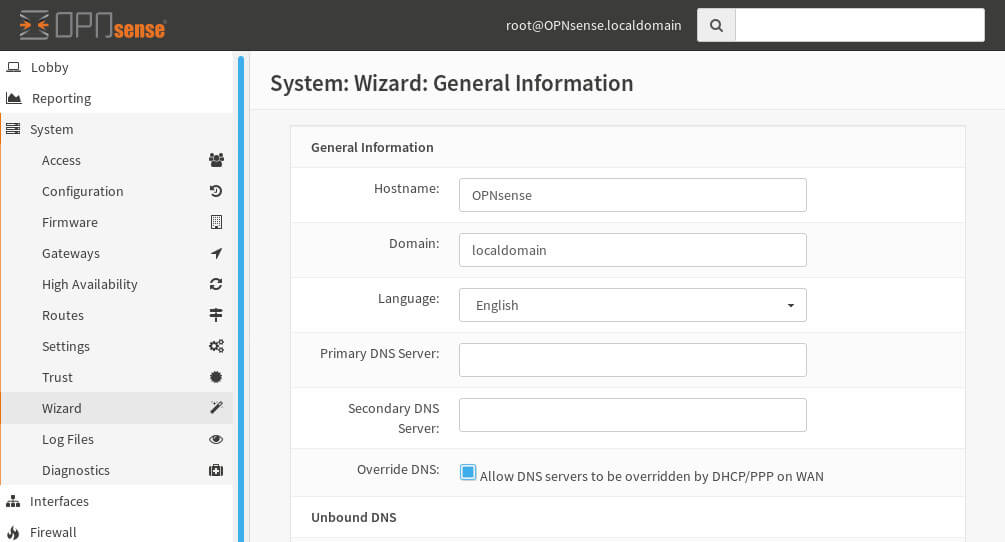
The first step of the installer is used to simply gather more information such as hostname, domain name, and DNS servers. Most users can leave the ‘Override DNS’ option selected.
This will enable the OpnSense firewall to obtain DNS information from the ISP over the WAN interface.
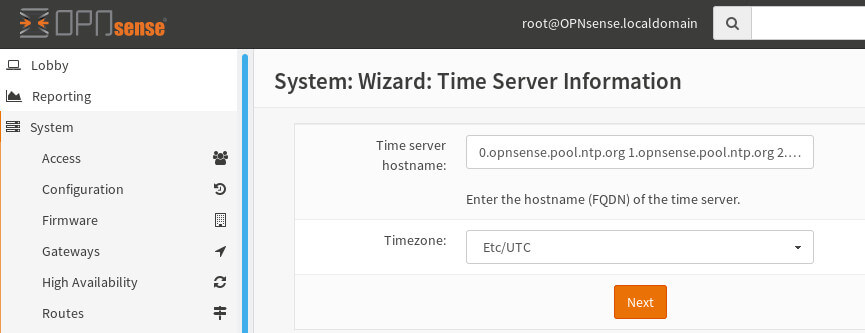
The next screen will prompt for NTP servers. If the user doesn’t have their own NTP systems, OpnSense will provide a default set of NTP server pools.
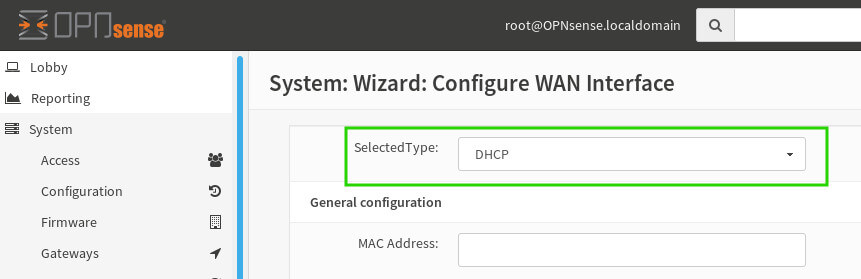
The next screen is the WAN interface setup. Most ISP for home users will use DHCP to provide their customers with necessary network configuration information. Simply leaving the Selected Type as ‘DHCP’ will instruct OpnSense to attempt to gather its WAN side configuration from the ISP.
Scroll down to the bottom of the WAN configuration screen to continue. ***Note*** at the bottom of this screen are two default rules to block network ranges that generally shouldn’t be seen coming into the WAN interface. It is recommended to leave these checked unless there is a known reason to allow these networks through the WAN interface!
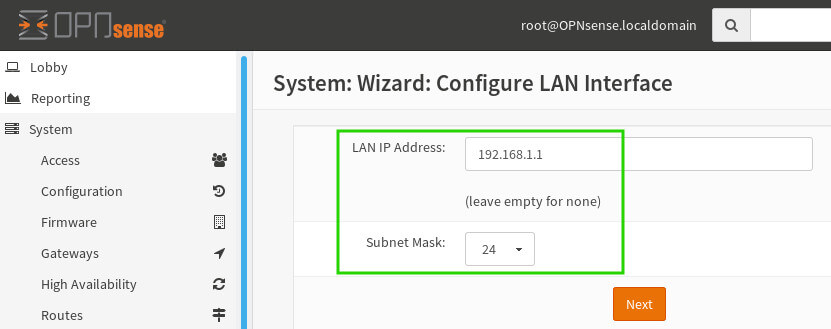
The next screen is the LAN configuration screen. Most users can simply leave the defaults. Realize there are special network ranges that should be used here, commonly referred to as RFC 1918. Make sure to leave the default or pick a network range from within the RFC1918 range to avoid conflicts/issues!
The final screen in the installation will ask if the user would like to update the root password. This is optional but if a strong password wasn’t created during installation, now would be a good time to correct the issue!
Once past the password change option, OpnSense will ask the user to reload the configuration settings. Simply click the ‘Reload’ button and give OpnSense a second to refresh the configuration and current page.
When everything is done, OpnSense will welcome the user. To get back to the main dashboard, simply click ‘Dashboard’ in the upper left corner of the web browser window.
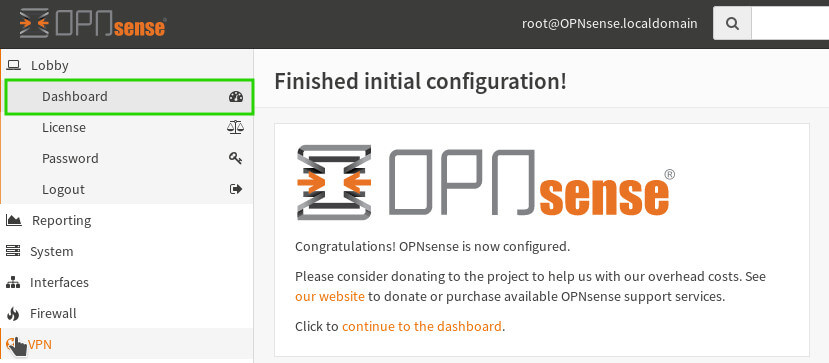
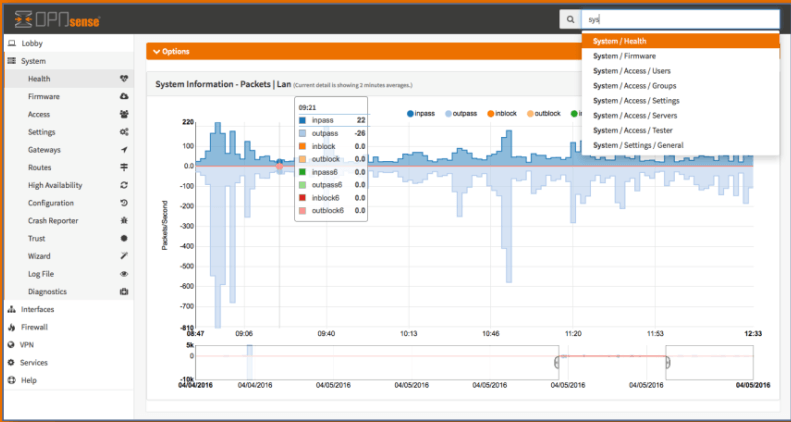
At this point, the user will be taken to the main dashboard and can continue to install/configure any of the useful OpnSense plugins or functionalities! The author does recommend checking and upgrading the system if upgrades are available. Simply click on the ‘Click to Check for Updates’ button on the main dashboard.
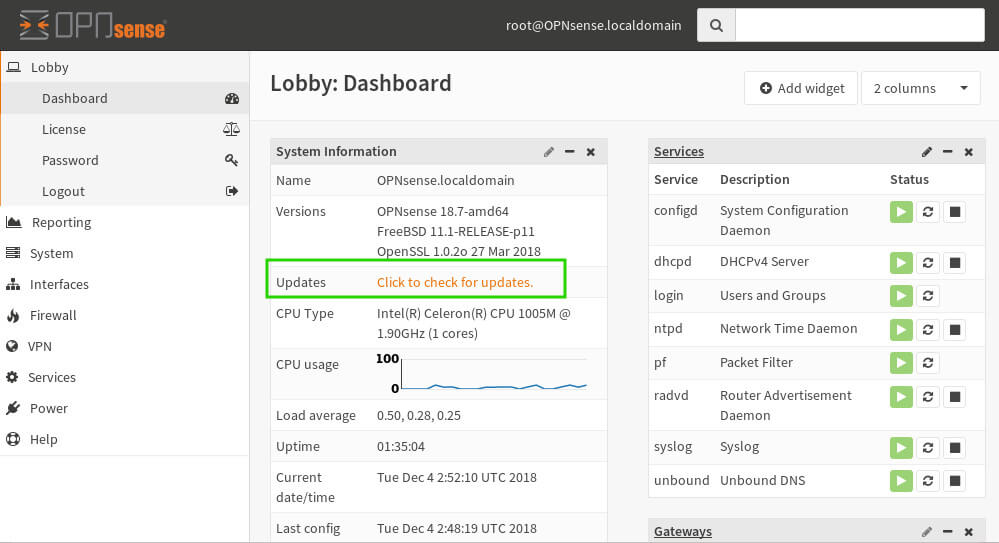
Then on the next screen, ‘Check for Updates’ can be used to see a list of updates, or ‘Update Now’ can be used to simply apply any available updates.

At this point, a basic install of OpnSense should be up and running as well as fully updated! In future articles, Link aggregation and inter-VLAN routing will be covered to show more of the advanced capabilities of OpnSense!


Should be “bunzip2” not “bunzip” to decompress the downloaded file?
@Eric,
Yes, it should be “bunzip2“, corrected in the article…
Ì choose option 1 but WAN not detected? Please help. Thanks
Hello, I’ve built a 32 bits HP Thin Client to a device for OPNsence. I want to place it between my ISP modem/router and my own router. I think I understand that I have to let the DHCP-mode on the ISP modem intact. i.e not in bridge-mode. But what to do with my own Asus RT-AC86u Router?
I normally had on both devices DHCP on and the Asus in a separate subnet. The default IP from my Asus is also 192.168.1.1. In my Thin Client I installed a 4 ports Intel P1000 pro. The already on the mobo installed port I use as WAN, so I have 4 LAN port. The Wan ports are called ibg0 to 3 and my wan port is called edb0.
I tried different combinations, ISP lan on and Asus out, the opposite way and Both on. In one case I get the message that the cable is not connected and sometimes all looks fine but I can only have access to the router and not the internet.
My main question is on what port I have to put the Lan-cable from the thin-client, Wan or Lan? And do I have to shut down DHCP on my Asus or not?
Does this method still work?
I tried but my computer wont read the USB driver after i select to boot from it?
The best way I’ve found to create, boot, and install from an opensense/pfsense drive was to:
Note: This method may work with a Windows machine but, when you try to boot from the flash you may get a GPT partitioning error. This results in an incorrect checksum which won’t allow you to boot from USB so I don’t recommend.