In an earlier article the installation of a powerful FreeBSD based firewall solution known as pfSense was discussed. pfSense, as mentioned in the earlier article, is a very powerful and flexible firewall solution that can make use of an old computer that may be laying around not doing much.
This article is going to talk about a wonderful add-on package for pfsense called pfBlockerNG.
pfBlockerNG is a package that can be installed in pfSense to provide the firewall administrator with the ability to extend the firewall’s capabilities beyond the traditional stateful L2/L3/L4 firewall.
As the capabilities of attackers and cyber criminals continues to advance, so must the defenses that are put in place to thwart their efforts. As with anything in the computing world, there isn’t a one solution fixes all product out there.
pfBlockerNG provides pfSense with the ability for the firewall to make allow/deny decisions based items such as the geolocation of an IP address, the domain name of a resource, or the Alexa ratings of particular websites.
The ability to restrict on items such as domain names is very advantageous as it allows administrators to thwart attempts of internal machines attempting to connect out to known bad domains ( in other words, domains that may be known to have malware, illegal content, or other insidious pieces of data).
This guide will walk through configuring a pfSense firewall device to use the pfBlockerNG package as well as some basic examples of domain block lists that can be added/configured into the pfBlockerNG tool.
Requirements
This article will make a couple of assumptions and will build off of the prior installation article about pfSense. The assumptions will be as follows:
- pfSense is already installed and has no rules currently configured (clean slate).
- The firewall only has a WAN and a LAN port (2 ports).
- The IP scheme being used on the LAN side is 192.168.0.0/24.
It should be noted that pfBlockerNG can be configured on an already running/configured pfSense firewall. The reason for these assumptions here is simply for sanity’s sake and many of the tasks that will be completed, can still be done on a non-clean slate pfSense box.
Lab Diagram
The image below is the lab diagram for the pfSense environment that will be used in this article.

Install pfBlockerNG for pfSense
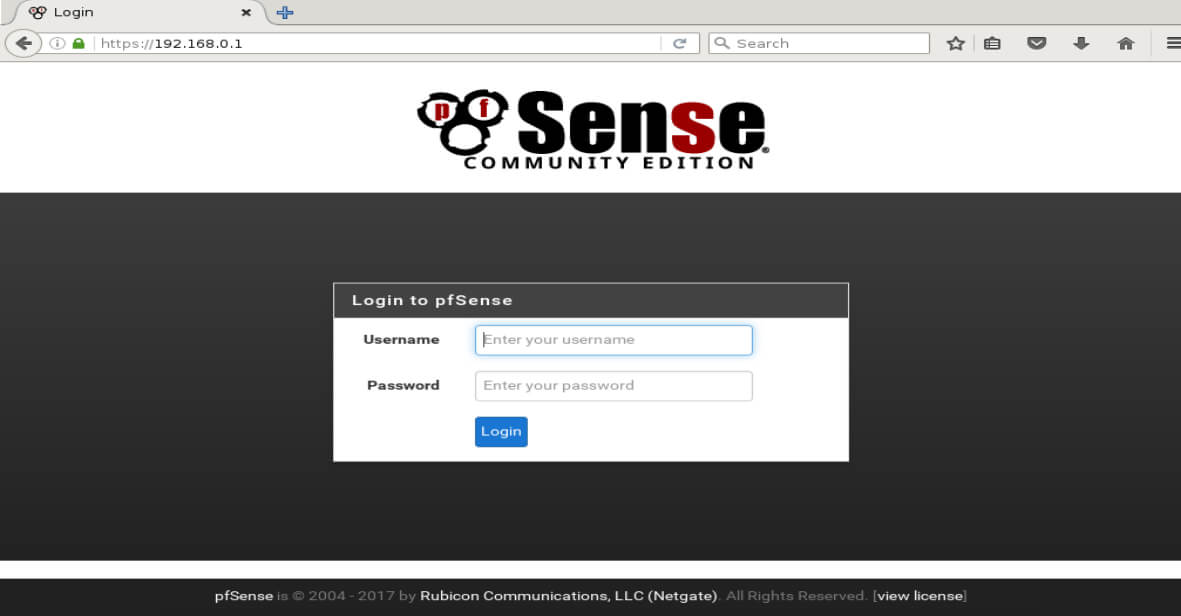
With the lab ready to go, it is time to begin! The first step is to connect to the web interface for the pfSense firewall. Again this lab environment is using the 192.168.0.0/24 network with the firewall acting as the gateway with an address of 192.168.0.1. Using a web browser and navigating to ‘https://192.168.0.1’ will display the pfSense login page.
Some browsers may complain about the SSL certificate, this is normal since the certificate is self signed by the pfSense firewall. You can safely accept the warning message and if desired, a valid certificate signed by a legitimate CA can be installed but is beyond the scope of this article.
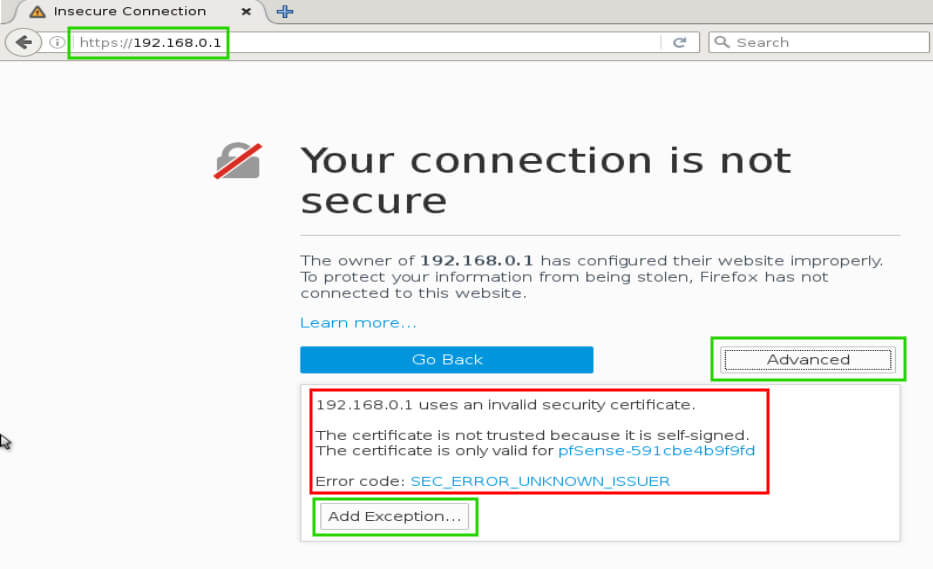
After successfully clicking ‘Advanced’ and then ‘Add Exception…’, click to confirm the security exception. The pfSense login page will then display and allow for the administrator to log in to the firewall appliance.
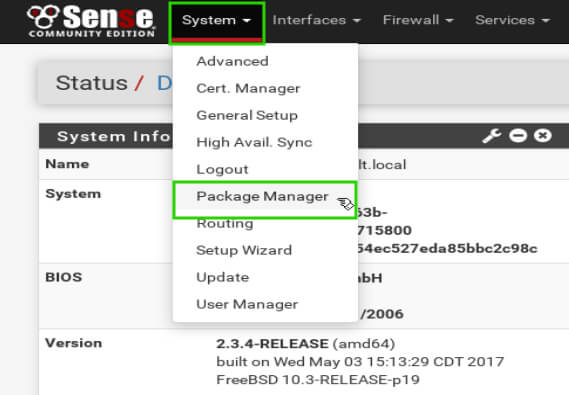
Once logged in to the main pfSense page, click on the ‘System’ drop down and then select ‘Package Manager’.
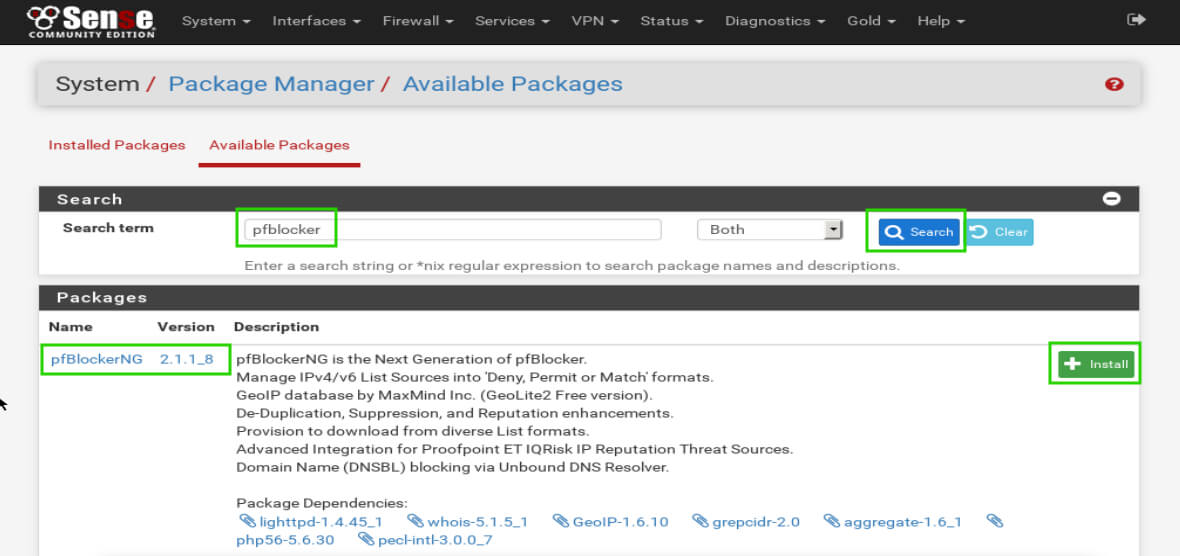
Clicking this link will change to the package manager window. The first page to load will be all the currently installed packages and will be blank (again this guide is assuming a clean pfSense install). Click on the text ‘Available Packages’ to be provided a list of installable packages for pfSense.

Once the ‘Available Packages’ page loads, type ‘pfblocker’ into the ‘Search term’ box and click the ‘Search’. The first item that is returned should be pfBlockerNG. Locate the ‘Install’ button to the right of the pfBlockerNG description and click the ‘+’ to install the package.
The page will reload and request the administrator confirm the installation by clicking ‘Confirm’.
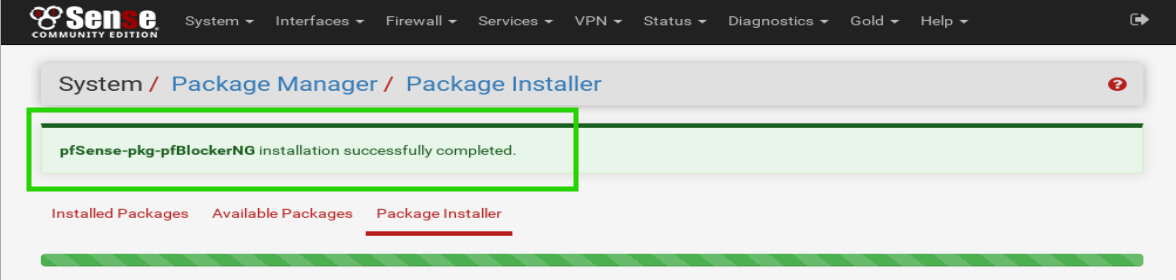
Once confirmed, pfSense will begin to install pfBlockerNG. Do not navigate away from the installer page! Wait until the page displays successful installation.
Once the installation has been completed, the pfBlockerNG configuration can begin. The first task that needs to be completed though is some explanations on what is going to happen once pfBlockerNG is configured properly.
Once pfBlockerNG is configured, DNS requests for websites should be intercepted by the pfSense firewall running the pfBlockerNG software. pfBlockerNG will then have updated lists of known bad domains that are mapped to a bad IP address.
The pfSense firewall needs to intercept DNS requests in order to be able to filter out bad domains and will use a local DNS resolver known as UnBound. This means clients on the LAN interface need to use the pfSense firewall as the DNS resolver.
If the client requests a domain that is on pfBlockerNG’s block lists, then pfBlockerNG will return a false ip address for the domain. Let’s begin the process!
pfBlockerNG Configuration for pfSense
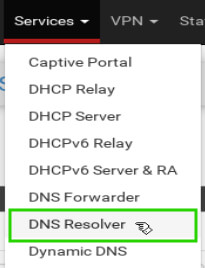
The first step is to enable the UnBound DNS resolver on the pfSense firewall. To do this, click on the ‘Services’ drop down menu and then select ‘DNS Resolver’.
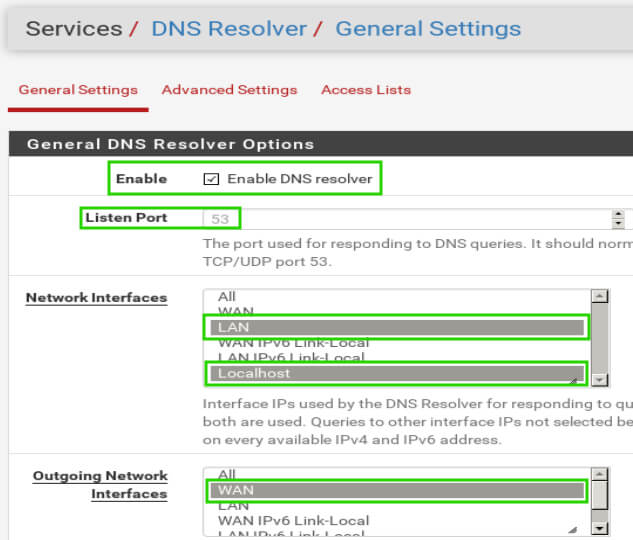
When the page reloads, the DNS resolver general settings will be configurable. This first option that needs to be configured is the checkbox for ‘Enable DNS Resolver’.
The next settings are to set the DNS listening port (normally port 53), setting the network interfaces that the DNS resolver should listen on (in this configuration, it should be the LAN port and Localhost), and then setting the egress port (should be WAN in this configuration).
Once the selections have been made, be sure to click ‘Save’ at the bottom of the page and then click the ‘Apply Changes’ button that will appear at the top of the page.
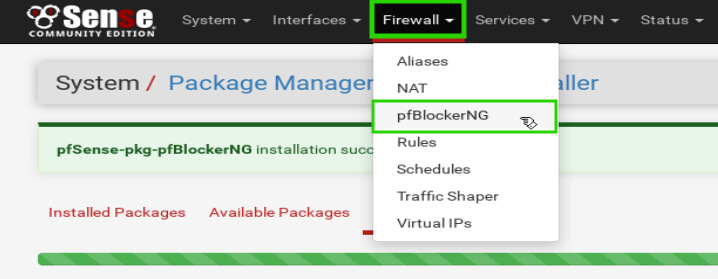
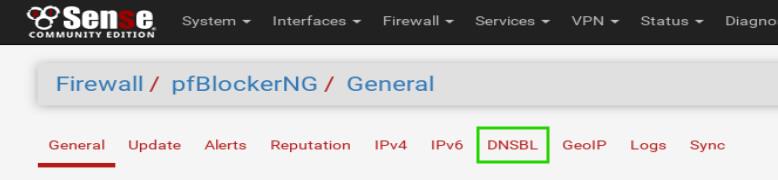
The next step is the first step in configuration of pfBlockerNG specifically. Navigate to the pfBlockerNG configuration page under the ‘Firewall’ menu and then click on ‘pfBlockerNG’.
Once pfBlockerNG has loaded, click on the ‘DNSBL’ tab first to begin setting up the DNS lists before activating pfBlockerNG.
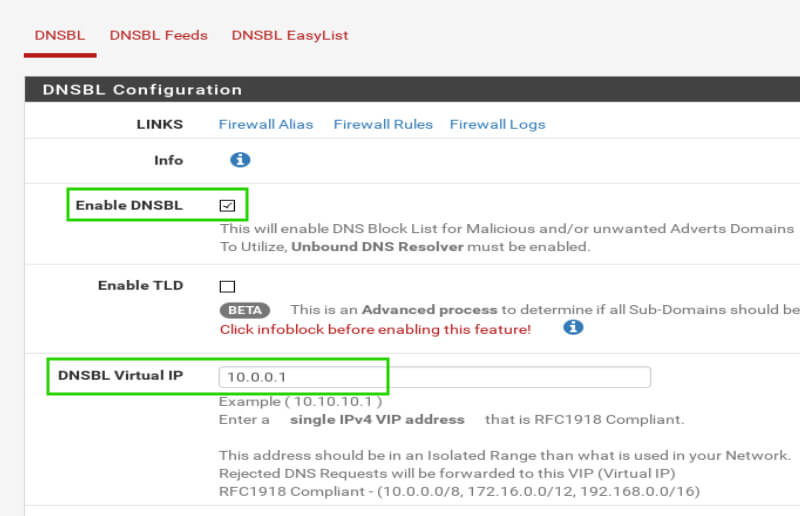
When the ‘DNSBL’ page loads, there will be a new set of menus beneath the pfBlockerNG menus (highlighted in green below). The first item that needs to be addressed is the ‘Enable DNSBL’ check box (highlighted in green below).
This check box will require the UnBound DNS resolver be used on the pfSense box in order to inspect dns requests from LAN clients. Don’t worry UnBound was configured earlier but this box will need to be checked! The other item that needs to be filled in on this screen is the ‘DNSBL Virtual IP’.
This IP needs to be in the private network range and not a valid IP on the network in which pfSense is being used. For example, a LAN network on 192.168.0.0/24 could use an IP of 10.0.0.1 as it is a private IP and isn’t part of the LAN network.
This IP will be used to gather statistics as well as monitor domains that are being rejected by pfBlockerNG.
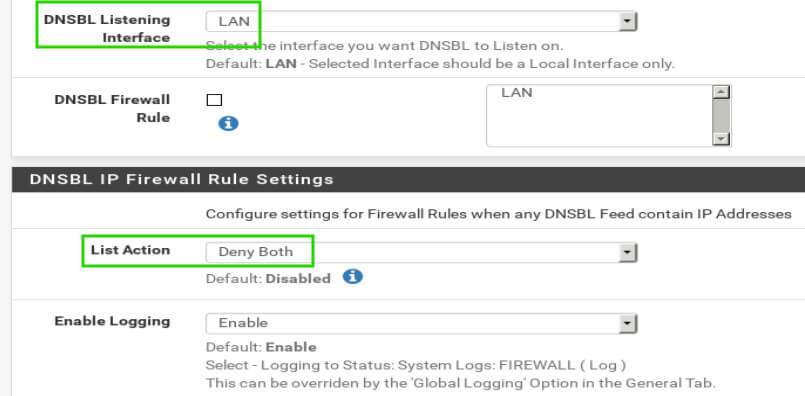
Scrolling down the page, there are a few more settings worth mentioning. The first is the ’DNSBL Listening Interface’. For this setup, and most setups, this setting should be set to ‘LAN’.
The other setting is ‘List Action’ under ‘DNSBL IP Firewall Settings’. This setting determines what should happen when a DNSBL feed provides IP addresses.
The pfBlockerNG rules can be setup to do any number of actions but most likely ‘Deny Both’ will be the desired option. This will prevent inbound and outbound connections to the IP/domain on the DNSBL feed.
Once the items have been selected, scroll to the bottom of the page and click the ‘Save’ button. Once the page reloads, it is time to configure the DNS Block Lists that should be used.
pfBlockerNG provides the administrator with two options that can be configured independently or together depending on the administrator’s preference. The two options are manual feeds from other web pages or EasyLists.
To read more about the different EasyLists, please visit the project’s homepage: https://easylist.to/
Configure pfBlockerNG EasyList
Let’s discuss and configure the EasyLists first. Most home user’s will find these lists to be sufficient as well as the least administratively burdensome.
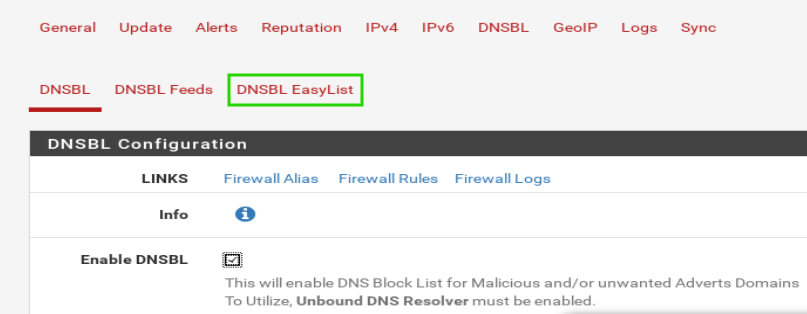
The two EasyLists available in pfBlockerNG are ‘EasyList w/o Element Hiding’ and ‘EasyPrivacy’. To use one of these lists, first click on the ‘DNSBL EasyList’ at the top of the page.
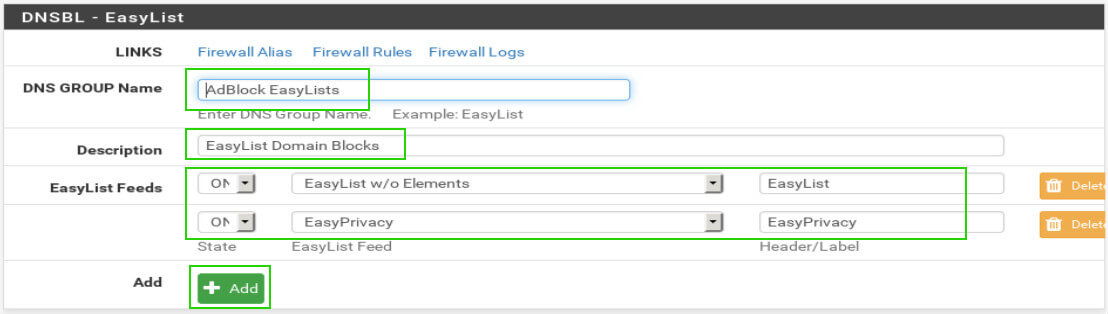
Once the page reloads, the EasyList configuration section will be made available. The following settings will need to be configured:
- DNS Group Name – User’s choice but no special characters
- Description – User’s choice, special characters allowed
- EasyList Feeds State – Whether the configured list is used
- EasyList Feed – Which list to use (EasyList or EasyPrivacy) both can be added
- Header/Label – User choice but no special characters
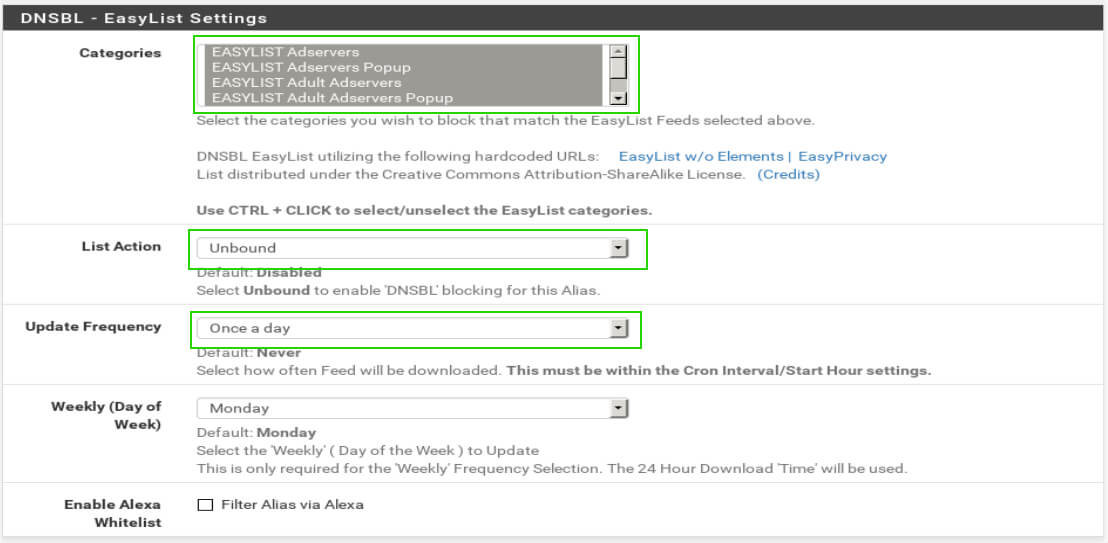
The next section is used to determine which parts of the lists will be blocked. Again these are all user preference and multiple can be selected if desired. The important settings in the ‘DNSBL – EasyList Settings’ are as follows:
- Categories – User preference and multiple can be selected
- List Action – Needs to be set to ‘Unbound’ in order to inspect DNS requests
- Update Frequency – How often pfSense will update the list of bad sites
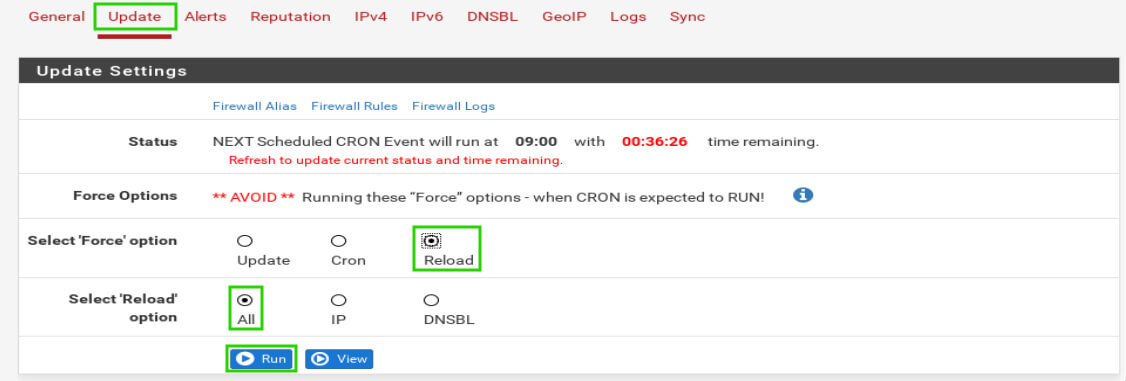
When the EasyList settings are configured to the user’s preferences, be sure to scroll to the bottom of the page and click the ‘Save’ button. Once the page reloads, scroll to the top of the page and click on the ‘Update’ tab.
Once on the update tab, check the radio button for ‘Reload’ and then check the radio button for ‘All’. This will run through a series of web downloads to obtain the block lists selected on the EasyList configuration page earlier.
This must be done manually otherwise lists won’t be downloaded until the scheduled cron task. Anytime changes are made (lists added or removed) be sure to run this step.
Watch the log window below for any errors. If everything went to plan, client machines on the LAN side of the firewall should be able to query the pfSense firewall for known bad sites and receive bad ip addresses in return. Again the client machines must be set to use the pfsense box as their DNS resolver though!
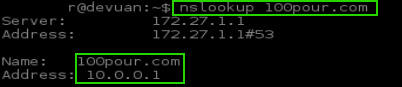
Notice in the nslookup above that the url returns the false IP configured earlier in the pfBlockerNG configurations. This is the desired outcome. This would result in any request to the URL ‘100pour.com’ being directed to the false IP address of 10.0.0.1.
Configure DNSBL Feeds for pfSense
In contrast to the AdBlock EasyLists, there is also the ability to use other DNS Black Lists within pfBlockerNG. There are hundreds of lists that are used to track malware command and control, spyware, adware, tor nodes, and all sorts of other useful lists.
These lists can often be pulled into pfBlockerNG and also used as further DNS Black Lists. There are quite a few resources that provide useful lists:
- https://forum.pfsense.org/index.php?topic=114499.0
- https://forum.pfsense.org/index.php?topic=102470.0
- https://forum.pfsense.org/index.php?topic=86212.0
The links above provide threads on pfSense’s forum where members have posted a large collection of the list’s they use. Some of the author’s favorite lists include the following:
- http://adaway.org/hosts.txt
- http://www.malwaredomainlist.com/hostslist/hosts.txt
- http://pgl.yoyo.org/adservers/serverlist.php?hostformat=hosts&mimetype=plaintext
- https://zeustracker.abuse.ch/blocklist.php?download=domainblocklist
- https://gist.githubusercontent.com/BBcan177/4a8bf37c131be4803cb2/raw
Again there are tons of other lists and the author strongly encourages that individuals seek out more/other lists. Let’s continue with the configuration tasks though.
The first step is to go into pfBlockerNG’s configuration menu again through ‘Firewall’ -> ‘pfBlockerNG’ -> ’DSNBL’.
Once on the DNSBL configuration page again, click on the ‘DNSBL Feeds’ text and then click on the ‘Add’ button once the page refreshes.
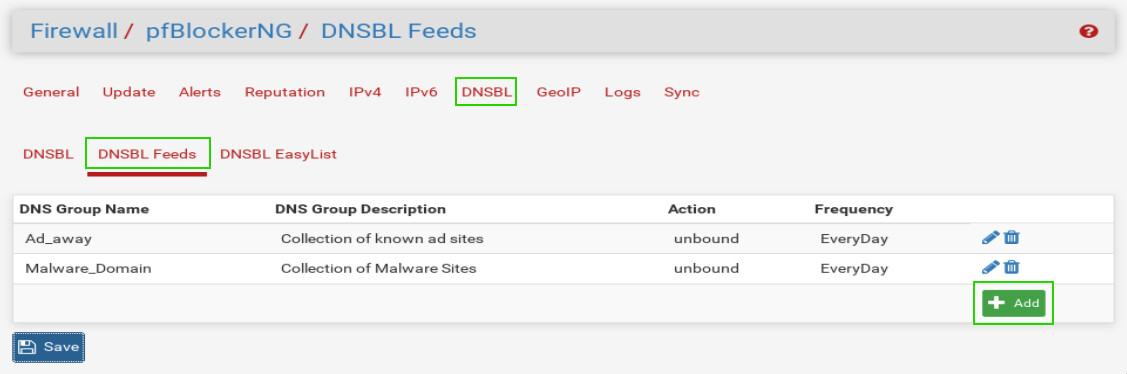
The add button will allow the administrator to add more lists of bad IP addresses or DNS names to the pfBlockerNG software (the two items already in the list are the author’s from testing). The add button brings the administrator to a page where DNSBL lists can be added to the firewall.
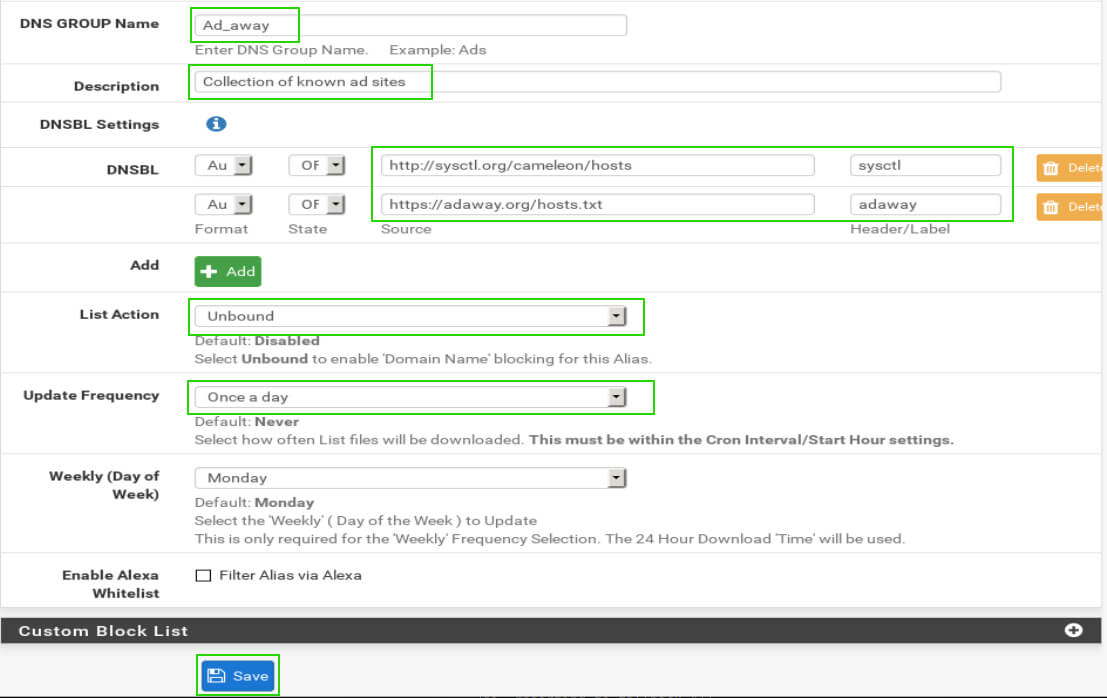
The important settings in this output are the following:
- DNS Group Name – User chosen
- Description – Useful for keeping groups organized
- DNSBL Settings – These are the actual lists
- State – Whether that source is used or not and how it is obtained
- Source – The link/source of the DNS Black List
- Header/Label – User choice; no special characters
- List Action – Set to Unbound
- Update Frequency – How often the list should be updated
Once these settings have been set, click the save button down at the bottom of the page. As with any changes to pfBlockerNG, the changes will take effect on the next scheduled cron interval or the administrator can manually force a reload by navigating to the ‘Update’ tab, click the ‘Reload’ radio button, and then click the ‘All’ radio button. Once those are selected, click the ‘Run’ button.

Watch the log window below for any errors. If everything went to plan, test that the lists are working by simply attempting to do an nslookup from a client on the lan side to one of the domains listed in one of the text files used in the DNSBL configuration.

As can be seen in the output above, the pfSense device is returning the virtual IP address that was configured in pfBlockerNG as the bad IP for the black list domains.
At this point the administrator could continue tuning the lists by adding more lists or creating custom domain/IP lists. pfBlockerNG will continue to redirect these restricted domains to a fake IP address.
Thank you for reading this article about pfBlockerNG. Please show your appreciation or support for the pfSense software as well as pfBlockerNG by contributing in anyway possible to the continued development of both of these wonderful products. As always please comment below with any suggestions or questions!


Thanks for the great article. I also recommend trying Sensei. It has a Free Edition which is a very powerful web filtering and application control engine.
Seems like this could be updated to 2020
@Seth,
We are in process of updating this article with the latest instructions, till then stay tuned…
I really appreciate this post. I’m going to implement the pfblockerNG as a second layer of security, and this article helps me a lot.
Dear Sir,
How to block youtube, facebook, torrent those things in pfsense ??
Thank you for a most helpful and informative article on pfBlockerNg!
Hello,
Do we have to Enable pfBlockerNG first please?
I just see setup but not “enable”
Thanks
Good work, helped me to get started and familiarize myself with concepts covered in this guide.
Great article, thanks a lot. It helped me get set up and even works with three interfaces (WAN, LAN, and OPT1 for my Wifi router).
About the only thing I found missing, and I only mention it because this is a good step-by-step set of instructions to get you going, is to enable pfBlockerNG first, Save, and then go to the DNSBL tab and continue with the instructions. Yes, I did figure it out as it’s not all that hard but with step-by-step, it should be complete :)
What a nice article !!!
Excellent work.
After reading your article I induced to use pfsense and results are far better than expected. I wish you very best for suggesting this. I would say that the solution is far better than commercial firewall.
May I seek your help by way of an article on a) How to create report of bandwidth usage based on users. b) How to create firewall rules based on mac addresses ( I spent nights to find this , but in vain ) using pfsense….
Keep writing such beautiful, informative and helpful articles. All the best