Virtual Hard Disk (VHD) is a disk image file format which represents a virtual hard disk drive, capable of storing the complete contents of a physical hard drive. It’s a container file that acts similar to a physical hard drive. The disk image replicates an existing hard drive and includes all data and structural features.
Just like a physical hard drive, a VHD can contains a file system, and you can use it to store and run an operating system, applications, as well as store data. One of the typical uses of VHDs in VirtualBox Virtual Machines (VMs) to store operating systems and application, and data.
In this article, we will demonstrate how to create a virtual hard disk volume using a file in Linux. This guide is useful for creating VHDs for testing purposes in your IT environment. For the purpose of this guide, we will create a VHD volume of size 1GB, and format it with EXT4 file system type.
Create a New Image to Hold Virtual Drive Volume
There are number of ways you can do this, but the most easiest way is using the following dd command. In this example, we will be creating a VHD volume of size 1GB image.
$ sudo dd if=/dev/zero of=VHD.img bs=1M count=1200
Where:
- if=/dev/zero: input file to provide a character stream for initializing data storage
- of=VHD.img: image file to be created as storage volume
- bs=1M: read and write up to 1M at a time
- count=1200: copy only 1200M (1GB) input blocks

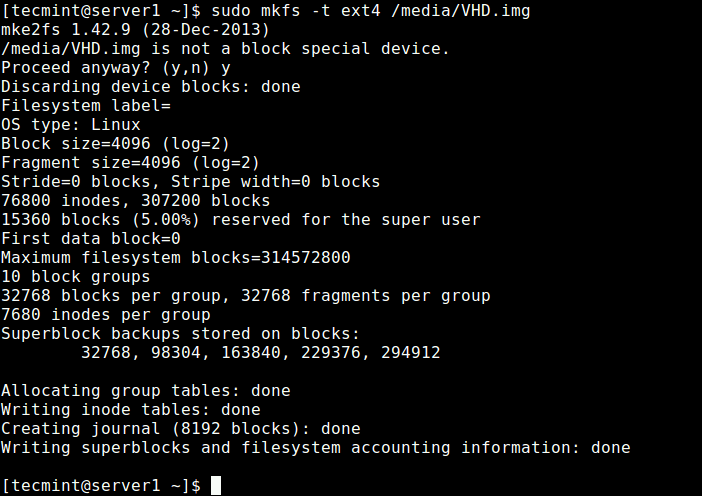
Next, we need to format the EXT4 file system type in the VHD image file with the mkfs utility. Answer y, when prompted that /media/VHD.img is not a block special device as shown in the following screenshot.
$ sudo mkfs -t ext4 /media/VHD.img
In order to access the VHD volume, we need to mount to a directory (mount point). Run these commands to create the mount point and mount the VHD volume, respectively. The -o is used to specify options for mounting, here, the option loop indicates the device node under the /dev/ directory.
$ sudo mkdir /mnt/VHD/
$ sudo mount -t auto -o loop /media/VHD.img /mnt/VHD/
Note: The VHD filesystem will only remain mounted until the next reboot, to mount it at system boot, add this entry in the /etc/fstab file.
/media/VHD.img /mnt/VHD/ ext4 defaults 0 0
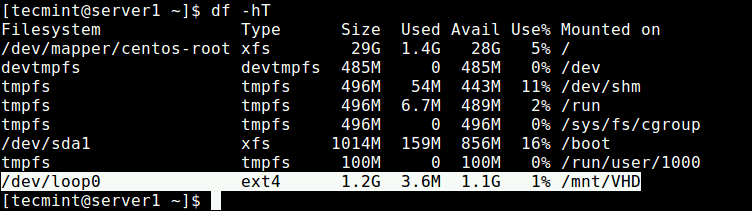
Now you can verify the newly created VHD filesystem with mount point using the following df command.
$ df -hT
Removing Virtual Drive Volume
If you don’t need the VHD volume anymore, run the following commands to unmount the VHD filesystem, then delete the image file:
$ sudo umount /mnt/VHD/
$ sudo rm /media/VHD.img
Using the same idea, you can also create a swap area/space using a file in Linux.
That’s all! In this guide, we have demonstrated how to create a virtual hard disk volume using a file in Linux. If you have any thoughts to share or questions to ask, reach us via the comment form below.


Hi,
`sudo` you only really need them for the mount and unmount.
dd does not need sudo (/dev/zero is world readable by default) and the mkfs also does not need root (as long as the file is owned by you).
mkdir also does not need sudo!
I’m halfway there. I was a bit confused about the “/media” bit being in the dd command but not the mkfs command, but then again I’m a novice. I took that out and continued.
When I got to the mount command I put in the full path to the created img file and that seemed to work.
However, in the graphical file browser (in Zorin) what I see is my img file’s name with a padlock on it. In the sidebar is “1.3GB volume” rather than the container name.
I can’t eject that. And when I try to save a new file in this virtual space — using Nano, for example, it says I can’t.
So like commenter Jam on this page, what I have is read only?
I appreciate the instructions, but how should I proceed so that I can use this virtual disk?
So I CANNOT take this “VHD” in a name-only file and “mount” it to Windows or VB, right?
VHD and VHDX have very specific specifications for COMPATIBILITY.
W10/11 has a Disk2vhd program and moves from MS to Ubuntu or RHEL/CENTOS (or whats left of it), so does Ubuntu/Linux/Unix have an equivalency to DUMP a physical disk into the VHDX or VHD format?
@Tom,
Yes, you are correct in noting that VHD and VHDX have specific compatibility specifications. While Windows 10/11 provides the Disk2vhd program for creating virtual hard disk files (VHD/VHDX) from physical disks, the process is generally tailored for Windows environments.
For Linux-based systems such as Ubuntu or RHEL/CentOS, you can use tools like “dd” to create a disk image. However, directly converting to VHD or VHDX may not be straightforward, as these formats are more native to Windows.
To achieve compatibility, you might need additional tools or a two-step process. You could first create a raw disk image using “dd” or a similar tool and then convert it to VHD/VHDX using a tool like qemu-img.
I tried this method, but the mounted drive/container remains read-only… I could not find how to enable write permission.
I’m not sure it’s fair to call this a VHD? since VHD is a file extension specifically used by Microsoft’s VirtualPC and Hyper-V hypervisor. What this creates is a bare image that doesn’t have whatever magic makes a Microsoft VHD work on a Windows machine.
VHD merely stands for “Virtual Hard Disk“, just as VMDK stands for “Virtual Machine Disk“. All of which are nothing but a file inside a partition, on a physical disk, pretending to be a real Hard/Machine disk. We just don’t use the word “pretend disk” in I.T., instead of calling them “virtual disks”.
VHD/VMDK files have metadata containing additional information such as the logical C/H/S layout, bytes per sector, etc.
VHD is a well-known and well-established format. Mention ‘VHD‘ to pretty much any IT professional, and they will assume you are talking about the Connectix/Microsoft format and NOT a generic disk image file.
How to increase the size of this drive ?
If your disk is not containing anything that is required at boot, you could create a new, bigger disk, copy the content across, then unmounted and mount the new one, not deleting the old one until you confirm the new one works. Within Linux there are a number of tools to help you manage hard disks, such as fdisk, gdisk, GParted, sdparm, tune2fs, etc…. you just need to find the right tool for the job. Hope that helps.
Are there any tools other than dd to create a virtual hard disk in Linux?
I store my VHD on a file share because there will be cases where I need to umount from Server 1 and then mount from Server 2. The risk here is if Server 2 ever mounts and writes before the umount from Server 1. Is there a way to fully prevent Server 2 from being able to mount if it’s already mounted by another server?
Is it possible to create the image file on another disk than the drive the command is issued from?
In essence, what I’d like to accomplish is this:
@Tux
Yes, it should work well as long as the other disk is properly mounted in the file system.