This tutorial will guide you on installing latest release of Debian 8 (codename Jessie) with /home and /var LVM partitions encrypted on top of a LUKS encrypted physical volume.
LUKS, an acronym for Linux Unified Key Setup, offers a standard for Linux hard disk block encryption and stores all the setup data in the partition header. If somehow, the LUKS partition header is tampered, damaged or overwritten in any way, the encrypted data that reside onto this partition is lost.
Still, one of the facilities of using LUKS encryption is that you can use a decryption key on the boot process to automatically unlock, decrypt and mount the encrypted partitions, without the need to always type a prompt passphrase at system boot (especially if you are connecting remotely through SSH).
You might ask, why only encrypt the /var and /home partitions and not the entire file system. One argument would be that /home and /var partitions contain, in most cases, sensitive data. While /home partition stores users data, the /var partition stores databases information (typically MySQL database files are located here), log files, websites data files, mail files and other, information that can be easily accessed once a third-party gains physical access to your hard drives.
Requirements
Installing Debian 8 with LUKS Encrypted /home and /var Partitions
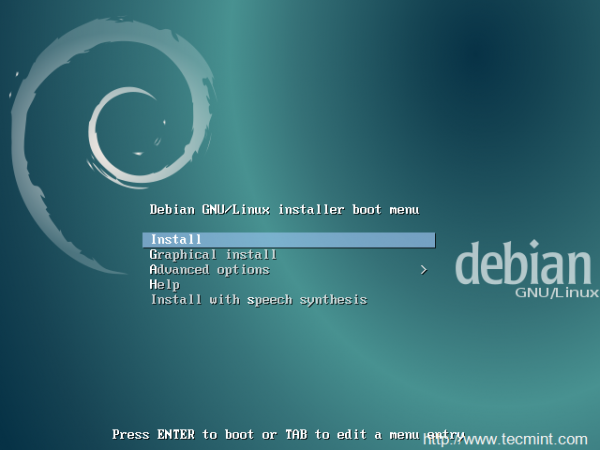
1. Download Debian 8 ISO image and burn it to a CD or create a bootable USB drive. Place the CD/USB in your appropriate drive, power on the machine and instruct the BIOS to boot from the CD/USB drive.
Once the system boots up the Debian installation media, choose Install from the first screen and press Enter key to move forward.
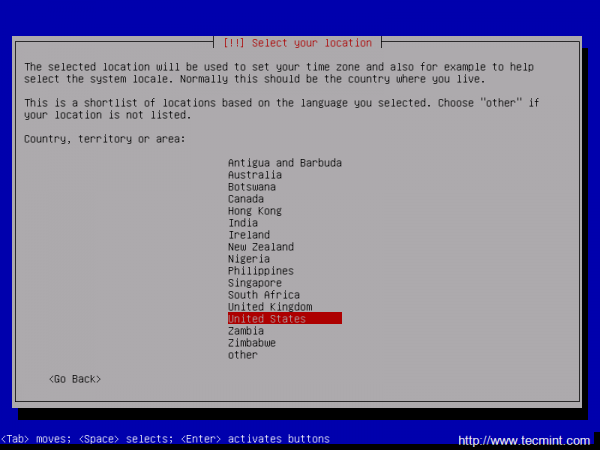
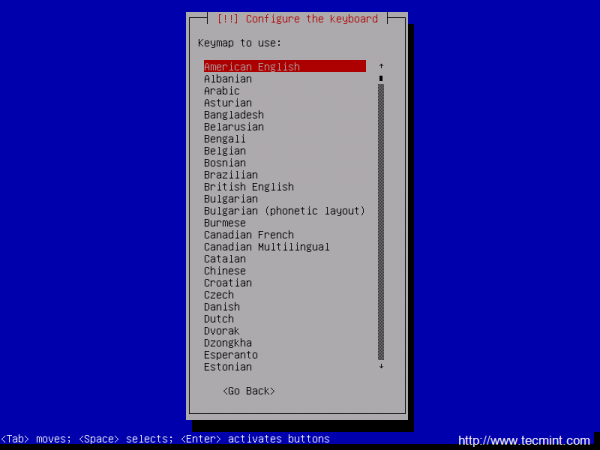
2. On the next steps, select the Language for the installation process, select your Country, configure your keyboard and wait for other additional components to load.

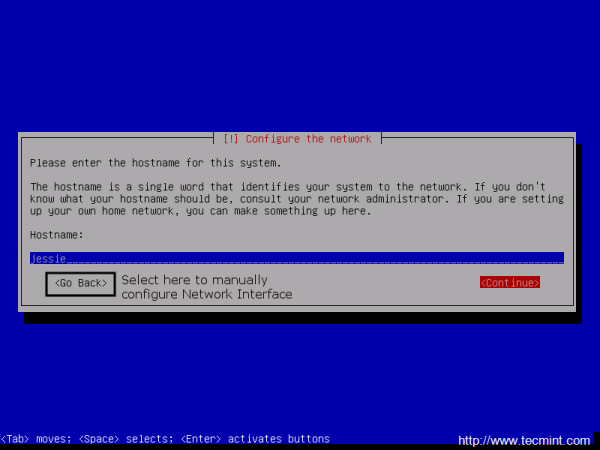
3. On the next step the installer will automatically configure your Network Card Interface in case you provide network settings through a DHCP Server.
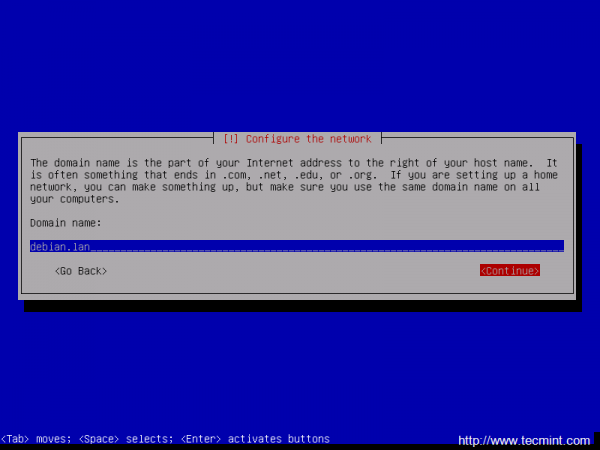
If your network segment doesn’t use a DHCP server to automatically configure network interface, on the Hostname screen choose Go Back and manually set your interface IP Addresses.
Once done, type a descriptive Hostname for your machine and a Domain name as illustrated on the below screenshots and Continue with the installation process.
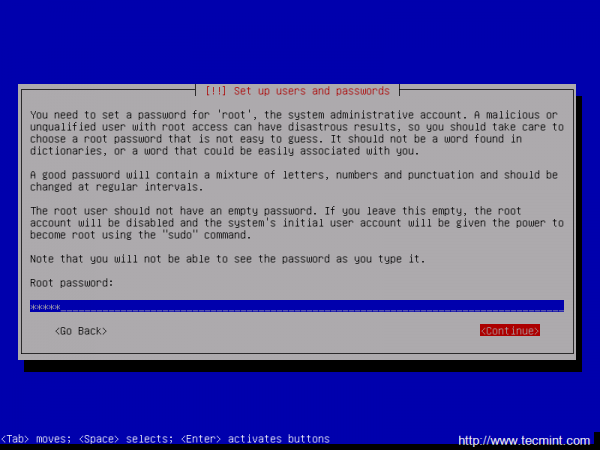
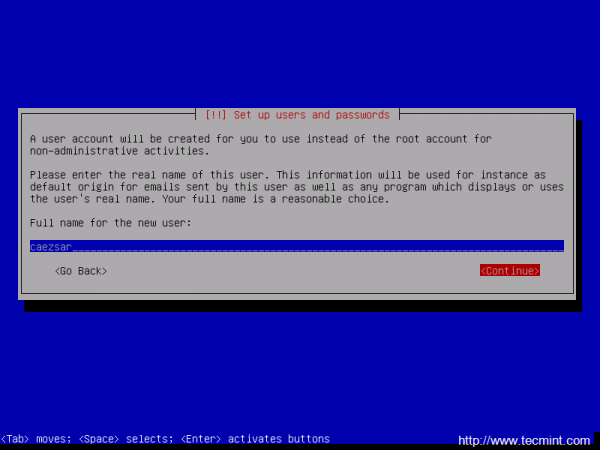
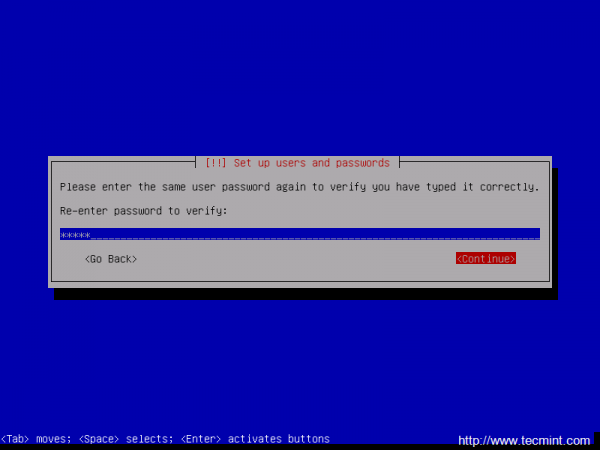
4. Next, type a strong password for root user and confirm it, then setup the first user account with a different password.
5. Now, setup the clock by selecting your physical nearest time zone.

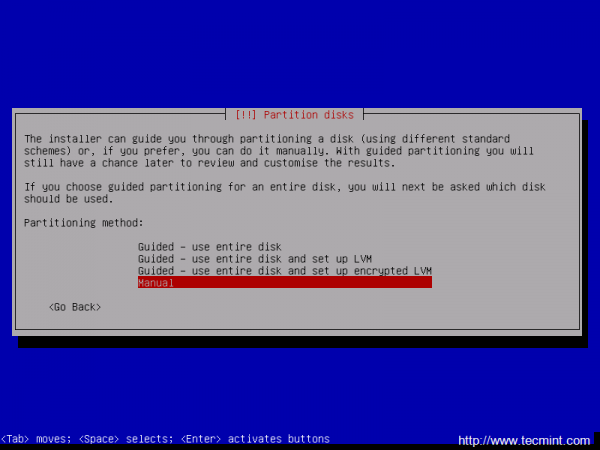
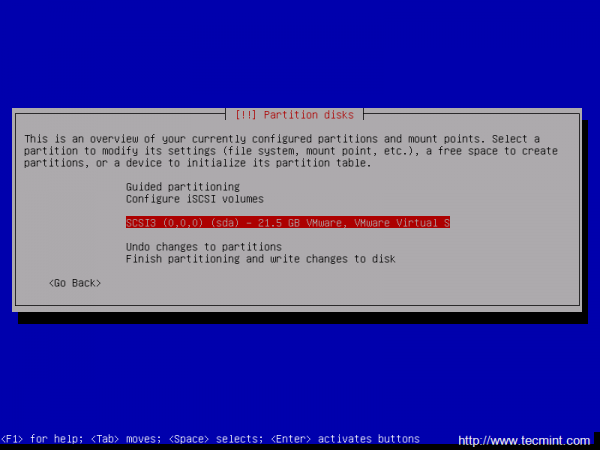
6. On the next screen choose Manual Partitioning method, select the hard drive that you want to partition and choose Yes to create a new empty partition table.

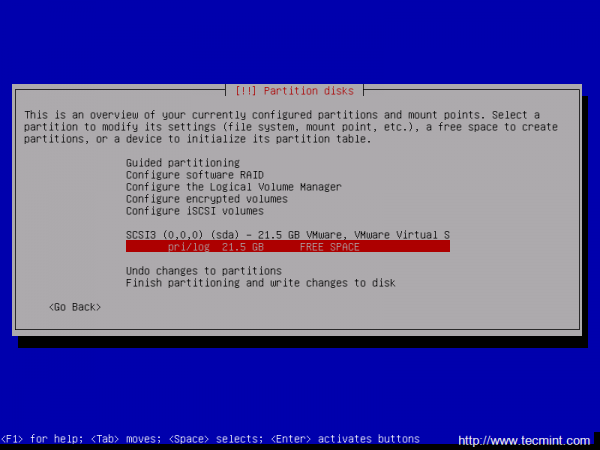
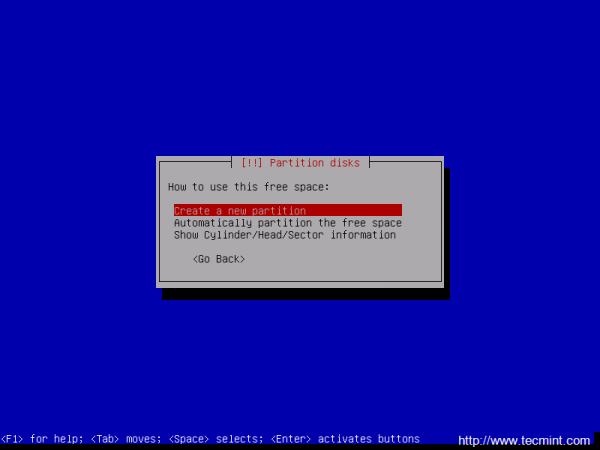
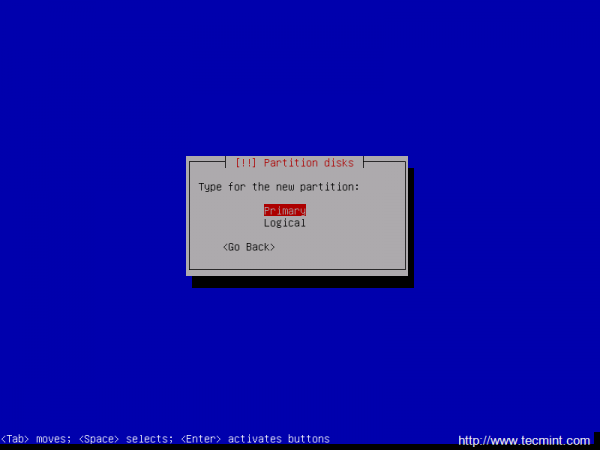
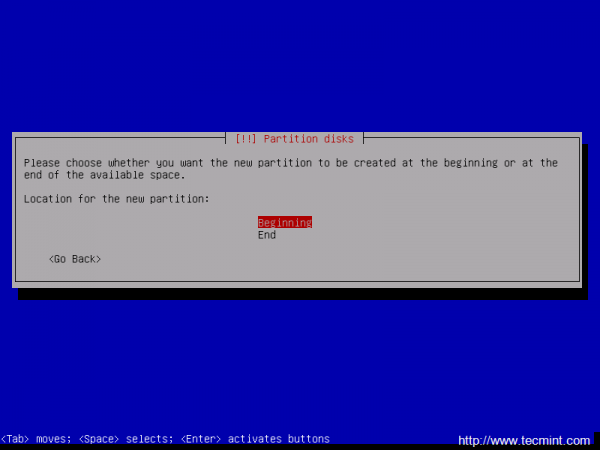
7. Now it’s time to slice the hard drive into partitions. The first partition that will create will be the /(root) partition. Select the FREE SPACE, hit Enter key and choose Create a new partition. Use at least 8 GB as its size and as Primary partition at the Beginning of the disk.

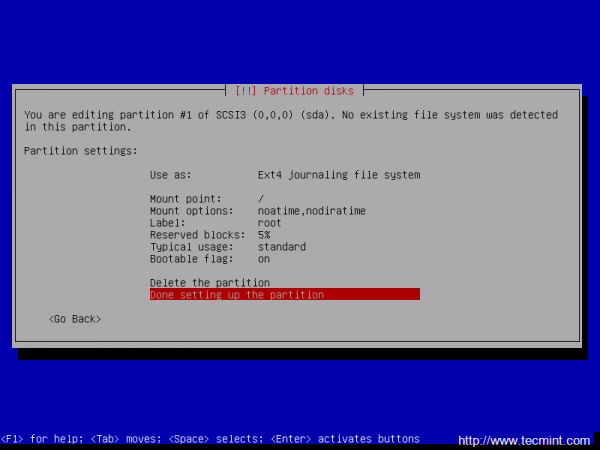
8. Next, configure /(root) partition with the following settings:
- Use as: Ext4 journaling file system
- Mount Point: /
- Label: root
- Bootable flag: on
When you have finished setting up the partition choose Done setting up the partition and press Enter to continue further.


hi guys
i want to know how to make passpshrase to automaticaly boot from usb.
Yeah, I’m not convinced automatic decryption works in Debian. If you issue ‘update-initramfs -u -k all’ you get the error, ‘cryptsetup: WARNING: target sdaX_crypt uses a key file, skipped.’ which will hang the system at boot.
https://bugs.debian.org/cgi-bin/bugreport.cgi?bug=776409
They’re dicking around with systemd and can’t get it sorted out so it isn’t clear if you can use a keyscript in Jessie/Stable.
>All sensitive data stored in /home and /var partitions will be highly secured in case someone gains physical access to your machine hard-drive.
I’m sorry, how exactly is it gonna be secured from anyone when we’ve just configured these partitions to be mounted automatically without asking the passphrase so anyone will be able to login on our machine and read all the data from these partitions?
That’s just a simple trick used to decrypt the partitions. I wouldn’t suggest that you should host the key on any of internal hard-disks but you can use an external drive to keep the key secure and plug the drive.
If you can boot-up and login to the console check if the / partition is present on fstab (i’m guessing the root partition is not encrypted). Then update the initramfs image with the command ‘update-initramfs -u’
Hi, after “update-initramfs -u -k all” the system won’t boot anymore with the error “Unable to find LVM volume hostname-vg/root”. Without that command the passphrase as still asked at boot. Do I need to add anything to /etc/fstab?
Any other suggestion?
put the key on usb stick :)
After step 25 (add the key to encrypted LUKS device and enter the passphrase) the key is not be added to the slot, but I get a message “Failed to open key file”.
All previous steps went flawless.
What went wrong?
Check permissions on /root/cryptkey file.
Hi,
After the last step, to make the system use the key file, I had to :
update-initramfs -u -k all
WIthout this command, the passphrase was still asked at boot time.
But I’m really wondering… how is it secure to store the key on disk, in the case someone get physical access to your hard drive? If I do this on a netbook, and someone steal it, will he be able to unlock the crypted volume after he found this key file??
Thanks for the tutorial!
Mate, you describe the creation of dm-crypt containers, which are not really LUKS. Try changing the pasword on the volume you create (a trivial operation for LUKS), and let us know how it worked.
“All sensitive data stored in /home and /var partitions will be highly secured in case someone gains physical access to your machine hard-drive.”
–> huummm , seriously ?
@Lemoidului,
Yes, what’s wrong here? /home contains important user data and /var contains important server logs, these two partitions needs to be secured..Instead finding out errors in the article, appreciate the author for his work hard..
IMHO, having a encrypted partition with the encryption key stored in a clear text partition by its side, is useless. A false sense of security.
Couldn’t agree more. I can decrypt your drives in 60 seconds if you store decryption key that way.
This is just a very simple and convenient trick to automatically decrypt and load the encrypted volume in case you don’t have any physical access to the machine or it’s impossible to access or tamper with the boot sequence in order to manually supply the passphrase.
@Chris: Check if the key has been added to the encrypted device slot by issuing cryptsetup luksDump command.Also, and verify the content of /etc/crypttab file and ensure that the correct key with absolute path has been added.
” Failed to open key file. ”
So whan next?
Sorry if I missed something, but… what’s the point of having a encrypted partition and storing the encryption password in a unencrypted partition?