Docker Desktop is an easy-to-use cross-platform GUI (Graphical User Interface) application used to manage Docker images, containers, and apps from your local computer. It can be utilized either independently or in conjunction with the command-line interface client.
A comprehensive Docker development environment can be quickly installed and set up using Docker Desktop, which also supports a variety of programming languages and frameworks. It comes pre-installed with the most recent version of Kubernetes, the Docker engine, the Docker CLI client, Docker Buildx, Docker Compose, extensions, and the Docker Content Trust.
With native Windows Hyper-V virtualization, it provides quick and dependable performance on Windows and lets you switch between the Linux and Windows Server environments with ease when developing applications. Additionally, it may operate natively on Linux on Windows computers via the Windows Subsystem for Linux 2 (also known as WSL 2).
Besides, Docker Desktop offers file change notifications, volume mounting for code and data, and simple access to active containers on the local host network.
This guide shows how to install Docker Desktop on Ubuntu and its derivatives, such as Linux Mint. Our test environment is Ubuntu 22.04.
This guide shows how to install Docker Desktop on Ubuntu 22.04 and Ubuntu-based distributions such as Linux Mint.
[ez-toc]
Prerequisites:
- 64-bit kernel and CPU support for virtualization/KVM virtualization support.
- QEMU must be version 5.2 or newer (but the latest version is recommended).
- Systemd init system.
- GNOME, KDE, or MATE Desktop environment.
- At least 4 GB of RAM, and.
- Enable configuring ID mapping in user namespaces.
1. Checking KVM Virtualization Support in Ubuntu
As mentioned under the prerequisite section above, Docker Desktop runs a virtual machine that requires KVM support. If the host has virtualization support, the KVM module should load automatically. But, you can load the module manually by running the following command:
$ modprobe kvm
You can run the following commands depending on the processor of the host machine to load the corresponding module:
$ modprobe kvm_intel  [For Intel]
$ modprobe kvm_amd    [For AMD]
To check if KVM acceleration can be used on your machine, issue the following command:
$ kvm-ok

Next, also check if the KVM modules are enabled, by running the following command:
$ lsmod | grep kvm

Now that the prerequisites exist on your machine, proceed to install Docker Desktop as described in the sections that follow.
2. Install Docker Repository in Ubuntu
Now, run the following commands first to update the local package index, then install the required packages, create a repository to store the Docker APT repository key, install the key, and then set up the repository configuration file:
$ sudo apt-get update
$ sudo apt-get install ca-certificates curl gnupg lsb-release
$ sudo mkdir -m 0755 -p /etc/apt/keyrings
$ curl -fsSL https://download.docker.com/linux/ubuntu/gpg | sudo gpg --dearmor -o /etc/apt/keyrings/docker.gpg
$ echo "deb [arch=$(dpkg --print-architecture) signed-by=/etc/apt/keyrings/docker.gpg] https://download.docker.com/linux/ubuntu $(lsb_release -cs) stable" | sudo tee /etc/apt/sources.list.d/docker.list > /dev/null
3. Install Docker Desktop on Ubuntu
Next, download the Docker Desktop DEB package file using the wget command-line downloader as follows:
$ wget -c https://desktop.docker.com/linux/main/amd64/docker-desktop-4.17.0-amd64.deb
Then, once again update the local package index and install DEB package using the apt command as shown.
$ sudo apt update
$ sudo apt install ./docker-desktop-4.17.0-amd64.deb
Note: Before you start running the application, remember that on Linux, Docker Desktop runs a Virtual Machine (VM) so it creates and uses a custom docker context desktop-linux on startup.
Therefore, if you had deployed any images and containers on the Linux Docker Engine before the installation, they will not be available in Docker Desktop for Linux.
3. Using Docker Desktop on Ubuntu
Once the Docker Desktop application has been successfully installed, search for it in the Activities or Applications menu. Then click on it icon as shown in the following screenshot.
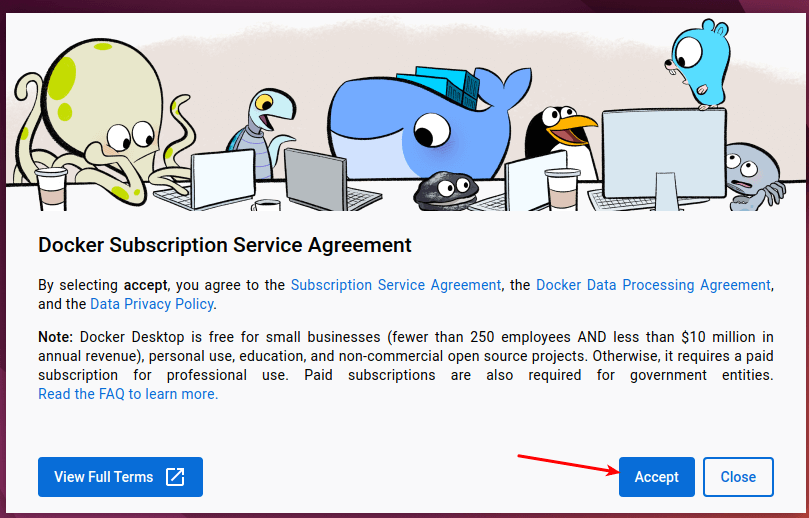
Next, the Docker menu will display the Docker Subscription Service Agreement window, read through it and click Accept to proceed as highlighted in the next screenshot.
Starting Container Using Docker Desktop
It’s time to run your first container using Docker Desktop by running the following command.
$ docker run -d -p 80:80 docker/getting-started
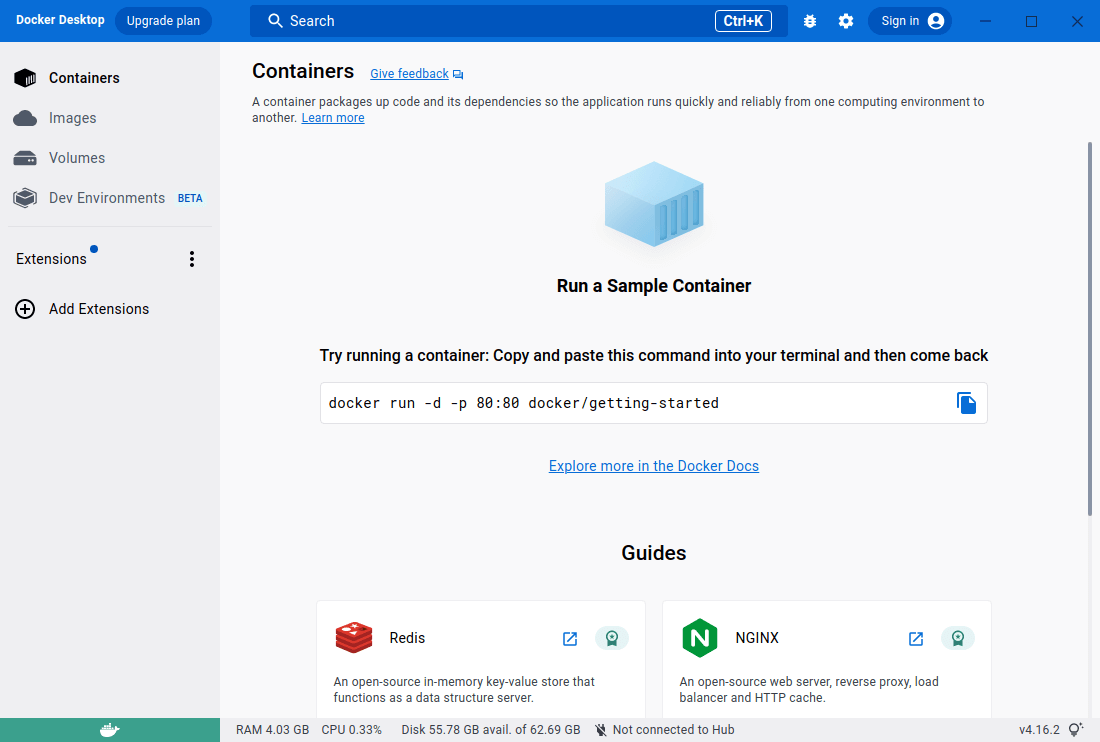
After running the above command, you should now see a container running as shown in the next screenshot.
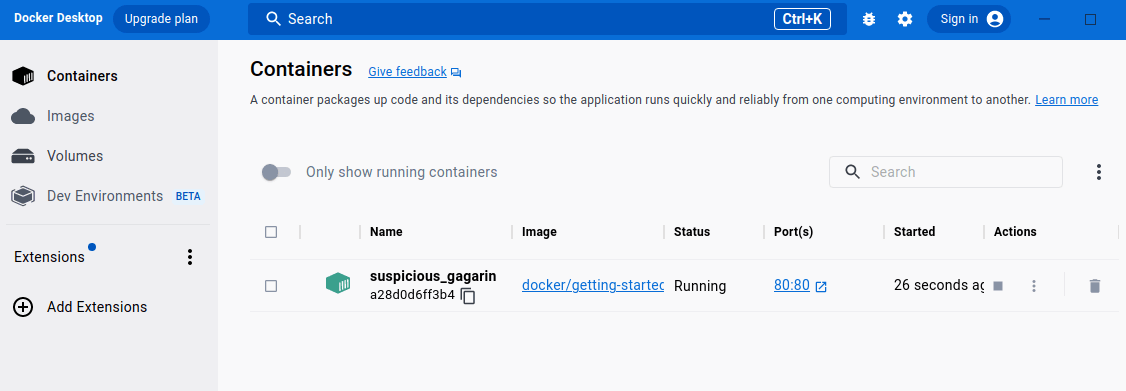
Click the expand arrow next to the port mapping, under the Port(s) column to view the simple static site running in the container, in your web browser.
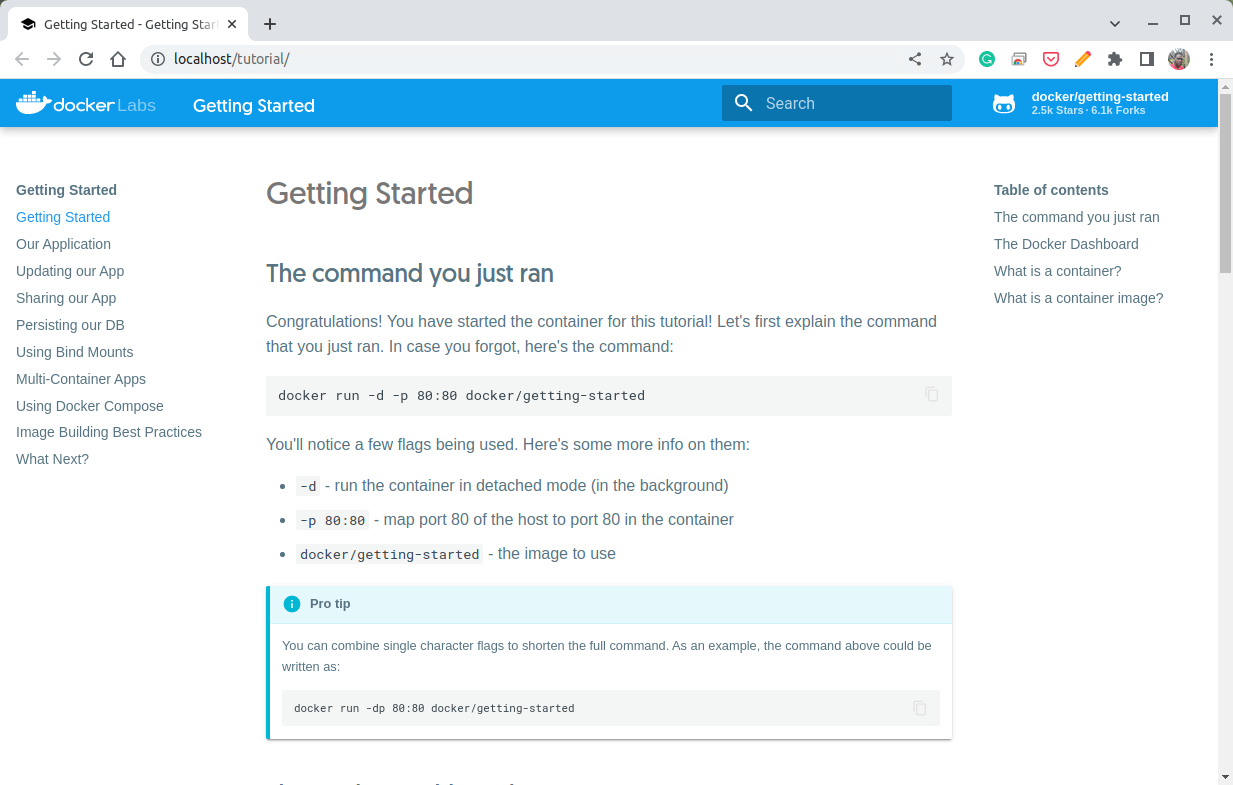
Congratulations! You have successfully installed Docker Desktop on your Ubuntu machine and run a sample container. For more information, read through the Getting Started guide provided by the static site in the sample container or view the online documentation.