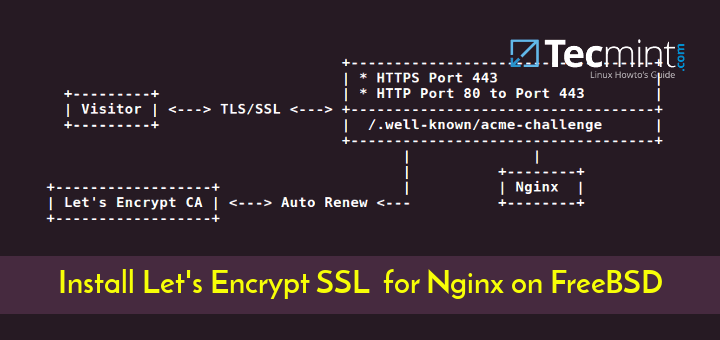
In this tutorial we’ll learn how to secure Apache HTTP server with TLS/SSL certificates offered by Let’s Encrypt in FreeBSD 11.x. We will also cover how to automate the process of the certificate renewal for Lets’ Encrypt.
Read Also: Install Let’s Encrypt for Nginx on FreeBSD
TLS/SSL certificates are used by Apache web server to encrypt the communication between end nodes, or more ordinary between the server and client in order to provide security. Let’s Encrypt provides certbot command line utility, which is an application that can facilitate the way you can obtain trusted certificates for free.
Requirements:
- Installation of FreeBSD 11.x
- 10 Things to Do After FreeBSD Installation
- How to Install Apache, MariaDB and PHP in FreeBSD
Step 1: Configure Apache SSL on FreeBSD
1. Before starting to install certbot utility and create the TSL configuration file for Apache, first create two distinct directories named sites-available and sites-enabled in Apache root configuration directory by issuing the below commands.
The purpose of these two directories is to facilitate the virtual hosting configuration management in the system, without modifying the main Apache httpd.conf configuration file each time we add a new virtual host.
# mkdir /usr/local/etc/apache24/sites-available
# mkdir /usr/local/etc/apache24/sites-enabled
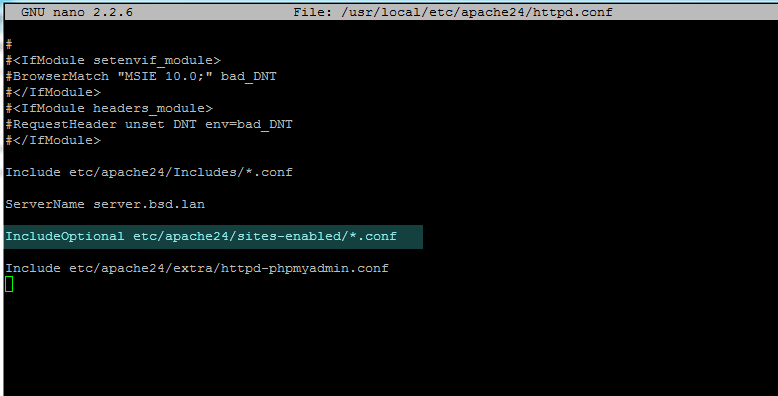
2. After you’ve created both directories, open Apache httpd.conf file with a text editor and add the following line close to the end of the file as illustrated below.
# nano /usr/local/etc/apache24/httpd.conf
Add the following line:
IncludeOptional etc/apache24/sites-enabled/*.conf
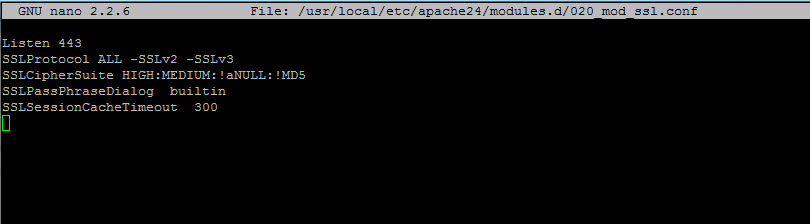
3. Next, enable the TLS module for Apache by creating the following a new file named 020_mod_ssl.conf in modules.d directory with the following content.
# nano /usr/local/etc/apache24/modules.d/020_mod_ssl.conf
Add following lines to file 020_mod_ssl.conf.
Listen 443
SSLProtocol ALL -SSLv2 -SSLv3
SSLCipherSuite HIGH:MEDIUM:!aNULL:!MD5
SSLPassPhraseDialog  builtin
SSLSessionCacheTimeout  300
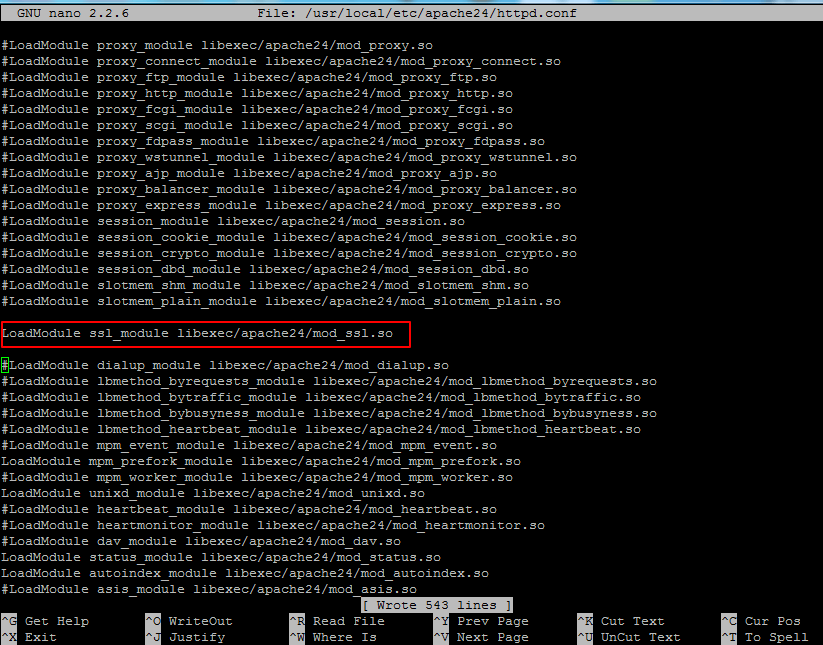
4. Now, uncomment the SSL module from /usr/local/etc/apache24/httpd.conf file by removing the hashtag from the beginning of the following line as illustrated below:
LoadModule ssl_module libexec/apache24/mod_ssl.so
5. Next, create the TLS configuration file for your domain in sites-available directory, preferably with the name of your domain, as presented in the below excerpt:
# nano /usr/local/etc/apache24/sites-available/bsd.lan-ssl.conf
Add following virtualhost configuration to file bsd.lan-ssl.conf.
<VirtualHost *:443>
    ServerName www.yourdomain.com
	ServerAlias yourdomain.com
                DocumentRoot "/usr/local/www/apache24/data/"
	SSLEngine on

	SSLCertificateFile "/usr/local/etc/letsencrypt/live/www.yourdomain.com/cert.pem"
	SSLCertificateKeyFile "/usr/local/etc/letsencrypt/live/www.yourdomain.com/privkey.pem"
	SSLCertificateChainFile "/usr/local/etc/letsencrypt/live/www.yourdomain.com/fullchain.pem"

<FilesMatch "\.(cgi|shtml|phtml|php)$">
    SSLOptions +StdEnvVars
</FilesMatch>

<Directory "/usr/local/www/apache24/cgi-bin">
    SSLOptions +StdEnvVars
</Directory>

	BrowserMatch "MSIE [2-5]" \
        nokeepalive ssl-unclean-shutdown \
        downgrade-1.0 force-response-1.0

	CustomLog "/var/log/apache/httpd-ssl_request.log" \
          "%t %h %{SSL_PROTOCOL}x %{SSL_CIPHER}x \"%r\" %b"

	<Directory "/usr/local/www/apache24/data/">
            Options Indexes FollowSymLinks MultiViews
        #AllowOverride controls what directives may be placed in .htaccess files.
                        AllowOverride All
        #Controls who can get stuff from this server file
                        Require all granted
        </Directory>

    ErrorLog "/var/log/apache/yourdomain.ssl-error.log"
    CustomLog "/var/log/apache/yourdomain.ssl-access_log" combined

</VirtualHost>
Makre sure you replace the domain name variable from ServerName, ServerAlias, ErrorLog, CustomLog statements accordingly.
Step 2: Install Lets’Encrypt on FreeBSD
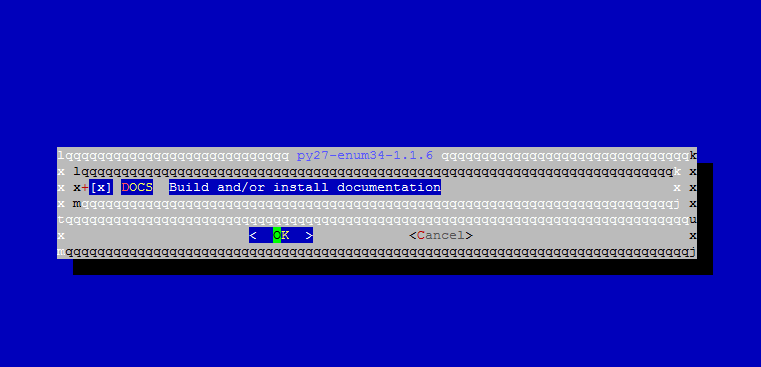
6. On the next step, issue the following command in order to install certbot utility provided by Let’s Encrypt, which will be used to obtain Apache TSL free certificates for your domain.
While installing certbot a series of prompt will be displayed on your screen. Use the below screenshot to configure certbot utility. Also, compiling and installing certbot utility might take some time, depending on your machine resources.
# cd /usr/ports/security/py-certbot
# make install clean
7. After the compilation process has finished, issue the below command in order to update certbot utility and certbot required dependencies.
# pkg install py27-certbot
# pkg install py27-acme
8. In order to generate a certificate for your domain, issue the command as illustrated below. Make sure you provide the correct webroot location where your website files are stored in the file system (DocumentRoot directive from your domain configuration file) using the -w flag. If you have multiple subdomains add them all with the -d flag.
# certbot certonly --webroot -w /usr/local/www/apache24/data/ -d yourdomain.com -d www.yourdomain.com
While obtaining the certificate, supply an email address for certificate renewal, press a to agree with Let’s Encrypt terms and conditions and n to not share the email address Let’s Encrypt partners.
Saving debug log to /var/log/letsencrypt/letsencrypt.log Enter email address (used for urgent renewal and security notices) (Enter 'c' to cancel):[email protected] There seem to be problems with that address. Enter email address (used for urgent renewal and security notices) If you really want to skip this, you can run the client with --register-unsafely-without-email but make sure you then backup your account key from /etc/letsencrypt/accounts (Enter 'c' to cancel):[email protected] ------------------------------------------------------------------------------- Please read the Terms of Service at https://letsencrypt.org/documents/LE-SA-v1.1.1-August-1-2016.pdf. You must agree in order to register with the ACME server at https://acme-v01.api.letsencrypt.org/directory ------------------------------------------------------------------------------- (A)gree/(C)ancel:a------------------------------------------------------------------------------- Would you be willing to share your email address with the Electronic Frontier Foundation, a founding partner of the Let's Encrypt project and the non-profit organization that develops Certbot? We'd like to send you email about EFF and our work to encrypt the web, protect its users and defend digital rights. ------------------------------------------------------------------------------- (Y)es/(N)o:nObtaining a new certificate Performing the following challenges: http-01 challenge for www.domain.com Using the webroot path /usr/local/www/apache24/data for all unmatched domains. Waiting for verification... Cleaning up challenges IMPORTANT NOTES: - Congratulations! Your certificate and chain have been saved at /usr/local/etc/letsencrypt/live/www.yourdomain.com/fullchain.pem. Your cert will expire on 2017-11-15. To obtain a new or tweaked version of this certificate in the future, simply run certbot again. To non-interactively renew *all* of your certificates, run "certbot renew" - Your account credentials have been saved in your Certbot configuration directory at /usr/local/etc/letsencrypt. You should make a secure backup of this folder now. This configuration directory will also contain certificates and private keys obtained by Certbot so making regular backups of this folder is ideal. - If you like Certbot, please consider supporting our work by: Donating to ISRG / Let's Encrypt: https://letsencrypt.org/donate Donating to EFF: https://eff.org/donate-le
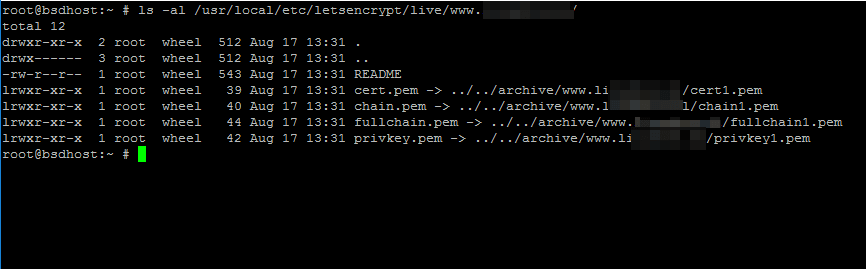
9. After you’ve obtained the certificates for your domain, you can run ls command in order to list all certificate’s components (chain, private key, certificate) as presented in the below example.
# ls -al /usr/local/etc/letsencrypt/live/www.yourdomain.com/
Step 3: Update Apache TLS Certificates on FreeBSD
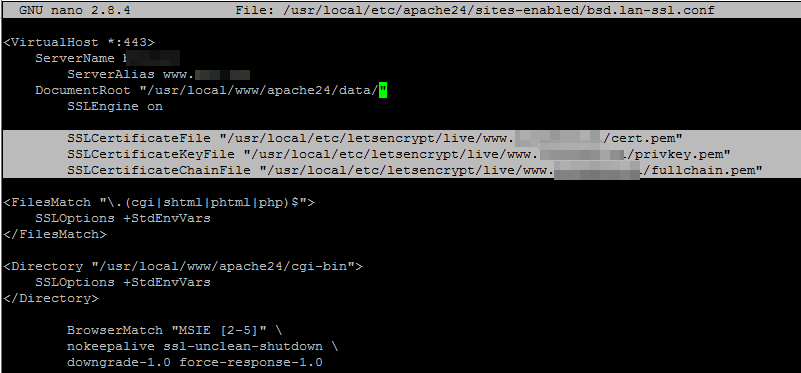
10. In order to add Let’s Encrypt certificates to your website, open apache configuration file for your domain and update the following lines to reflect the path of the issued certificates.
# nano /usr/local/etc/apache24/sites-available/bsd.lan-ssl.conf
Add these TLS certificate lines:
SSLCertificateFile "/usr/local/etc/letsencrypt/live/www.yourdomain.com/cert.pem"
	SSLCertificateKeyFile "/usr/local/etc/letsencrypt/live/www.yourdomain.com/privkey.pem"
	SSLCertificateChainFile "/usr/local/etc/letsencrypt/live/www.yourdomain.com/fullchain.pem"
11. Finally, enable the TLS configuration file, by creating a symlink for your domain TLS configuration file to sites-enabled directory, check Apache configurations for possible syntax errors and, if the syntax is OK, restart Apache daemon by issuing the below commands.
# ln -sf /usr/local/etc/apache24/sites-available/bsd.lan-ssl.conf /usr/local/etc/apache24/sites-enabled/
# apachectl -t
# service apache24 restart
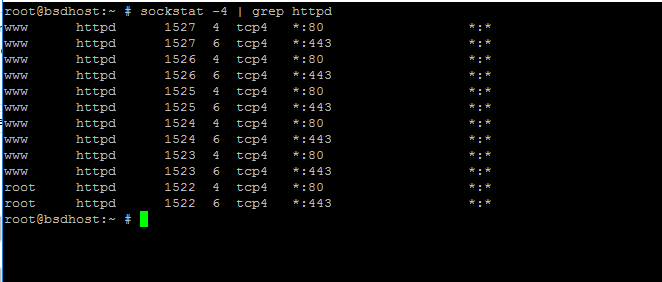
12. In order to check if Apache service is listening on HTTPS port 443, issue the following command to list httpd network sockets.
# sockstat -4 | grep httpd
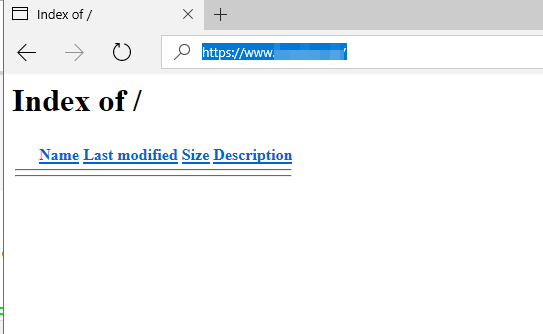
13. You can navigate to your domain address from a browser via HTTPS protocol in order to confirm that Let’s Encrypt certificates are successfully applied.
https://www.yourdomain.com
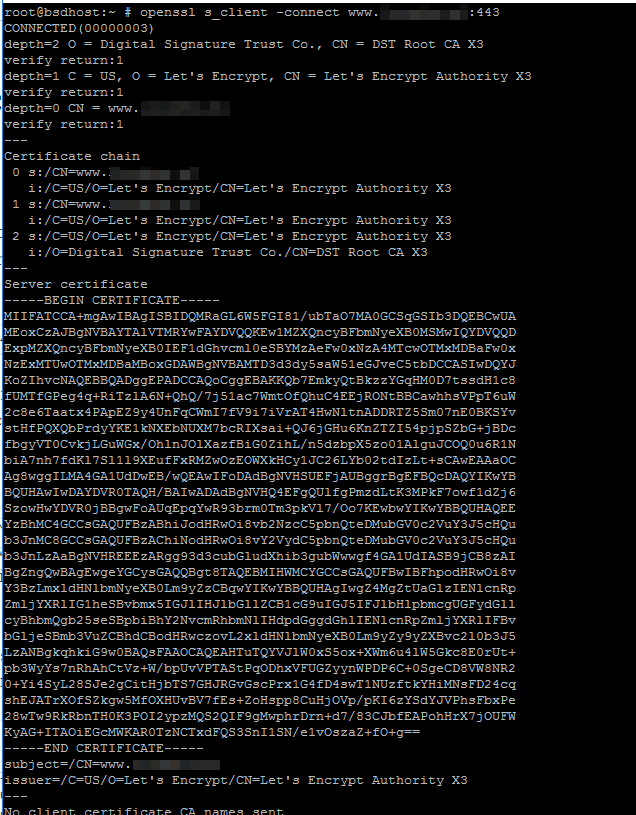
14. In order to obtain extra information about the issued Let’s Encrypt certificate from command line, use the openssl command as follows.
# openssl s_client -connect www.yourdomain.com:443
15. You can also verify if the traffic is encrypted with a valid certificate provided by Let’s Encrypt CA from a mobile device as illustrated in the below mobile screenshot.

That’s all! The clients can now visit your website securely, because the traffic that flows between the server and the client’s browser is encrypted. For more complex tasks concerning certbot utility visit the following link: https://certbot.eff.org/
Hello,
What about weekly_certbot_enable=”YES” it renews all certs?
Thanks.
I had used this tutorial to secure Apache 2.4 for 1 year. Last week, I upgrade FreeBSD 11.1 to 12.0 and found that certbot command can’t use. I can’t renew a Certificate.
This tutorial can still use to secure apache 2.4 on FreeBSD 12.0 or not?
If no, waiting for a new method. Thank you in advance.
@Somsak,
Yes, you can use these instructions on FreeBSD 12.0 as well..
Hello,
I have a solution;
What is the different?
Thanks
Great help, thanks!
silly observation – step 10 instructs reader to open .conf file in “./sites-available/.” which screenshot shows .conf accessed from “./sites-enabled/.“.
might throw someone, might not, great writeup!
1. Step 3. Install Let’s encrypt on FreeBSD: Is it Step2?. Because there is duplicate of Step 3.
2. The command in order to update certbot utility and certbot required dependencies in number 7.
I think it should be
@Somsak,
Thanks for pointing out those errors, corrected in the writeup..:)
Add a cron job each night at 02:30 which runs certbot renew script:
30 02 * * * certbot renew
Ok, Thanks a lot Matei Cezar.
Hello, I can’t find the process of the certificate renewal for Lets’ Encrypt as you said earlier. How to do that?