Linux Mint is a modern, polished, easy-to-use, and comfortable community-driven GNU/Linux desktop distribution based on the popular Ubuntu Linux distribution. It is a great and recommended distribution for computer users switching from Windows or Mac OS X operating system to the Linux platform.
Linux Mint 22 code-named “Wilma” is the latest version of the popular Linux Mint desktop operating system that is available in three versions, namely Cinnamon, Xfce, and MATE. It is an LTS (Long Term Support) release that is built atop Ubuntu 24.04 and will be supported until 2029.
Linux Mint 22 ships with several updated software, improvements, and many new features that will offer you a more pleasant desktop experience:
[ You might also like: How to Install Linux Mint Alongside Windows Dual-Boot ]
This guide will walk you through the steps to install Linux Mint 22 Cinnamon edition, but the steps below also work for Mate and XFCE editions.
Before you proceed, ensure that you have an 8 GB USB drive for the installation medium and a stable broadband internet connection to download the ISO image.
Step 1: Download Linux Mint 22 Cinnamon ISO Image
To get started with the installation, head over to the Official Linux Mint download page and download the Cinnamon ISO image file on your PC.
Once you downloaded the Cinnamon desktop edition, make sure to verify the ISO image by generating the SHS256 sum as shown:
sha256sum -b linuxmint-22-cinnamon-64bit.iso
Compare it with the sum presented in the sha256sum.txt which you can download from the ISO download page.
Next, you need to create a bootable media-USB flash/DVD using these useful USB creator tools in order to create a Linux Mint bootable USB drive.
Alternatively, you can use the dd command to create a bootable USB device.
sudo dd if=linuxmint-22-cinnamon-64bit.iso of=/dev/sdX bs=4M status=progress && sync
Replace /dev/sdX with the location of your USB drive (e.g., /dev/sdb). If you do not know, you can use the lsblk command to find all block devices (drives and partitions) connected to your system.
Step 2: Installation of Linux Mint 22 Cinnamon Edition
Now plug in the bootable USB flash drive into your computer and reboot. Once the system has rebooted, press your BIOS key to select the boot device and select the USB drive to boot from it.
Once the system has booted, from the grub menu, select the first option and click enter to load Linux Mint.
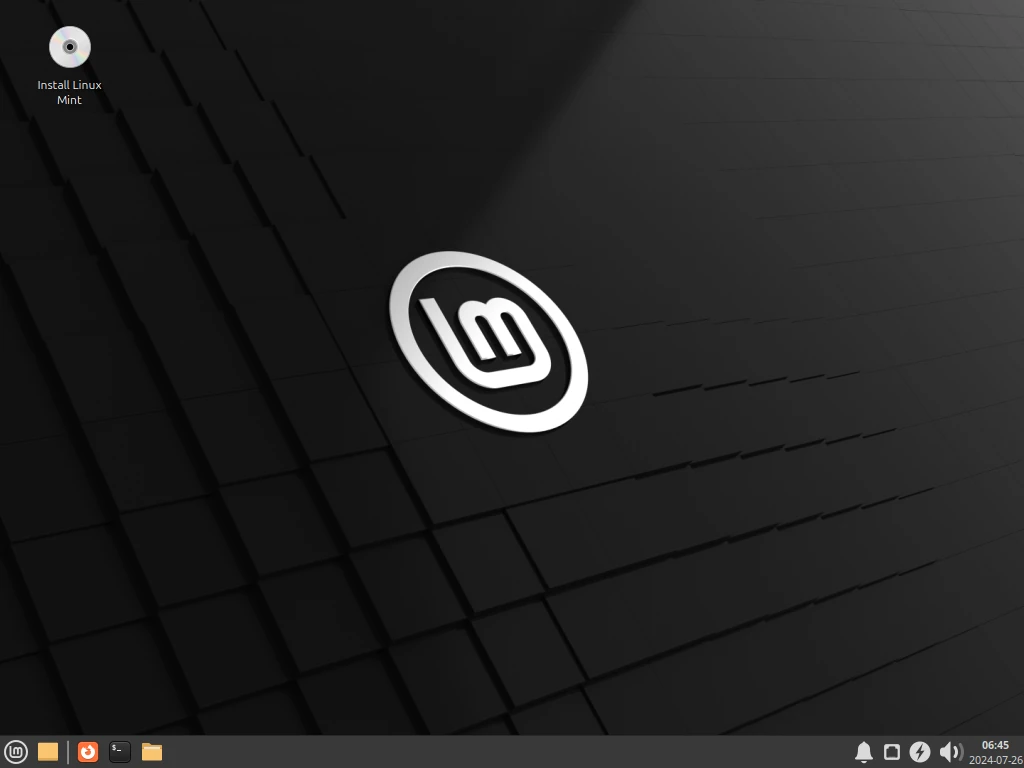
From the desktop, click Install Linux Mint to launch the installation wizard as highlighted in the following screenshot.
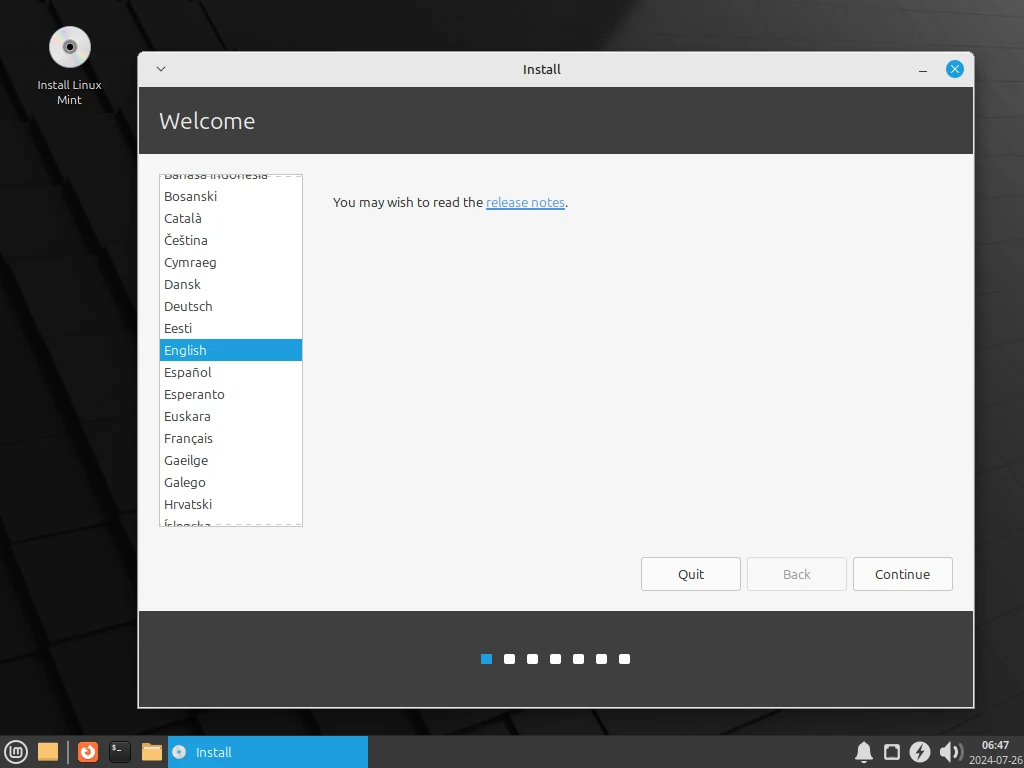
After the installation wizard opens up, you can optionally read the release note, then click Continue.
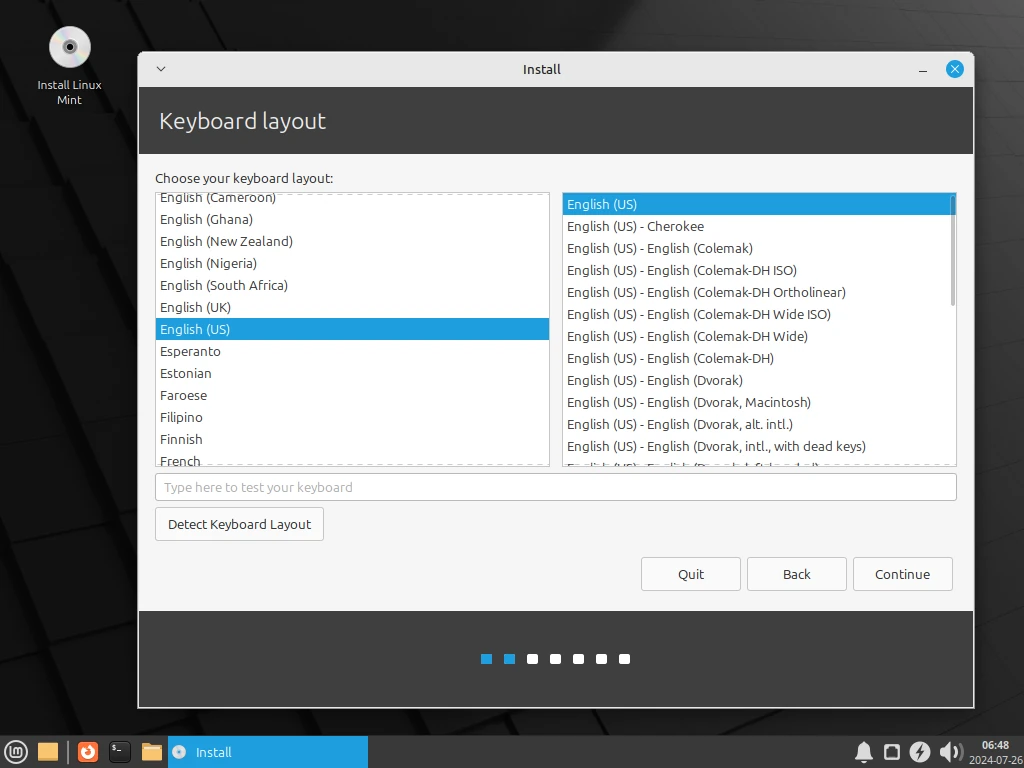
Next, select the keyboard layout and click Continue.
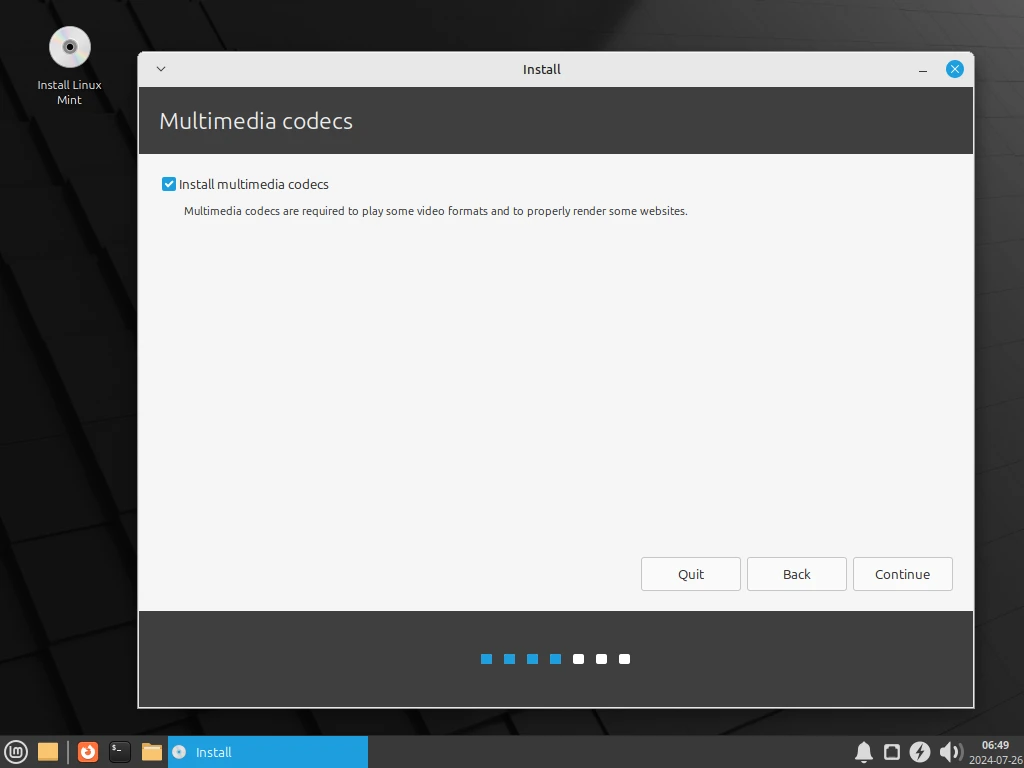
In the next windows, check the option Install Multimedia codes (which are required to play certain video formats and more), and click Continue.
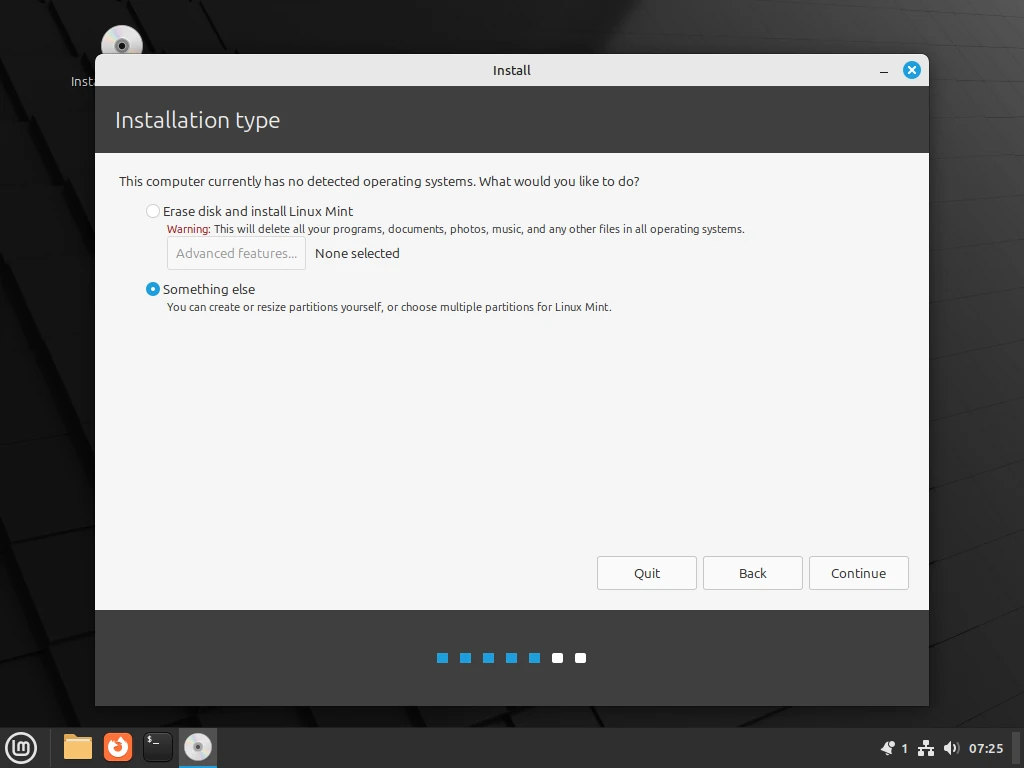
Now pick the installation type by selecting the second option, Something else to enable you to manage partitions for installing Linux Mint.
Note: If you already have existing partitions where you wish to install Linux Mint, for example, a partition with an existing installation of another Linux Mint version installation or Linux distribution, simply ignore the partition creation steps, simply select the root, and swap partitions and set the properties.
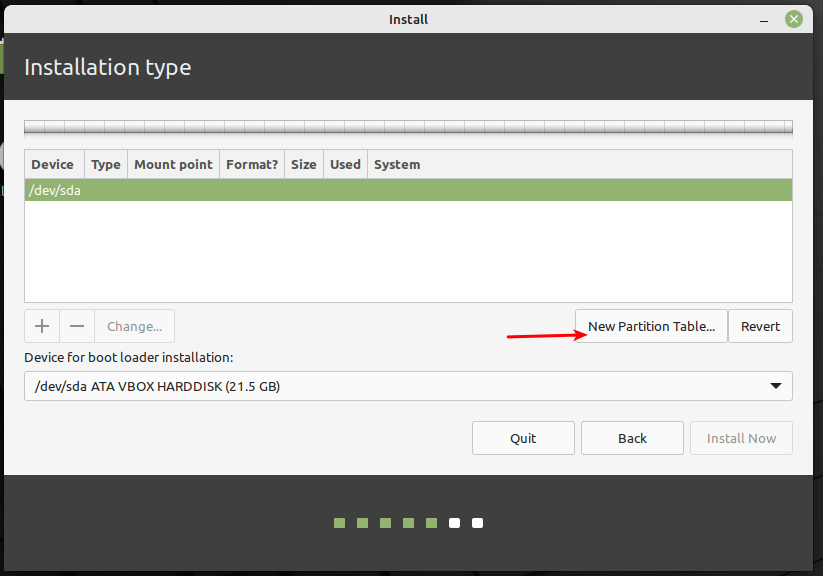
Next, in the partition setup window, click New Partition Table.
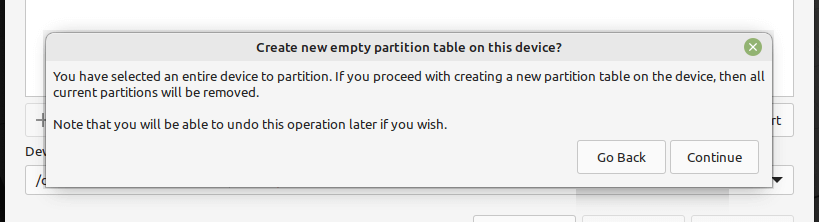
And confirm the new partition table creation step by clicking Continue in the pop-up window.
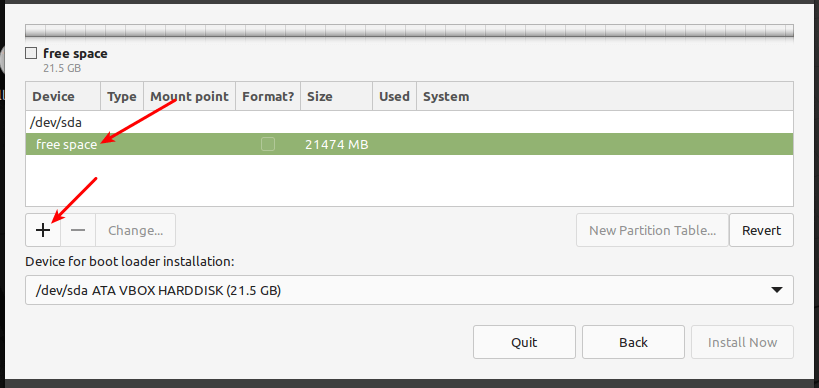
Next, you need to create the EFI system partition, a mandatory partition for UEFI systems. It will hold the EFI bootloaders and drivers to be launched by the UEFI firmware. Select the free space, and click the add (+) button to create a new partition.
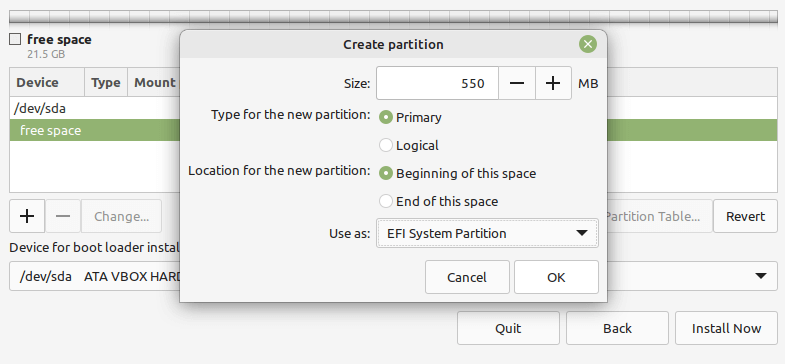
And set the EFI partition properties:
- Size – you can set a size between 100 to 550 MB, and
- Use as – set to EFI System Partition and click OK.
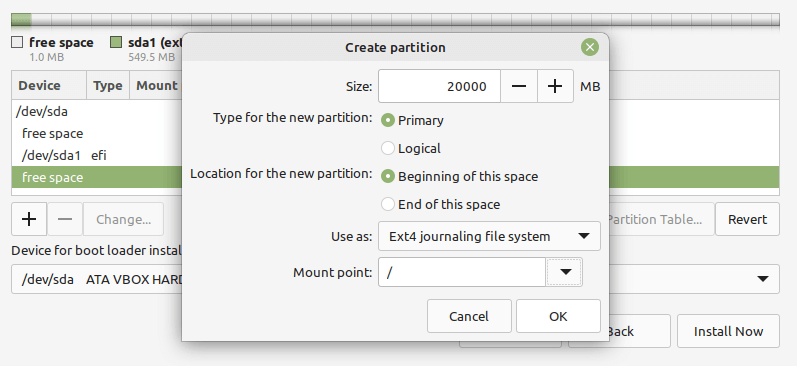
Next, create the root partition which will store the system files. Select the free space again, and click the add (+) button to create a new partition with the following properties:
- Size – minimum size should be 20 GB but recommended is 100 or more GB
- Use as – file system type you wish the partition to use e.g EXT4, and
- Mount point – should be
/(for root partition) and click OK.
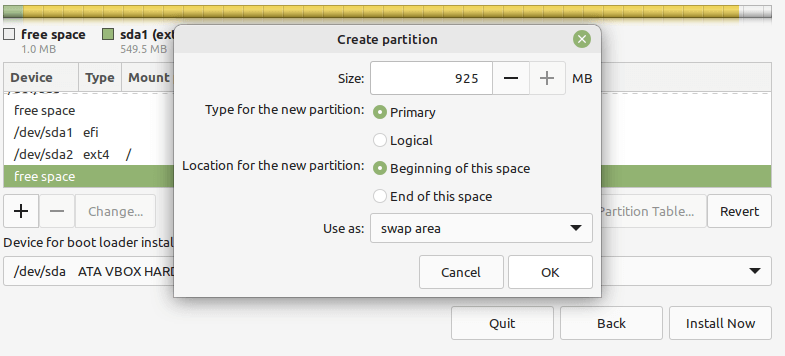
Next, create the swap space by selecting the free space and clicking on the plus (+) sign to create a new partition with the following properties:
- Size – you can set a size of 500 MB or more if you have more free space, and
- Use as – set value to swap area.
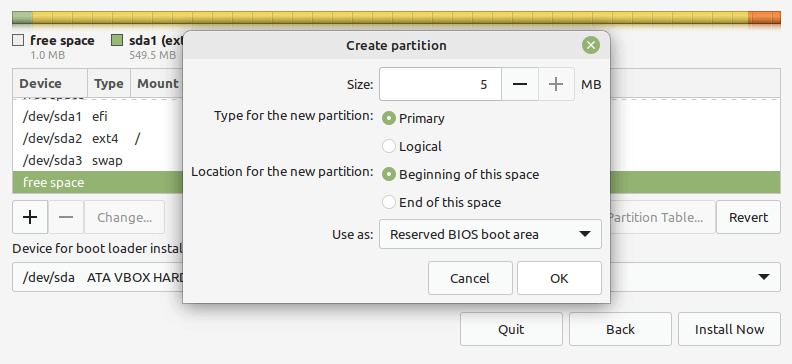
Finally, create a “Reserved BIOS Boot area” partition of at least 1 MB, which will store the boot loader code.
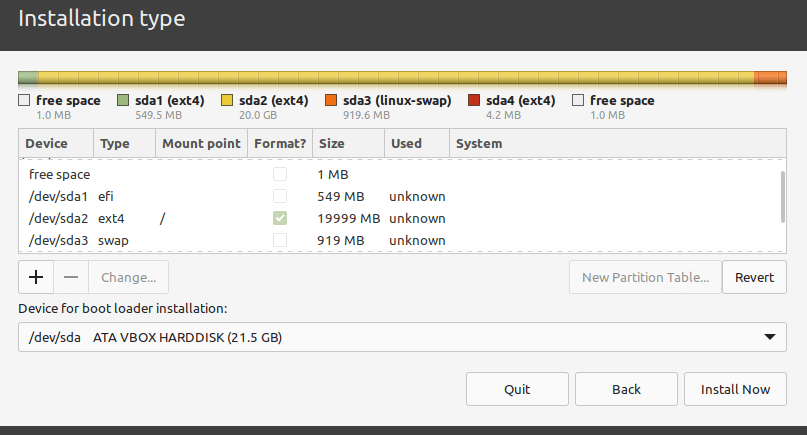
After creating all your partitions as shown in the following screenshot, click Install Now.
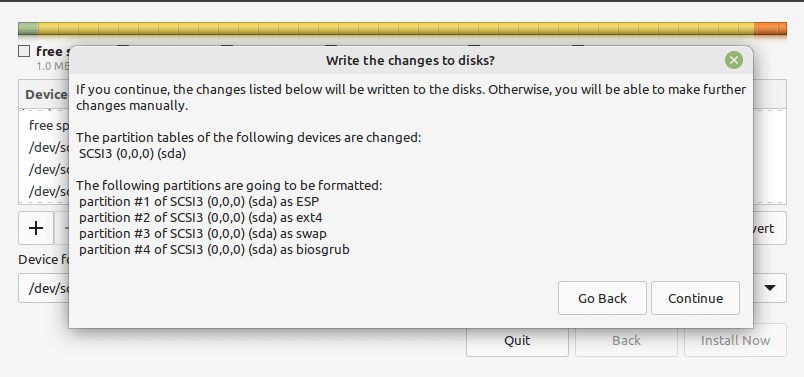
In the pop-up window, click Continue to accept the new partition table setup.
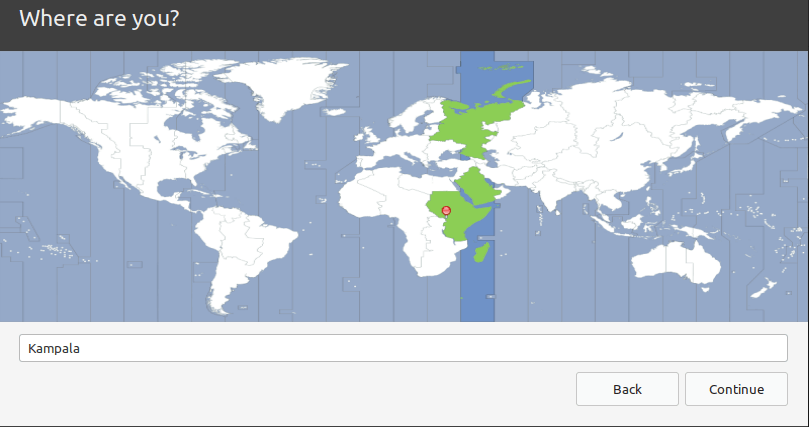
Now select your location and click Continue.
Next, create a user account with a password and set the computer name as shown in the following screenshot. Then click Continue to start the actual installation of system files and packages to the root partition.

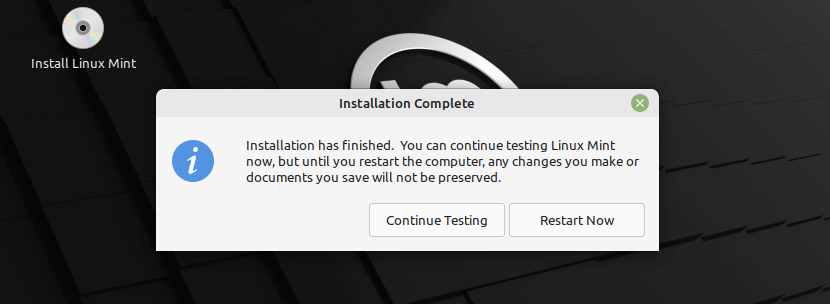
Wait for the installation of the system files and packages to complete. Once all is done, click on Restart Now.
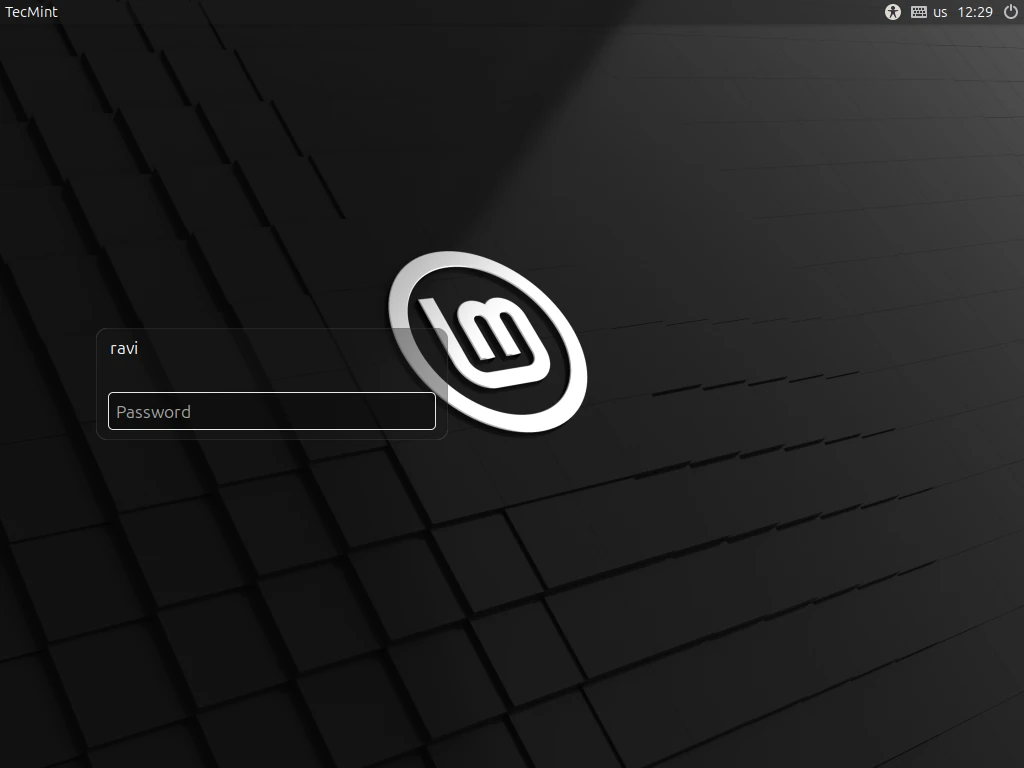
Once the system has rebooted, log into your new Linux Mint 22 Cinnamon edition installation.
[ You might also like: 10 Things to Do After Installing Linux Mint ]
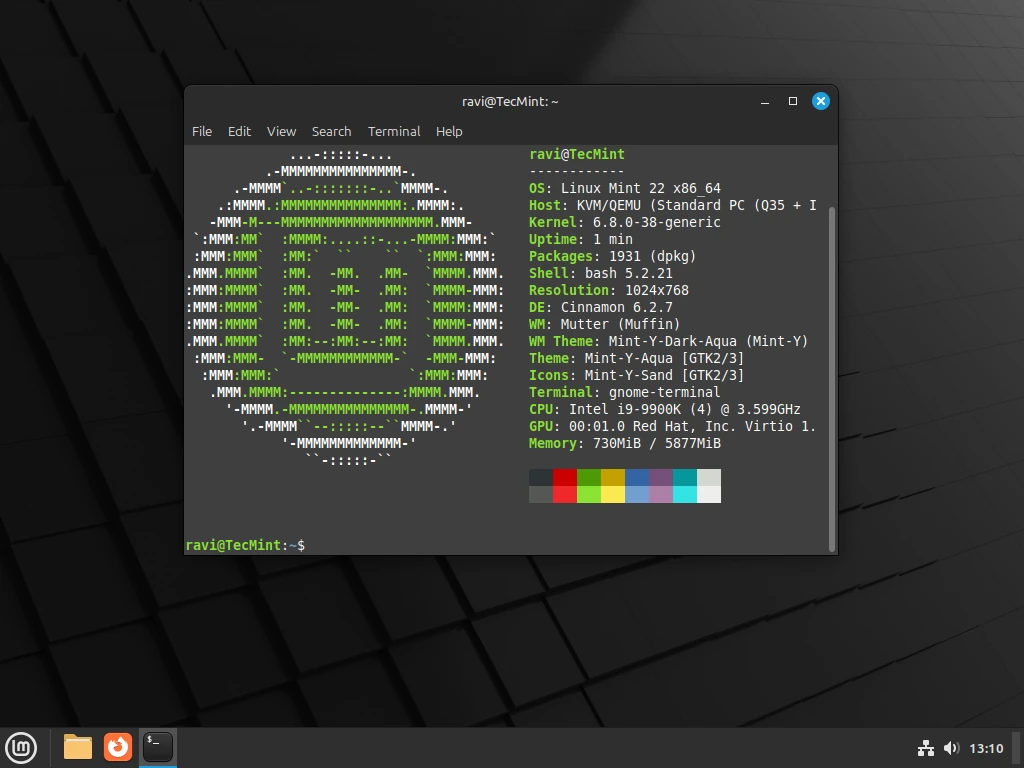
Congratulations! You have just successfully installed Linux Mint 22 Cinnamon edition on your computer. For any questions or additional information, you can use the comment section below.
So I’m a total noob and thought this guide was nice, but I ended up with 200+ GB of unallocated space and only 24 GB available, split across two partitions.
I thought the root partition for “system files” meant just that, not that it would take up essentially all remaining free space. It never occurred to me that I also needed to explicitly create a partition for the rest of the free space, and the installer didn’t warn me about this either. I was installing the system on a separate SSD.
I’m asking on Reddit now what to do and whether I can fix this without reinstalling. But in my opinion, things like this should be clearly explained for beginners like me. Also, creating such a large root partition before setting up swap and bios_grub (or whatever is required) probably isn’t ideal or at least there should be a clear mention of what happens to unallocated free space.
Hey, no worries, this is a very common confusion for beginners. The root partition (/) is indeed meant for system files, but it doesn’t automatically “reserve” all your remaining free space unless you explicitly tell the installer to use it that way. Most installers assume you’ll create other partitions (like swap or BIOS/UEFI partitions) first, or at least guide you to allocate the remaining space manually.
Since you still have a large chunk of unallocated space, you can usually fix this without reinstalling by creating a new partition in that free space or resizing your existing partitions using a tool like GParted. Just make sure not to touch your root partition if it already contains the system, you don’t want to accidentally lose data.
If you want, I can write a quick step-by-step on how to safely use that unallocated space without reinstalling.
First of all I want to thank you very much for the helpful instructions.
Please kindly help me in the following problem:
I have a Lenovo G50-45 laptop with w10, ssd 230gb, 8gb ram. I tried to replace with linuxmint-22-cinnamon-64bit. I followed your instructions but when i tried to set up root partition it doesn’t accept (not acceptable constrains) I tried various settings without result. So I went back to windows.
Please give a hand to accomplish the setting.
Thank you in advance
Nick
Athens, Greece
@Nick,
Thank you for your kind words! Let’s resolve the issue:
1. Create a root (`/`) partition with at least 20GB (ext4 format). Optionally, add a swap and home partition.
2. Use “Something Else” in the installer to delete and recreate partitions.
3. Match the BIOS mode with the installer. For UEFI, ensure a 300MB EFI partition (FAT32).
4. Turn off Secure Boot and Fast Boot in the BIOS.
5. Boot into the live session and use GParted to manually partition if needed.
If the issue persists, please share the exact error message, and I’ll assist further.
Good luck!
Thank you very much.
I ‘ll try (although i don’t know how)
Nick
How and when to apply Nos 3, 4 and 5?
During the Linux installation or Separately before the beginning of installation?
Thank you very much again,
Nick
Hi Nick, great question!
No. 3 should be done during the partitioning step of the Linux installation process.
No. 4 is applied after installation, during the first boot.
No. 5 is optional and can be done at any time if needed.
Hope this helps! Let me know if you have more questions.
Thank you again Ravi!!!
I will try and let you know
Nick
Maybe I’m too late.
What changes need to be made to install Mint within VirtualBox?
I can’t seem to get a Mint install to work within VirtualBox.
(Do replies get forwarded to my email?)
Very clear tutorial, thank you. But why is there no /home Partition?
@Worner,
The decision to add a separate /home partition is depends on individual preferences and use cases.
I’m a newbie Linux user. I loaded Linux mint xfce 18.3 on my tablet some time ago. Now I want to remove 18.3 from my laptop and load Linux mint xfce 19.2 in its place, and have acquired a live bootable disk for that purpose.
How do I make a backup copy of what’s loaded now and can I use a USB for storing the backup?
Should I choose to remove everything from the drive after a backup copy is made for a clean install?
Jack
@Jack,
Better you can take backup of important files to your USB drive, and do a clean fresh install of Linux Mint…
Ok, but how do I select the files and move them to a USB drive?
With a clean installation do I still have to make manual partitions or can I let the device make the partitions automatically?
Jack by
@Jack,
Insert your USB Device in your USB port and copy files from Mint to USB. No need to create partitions manually, just select auto…
Ok, Ravi, I will try your suggestions.
Thanks
Jack
Everything was ok, after reboot I get the message “Booting freezing on the screen, nothing happens”.
Hello, I am having issues going back to my Linux screen from the command page. It shows something like Linux Mint 19.2 Tina Abdulkareem-X551CAP TTYL and then password and login details required. I don’t know if I can share my screen so as to understand what the problems…
Hi, Currently running Mint 17 Qiana for the past year, on an 80 GB root internal drive, and two other drives, a 160 GB and a 1TB drive, both using USB the 80GB drive is telling me it is full, yet the directories say it is only “half” full machine is sluggish and acting strangely…(I can’t save files to desktop…)
So, I purchased a 2 TB drive, and wish to install Mint 18.3 Sarah, on that, keeping the two USB data drives. Are there any pitfalls I should watch for? I would also like to name the partitions rather than
have a 17 digit Alpha- Numeric naming protocol on my 1TB drive, and a 9 digit Alpha- Numeric for the 160GB as it is currently (by default).
This will be my 2nd Linux installation. Thank You.
Hi, i installed Linux Mint with following partition /(120GB), swap(4gb) and /home (remained capacity approximately 376 Gb). my HDD is 500GB. every thing is going well. but I have a drive on my computer beside filesystem (which is my root) when I want to open I face to this error “unable to mount location, can’t mount file”.
I don’t know about this drive is that /root drive? why I can’t mount it.I want another drive to save my files and other stuff except /root and /home partition.
@morteza
You need to mount the drive partition manually and add a mount entry in /etc/inittab so it is auto mounted at boot time. For more info, check out the mount utility man page.
I am getting error input/output error 5 while copying of mint 18.2
@vkmp1432
Which command outputting error?
How should i partition my hard disk into drive c and drive d like that of windows.
Just follow the steps used in the guide, it is done the same way the partitions here have been created. C=/ (root)partition in Linux and likewise create another partition as D.
What happens if you skip adding the partitions during installation? I have to ask since I am new to linux.
Why not create the 3rd partition for /home? It will save you the headache for future reinstalls.
@onadd
Sure, really useful suggestion. We will include this in upcoming guides. Thanks for the feedback.
Hello Aaron,
Great article, really it helped me in installing mint 18 on my Pc.great going follow up with same pace.
@Aravind
Welcome, good to know and thanks for following us.
HELP! I am trying to select The “INSTALL LINUX MINT” button after the first picture, but my PC freezes, then it reboots, I am kind of good with computers, but I am stumped, I am unaware of the tower I have, all I know is that it was given to me and the brand is “Ultra”, It would be awesome if you could get back to me as soon as possible, Thank you in advance!
I have a Thinkpad t500 with a clean hard drive (no os). If I choose to let the software configure the installation partitions (I am not to knowledgeable on computers), will it do some damage to other parts of the machine, such as the Thinkvantage application, etc? Thanks
@Bill
The best and recommended option is to create partitions on the hard disk, such as the root partition will keep the system files, swap partition and one bigger partition to keep your data. You can follow the instructions above to create partitions with suitable sizes.
I hope this will help.
Is there a way to install Mint with no interaction from the user?
This is all greek to me.
If not is there a place to bring my MacBook to have it done?
I’ve been enjoying Mint 18 but the other day we began having some trouble. We had new ethernet cables installed from the router after moving it to another location. Plugged the cable in my laptop and turned off the wifi to make sure it worked.
It did connect by wire, but now the laptop is having trouble making a wired or wifi connection. In fact it does not connect to a site via wifi despite displaying a full-strength signal. The wired network is deleted. Any tips?
I can´t reboot. After the message that i have to put out the Installation device and press Enter, it happens nothing. Please Help
@Dennis
I faced the same problem, but i simply turned off my machine and switched it on again. And it booted very well, you can as well try this ugly yet helpful method.
Hi there, thanks for the guide but unfortunately mine wasn’t going well. as I am on EUFI mode and I’m having an error in partitioning, I also tried legacy mode but it wont start at first.
Can you please give me an idea on how to fix this or any guide.
Thanks
The presentation is summary! A big minus is that it does not explain for newbies how to make the internet connection in fresh install! I suppose this article is for beginners and newcomers to Linux!
@Ice Alinutza
Basically, that is true, because nothing is significantly new in the installation process, therefore experts like you will not find it offering a lot.
But the main intention, as you pointed out is to guide beginners and newcomers, as they advance, they will always discover more.
@ Aaron Kili k
I hope not misunderstand me. You’re doing a great job and I like your site! But instead of trying to be someone who has followed the instructions above. Finally he finds that aren’t network connection. And any other device on which to seek a solution for this problem! It’s not funny. Perhaps a warning before starting the installation would be welcome. Please excuse me… I don’t speak English very well!
@Ice Alinutza
Thanks for that great suggestion, next time, i will prepare a comprehensive guide to include your issue of concern.
Hi Aaron,
Thanks for this detailed guide. Unfortunately, my attempts to install Mint are not going well. I get as far as the screen shown in step 3, but then it skips to step 5. I never get the ‘Installation type’ screen. I can’t get past that point. Do you have any ideas what I need to do?
(Dell Inspiron 14z Ultrabook).
Thanks for your time.
@Anneta
Let me look into that, especially concerning your machine specification. That would be a major cause of the problem. I will let you know when i get a clear solution.
I am unable to install Sarah. when the installation is about 3/4 of the way thru, it hangs-up, and won’t finish. No error messages. Nothing. Any advice ? I NEED HELP !!!
@Jeff
Can you provide your machine specifications and the exact installation stage where it hangs-up, may be by referring to the steps, that way we can figure out whats really is wrong.
I still try to understand why all the fuss about Linux Mint. I tried it twice, the graphics were poor, some of the available desktop applets were out of date and not working at all. For some reason people are nice to Mint, so please continue use it. Personally, after having tried some number of linux distros, I prefer and use Xubuntu. Light, reliable and configurable.
You may be right there, but which versions did you try? Linux Mint 17.3 has good graphics and applets also, 18 too, though i have just started using 18, i will give it some time before making judgments. But taste and preference will always differ and above all, thanks for the feedback.