Have you ever considered using someone else’s computer with all your personal files and settings? Well, it’s possible with any Linux distribution! Yes, you can run your own custom Linux operating system on any computer using just a USB drive.
This tutorial focuses on installing the latest Linux OS on your USB drive (a fully reconfigurable personalized OS, not just a Live USB). You’ll learn how to customize it and use it on any PC you can access.
For this tutorial, I’ll be using Ubuntu 24.04, but you can use any Linux distribution.
Requirements:
You’ll need the following items:
- A main USB drive (16GB or more), let’s call it the Main USB drive.
- Another USB drive (4GB or more) or a DVD disk to use as bootable Linux installation media.
- A Linux OS ISO file, such as Ubuntu 24.04.
- A PC with internal hard drives disconnected to prevent alterations to the boot record.
Note: Although this process won’t result in data loss, certain users have noticed alterations in their internal drive’s bootup behavior depending on the chosen Linux distributions. To avoid any potential issues, you might consider disconnecting your hard drive before proceeding with the USB installation part of the tutorial.
Step 1: Create Bootable Linux Installation Media
To create a bootable Linux installation media for Ubuntu 24.04, follow these steps:
- Download the Ubuntu 24.04 ISO file from the official Ubuntu website.
- Connect a USB drive with a storage of at least 4GB into your computer.
- Download and install a USB bootable creation tool such as Rufus or Etcher.
- Open the USB bootable creation tool and select the Ubuntu 24.04 ISO file you downloaded.
- Choose the USB flash drive you inserted as the destination drive for the Ubuntu installation media.
- Click on the “Start” or “Create” button to start the process of creating the bootable Ubuntu 24.04 installation media.
Once the process is complete, you can use it to install Ubuntu 24.04 on your main USB drive or try Ubuntu without installing it.
Step 2: Install Linux on Main USB Drive
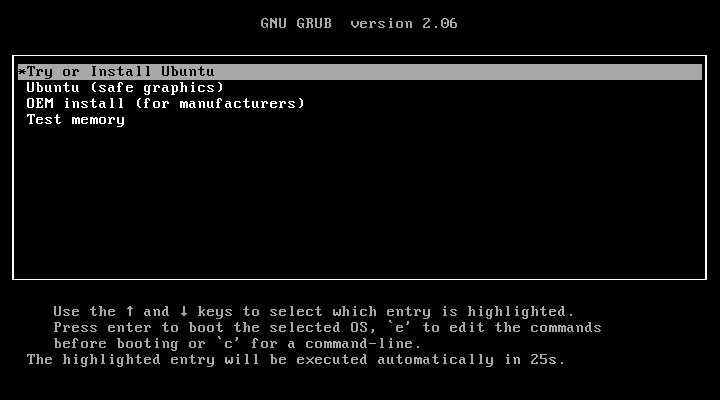
Now restart your computer and boot from the main USB drive, once it booted, you will be presented with the option to try Ubuntu or install it. Choose the “Install Ubuntu” option to begin the installation process.
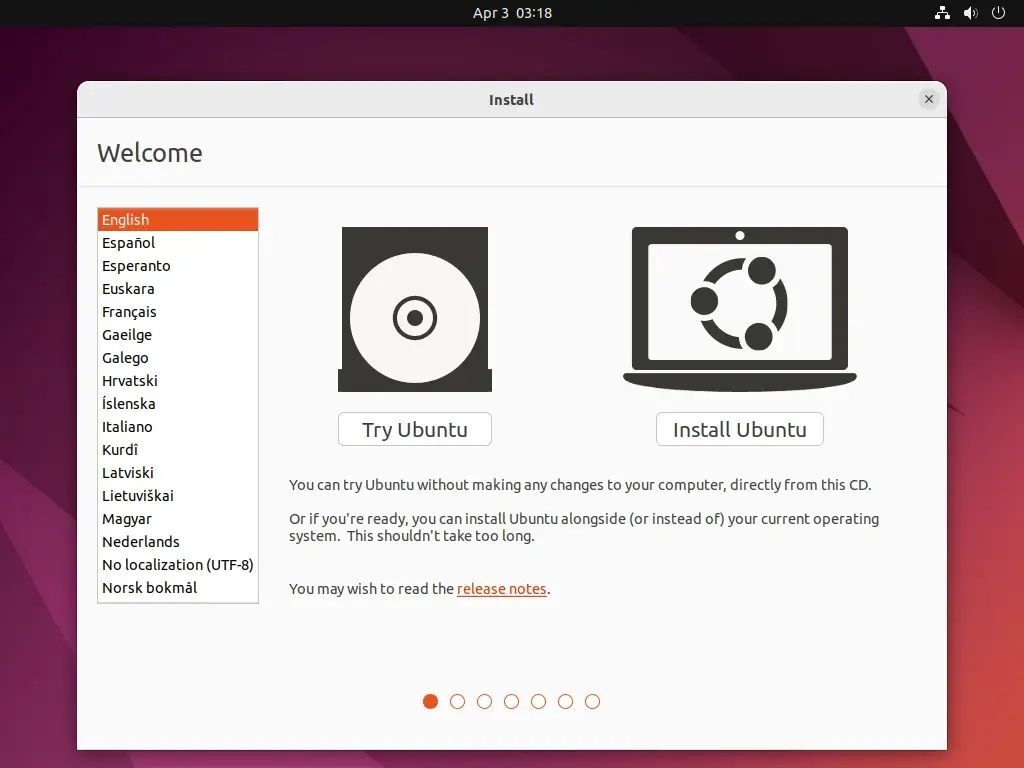
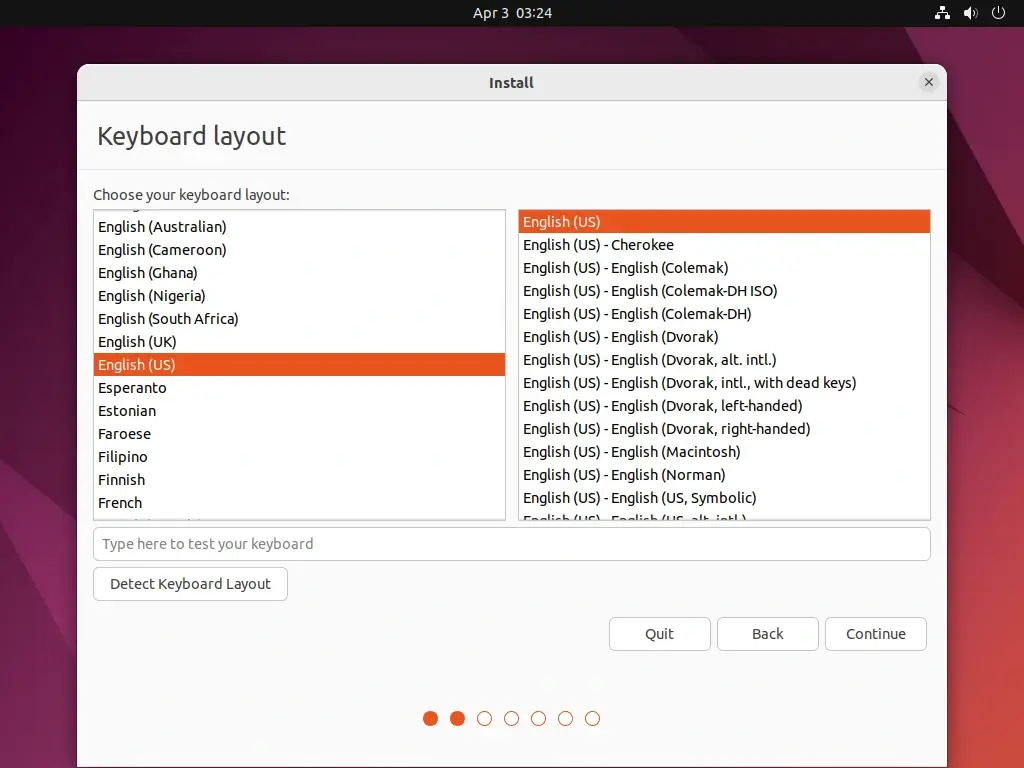
Follow the on-screen instructions to select your language, timezone, keyboard layout, and other preferences.
Step 3: Partitioning Steps (Most Crucial Part)
When prompted with the installation type, select “Something else” to manually configure partitions on your Main USB drive.
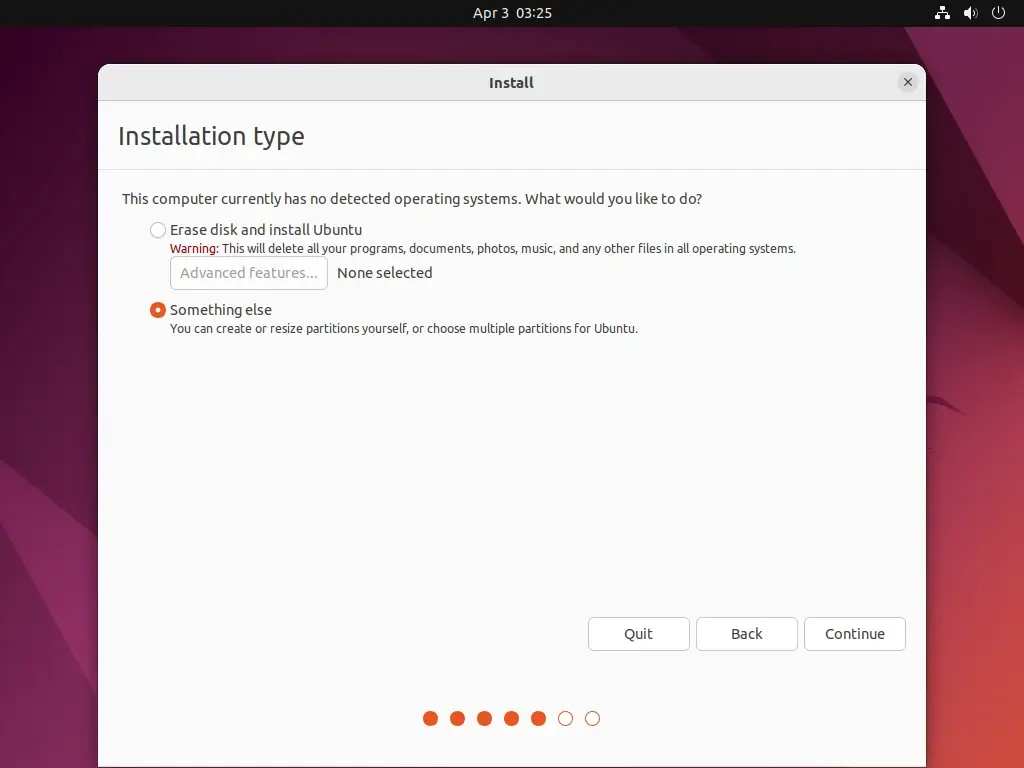
Identify your Main USB drive from the list of available drives. Be cautious to choose the correct drive to avoid overwriting your internal hard drive or other data.
Once selected, you need to create the following partitions:
EFI System Partition (for UEFI systems):
Size: 512MB
Type: EFI System Partition
Mount point: /boot/efi
Root Partition (/):
Size: Allocate the majority of your USB drive space here (e.g., 10GB or more).
Type: Ext4 journaling file system
Mount point: /
Swap Partition:
Size: Typically equal to your system’s RAM size (e.g., 2GB, 4GB, etc.).
Type: Swap area
Once you’ve set up these partitions, click “Install Now” and confirm your choices.
Continue with the installation process, providing your name, username, password, and other details as required. Once the installation is complete, restart your computer and remove the USB drive.
Boot your computer from the USB drive to access your newly installed Ubuntu system. You can now enjoy Ubuntu 24.04 on any computer that supports booting from USB drives.
Conclusion
Installing Ubuntu 24.04 on a USB drive offers a convenient and portable way to experience Ubuntu without making any permanent changes to your computer. By following the steps outlined in this guide, you can create your own Ubuntu USB drive and take your favorite operating system with you wherever you go.


You didn’t show the partitioning steps. They are the most crucial!
@Dave,
Thank you for pointing that out!
You’re absolutely right—partitioning steps are indeed crucial. I’ll make sure to include a detailed explanation in the next update. Stay tuned, and I appreciate your feedback!
Have you identified & created a document on exactly how to do the create of the 3 steps before continuing the “Install Now”
After doing this, I want to add software to the system and I want this software to be permanent.
Is there any way to do this?
Thanks
Linux is so freaking hard and takes a long time but I love it.
Finally installed Ubuntu 20.04 on my usb and got all the graphic and sound drivers to work. Took like 7 hours but was worth it
Where can I get a 32GB flash drive with a minimal Linux OS already installed to operate on any computer? I am 76 years old and not capable of creating one myself?
I can make you one…
Hi Ravi,
I followed the steps exactly as described, but after redoing the installation about six times, I keep encountering an error.
When I boot from the USB, I see “Reset System“, and my system keeps rebooting.
My system is an Acer with an i3 CPU, 8GB RAM, and UEFI.
What do you think could be the problem?
@Claude,
Sorry to hear about the issue!
Here are some quick steps to try:
Check the USB Drive – Ensure it’s properly formatted and try a different USB drive.
Verify the ISO – Confirm the ISO file isn’t corrupted using its checksum.
Recreate Bootable USB – Use tools like Rufus, Etcher, or dd and ensure UEFI options are set correctly.
Update UEFI Settings – Disable Secure Boot and enable USB boot in BIOS.
Try Another Distro – Test with a different Linux distribution to rule out compatibility issues.
If it still doesn’t work, let me know the Linux distro and tools you’re using, and I’ll help further.
Hope this helps!
This did not work for me. At the end of the installation, it said “unable to install Grub……“. I think you have missed something in Step 6. I’ll search for other newsletters and see if I can find one that works
Can you install Linux to its install USB?
Thank you so much it is so useful that I have fully installed Ubuntu on my Pendrive and SD card using this method. ❤️Thank you❤️
Please, Double Check the USB Boot Program you recommend!
RUFUS IS THE ONLY ONE THAT WORKS (WITHOUT SOFTWARE ERRORS).
Also, the method of Formating the Main USB. We wanted to install MINT LINUX. Apparently MINT LINUX preferable is EXT2. Needs a minimum of 6GB to install.
Hi there,
When I tried proceeding with step 6 by formatting my usb to “cleared”, it is shown as “unknown” instead of “allocated”.
My usb is under exFAT format, is it not possible and I’ll need a fat32 usb?
Hope someone could help give me some pointers on this soon so I can order a fat32 usb right away to get Linux running for my project!
Thanks in advance.
You can format it to Fat32 again.
Item #7 needs another description/alternative.
I tried many method and I totally forgot the swap partition.
Now the installation is a success.
So far your article can save a day. Thank you…
(1)will it boot Linux Lite 5.0 from an old PC motherboard like ‘Gigabyte GA-G31M-S2L 3GB ram?
(2)Advice on youtube installation need USB Flash Drive USB 3.0 instead of USB 2.0 but not sure?
Thank you for your help.
I’ve done this 3 times and it still installs the boot field to my windows hard drives (internal SSD on a laptop) is there a method to move them to the USB to fix this issue? Otherwise, this won’t work for laptop users.
“Important: While this procedure will not cause loss of data, some users have experienced changes to their internal drive’s bootup behavior depending on Linux distributions selected. To prevent any possibility of this occurrence, you may wish to disconnect your hard drive before continuing with the USB install portion of the tutorial.”
This is very troubling – I am using my PC to launch the steps in your tutorial so how can I disconnect internal disks one of which is Windows OS and it is an SSD.
It sounds something is missing in your steps particularly the initial ones. Somewhere there is a claim no need to reboot which means Windows OS is running during the entire process??
I have downloaded LILI and Ubuntu 20.4 LTS
Thank you.
I have installed Linux lite on a 32 GB flash drive. After running for a few days it develops Kernel panic error with exit code 0x000000b and sometimes 0x0000004 and freezes. In the advanced options during boot, I get options for 3 kernels and their recovery modes, but sometimes none of them will boot, and sometimes the oldest one boots up.
I have already reformatted and reinstalled it thrice in two months. I wanted to ask that how long can I expect a good quality pen drive (HP/Sandisk) to successfully run full installations without being corrupted? In this case, do you think I should replace my flash drive? Thanks
Where do new softwares installed -in usb stick or any other storage?
Hi, I’ve formatted my USB drive just like you did. I have a root ext4 partition and then a fat one. The problem is, my Windows does not see the USB stick anymore. It recognizes that something is plugged and plays a sound, but does not see it in file manager nor in disk management utility. What can I do with that?
P.S. I also tried NTFS as the second partition and then Windows could recognize it, but couldn’t use without formatting. Thank you for your answer.
Thanks, I’ll give it a try, and Hope it will work. I’m myself a power user of Linux. Your article has great clarity containing enough details about the procedure.
I don’t understand partition making. Must I download Gparted? Where? How does it run?
Is there any other way to prevent it from messing with booting? I don’t really want to touch my hardware.
My computer is not online. I am wondering if it’s possible to take my flash drive to the library and use their computer to install a Linux OS on the flash drive and then put it on my computer and install it. Is there a way to do this?
Physically, it is possible. It would be no different than using a friend’s computer. However, the library’s policies on public computer use may prohibit doing that. You should ask that question of library personnel.
There is a thing that I don’t get here, so you mean every time I run the Linux kernel on my pen drive, are you saying that I need to disconnect my hard drives first? please reply I really need your answer.
@Gelo,
No need to disconnect any hard drives on the computer, just plug the USB and instruct BIOS to boot from USB. That’s it…
Hello,
Your article is great but I was thinking if we can go crazy and install multiple Linux Os on one USB
@Arsian – you can install multiple flavors of Linux on a single USB. Check out –
https://www.pendrivelinux.com/– I think this is what you are looking for. On booting with the USB, you will get a choice of the flavors you want to boot into.Hello,
Thank you for making this tutorial, it is really cool!
I know this is an old article, but maybe you’ll still reply. I got through the whole thing, and the main USB looks like how a Linux system should in the file manager, but my computer does not see it as a boot option on startup.
Any recommendations? Linux live boot USB still recognized.
@Noah,
I think you need to edit the BIOS or firmware settings to enable the system to boot from USB.
What would happen if I unplug the pen drive while the system is still running on the pen drive? There are also some apps open.
well, the world comes to an end.
What would happen if I don’t partition the Pendrive first and just install it on the pen drive right away?
It will install itself as a Linux version. You only need to partition it if you want to use the space for something else like FAT32. If you don’t care then it will take the whole Pendrive up on installing Linux or whatever you choose.
It doesn’t matter to me if the File System is in ext4 format. So, should I go with installing it without the partitioning?
I’ve installed several ‘Full Installs’ using the complete USB. the partitioning thing is if you want to use space for other things.
So if you understand the terminology and know how it works then this article is fine. if you don’t know the terminology and don’t know how it works then unless the installer makes it obvious you’re going to have a painful time.
I really like lubuntu running from the iso image on a USB, but of course with no persistence. But it works perfectly. Every time I follow the instructions above installing on a 2nd USB (tried several) the resulting stick will not boot. Does anyone have any troubleshooting advice? Using an older BIOS machine. Thanks!
Are you trying to run the other USB’s on a different machine than the one that your original USB worked on? You say the 1st one worked but others made do not, so I’m thinking you’re creating them for another PC.
If so, it seems you need to go into the BIOS settings and allow the USB to be ‘seen‘ in the Boot Options. Sometimes on older PCs that need Legacy enabled. Check out your Boot Options on the older machine and make sure you can verify that the USB is showing.
@Ravi Sive,
Really? Why do I need an efi partition? Please
I think it’s because modern BIOS firmware won’t see your USB stick as a bootable option if the EFI partition is not present with the boot files needed to continue the boot process.
Thanks for this article. Only one thing I am missing: can You extend this tutorial with after install procedures necessary for preventing GRUB from looking for another OS? Otherwise, every time I run an update/upgrade of the system on my USB stick, it will collect all OS’s on other drives and put it in the GRUB menu. As I looked for this issue, it is advised to disable os-prober in GRUB config…
Good article. What is the difference between this installation approach and installing on USB with persistence using a utility like say Linux Live USB creator?
The difference I have found is that you cannot update the kernel because of the lack of a partition which the update process can access. To get around that, I tried to modify an ISO with an updated kernel using a utility I found, but it did not work.
so, how can I install it using EFI?! creating /boot/efi on usb stick with a EFI partition?
@Wolfo,
Yes, you need to create an EFI partition on the USB stick.
How do I install Arch Linux on my 1 TB sony hard drive? (i want to create a partition of 25-50gb for it, using my windows 10 pc ). I shall be able to play a few games on the Pendrive.
In Laptop Bios-Dell, with
F2! I have System Configuration and then Devices> SATA & SSD-PCIes both connected. I can disable SATA & SSD-PCIes (forgot the exact name). Disabling SATA in bios could work?? Does the system really thin it is physically removed??? Should I have to disconnect SSD_PCIes too? I just don’t want a hit my main system too.So far I made the recovery disk, then deselect SATA in bios. after that I rebooted and Enable SATA option again, again rebooted, There is not boot to the system , the system just got black, therefore, I again go to bios and restore default settings and then It again win boot manger comes and I am in win 10.
Fellas! thanks for responses. I did message earlier but don’t know why it’s not updated. @MIhvoi, I used your suggestion. I noticed that when I boot from USB-Debian, mount point /boot/efi was of my Internal Hard Disk. I mount my USB-EFI partition to /media/esp and then cp the EFI/boot & EFI/Debian from EFI-Internal-Hard to my USB-EFI.
Then changed the UUID in /etc/fstab to my USB-Partition. OK. Then when on boot I pressed
F12, a new option comes which is UEFI-***USB-Sandisk, with already options (Win Boot manager & Debian (this entry was created automatically on the time of installation)).When I select to UEFI-***USB-Sandisk, option then my pc restart and a new entry would be created and then boot into USB. I think it should straight enter into grub and then boot to Debian when choose to boot from the UEFI-***-USB-Sandisk option.
It should not restart and create a new entry in Internal-Hard-disk-EFI! The USB should be standalone. Thanks. another hit… I also have an old UEFI type Dell laptop year 2012. This USB appeared an option to boot from UEFI-***_USB_Sandisk, but when I used this option then it becomes just an error black screen and there is no restart and creating entries. Any Suggestion Further?
@bobcov, @Mihvoi! Thanks for the response. I noticed that when I boot Debian from USB it uses internal HD EFI partition, rather than EFI partition of my USB. I copied EFI/Debian and EFI/Boot from internal esp to my USB esp partition also changed UUIU in etc/fstab of my USB EFI partition.
Now /boot/efi is mount point of my USB EFI partition. Now in the boot menu, there is a new option to run from USB UEFI and when I enter to run from USB it becomes a black screen, computer restart and new entry added to my PC-boot sequence, with the name of Debian and now there is 4 option come in my boot menu.
First newly created Debian, 2nd is Microsoft boot manager, 3rd entry was old Debian which is created at the time of installation and 4th option is run from UEFI-USB. Here I am confused about my USB-Linux behaviour. when I used the option in the boot menu to run from UEFI-USB, then it should straight run into Debian, rather than restarting and creating a new entry in the boot sequence and then boot into Debian.
OK. now I also have access to dell-2012- with old-style UEFI I supposed. when I attached this USB-Debian to that pc than it will give failure with some lines on a black screen. so here I am stuck and reading grub-install into EFI types of topics and still not tried it because I thought it may mess my Mian Hard drive. need some more guidance to get my work done. Thanks. I just learned enough from doing this.. I hope it will continue. Thanks for all
Unfortunately, this tutorial never worked for me. Some builds would not boot at all, some would boot on the UEFI machine, but not on the older PC, some the other way around and worst of all, it messed up my Win7 boot partition.
But what is working is very simple, took about 10 minutes total and did not alter or touch my hard drive: Mint 19 and Universal-USB-Installer-1.9.8.8 (UUI). I set UUI to format to NTFS, persistence to 30 GB. Boots on both machines.
I ordered a super-fast USB stick and will set that up with an additional partition for hibernation. Thanks, everyone who had suggestions and tips.
Hi, Amit. Unless I did something wrong, I think there is a reason to change your tutorial. One of the emphasized points, “One PC (Don’t worry, there will not be any effect on that PC),” appears to be in error.
I think you should advise people to disconnect their hard drive before following these steps so that Grub does not end up depriving them of the ability to boot Win7 unless the USB stick is in the drive. Not ideal. I”m repeating the steps again after recovering from this. And my hard drive is definitely disconnected this time.
Ah, that’s very interesting. So, after creating an EFI partition on the USB stick, I could copy the EFI/ubuntu directory to it? I’ve fallen down an extensive rabbit hole working on this, delving into GPT and boot processes and all manner of things unrelated to the task at hand. But this morning, with a cloned hard drive, I will attempt the instructions given earlier.
@Bob Most likely, your Win7 boot does not work without USB because Linux installed the Grub in your hard drive instead of USB.
There should be no damage if your Win7 was installed in EFI mode; Linux puts its files in the EFI/ESP partition along with the Windows files (will not delete them). Normally you should be able to select Windows from the “Bios” (actually EFI), from a Boot menu, to boot Windows first and not “Ubuntu/Lubuntu/etc.
A more permanent solution is to move the Linux directories (like EFI/ubuntu and EFI/Boot) from the EFI directory of the ESP/EFI partition of your hard drive. Better, copy them to the USB’s EFI partition, so the USB can boot on other systems too.
If Win7 was installed in Bios mode it is different, like booting Win7 and running from an Administrator command prompt: “fixboot” and “fixmbr”
The problem was that the steps in the tutorial altered the behavior of the host machine, in direct contradiction to the promise in the requirements list at the top of the tutorial: “One PC (Don’t worry, there will not be any effect on that PC).” Had that been accurate, none of this conversation would exist.
Your statement “Most likely, your Win7 boot does not work without USB because Linux installed the Grub in your hard drive instead of USB” reflects exactly what happened and undoing it was not easy, although I have since read that maybe an x86 tool called “Bootice” might have been able to handle the editing of the bios boot device list without requiring working Linux.
There is an old Ubuntu bug to install boot on your PC’s hard drive, even if you create EFI partition and select boot target on USB. I struggled a long time until I found that short fix – to move/copy EFI files from PC to USB.
Normally nothing is deleted on PC if you don’t choose to format partitions on the hard drive. Just that you will have 2 additional directories on PC’s EFI partition that change the normal booting: Ubuntu boot will become first in the boot options list, and its Grub depends on files on USB.
After the above installation, you should be able to also select the Windows EFI boot from your “Bios” in the Boot menu – without any USB. Moving the Ubuntu files from PC would fully eliminate the confusion. If this does not work, maybe you inadvertently formatted the EFI or system partition on your PC. It’s ideal to remove the hard drive first, however, it is tedious to remove the disk in a laptop.
On another point, Ubuntu EFI install on USB will use EFI filesystem UUID, so it should not depend on the disk order (like sdb or sdc).
Yep. Bad tutorial instructions which do not reflect what actually happens when you follow the step by step.
@Bobcov,
Could you instruct where we need to make changes in the article, so that article should be 100% working correctly.
Sure, I would amend the last bullet point. It currently reads as “One PC (Don’t worry, there will not be any effect on that PC).” I would change it to read: “One PC (Warning: Disconnect internal hard drives to prevent boot record alteration.*).
And the
"*"could lead to the further explanatory text below: “*While this procedure will not cause loss of data, some users have experienced changes to their internal drive’s bootup behavior depending on Linux distributions selected. To prevent any possibility of this occurrence, you may wish to disconnect your hard drive before continuing with the USB install portion of the tutorial.”@Bobcov
Thanks for the note, updated in the article. Please check and confirm.
The edit looks fine to me. Thanks for the hard work you do here. There was one other part where I had trouble, but I didn’t write down how I got around it. It’s the part where you are supposed to make
"/"the mount point.After I figured it out, it was stupidly obvious, but now that I have forgotten, I’m the one who is obviously stupid. If you could add a step by step of how exactly to get that
"/"to show up on the drive you want it to be on, that would be great.Hi, thanks for the tutorial. Things got a bit mysterious in Step 7 as there was no instruction on exactly how to set the mountpoint and it wasn’t exactly clear sequentially if I should reformat my already formatted partitions, but I eventually stumbled into it.
But my problem is that for reasons unknown, the install touched my Win7 hard drive, which was not supposed to be part of any process. Without the USB in, I get a Grub command prompt. With the USB in I get a text menu and can boot into Windows 7. Why did this happen and how can I undo it? This is what I get for not remembering until at an awkward point that maybe I should remove my internal drive to prevent exactly this scenario.
Hey, Bob, I had a similar issue. You can read my post about it in this thread. The reason it happened is that you didn’t partition an ESP boot partition on your USB for the GRUB bootloader. Windows uses the same type of ESP partitioning for its bootloader as Linux does.
When you did the install the installer automatically looked for an ESP partition and it found the one on your main OS drive and automatically installed GRUB on it because there were no others. Honestly, the best way to get over this issue is to remove all drives but the USB you’re installing Linux on to.
Alternatively, you can make sure that you make a 500MB ESP partition on the USB for the bootloader and it should ask you if you want to install the bootloader on the USB. As I said, the best way to do it is by removing the drives and you really can’t make any mistakes.
Let me know if you want a link to fix and repair your windows bootloader. There is an awesome tutorial on youtube that shows how to completely remove the damaged windows boot partition and reinstall all of the original boot files like it was never touched.
Hi, thanks very much for that information. Yes, I would like to get your links on how to fix this. I’m scouring the house for a spare 1 TB drive so that I can make a mirror backup and then try the procedure first on the mirror to make sure it works.
As for my USB drive, do I need to scrap it and start over and make the ESP partition, then the Linux, then the FAT? I had 10gb Ext4, 110gb fat32. Would the install have created an esp partition if it could not have found one on the USB if I had (intelligently) removed the hard drive?
Hey, again Bob! Here is the link to completely repair your windows bootloader partition
youtu.be/F72D7uL6cZg.Also, to answer your question about unplugging all of your drives except for the USB, the answer is yes. If the USB is the only recognizable drive then it will automatically create an ESP partition and install the bootloader on your USB drive and installation is foolproof with absolutely no mistakes.
I used two different USB drives for mine. the bootable live version of Linux mint on one of my USB drives and I formatted the other one to Fat32 so Linux would recognize it. Mind you before I even turned on my computer I disconnected all of my main drives but the USB sticks. I then booted into the Linux installation media and then mounted the other USB drive that I wanted the full install on.
After that, you just follow the installation instructions and partition your root and free space as you want. After that as long as your main drives are disconnected everything will go smoothly and install onto your target USB drive. Some distros are different than others with the dialogue and way they install.
Linux mint let me pick the drive I wanted to install on which was obviously the only USB stick beside the one I booted from. You will easily be able to tell them apart. Linux asked me how I wanted to partition the drive so I make all of it root. You don’t have to do this, but that is how I did mine.
Lastly, there was a checkbox that asked if I wanted the bootloader on the selected drive that I was installing Linux too and I checked it yes. After that, it will install no problems and you can boot from it in your boot menu. Just make sure you have fast boot turned off in the bios of any computer you want to boot your portable Linux OS on or it won’t let you select it the USB at your boot menu.
No matter what distro you use though, even if you don’t have the option like I had in mint to tell it which drive to put the bootloader on as long as you have all of your drives disconnected and make at least a root partition on your target USB stick in the installer it will automatically default to installing the boot partition and bootloader on said USB stick along with the entire OS.
After that, you will have a portable OS that you can use on almost any modern computer that has fast boot turned off. Let me know how it goes! I have already tested my USB stick on 4 different computers and it boots up and runs awesome and it is my fully customized OS in my pocket.
Lastly, if you want a suggestion on the perfect USB drive to use for your portable OS I would highly recommend the Samsung Fit. It is the size of the tip of my finger and has 128gb of space and you can get them up to 256gb.
It is super fast and does 4K read-write which is perfect for an OS. Mine runs super smooth and flawlessly without any hiccups and it is the smallest drive I have ever seen. I’ll put the link for that drive below. They are only $20 on Amazon –
www.amazon.com/dp/B07D7PDLXC/ref=cm_sw_r_cp_apap_TUaViVnTXOmzM.Well, after many days of diversion (getting seriously side-tracked), I finally have a backed-up drive, a Win7 boot repair disk and this lovely message from following the youtube tutorial: “This tool can only be run on systems booted using a PC/AT BIOS. This system was booted using EFI or some other firmware type.” So, now I will hunt down equivalent EFI compatible commands.
Well, that was truly as I would imagine a root canal would feel with no pain killer. Wow. If you followed the tutorial to install Linux to USB and now your Win7 hard drive will only boot when the USB stick is in, this is what I did to fix it. (Word to the wise: REMOVE your hard drive before following the tutorial, then you won’t have to go through this.)
If you do NOT have “ubuntu” or similar Linux-related entries in your boot device list in BIOS, you can probably skip the steps involving efibootmgr. I am no expert. If these steps fail along the way I likely have no answers for you. Good luck.
Set the boot order in BIOS to favor the boot DVD and then the Ubuntu boot device (most computers let you skip past the DVD).
The command is “sudo efibootmgr -b x -B” where the “x” is replaced by the alpha-numeric for the entry you want to delete. In my case, the command would be “sudo efibootmgr -b B -B“.
After the command is entered, the screen displays the updated boot device list. Your “ubuntu” entry should be gone.
Now we will use Linux to remove the ubuntu sub-directory in the EFI partition. If you boot windows to do this in a Repair disc session, your work here will be undone by the system before you can even get to a command prompt. Don’t try to do this in Windows.
The following steps come from https://askubuntu.com/questions/63610/how-do-i-remove-ubuntu-in-the-bios-boot-menu-uefi
l) Find the line that shows a disk of 100-500mb. It should be of type “EFI System.” Mine is”/dev/sda1“.Using mine as an example, here are the commands:
c:” brings you to a c: prompt. If not, fix that because you will need access to your installed windows drive. If it”s on another drive, then make sure you see it.The first time I did this on the cloned drive, it was pretty much as listed above. The second time I did it, for the original drive, the first thing that happened before I could even get into bios, was the firmware “repaired” the boot device list!
Yeah, it picked up from the EFI that there was an ubuntu entry in EFI, but not in the BIOS list, so it went ahead and added it before I could blink. So, if you do this with two drives (a safety copy and a primary) you will probably see similar behavior.
Okay, now I can do the whole tutorial over again….with my main drive disconnected. At least I learned a lot from this and got a mirrored backup hard drive of my laptop out of it.
Hey Bob, you might need to install windows system repair tool onto a USB and boot into it from there. Or were you already in the repair tools command prompt and the commands didn’t work?
Win7 64bit Repair disc was created and burned to a DVD, which I used to boot to access the tools. The tutorial on Youtube was incompatible with UEFI architecture.
Hey Amit or anyone else that can please help. I am pretty good with tech, but I have never done this before. I found this tutorial after I already installed Linux to my USB drive. Everything works fine, but as you said I can only use the pen drive on the current computer because grub installed itself on my main windows 10 OS.
Now I know how to do it right this next time around and my windows still boots up like normal unless put the USB in and select Linux from the boot manager. My main question is where did Grub get installed to on my main NVME drive? I would like to remove it just to keep things clean. I have no idea where it went or how to get it off of my computer.
Don’t worry, your computer is clean. there is only one entry added in grub. if you remove grub from your hard disk, you cannot use Linux installed on USB.
If you still want to remove grub and restore windows bootloader. Got one youtube video for that- https://www.youtube.com/watch?v=DOA6hEnOEjs
Hey Amit! Thanks again for your reply and the assurance that there isn’t anything wrong. I finally achieved what I wanted and got everything on the USB stick including the bootloader. I tested it on 3 different computers and it will now boot on any computer with fast boot disabled. I still would like to remove grub from my windows boot partition since the my USB stick now has it’s own ESP partition on it.
Hi,
I have done this and it’s working well. However, I cannot access the files on the 2nd partition on windows. Any idea how to make it so that I can still use the 2nd partition on other operating systems?
Thanks.
Formatting second drive with fat32 it will be accessible in windows. If doesn’t work, try assigning letter to that drive in windows disk management.
Can this USB be formatted to FAT32, after installing Linux?
Yes
Make sure you only format the partition that DOES NOT contain your Linux OS.
Wouldn’t this work better using a Virtual Machine in VirtualBox and then just using the USB passthrough? You only need ONE USB to do this, and you don’t have to worry about files being lost. (If you do use a VM, don’t add a hard disk and it will be WAY easier because then it will just be a normal Linux install since your USB is
/dev/sda.)There may be a slight speed benefit by doing it this way, but why when it could be much simpler? The main bottleneck will pretty much be the USB speed anyways.
All you’d need in the VM method is:
Yes that is also a good option.
Not all applications can be run on a VM. I am planning to use this method to forward my USB port (over IP) using Virtual Here server. That won’t run on a virtual machine since it virtualizes a real device.
Hi thanks for your instruction..
I installed two distros (Ubuntu 16.04 32bit & Kali 2019.2) with your method on my 32G flash drive & installed GRUB in the MBR of my USB pen drive (/dev/sdc) & everything worked like a charm but a day later when i inserted my USB it was recognized as /dev/sdd (because my external hard drive was inserted already) & GRUB goes to rescue mode & says:”there is no OS in /dev/sdc” which is true because now my USB flash is in /dev/sdd.
I replaced my external HDD & flash drive to have my USB flash at sdc again & the problem is solved.
The question is I need this USB flash to boot on my distros in any computer & there is no guarantee that i always have it at /dev/sdc in every computer so how do you propose to work around this problem & have USB OS that is fully installed(not just live OS) & boots in any computer
I Think you have installed grub on your local hard disk. check step no 7, second red box.
No I did install the GRUB on the MBR of my USB Drive (checked that in other Computers) when I plug my USB to the computer the grub comes up & I can see the OSes installed on the USB but when I hit Enter I face this error (but sometimes it runs completely OK if it is sdc!!!)
“Missing modules (cat /proc/modules; ls /dev)
ALERT! /dev/sdc2 does not exist. Dropping to a shel!
Busybox V1.30.1
(initramfs)
Try with other pen drive.
I got a similar problem. Even though my USB was
/dev/sdc, and I selected that for the bootloader. Grub still got installed to/dev/sda. The USB only works in the computer where I created it. Not possible to boot on another computer.Ubuntu will install the necessary EFI files on the PC’s EFI partition instead of the USB drive. You can make the USB portable by copying the EFI files to the USB drive.
Same problem here. Now how can I copy EFI files to my USB’s EFI partition to make it bootable on any pc? My UEFI system is the latest and I did it in secure mode on. My USB is working only with host pc. Thanks
There is a very powerful and powerfully dangerous utility called “Bootice” which I think will let you copy what you need. I have Bootice X64 version 1.3.4.0. It has been extremely useful. I don’t remember where I downloaded it from, but if you have trouble finding it, let me know.
@Freeman
Basically, in order to make the USB bootable on any PC, you need to copy or move 2 directories from the PC’s efi/esp partition to the USB’s efi/esp partition:
EFI/ubuntu
EFI/Boot
is this so important use x32 version of Ubuntu? today all computers maintain amd64 architecture
Wouldn’t you want a swap partition, if your using this on different computers which you may not know the specs of? Also how fast will this wear out a USB stick? Would something like zram be better?
Wow – thank you for this article. The hard drive failed on my old Inspriron. With these instructions I was able to salvage my computer. So I’m using a 64gb usb3.0 to replace my hard drive.
I use ElementaryOS, and I had one issue while installing, it failed at the end because it was trying to install Grub on the old hdd. I realized this was because I hadn’t created the fat32 partition, I didn’t see why I needed one. I used gparted to reformat the usb with a GPT partition table and followed the instructions at help.ubuntu.com/community/UEFI – Creating an EFI System Partition.
It boots faster and loads programs faster than my old hard drive did. I’m not going to replace the hdd after all, I’ll just get a larger USB!
Hi, I tried your method which worked perfectly. However, the fat32 partition does not appear in windows (apparently because windows does not look after the first partition it sees, ext4 in our case).
Do you know how the fat32 partition could be seen by windows ? I tried to set the fat32 before ext4 in partition table, but then the USB is not recognized as bootable anymore at startup.
OMG! If I were teaching you quantum physics, would you appreciate my telling you about the five different ways to do each calculation when you’re only interest is solving the problem? That would be a major no; however, you seem to think giving me an ocean of choices in how to format a usb, further skipping any procedures to get it and remove it from my PC once I’ve used it, and totally overshoot the whole getting the ISO image altogether. This are not instruction; it’s a book report…
“Use your Linux ISO image file to create a bootable USB installation media. You can use any software like Unetbootin, Gnome Disk Utility, Yumi Multi Boot, xboot, Live USB Creator etc. to create bootable usb with the help of ISO image file.”
I had a fault with GRUB not wanting to install at the end. I selected exactly like you /dev/sdb/ and a sandisk for the boot installation. (previous of courses i made the 2 partitions using gparted).
I used Ubuntu Mate. But that should not make any difference. So installation went ok except for the GRUB. What can i do next, try it again. or is there an easy way to install GRUB? I have read you also need then some txt file so it know from which disk to boot.. Thanks for any help.
Try to completely format your main usb (create new partition table with ms-dos format in Gparted). and then install it. Another thing is check whether your live installation usb is booted in UEFI or BIOS.
Thank you Amit!
I did it again, now it works :)
You’ve been a great help!
After I complete installation, UBUNTU boots takes very long time, is it normal?
Yes, OS speed depends on pen-drive read/write speed. use lightweight Linux distro for good performance.
Linux Mint 19.1 boots much faster than Ubuntu which is about the slowest out there boot wise. No matter if you have SSD and 3.1 USB it is still slow.
Execute ‘dmesg command‘ after boot and check which process takes longer time.
Did someone try the same procedure using some distros that should have been developed for this very purpose? I’m referring to Slax and Porteus. They might perform better than Lubuntu!
Cheers,
J.
Yes, definitely it will work better.
What about using it between AMD and Intel machines? I am thinking to install UBUNTU on USB SSD and use it between 3-4 different machines that one of them is Ryzen based. All are x64.
@Tmhd,
It should work without any issues on AMD and Inter machines, I have tested in on my Intel machine and now I am using it on any PC anywhere.
This is indeed interesting idea for those who use few machines during the day. Will give it a try with Linux Mint :) Thx
I have one old Compaq laptop (nx 6110) whose hard disk is not working. I wanted to use it as a Linux setup and work with python and use for my internet requirement. I was just going to buy one internal hard disk.
Going through this post I feel that it will be very nice if I can use it using an USB drive. So, all I want to know that can I install Ubuntu 18.04 LTS on 32GB USB drive without caring for any hard disk?
@Bidyut,
Yes, you can install any Linux operating system on USB drive and use it anywhere on any PC. Just connect and use it..all data will be saved on USB disk..
Hello everyone,
Thank you for this easy to follow tutorial. I could successfully install lubuntu 16.04 on a 8gb USB drive. To do so I used an old HP Pavillion dv5, a 32 bit machine. After do so I tested my new “mini USB computer” on the same machine and it works nicely even if it is very slow. I could even install and use i3wm which is my favourite window manager.
However, when I try to use it on my main machine (Dell Precision M4600, 64 bit) it failed to find the USB drive and boot from it. I set up the boot sequence in the BIOS as I always did when I was a distro hopper, but nothing! Bootable USB device not found!
To test whether it is a problem in the Dell settings for finding USB drives I inserted the USB drive burned with the lubuntu ISO I used as bootable Linux installation media and my computer found it immediately without any problem.
I’m wondering whether the fact that I created my USB PC using a 32 bit machine is the cause behind the fact that I can’t use it in a 64 bit computer.
Any idea?? Thanks
@Javus,
May I think so, also no one uses 32-bit these days, so most of the apps are created for 64-bit only. I suggest you to re-install 64-bit Linux operating system using a 64-bit machine..
Yes this was perhaps an issue, not sure about it. At the end I re-did the whole process from a 64bit machine and on a 32GB USB drive. I eventually found out how to boot from it also with my Dell Precision so everything more or less is working now.
Just few last tweaks. I’m looking forward to work on it! It would be a lot easier to carry around only an UBS drive when visiting my family and then use my mom PC ;-)
Well performances will be poor I guess… It’s slow, but I must admit that also the USB drive I’m using is not new, it has at least 5 or 6 years :-P
It does not work for me. I am trying to make a Debian web server without GUI. I did everything as mentioned. My Disk is “sdh“, i made a partition sdh1 flagged
"/", left the rest of the space for later partitioning, wrote bootloader into sdh, finished installing.After reboot it goes to GRUB and wants to start Debian and then it says: “Gave up waiting for file system”
“Alert1 /dev/sdh1 does not exist” and then i am left in initramfs prompt.
I think the problem is, that it is specifically looking for sdh1 instead of sdX1. Any idea?
I am trying to create a boot-able USB Drive using a 9Gig Centos 7 Image. I tried a couple of tools but each one requires the USB to be formatted using FAT32 and FAT32 can only handle 4Gig files.
Is there a way for me to create a bootable USB drive with a 9 Gig Centos 7 image?
Thanks
@Mike,
Yes, there are many tools out there, some of them you can find here: https://www.fossmint.com/3-best-gui-enabled-usb-image-writer-tools-on-linux/
does this not assume I am already using linux? I am a windows user.
That doesn’t matter. this tutorial is only for creating a portable linux os which we can use on any pc.
I would truly like to be able to have a Linux system on a stick but I have run into install failed 3 times. Twice the install failed because “GRUB Installation Failed. The ‘grub-efi-……….‘ package failed to install into /target/.
Without the GRUB boot loader, the installed system will not boot”. I don’t have the exact grub-efi wording but the system I’m building this on is an ASUS U56E-RBL7, Windows 10 1803 with UEFI, Secure boot, fast start, 8GB RAM. I am wanting to use Linux Mint 19.1 Cinnamon.
I have set up (partitioned) a 32 GB USB using GPARTED with 15GB Ext4 and 16GB FAT32. I thought I had gotten over the hurdle of Step 7 and setting the mount point. I reset both partitions same as before. The resulting partition table appeared ALMOST EXACTLY as in this tutorial image except that the FAT32 partition box in the format column was not checked.
I tried repeatedly to change the partition but the box to format the partition would not change to be checked. The partition had been formatted previously so I left it as is. The installation began then shortly after tells me that I am setting up a UEFI installation and that it might be a problem for running on a BIOS system computer.
My options were to proceed or to go back. Not sure what I would go back to anyway so I have selected the UEFI option. The installation proceeds all the way to the end, requests my signin info and then gives the error message. The USB will not boot and the computer opens directly into Windows.
I’ve read many many websites about grub failing, etc. though these have all been on HDD installations. I have read about selecting GPT as the FAT32 partition type and I’ve seen options to set the Ext4 as a EFI partition type and one suggestion was to remove the live USB before proceeding with the installation.
I’m stumped! I certainly don’t want to do anything to mess up the UEFI setting on the computer though I have entered system settings and selected UEFI as the first boot option and it works fine for the distro USB. I’d very much appreciate some direction. I feel certain the key is in step 7 but I don’t know which combination of options will magically fix the problem. Looking forward to hearing from you all and appreciate anything you might suggest.
Once you have installed Linux on USB (any Ubuntu based Linux). Without restarting your PC (In live OS only), install one app called boot-repair with following Commands
Last command will install and open boot repair.
Go to advanced option and select your main usb disk drive (Important), apply and click on recommended repair.
Follow all the instructions properly. and after completion restart your system to usb drive.
It will fix the problem.
Hi,
I tried this method, but it failed. It seems that the reason is because my machine uses UEFI.
I explained the problem in details here:
https://forums.linuxmint.com/viewtopic.php?f=46&t=281270
Can you please help me fix the boot? I would like to remove that ubuntu boot option from my internal disk (which wasn’t meant to be there, but in my USB drive).
You may be able to ‘disable’ Secure boot in BIOS this is the UEFI microcode in boot
You can try boot-repair app.
Install it on Live OS without restarting after installation on main usb.
go to advanced option and select main usb drive and follow all the instructions by clicking Recommended repair.
I have an old Asus netbook that had Windows XP. When that was no longer supported, I put Linux on it. I really don’t like Linux, so I turned it into a quasi-Chromebook (using Cloud Ready). However, I think it might be nice to have Linux available to have apps available that aren’t cloud-dependent.
Do you see any problems with running it this way (after I create the USB using my Windows computer)? Are apps added when running off the flash drive and data downloaded/created saved on the flash drive?
Yes. all the software, settings etc are permanent on the flash drive.
I think only Live cd / live cd with /home persistence will be bootable on any pc. Once you install it, the way you did here, only relevant drivers for the hardware at the time of installation get installed. So, you can’t expect to boot from same pendrive on a different PC. It will possibly freeze !!
I don’t know about lubuntu but puppylinux, antix & mxlinux are good at persistence with frugal install, (and can be booted on PCs with different hardware.)
Is the resultant USB stick mountable on a Windows system, such that Windows can access the FAT partition? I’ve read that Windows won’t mount sticks formatted like this and offers to reformat them because it doesn’t understand the Ext4 partition at the beginning. I don’t have have a Windows system to try it on.
The Ext4 is that way so you can boot into it from any machine…
You miss my point, likely because I didn’t make myself clear. What would happen if you put a stick formatted like this in a Windows machine? Could you access the FAT partition on it?
Windows can mount FAT partition of that USB drive. which is second partition.
It works nicely on my laptop which I used for installation, but on my PC the system almost freezes after like 2 min or so. When I barely manage to launch task manager there is no load on CPU or RAM. Any idea what may be causing this?
May be it is because of USB read write speed/ USB read write problem.
Maybe you didn’t installed the proper distribution x32 bits or it could be hardware issue, try to look for a refreshment setup or program that adapts to changes in the hardware environments
Mine will freeze unless, upon boot, I press
"e"and add"acpi=off"then it runs fine without freezing.Hi Amit,
It was nice to read your article, very knowledgeable.
Can you please elaborate on making the USB partitions using GPARTED. I am using Windows 7 if that matters.
Thank you.
Just follow this procedure.
Thanks, I found this helpful. A couple of points, though:
1. When I got to step 7, I couldn’t see how to create the mount point on the EXt4 partition. I didn’t expect to have to format the USB drive again as I’d already done that at Step 2 with Gparted.
It took a lot of fruitless searching before I got round to clicking on the “format” button and discovering it’s only when you actually select one of the formats on offer that you then get a choice of mount points. This is so crucial I think it should be mentioned in the guide.
2. When I got to Step 8 and checked what was listed, I noticed the installer was proposing to reformat one of my main hard drive partitions as a Linux Swap partition! I had not requested this.
So I went back to Step 2 and used Gparted to create a small additional partition on the “Main” USB stick, between the Ext4 and the Fat32 partitions. When I then re-ran the installation, the installer found the swap partition and kept all its operations to the USB stick as intended.
Swap partition is needed only if your RAM is low. If you have RAM size above 4 GB, I don’t think you will need swap space.
GRUB is installed to hard drive, i need to boot to hard drive with installed ubuntu usb to access ubuntu, i can’t boot from installed linux usb on other computer
Carefully follow Step 7. You have to select Bootloader device as your MAIN USB drive.
Where in this process is the ‘EFI system partition’ created? On my machine, Grub installation fails and the entire process aborts.
This happens at the every end of course, after all kinds of time has been expended. I’m fairly certain the Grub install fails because there isn’t an EFI system partition on the USB Thumb drive.
Am I missing something?
Which Linux OS you are using? For Ubuntu derivatives, it works correctly. Carefully follow 7th step. you have to select your main usb device for grub installation. No need to create EFI partition. Another thing, just check whether that installation live os booted in UEFI mode or BIOS mode. try again on another PC.
This article doesn’t mention that, at least with different usb stick apps like Rufus and Etcher, some ISO’s will not install onto a ext3 or 4 partition, but create their own ISO 9660 formatted partition (essentially an optical disk image).
Some USB distros like Fatdog64, will expand to fill the entire drive, but it remains in an optical disc image format, not following typical linux partition layouts. The good news is that a separate EFI partition is not needed for these. Fatdog64 works on EFI-booting machines by providing a disk image; refind.img.
So I guess you are partly right, a boot EFI partition of some sort is needed, but, it can be provided in other ways than a “true” primary 16 or 32 FAT formatted partition in a disk partition table. There are workarounds. Unfortunately most articles published on websites don’t explain this adequately, they just show the steps any user can use to end up with a boot disk that works in most cases. You have to scour forums for technical users to get explanations why your particular set-up may not wo.rk
From Step 1 to Step 2 you must make two bootable usb’s. One with the OS/Distro you want to use; the other with the Gparted .ISO, then you boot to the Gparted with the blank (Main) usb inserted create the partitions (EXT4 & FAT32) THEN you boot to the bootable OS .ISO and install that to the partition you created.
Yes. correct. Instead of bootable usb you can use bootable CD/ DVD also.
Seems like you left out one very important fact, don’t we have to boot to the mounted CD .ISO first? then have the ‘blank usb (Main USB) inserted and also??
When you say download the .ISO you don’t make it clear what exactly you do with it to make it work. Your next image is of your drives listed. It would help if you explain or show how you got to that point then show how to use the .ISO to create the partition.
In first step, I have mentioned about bootable stick. In 7th step there should be both pen drives connected and you have to select main drive there, which is blank.
Sorry not 1st step.
it should be 3rd step.
This does not work on my Acer laptop. It won’t recognize a usb stick with an ext filesystem. I can boot from a live usb as that is formatted to fat32 but not it does not recognize a usb stick formatted to ext4.
However it does work fine on my desktop and my Dell laptop. Thanks
I think that is not he issue of ext4 or fat. there must be problem with grub.
Hello, thanks for the tutorial,
If I do that in my laptop, then unplug the USB drive, will windows boot normally? Or it will start with the grub (dual boot) interface?
Since the laptop I am using is not mine, I don’t want to do any permanent change on it.
Yes windows will boot normally. see step no. 7. you have to select bootloader device as your usb drive. so it will not affect SSD/HDD of that laptop.
1) I hate Windows 10 (and all the previous versions, too) for every reason ever stated.
2) I’d like to get ANY Linux OS, just to try it out to see if it’s any better than W.10.
3) You lost me at: “Step One: Use your Linux ISO image file … ” ???????
Thanks for trying, but…!
I didn’t get weaned on an electronic device. I didn’t suckle on a mouse curser-teat. I read books I held in my hands and if there was a lit-up screen, it was a TV and what went in my eyes usually left the moment the next spray of electrons changed what was shown enough to detect motion in the picture.
Most TVs were still black and white and I always wondered what NBC’s peacock actually looked like. When I was in High School, the most modern computer filled a multi-story building, ran on magnetic tape and received instructions via punch cards, and had less capacity than a 2017 fit-bit.
I have been searching for years for ANY “literally” Step-by-Step how-to-get-a-copy instructions so I can experience Linux without the corporate for-profit motivated intrusions that accompany all Microsoft and/or addle and/or gurgle “product”.
Is ANYONE aware of such a set of instructions? Karmic infinite justice (it isn’t a bad thing) upon all who reveal (or create) such an up-to-date set of instructions. I’d really like to experience it before I can’t experience anything at all.
Joe
Linux is different than Windows. Windows is developed commercially for commercial purpose by a single company, where as Linux is developed by many developers from many distributors. Windows is the base for most of the software developed. that’s why it is difficult to make it work on any Linux distribution. Both Operating systems are having their own advantages and disadvantages.
I don’t saying that Linux cannot be used as Windows, I am using Linux for more than 5 years without any problem. I can do every task on Linux even some extra features than windows are there. Give some time to Linux, try every possible way of doing tasks you want. Take help of Linux communities and then Linux will be your friend. Best Luck.
For use on USB with different PC’s and laptops it seems easier to make “”lubuntu live usb persistence“” which for instance this tutorial shows
https://www.howtogeek.com/howto/14912/create-a-persistent-bootable-ubuntu-usb-flash-drive/
But maybe I am missing out something important about your fine tutorial compared to the live usb persistence?
Yes, Live USB persistence will be useful for making files available after reboot. but USB created by this tutorial makes every change permanent in the system. That means every modifications like installing software, tweaks, settings, files etc. will not change after reboot.
It is just like installing OS on your Hard disk, only the thing is, that hard disk (i.e. pen drive here) is portable.
I used an 8GB USB flash drive. I partitioned it per the instructions.
In Step #3, bullet #7 – I was asked for additional details regarding partitions, but these are not addressed in the tutorial. I guessed the right settings – the installation proceeded, I was able to boot and use Lubuntu from the USB, but that’s where the fun ended. The OS tried downloading the updates and ran out of space. Also, the drive remained unreadable to the Windows machine I was using.
Not sure what went wrong – perhaps the additional details would have been helpful.
Anyway, just something for you to consider expanding upon.
You have to select your boot partition size according to your need. Your boot partition is in ext4 format that’s why it will be unreadable in windows. but if your 2nd partition is unreadable, then format it using FAT or NTFS format.
This deleted my existing bootloader for windows. How to reload that?
I dont have a windows cd with me now. Please help.
Use your pendrive or linux installation disk to open linux OS on the same machine. and from terminal install boot-loader again on your hard disk. that’s it!
Why usb pendrive? Is still not so fast if you count the write cycle part! Even better, just use an external ssd! Pricey but with usb 3.0 or esata screaming fast! On driver support part is common knowledge today that auto-detection part of Linux kernel just work.
On all mainstream Linux distro the kernel is configured to carry almost all drivers, some specialized distros can choose to make some trade-off, to exclude some drivers to save space and memory, but hdd space is so cheap that for years default kernel configuration is to include all drivers and this means a lot of drivers!
You need to be careful on only one part, when you install the distribution usually the intended target IS NOT /dev/sda when you want to install to some external ssd or usb pendrive but something like /dev/sdb or /dev/sdc or even more
Yes, SSD will be great choice, but also costlier. It depends on speed requirement.
The 2 screenshots for #6 and #7 are really small, even after clicking on them, and those are the most important ones.
Any chance of getting bigger ones to enlarge?
@Kurt,
Thanks for pointing out, we’v’e updated the images with bigger sizes so that you can clearly see it..
Most distros now use blkid to reference partitions but check to make sure on whatever distro you use. Also, there are many tweaks to help reduce writes to the USB so you don’t wear it out too fast.
On installation avoid using any proprietary drivers for your hardware. You may also want to look into zram and prelink.
Porteus offers a lighter, optimised linux that can run from RAM.
Yes, But installing on USB offers using your customised system anywhere…
Great article but will this work on pc’s that have UEFI enabled?
Yes, it works…
Yes It works…
What a great idea, and Awesome tutorial thanks.
Thank you…
Nice one, Ravi.
@Saidiq,
Thanks, but it was written by one of our author Amit Hambar.
What happens with drivers video network etc when you plug it in a different platform Intel vs AMD CPUs, Intel vs Nvidia vs AMD GPUs etc?
How is this better than boot with grub from ISO and add a permanent file system as Multisystem offers you to do?
If you are using boot from ISO, all the modification like settings or installed software will not be permanent. In next boot there will be fresh OS again. That is not the case with permanent file system…
for GPUs if you have installed all the drivers on Linux on USB, It should work on any PC, with or without GPU…
It would be a great help if you add this tricks – install all the GPU and network drivers to the article or a second part of it.
With debs rpms archs distros and Manjaro – mhwd – and other singularities in major distros if there are any how to.
Also some boot options as amd_iommu=on iommu=pt that is needed in my gigabyte 970 motherboard to make USB 3.1 work, but more important than that, the network drivers.
And even better if there is an easier way than adding it to GRUB.CFG from the grub console making easy to add a grub entry for this kind – and other exceptions – of machines.
For GPU and Network drivers installation you can go with Normal procedure which you are using for your PC with Hard Drive installation.
There is no any change, In this tutorial we are installing OS on USB (because it is portable) instead of Hard disk. Rest everything is same…
For BOOT options Normal Procedure should work. But I am not sure…