The Apache web server is highly customizable and can be configured in multiple ways to suit your needs. There are many third-party modules that you can use to configure Apache to your preference.
ModSecurity is an open-source WAF (Web Application Firewall) that is native to the Apache web server. It was initially an Apache module only but has grown over the year to become a fully-fledged web app firewall. It is now supported by Nginx and even IIS.
ModSecurity inspects incoming requests to the webserver against a predefined set of rules. Typically, it provides a set of rules known as CRS (Core Rule Set) that protect a website from an array of web application attacks such as SQL injection, XSS, and session hijacking among other exploits.
[ You might also like: 5 Tools to Scan a Linux Server for Malware and Rootkits ]
The ModSecurity application firewall forms an integral part of PCI DSS compliance in shielding sites from external attacks. When the module is enabled it triggers a ‘403 Forbidden Error’ which simply implies that you have insufficient permissions to access the resource on the webserver.
In this guide, we will show you how to set up and configure ModSecurity to work with Apache on Debian and Ubuntu Linux.
Important Note for Debian 12 (Bookworm) Users
If you are using Debian 12 (Bookworm), be cautious when following this setup, as it may create duplicate rules that can prevent Apache from starting. In recent Debian versions, the core ruleset (modsecurity-crs) often comes bundled with the modsecurity-crs package by default, so manual installation may not be necessary.
Make sure to check your installed packages first to avoid any duplication issues.
dpkg -l | grep modsecurity-crs
If you see a line with modsecurity-crs listed, it means the package is already installed.
Step 1: Install ModSecurity on Ubuntu
The first step is to install ModSecurity. We will begin by, first, refreshing the package lists as follows:
$ sudo apt update
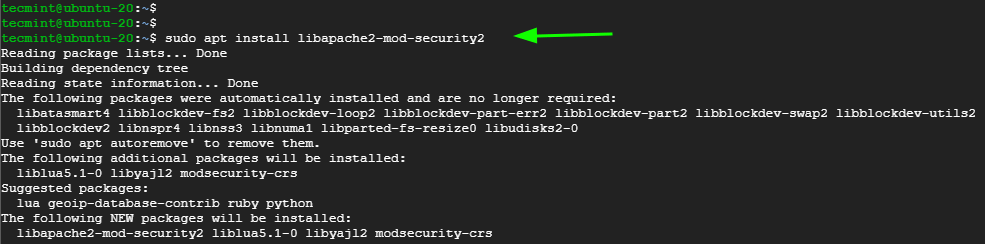
Next, install the ModSecurity package alongside other dependencies and libraries.
$ sudo apt install libapache2-mod-security2
Afterward, enable the module.
$ sudo a2enmod security2
Then restart the Apache webserver to apply the changes.
$ sudo systemctl restart apache2
At this point, ModSecurity is successfully installed. Let’s now configure it.
Step 2: Configure ModSecurity in Ubuntu
By default, ModSecurity is only configured to detect and log suspicious activity. We need to go an extra step and configure it to not only detect but also block suspicious activity.
Copy, the default ModSecurity configuration file – modsecurity.conf-recommended – to a new file as provided in the command below.
$ sudo cp /etc/modsecurity/modsecurity.conf-recommended /etc/modsecurity/modsecurity.conf
Using your preferred text editor, open the file
$ sudo nano /etc/modsecurity/modsecurity.conf
Locate the line:
SecRuleEngine DetectionOnly
Set it to:
SecRuleEngine On

Save the changes and exit the file.
To apply the changes in Apache, restart the webserver.
$ sudo systemctl restart apache2
Step 3: Download OWASP ModSecurity Core Ruleset
The next step is to download the latest OWASP ModSecurity Core Rule Set (CRS) from the GitHub page.
Clone the OWASP git repository as shown.
$ git clone https://github.com/coreruleset/coreruleset.git
Navigate into the directory.
$ cd coreruleset/
Be sure to move the crs-setup.conf.example file to the modsecurity directory and rename it as crs-setup.conf.
$ sudo mv crs-setup.conf.example /etc/modsecurity/crs-setup.conf
In addition, move the rules directory to the modsecurity directory as well.
$ sudo mv rules/ /etc/modsecurity/
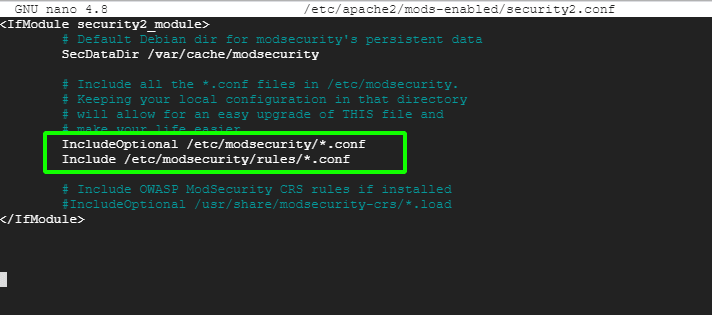
Next, edit the security2.conf file.
$ sudo nano /etc/apache2/mods-enabled/security2.conf
Ensure that it contains the following lines.
IncludeOptional /etc/modsecurity/*.conf
Include /etc/modsecurity/rules/*.conf
Then restart Apache for the changes to persist.
$ sudo systemctl restart apache2
Let us now test our ModSecurity configuration.
Step 4: Testing the ModSecurity Configuration on Ubuntu
Lastly, we need to test that ModSecurity can detect and block suspicious HTTP traffic. To achieve this, we need to edit the default virtual host file.
$ sudo nano /etc/apache2/sites-available/000-default.conf
Next, we will create a blocking rule that will block access to a certain URL when accessed by a web browser.
Append these lines at the end before the ‘Virtualhost’ closing tag.
SecRuleEngine On
SecRule ARGS:testparam "@contains test" "id:254,deny,status:403,msg:'Test Successful'"
Feel free to set the ‘id’ and ‘msg’ tags to whatever desirable values.

Then restart the Apache webserver to apply the changes made to the virtual host configuration file.
$ sudo systemctl restart apache2
On your web browser, try to visit the URL shown with ?testparam=test at the end.
http://server-ip/?testparam=test
You get a ‘403 Forbidden error’ indicating that you have been blocked from accessing the resource.

You can further confirm the client was blocked by checking the error logs as follows.
$ cat /var/log/apache2/error.log | grep “Test Successful”

[ You might also like: How to Install ModSecurity for Nginx on Debian/Ubuntu ]
This is confirmation that we have successfully set up ModSecurity to detect and block unwanted traffic. In this guide, we have walked you through the process of setting up ModSecurity with Apache on Debian/Ubuntu systems.


Don’t run this on Debian 12 (Bookworm) It will create duplicate rules and Apache won’t start. Is the coreruleset already installed with modsecurity-crs anyways now?
@Seth,
Hey, thanks for the heads-up!
Yeah, on Debian 12 (Bookworm), running this as-is can cause duplicate rules which will stop Apache from starting — definitely something to watch out for. About your question, these days the core ruleset usually comes bundled with the modsecurity-crs package, so you probably don’t need to install it separately anymore.
I’ll update the article soon to make this clearer and help avoid confusion for others using Debian 12.
Really appreciate you pointing this out!
Had a problem with duplicated rule IDs.
At the point in the guide where you have to edit /etc/apache2/mods-enabled/security2.conf, make sure it contains the following lines:
Make sure you also comment out the last line like this, or else it will load the rules twice:
3 hours of my day wasted. I tried to install on my old aws ec2 ubuntu 18.04.6 LTS instance and only had problems: &MULTIPART_PART_HEADERS as posted by @Gustavo and errors of multiple duplicate RULE IDs that stop Apache from running.
The problem is: There is no notice at the top of the page of which minimum version(s) of your operating system or libs is required for this to work. That would save a lot of time.
I have an error restarting apache2,
unknown variable &MULTIPART_PART_HEADERS
in file: /etc/modsecurity/rules/REQUEST-922-MULTIPART-ATTACK.conf
Man, I was trolling yesterday by saying (that’s crap), I’m an idiot ^^.
Thanks for this useful article.
Another error I discover is in step 4 for the “configuration”/”override” section the grep command didn’t work because of the low case ‘s’ in the command “grep “Test successful”” and in the configuration file you write it in upper case.
SecRule ARGS:testparam "@contains test" "id:254,deny,status:403,msg:'Test Successful'"
@Emilien,
It is uppercase only, I have corrected the grep command in the article..
Sorry for the typos…
Be careful guys, at step 3 the guide gives you the following command:
But this one is a piece of shit, because that call two times the sudo command, that really crap.
@Emilien,
Corrected the command in the article…
Thanks
Gentlemen, This is wrong. I spent a lot of time on this. If you are doing “sudo a2enmod security2” then not:
“IncludeOptional /etc/modsecurity/*.conf
Include /etc/modsecurity/rules/*.conf ”
I am ready to talk about it to improve it.
Hi Tom. Didn’t work for me.
AH00526: Syntax error on line 829 of /etc/modsecurity/crs/crs-setup.conf:
ModSecurity: Found another rule with the same id
Is it the same with you? how did you solve it?
I’ve got the same. Reverse this step:
What do you mean reverse it?