Nextcloud is an open-source, powerful and secure PHP-based content collaboration platform built for file synchronization and sharing. It offers a safe, secure, and flexible solution that allows users to share one or more files and directories (or folders) on their computer, and synchronize them with a Nextcloud server.
The solution includes the Nextcloud server software, which runs on a Linux system, client applications for Linux, Microsoft Windows and macOS, as well as mobile clients for Android and Apple iOS.
Nextcloud comes with enterprise features for individuals (or small enterprises), large enterprises and service providers. To set up a Nextcloud server requires a LAMP stack (Linux, Apache, MySQL/MariaDB, PHP) installed on your server.
This guide shows how to install the Nextcloud server on the Ubuntu Linux server with Apache and MariaDB as the web server and database software respectively.
Step 1: Installing LAMP on Ubuntu
1. To install a LAMP stack, open a terminal window and connect to your Ubuntu server via SSH. Then run the following command to install Apache, MariaDB server and PHP packages, plus the required and recommended PHP modules.
$ sudo apt-get update
$ sudo apt-get install apache2 mariadb-server libapache2-mod-php7.2 php7.2-gd php7.2-json php7.2-mysql php7.2-curl php7.2-mbstring php7.2-intl php-imagick php7.2-xml php7.2-zip
2. Once the installation of the packages is complete, the installer will setup the Apache2 and MariaDB services to start for now and enable them to automatically start at system boot.
To check if the two services are started and enabled, run the following systemctl commands.
$ systemctl status apache2
$ systemctl status mariadb
$ systemctl is-enabled apache2
$ systemctl is-enabled mariadb
Note: If for one reason or the other the above services are not started and enabled, start and enable them as shown.
$ sudo systemctl start apache2
$ sudo systemctl start mariadb
$ sudo systemctl enable apache2
$ sudo systemctl enable mariadb
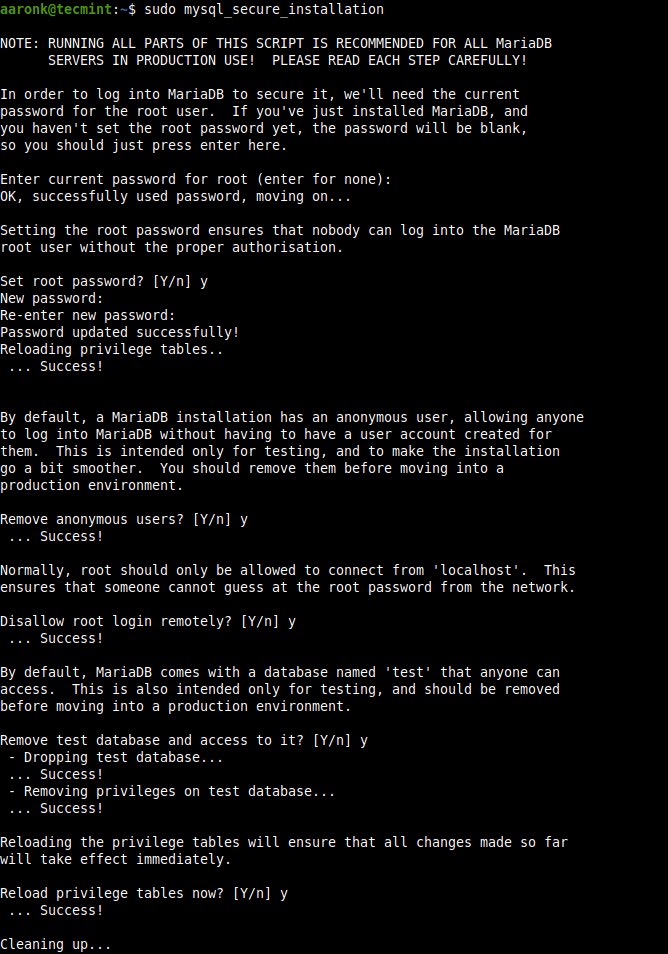
3. Next, secure the MariaDB server installation by running the security script that ships with the package as shown.
$ sudo mysql_secure_installation
Then answer the following questions when prompted (remember to set a strong and secure root password):
- Enter current password for root (enter for none):
enter - Set root password? [Y/n]
y - Remove anonymous users? [Y/n]
y - Disallow root login remotely? [Y/n]
y - Remove test database and access to it? [Y/n]
y - Reload privilege tables now? [Y/n]
y
Step 2: Install Nextcloud in Ubuntu
4. After securing the database installation, you need to create a database and database user for Nextcloud. So, log into the MariaDB server to access the MySQL shell.
$ sudo mysql -u root -p
And run the following sql commands (replace “=@!#@%$lab” with your secure password).
MariaDB [(none)]> CREATE DATABASE nextcloud;
MariaDB [(none)]> CREATE USER ncadmin@localhost IDENTIFIED BY '=@!#@%$lab';
MariaDB [(none)]> GRANT ALL PRIVILEGES ON nextcloud.*  TO ncadmin@localhost IDENTIFIED BY '=@!#@%$lab';
MariaDB [(none)]> FLUSH PRIVILEGES;
MariaDB [(none)]> EXIT;
5. Now go to the Nextcloud Download Page, then click on Download Nextcloud Server => Download Nextcloud to grab a .zip archive or run the following commands to download it from the command-line using wget command.
$ sudo wget -c https://download.nextcloud.com/server/releases/nextcloud-18.0.0.zip
6. Next, extract the archive contents and copy the extracted nextcloud directory/folder into your web server’s document root. Also set the appropriate ownership on the nextcloud directory, as follows.
$ sudo unzip nextcloud-18.0.0.zip
$ sudo cp -r nextcloud /var/www/html/
$ sudo chown -R www-data:www-data /var/www/html/nextcloud
Step 3: Configure Apache to Serve Nextcloud
7. The next step is to create an Apache configuration file for Nextcloud under the /etc/apache2/sites-available directory.
$ sudo vim /etc/apache2/sites-available/nextcloud.conf
Copy and paste the following lines in the file (replace /var/www/html/nextcloud/ if your installation directory is different).
Alias /nextcloud "/var/www/html/nextcloud/"

<Directory /var/www/html/nextcloud/>
  Require all granted
  Options FollowSymlinks MultiViews
  AllowOverride All

 <IfModule mod_dav.c>
  Dav off
 </IfModule>

 SetEnv HOME /var/www//html/nextcloud
 SetEnv HTTP_HOME /var/www/html/nextcloud
</Directory>
Then save the file and close it.
8. Next, enable the newly created site and other Apache modules in the Apache configuration structure as shown.
$ sudo a2ensite nextcloud.conf
$ sudo a2enmod rewrite
$ sudo a2enmod headers
$ sudo a2enmod env
$ sudo a2enmod dir
$ sudo a2enmod mime
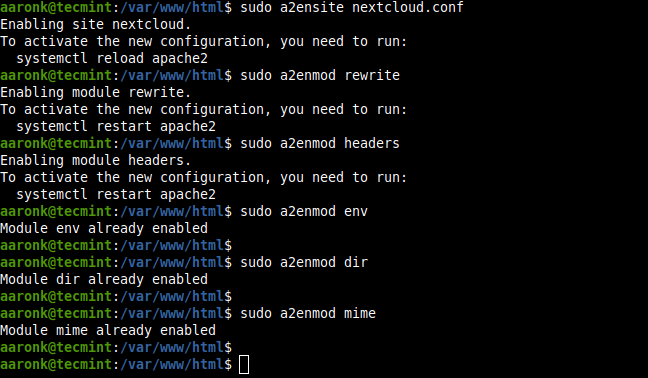
9. Finally, restart the Apache2 service for the recent changes to take effect.
$ sudo systemctl restart apache2
Step 4: Complete Nextcloud Installation via Graphical Wizard
10. Now you need to complete the installation via the graphical installation wizard from a web browser. Open your browser and point it to the following address:
http://SERVR_IP/nextcloud/
OR
http://SERVER_ADDRESS/nextcloud/
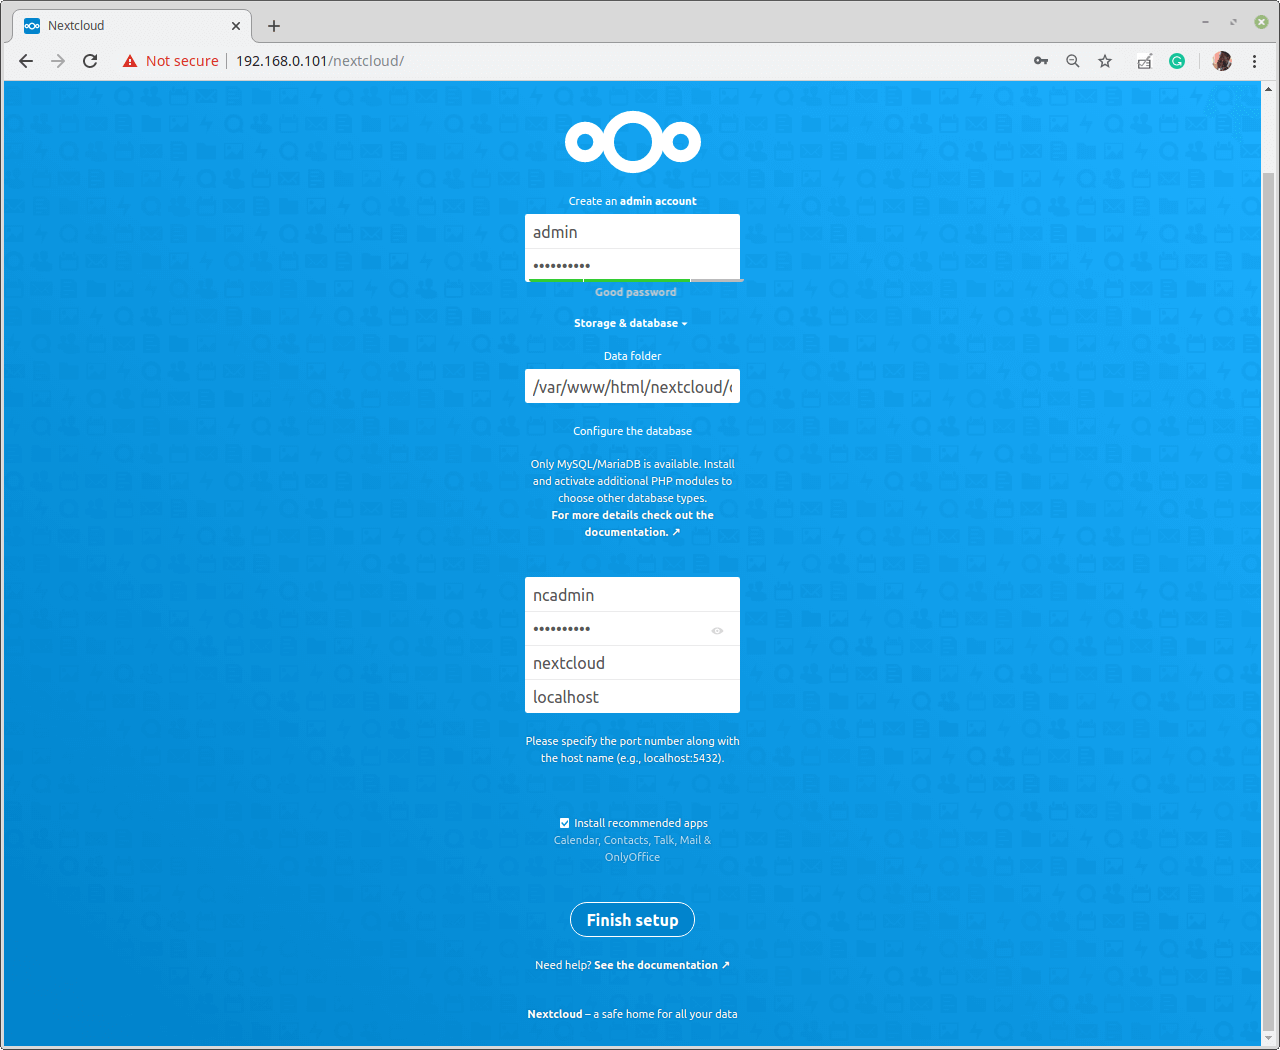
11. Once the installation wizard loads, create a nextcloud superuser/admin user account. Enter the username and password. Besides, click on the Storage and Database link to access additional installation configuration options for your Nextcloud data directory and database.
Then fill in the database connection details as shown in the following screenshot and click Finish Setup.
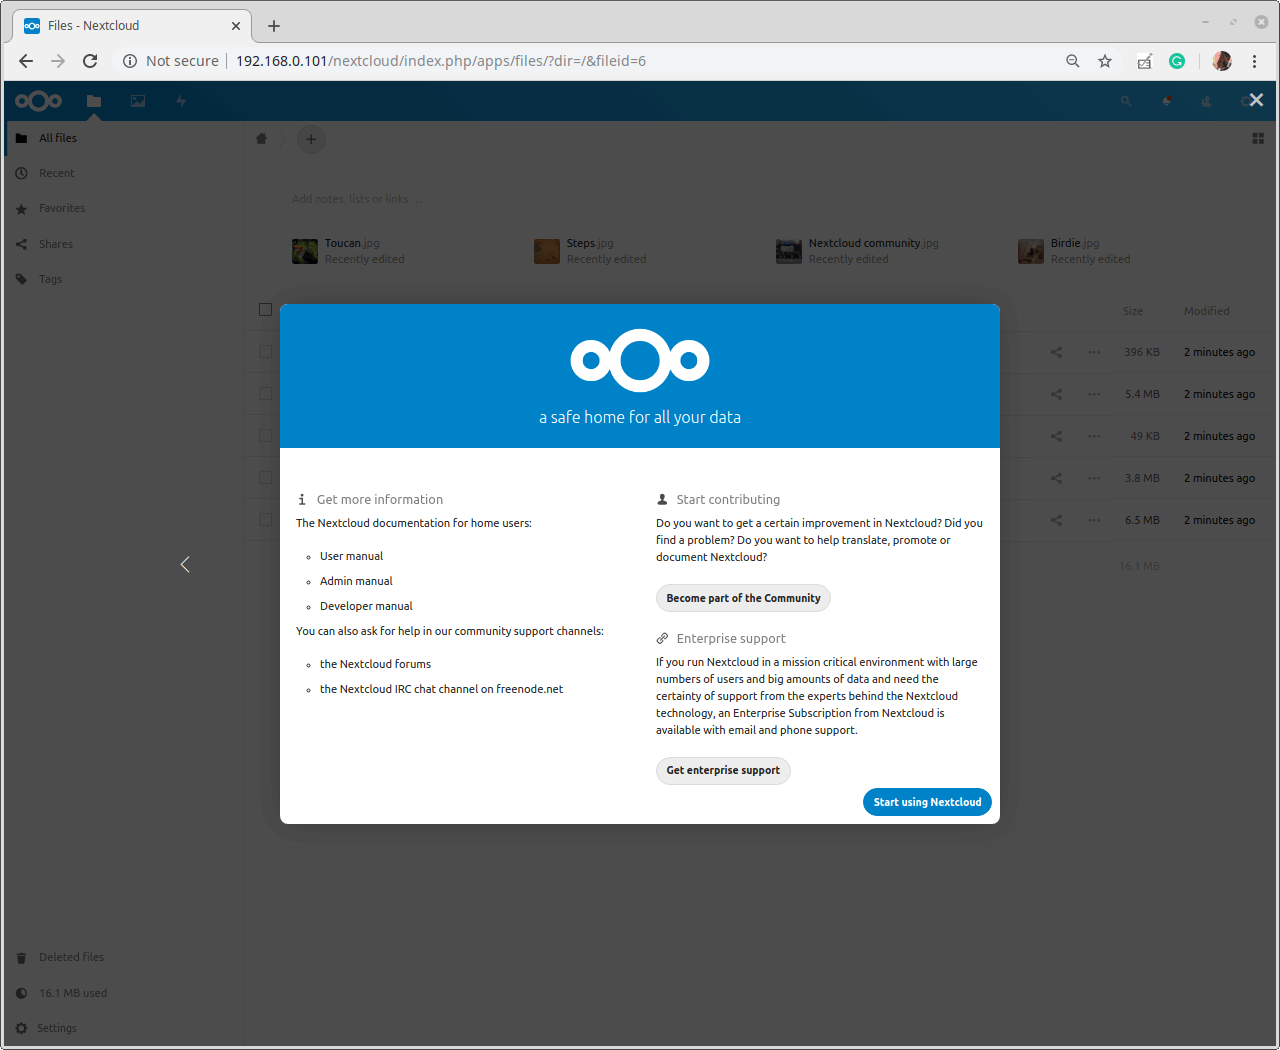
12. When the installation is complete, you will see the following window. Click on the forward arrow that will appear at the right side of the blue window to proceed and follow the prompts.
13. Then in the next window, click Finish Setup to start using your new Nextcloud server.
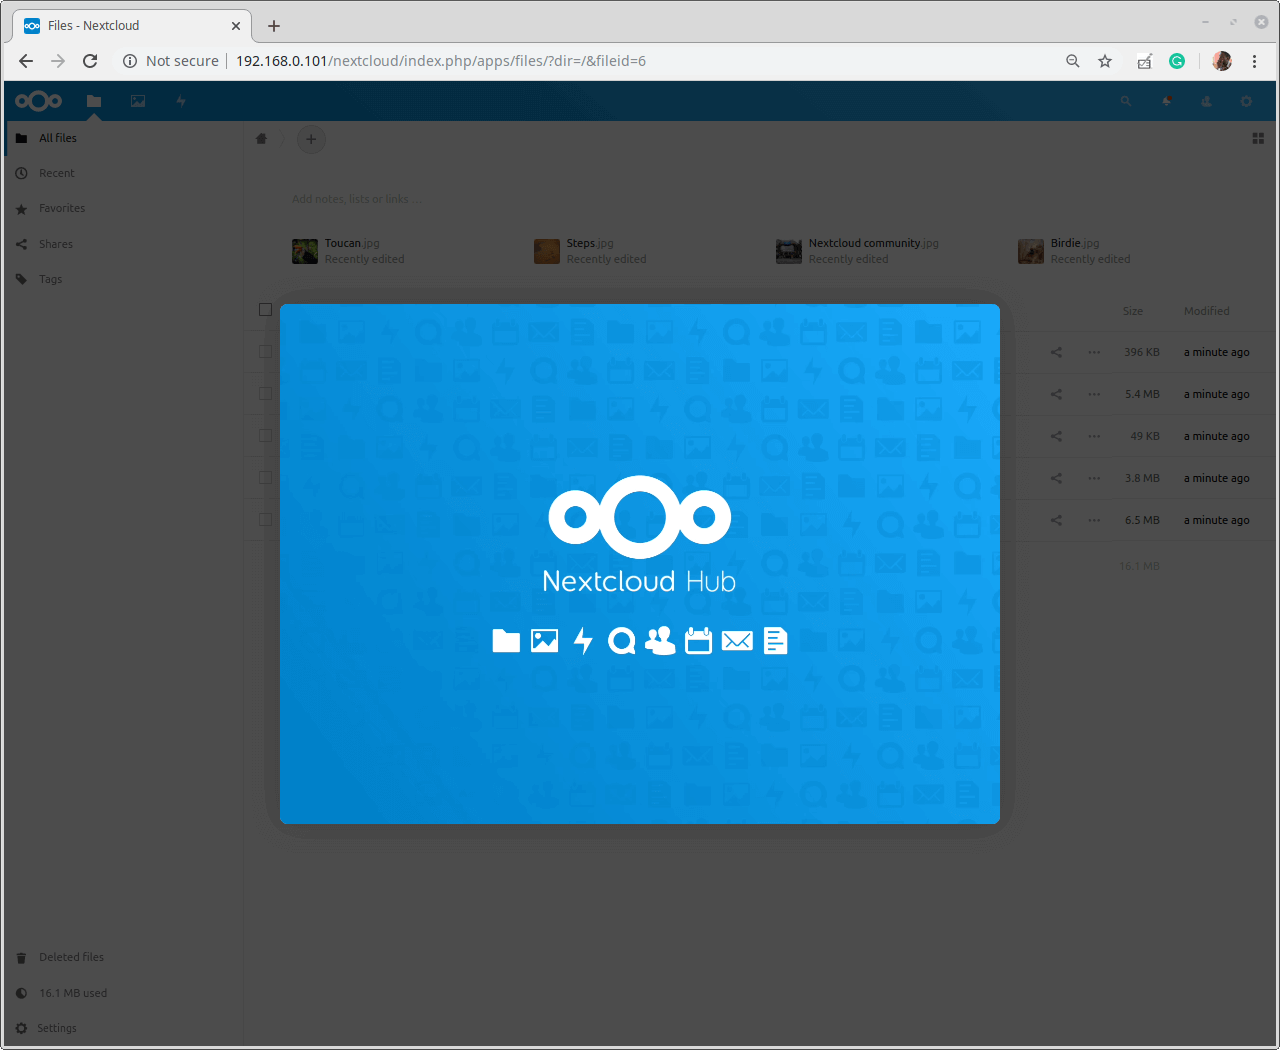
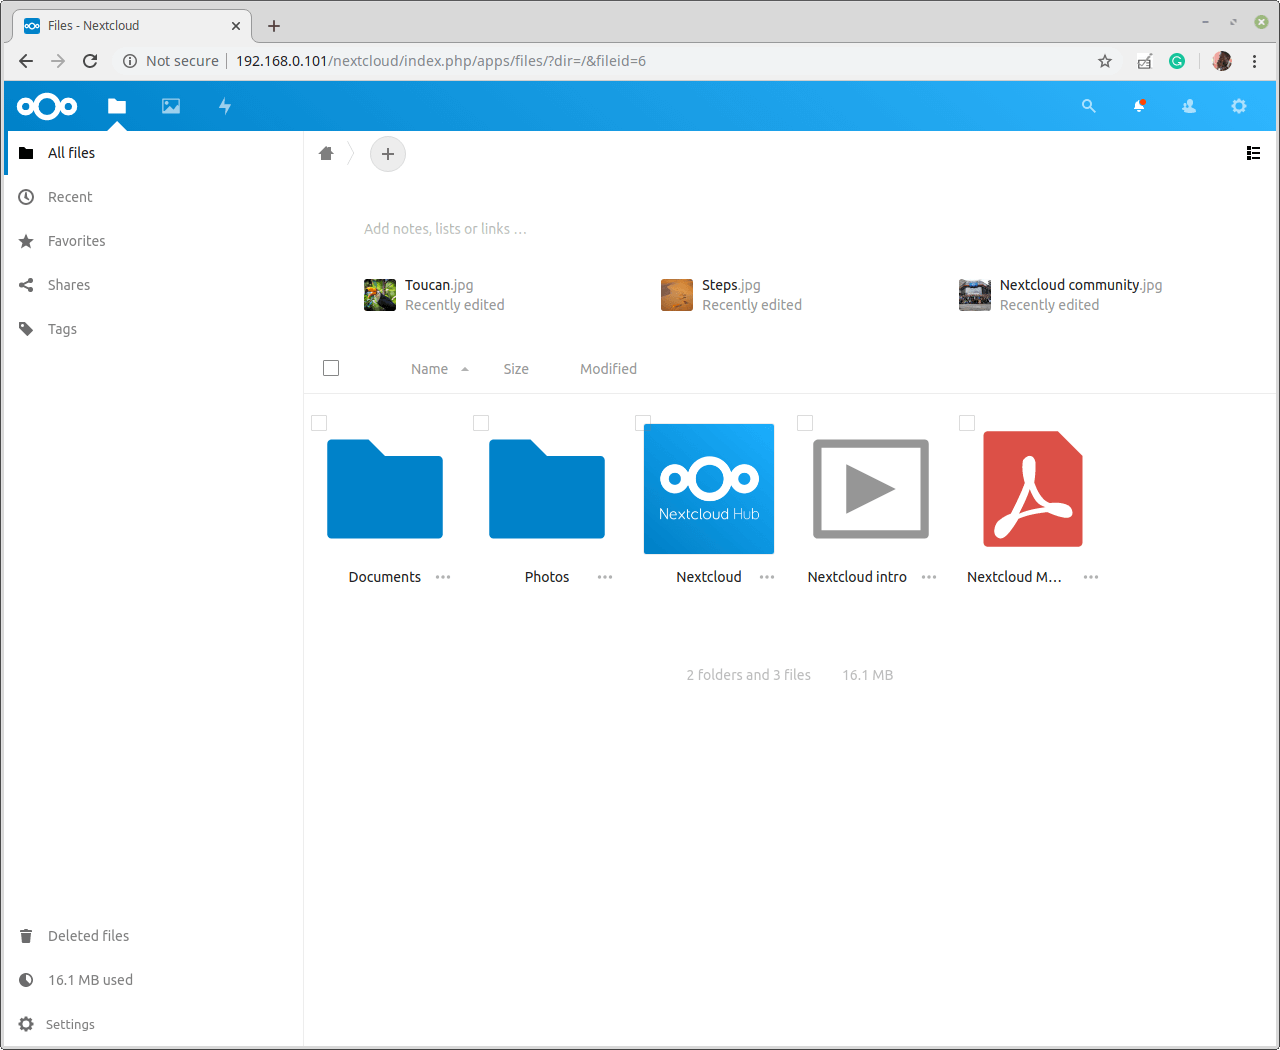
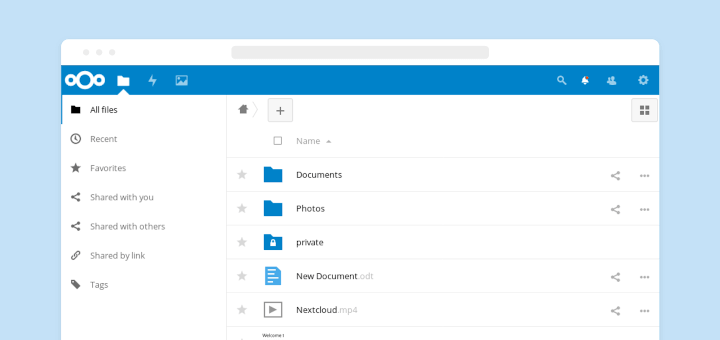
14. The following screenshot shows the Nextcloud web browser client’s main dashboard.
For more information and server configurations, see the Nextcloud admin manual and to learn how to use it, read the Nextcloud user manual.
That’s all! In this article, we have shown how to set up Nextcloud server software in the Ubuntu Linux server, using the Apache web server and MariaDB database. If you have any questions concerning this guide or any additions, reach us via the comment form below.


I followed all the steps and I am able to get into nextcloud, however, it gives me a big error saying that
So…. any tips?
Are you sure you installed all php files?
Thank you so much for this. This is the only howto which just works. Great job and thank you again!
@krzysztof
Welcome, thanks for the feedback.