One of the easiest ways to protect your Ubuntu systems is by keeping up to date software on them. Therefore applying updates frequently is an important part of maintaining secure systems. In this article, we will show how to install security updates in Ubuntu and Linux Mint systems.
Intalling Security Updates on Ubuntu
If your system has the update-notifier-common package installed, Ubuntu will alert you about pending updates via the message of the day (motd) upon console or remote login.
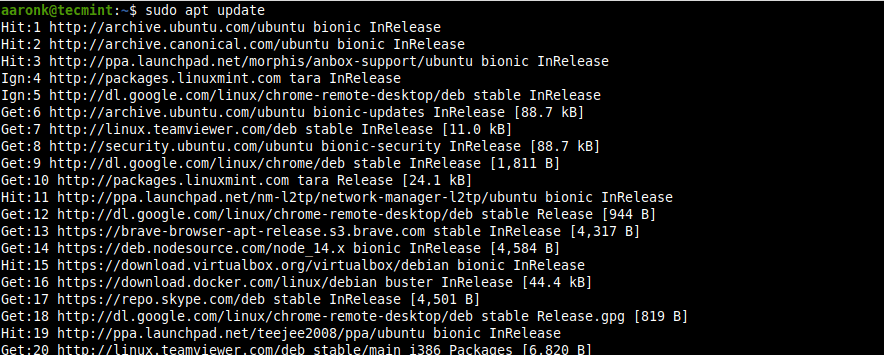
Once you have logged into your Ubuntu system, you can check for new updates using the following apt command.
$ sudo apt update
Updating a Single Package on Ubuntu
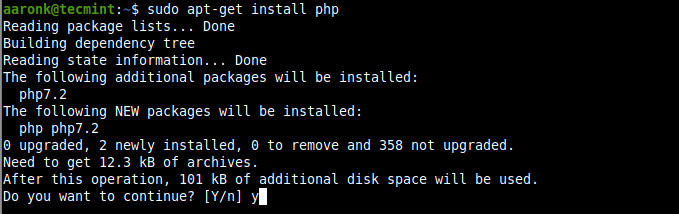
To check and update a single package, for example, a package called php, after updating your system’s package cache, then update the required package as follows. If the php package already installed it will try to update to the latest version available:
$ sudo apt-get install php
Upgrading a Ubuntu System
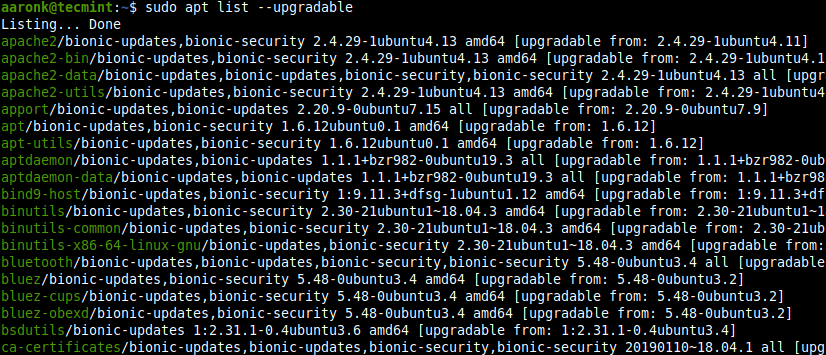
To list all the newly available updates for your Ubuntu system, run:
$ sudo apt list --upgradable
To install all updates, run:
$ sudo apt-get dist-upgrade
Installing Latest Security Updates Automatically on Ubuntu
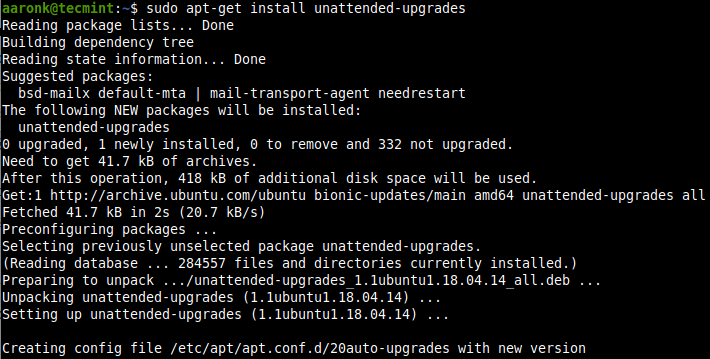
You can use the unattended-upgrades package to keep the Ubuntu system with the latest security (and other) updates automatically. To install the unattended-upgrades package if it isn’t already installed, run the following command:
$ sudo apt-get install unattended-upgrades
To enable automatic updates, run:
$ sudo dpkg-reconfigure unattended-upgrades
Then configure the package to install automatic updates by selecting yes from the interface below.
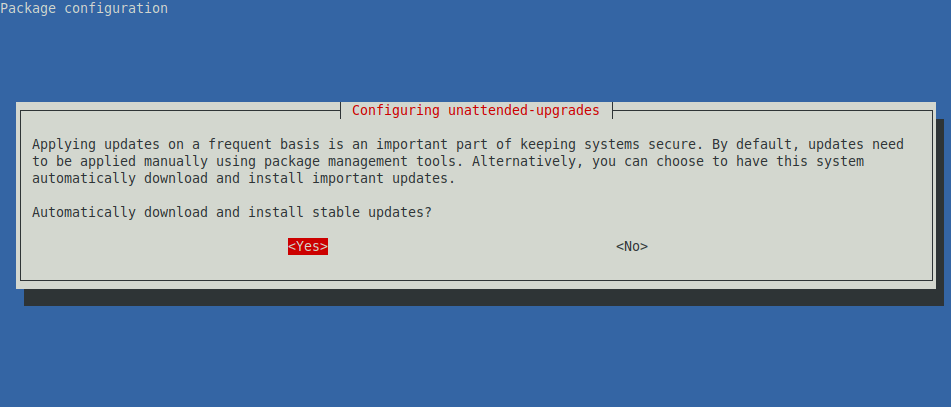
Attention: Please note that updates may restart services on your server, so applying updates automatically may not be appropriate for all environments particularly servers.
You can run unattended-upgrades manually also:
$ sudo unattended-upgrade
Or add the -d flag to enable debugging mode:
$ sudo unattended-upgrade -d

That’s all for now. For any queries or comments, you would like to share with us, use the comment section below.


Hi there,
I run both these commands below but in the next login, there are as many updates available as before. Would you please guide me? what can I do?
$ sudo unattended-upgrade -d (output: 0 upgraded, 0 newly installed, 0 to remove, and 6 not upgraded)
$ sudo apt install unattended-upgrades (output: No packages found that can be upgraded unattended and no pending auto-removals)
This update will automatically restart the server or not?
@Robi,
You need to manually reboot the Ubuntu server after applying updates…