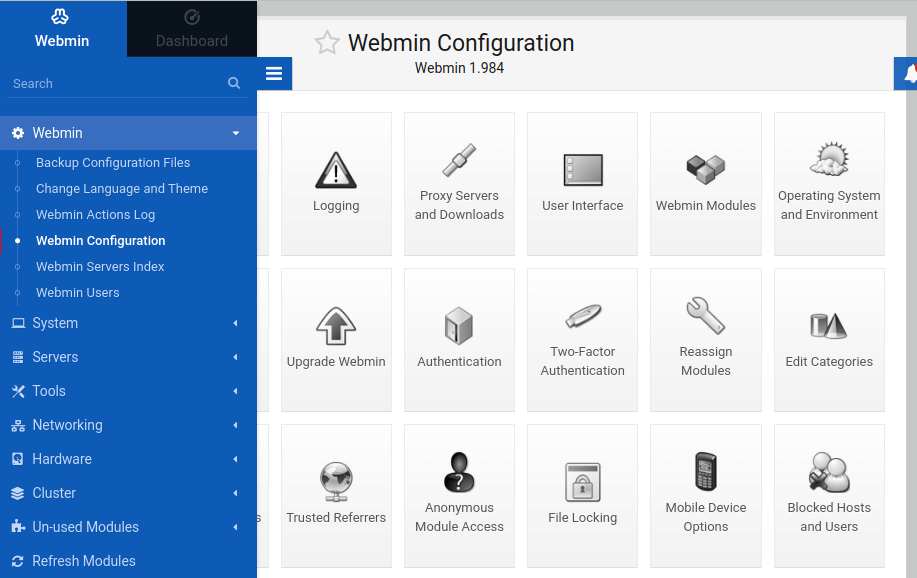
Webmin is an open-source web-based system configuration tool for Linux system administration. With the help of this tool, we can manage internal system configuration such as setting up user accounts, disk quotas, services configuration like Apache, DNS, PHP, MySQL, file sharing, and much more.
Webmin application is based on Perl module and it uses TCP port 10000 with OpenSSL library for communicating via browser.
Some of the things you can do with Webmin are:
- Create, edit and delete user accounts on your system.
- Share Files and Directories with other Linux systems via the NFS protocol.
- Set up Disk Quotas to manage the amount of disk space available to users.
- Install, view, and delete software packages on the system.
- Change system’s IP address, DNS settings, and routing configuration.
- Set up a Linux Firewall to secure your system.
- Create and configure virtual hosts for the Apache Webserver.
- Manage databases, tables, and fields in a MySQL or PostgreSQL database server.
- Share files and directories with Windows systems via the Samba file sharing.
In this article, you will learn how to install the latest version of the Webmin system administration tool in Linux systems.
Installing Webmin Control Panel in Linux
We are using the Webmin repository for installing the latest Webmin tool with their required dependencies and we also receive up-to-date automatic updates of Webmin via repository.
Install Webmin in RHEL Systems
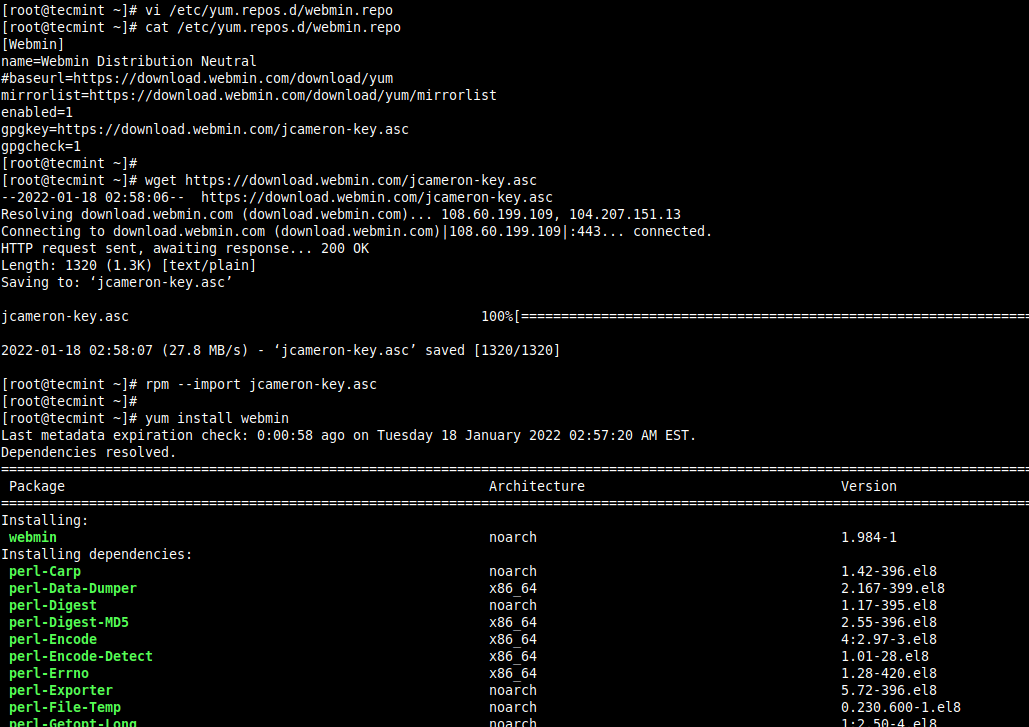
On RHEL-based distributions, such as Fedora, CentOS, Rocky & AlmaLinux, you need to add and enable Webmin repository, do to this create a file called /etc/yum.repos.d/webmin.repo and add the following lines to it as a root user.
# vi /etc/yum.repos.d/webmin.repo
[Webmin]
name=Webmin Distribution Neutral
#baseurl=https://download.webmin.com/download/yum
mirrorlist=https://download.webmin.com/download/yum/mirrorlist
enabled=1
gpgkey=https://download.webmin.com/jcameron-key.asc
gpgcheck=1
You should also download and install the GPG key with which the packages are signed, with the commands:
# wget https://download.webmin.com/jcameron-key.asc
# rpm --import jcameron-key.asc
You will now be able to install Webmin with the commands:
# yum install webmin
Install Webmin in Debian Systems
Similarly, you need to add and enable Webmin APT repository to the /etc/apt/sources.list file on your Debian systems such as Ubuntu and Mint.
$ sudo nano /etc/apt/sources.list
Add the following line at the bottom of the file. Save and close it.
deb https://download.webmin.com/download/repository sarge contrib
Next, import and install GPG Key for installing signed packages for Webmin.
$ wget https://download.webmin.com/jcameron-key.asc
$ sudo apt-key add jcameron-key.asc
On Debian 11 and Ubuntu 22.04 or higher, the commands are :
$ wget https://download.webmin.com/jcameron-key.asc
$ sudo cat jcameron-key.asc | gpg --dearmor > /etc/apt/trusted.gpg.d/jcameron-key.gpg
You will now be able to install Webmin with the commands:
$ sudo apt-get install apt-transport-https
$ sudo apt-get update
$ sudo apt-get install webmin
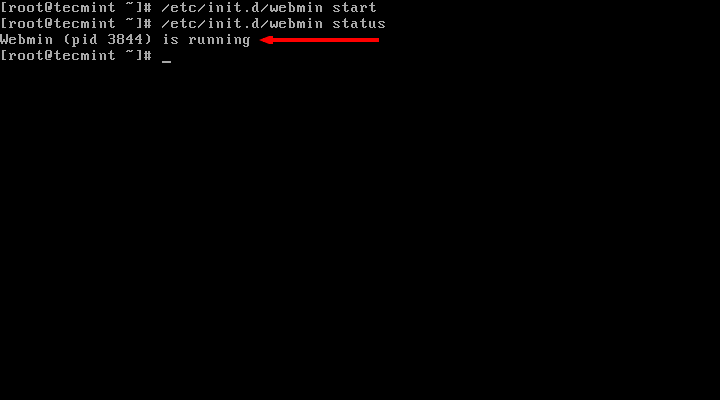
Starting Webmin in Linux
Run the following commands to start the service.
------------------- [on RedHat based systems] -------------------
# /etc/init.d/webmin start
# /etc/init.d/webmin status
------------------- [on Debian based systems] -------------------

$ sudo /etc/init.d/webmin start
$ sudo /etc/init.d/webmin status

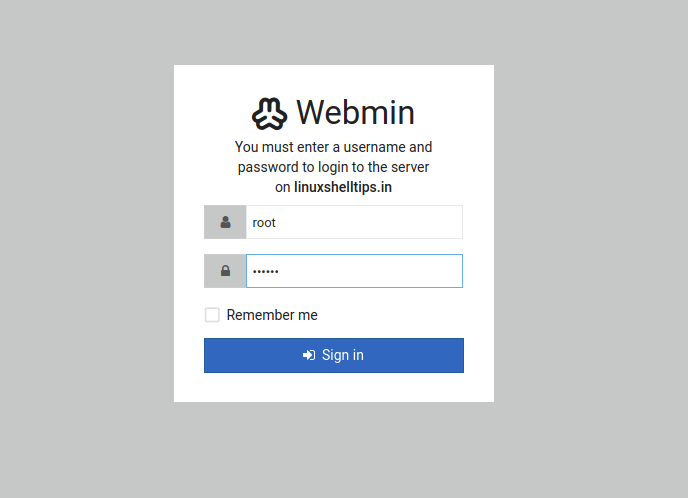
Step 3: Accessing Webmin Control Panel
By default Webmin runs on port 10000, so we need to open the Webmin port on our firewall to access it. The easiest way to open the port on the firewall is using the following commands.
------------------- [On FirewallD] -------------------

# firewall-cmd --add-port=10000/tcp
# firewall-cmd --reload
------------------- [On UFW] -------------------

$ sudo ufw allow 10000
------------------- [On IPtables] -------------------

# iptables -A INPUT -p tcp -m tcp --dport 10000 -j ACCEPT
# service iptables save
# /etc/init.d/iptables restart
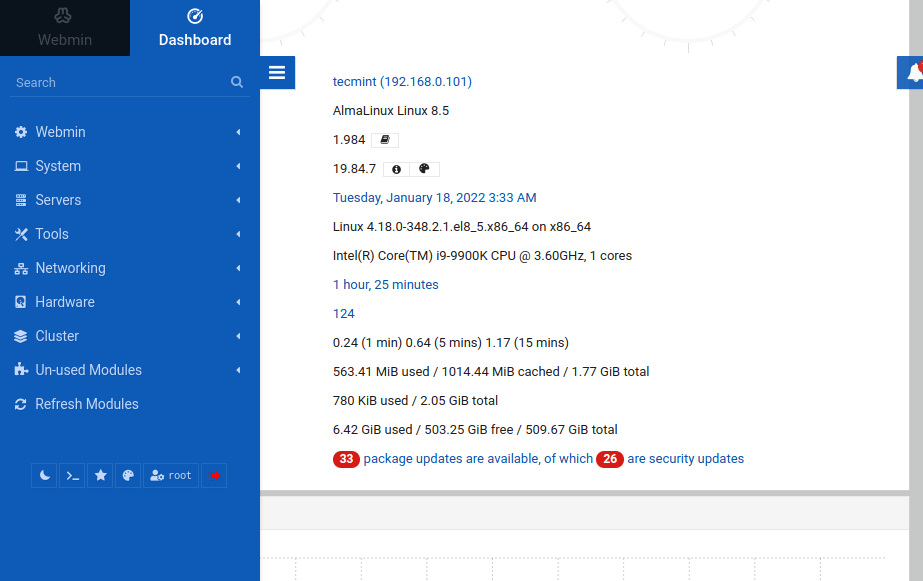
Now we should be able to access and login to Webmin using URL http://localhost:10000/ and enter the username as root and password (current root password), for remote access just replace localhost with your remote IP address.
http://localhost:10000/
OR
http://IP-address:10000/
For more information visit webmin documentation.


Hi All,
How can I join all the webmin servers into one console to view all 50 servers instead of logging into each one?
Hi Ravi,
Same here, followed instructions to a tee and not working. Using Centos 8.
not connecting. Yes, I did:
When I look at my firewall settings, I see ‘Cockpit with port 9090’, which is the default Centos Server Web portal monitoring tool.
Thank you,
YVan
@Yvan,
Could you confirm that Webmin is running on port 10000?
Hi Ravi,
I did the following and all is good now:
Thank you for this guide, very well done and appreciated.
Keep on the good works!:-)
Yvan
Instructions followed exactly the instructions, Webmin is running, firewall is off. Unfortunately it’s not working on Linux Mint 19
@Gerard,
May I know any error messages you getting while running Webmin on Linux Mint 19?
Unfortunately no error message, browser is doing nothing. I tried several settings in iptables, nothing helps. Any logging I could check?
@Gerard,
Let me try installing Webmin on Linux Mint 19, i will keep you updated..
Super easy to install in FreeBSD or FreeNAS in a jail.
http://doxfer.webmin.com/Webmin/Installation
(Inside of a jail set password with “passwd”)
pkg update
pkg install webmin
/usr/local/lib/webmin/setup.sh
echo “webmin_enable=”YES”” >> /etc/rc.conf
/usr/local/etc/rc.d/webmin start
Once installed navigate to the IP address (hint try ifconfig to find it) and port. Login and start using it.
Working!!! Greate! Thanks
i have installed correctly but the username and pass is not working
i try to figure that but i cant figure /usr/libexec/webmin/ folder
there is not libexec folder
the above tutorial didnt helpd me……
ip:10000
Nothing happened.
How to open the port 10000 ………..
Already instructed in the article, how to open a webmin port please read a article carefully..
I am still unable to access webmin…
i want to run on port 80
what should i do???
i need serious help….
Try adding the custom port in /etc/webmin/miniserv.conf file
Can we use Web for patching multiple CENTOS servers in environment.
I have install Webmin on my Systems , but i am not able to access it.It takes me to default page of Apache.Even i have added rule in iptable for the same with port 1000, 10000.
Please contact me on my email if required.
Have you able to open in from localhost in commandline using lynx or links browser? Please let me know..
can not install webmin on a vps, can you help?
Surely, but can you tell me why you not able to install it? is there any erros you getting while installing?
Fedora 20 uses firewalld not iptables so everything dies.
This will fix it
systemctl disable firewalld.service
systemctl stop firewalld.service
systemctl enable iptables.service
systemctl enable ip6tables.service
systemctl start iptables.service
systemctl start ip6tables.service
Of course if you are like me and like to install minimal systems you may need to run this command first.
yum -y install iptables-services iptables-utils
http://download.webmin.com/download/yum/mirrorlist is not working ….. what to do?
I’ve just checked, it’s working fine.
Solved it, downloaded rpm directly from webmin….
I installed it on Ubuntu. I was stuck at Step3.. I didnt do any restart of firewalls. Directly tried to access https://localhost:10000/ . It asked for UNAME and PWD. What’s the password I should enter here ?? I tried giving “root”, “password”, and my System Root password. Nothing worked. It just blocked my localhost IP ( 127.0.0.1 ) Help me
Thanks Ravi … it is really helpfull.
how can i view the incoming mail in my webmin that runs on a fedora 18
Dear sir ,
I am getting this error
root@localhost ~]# wget http://www.webmin.com/jcameron-key.asc
–2013-08-17 04:00:33– http://www.webmin.com/jcameron-key.asc
Resolving http://www.webmin.com... 216.34.181.97
Connecting to http://www.webmin.com|216.34.181.97|:80… connected.
HTTP request sent, awaiting response… 200 OK
Length: 1320 (1.3K) [text/plain]
Saving to: âjcameron-key.asc.6â
100%[======================================>] 1,320 –.-K/s in 0.005s
2013-08-17 04:00:39 (276 KB/s) – âjcameron-key.asc.6â
[root@localhost ~]# rpm –import jcameron-key.asc
error: jcameron-key.asc: key 1 import failed.
can u plz help me out in this matter
Regards
Nabeil Pasha
1. Open up the browser and navigate to “http://www.webmin.com/jcameron-key.asc”.
2. Copy whole output and Paste into the file “public.gpg.key”.
3. Run import command again to import GPG key.
That’s it! GPG key installed successfully now do:
hi,
thanks, installed without any fuss.