When you delete a file accidentally or intentionally on your system using ‘shift + delete‘ or delete option or empty Trash, the file content is not destroyed from the hard disk (or any storage media).
It is simply removed from the the directory structure and you cannot see the file in the directory where you deleted it, but it still remains somewhere in your hard drive.
If you have the appropriate tools and knowledge, you can recover lost files from your computer. However, as you store more files on your hard disk, the deleted files are overwritten, you may only recover recently deleted files.
In this tutorial, we will explain how to recover lost or deleted files on a hard disk in Linux using Testdisk, is a remarkable recovery tool ships in with a free tool called PhotoRec.
PhotoRec is used to recover lost files from storage media such as hard drives, digital camera and cdrom.
Install Testdisk (PhotoRec) in Linux Systems
To install Testdisk by running the relevant command below for your distribution:
------- On Debian/Ubuntu/Linux Mint -------
$ sudo apt-get install testdisk

------- On CentOS/RHEL/Fedora -------
$ sudo yum install testdisk

------- On Fedora 22+ -------
$ sudo dnf install testdisk

------- On Arch Linux -------
$ pacman -S testdisk

------- On Gentoo -------
$ emerge testdisk
In case it is not available on your Linux distribution’s repositories, download it from here and run it on a Live CD.
It can also be found in rescue CD such as Gparted LiveCD, Parted Magic, Ubuntu Boot CD, Ubuntu-Rescue-Remix and many more.
Once the installation is complete, start PhotoRec in a text window as follows with root privileges and specify the partition from which the files where deleted:
$ sudo photorec /dev/sda3
You’ll see the interface below:
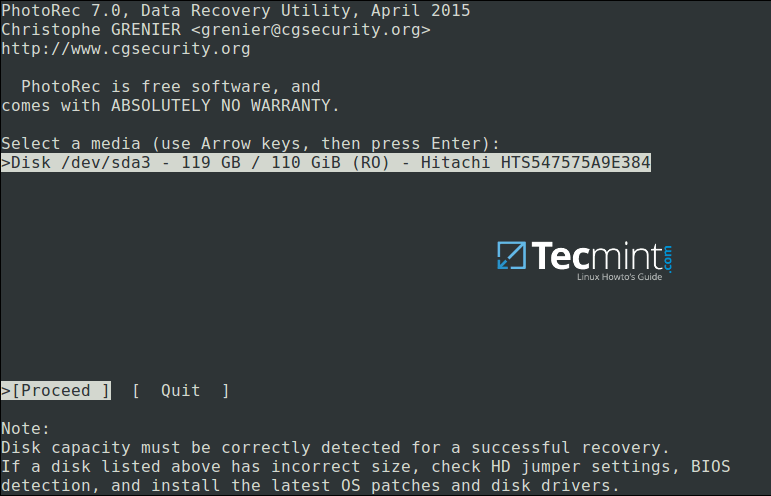
Use the right and left arrow keys to select a menu item, and press Enter. To continue with the recovery operation, select [Proceed] and hit Enter.
You will be at the following interface:
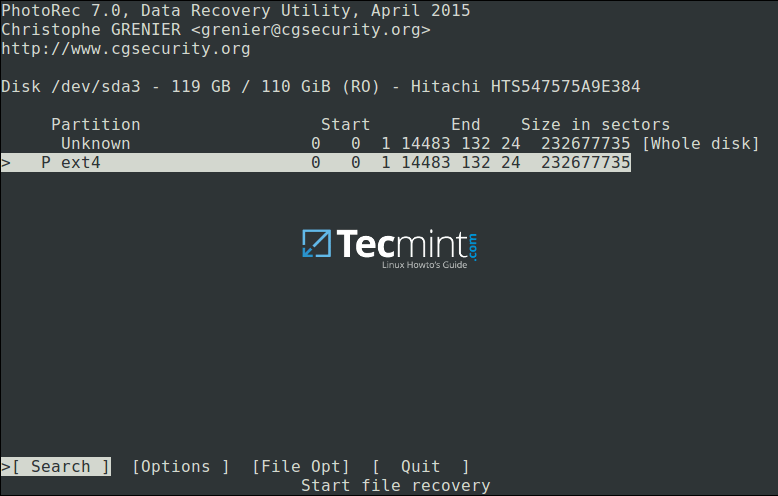
Select [Options] to view available recovery operation options as in the interface below:

Press Q to move back, at the interface below, you can specify the file extensions you want to search and recover. Therefore, select [File Opt] and press Enter.
Press s to disable/enable all file extensions, and in case you have disabled all file extensions, only choose types of files you want to recover by selecting them using right arrow keys (or left arrow key to deselect).
For instance, I want to recover all .mov files that I lost on my system.
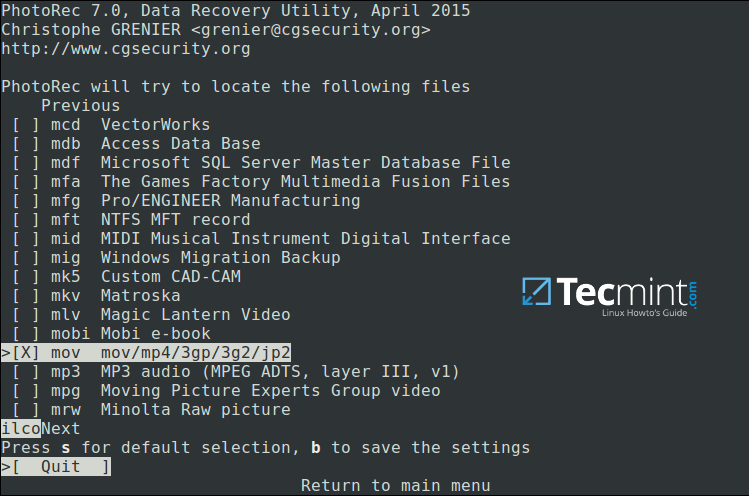
Then press b to save the setting, you should see the message below after pressing it. Move back by hitting Enter (or simply press Q button), then press Q again to go back to the main menu.

Now select [Search] to start the recovery process. In the interface below, choose the filesystem type where the file(s) were stored and hit Enter.
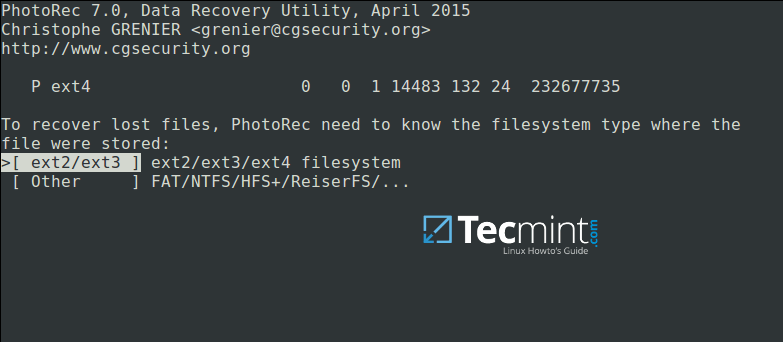
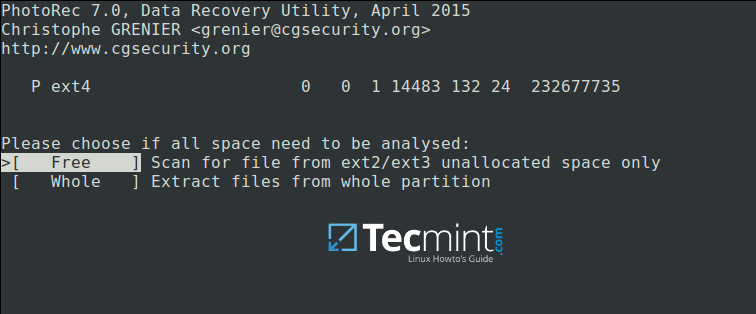
Next, choose if only free space or the whole partition needs to be analyzed as below. Note that choosing whole partition will make the operation slower and longer. Once you have selected the appropriate option, press Enter to proceed.
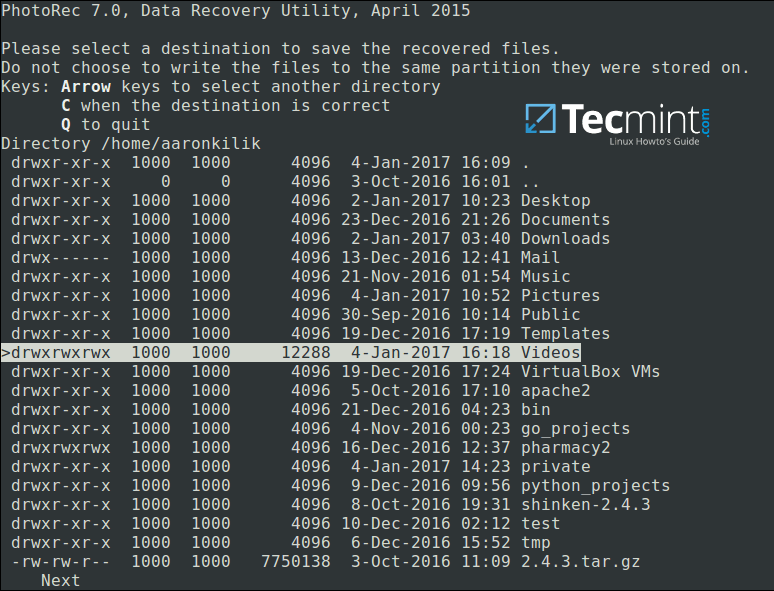
Closely select a directory where recovered files will be stored, if the destination is correct, press C button to continue. Choose a directory on a different partition to avoid deleted files being overwritten when more data is stored on the partition.
To move back until the root partition, use the left arrow key.
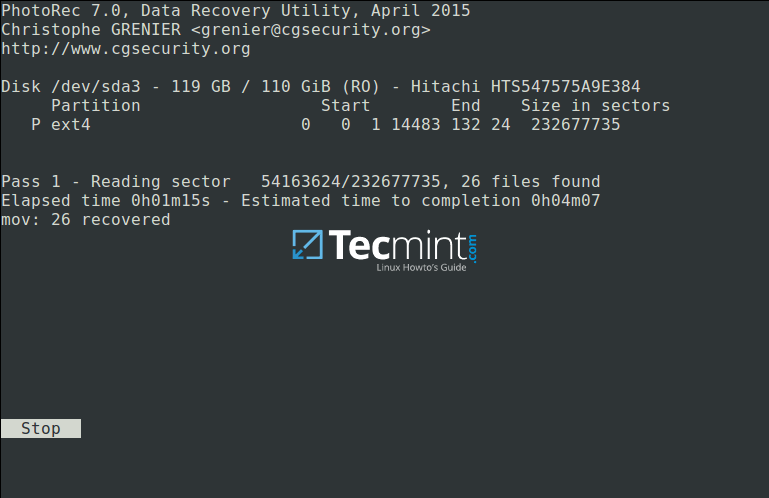
The screenshot below shows deleted files of the specified type being recovered. You can stop the operation by pressing Enter.
Note: Your system may become slow, and possibly freeze at certain moments, so you need to be patient until when the process is complete.
At the end of the operation, Photorec will show you the number and the location of files recovered.

The recovered files will be stored with root privileges by default, therefore open your file manager with elevated privileges to access the files.
Use the command below (specify your file manager):
$ gksudo nemo
or
$ gksudo nautilus
For more information, visit PhotoRec homepage: http://www.cgsecurity.org/wiki/PhotoRec.
That’s all! In this tutorial, we explained the necessary steps to recover deleted or lost files from hard disk using PhotoRec. This is so far the most reliable and effective recovery tool I have ever used, if you know any other similar tool, do share with us in the comments.


Hi,
Great, I just recovered several picture files accidentally deleted!
But please note the following:
I had 2 files for each picture, one JPG, and a second ARW, because of Sony camera settings. ARW is the Sony RAW version but is not included in the file type list to be recovered.
Therefore I ran PhotoRec the first time specifying to recover the JPG files. Files were recovered successfully.
Then I run PhotoRec for a second time, leaving all file extensions selected [x]. During the process the console told me about several tiff file types found and at the end I found my recovered ARW files with SR2 extension, and no one JPG.
Furthermore, the file names resulting are completely random, not matching JPG and SR2, but this is even secondary, having recovered my lost job.
I hope this comment helps you in a future release.
thanks a lot
Mario
Please delete my previous post. It is a wrong fact. My partition was only almost full so it scanned it in less than one second.
Help, PhotoRec tool is powerful but sometimes it refuses to scan a partition again why?
It answers by displaying the last results for this partition…
My files got recovered but are in small sizes like very low resolution.
How can I get them back as they were before? High resolution?
Please help.
Thank you!
This program worked for me. I’m a storm chaser here in southern Louisiana. I went out Saturday evening to get some lightning shots and watch a storm that passed by my house. When I got home, I transferred the images from my SD card to my external hard drive. When I got up yesterday morning, the pictures weren’t there. I scanned my whole external drive yesterday to no avail. When I got up this morning, I scanned my SD card and the pictures were still on there. It even had pictures from earlier this year. Thanks for this.
I have mounted a pen drive where the files were deleted from, but when i enter the file path it says “unable to open file or device”.
Hi, I dont have an sda3 folder in my dev folder. What should I do?
specify the partition from which the files where deleted:
“sda3” us an example, put the drive you are trying to recover in that spot, whether sda1 or sda 2, an extended logical drive or a USB drive (i,e,sda1).
Apparently, doesn’t work on Linux Mint 19. Can it recover
.xlsfiles ?Will this tool recover .tgz files?
@John,
Yes, it will recover any files with any extension, just give a try and see..
I am limiting by filetype. I don’t see an option to select tgz guessing it will get the file if I select tar and or gz? I am searching an ext3 filesystem.
@John,
I think so, select file type as tar and gz, and see if it works..
I was just one step away from finishing a research project and all of sudden one of my students removed everything by
"rm -rf *"command. I recovered all my python files and manuscript with this helpful guide you provide here. I don’t know how to say thank you for sharing this knowledge.@Newsha
Oh, that’s great, we are glad to know this. Many thanks for the feedback.
Any Assistance would be greatly appreciated. Trying to recover a series of deleted MS Office files on a windows 10 system. I have booted the machine to a SystemRescueCD Live USB drive which includes TestDisk (PhotoRec) and Gparted.
From the command line, I have mounted a second USB drive (to store the recovered files to) as well as the Windows partition on the ssd hard disk I am trying to recover files from. (Note: there are 4 partitions on this SSD hard drive – Recovery etc. I am only mounting the Windows partition). Once mounted I can view the files and folders of the windows partition through the Live USB file system (nautilaus I think).
When I launch photorec from the command line I get the choice of log file type (I choose none) and am then presented with a list of drives to recover data from. I can see both USB drives (the Live USB boot drive and the blank USB drive, but cannot see the windows drive/partition I want to recover data from.
NOTE: The windows drive is the internal drive of the laptop that I have mounted after boot to live USB drive. I tried unmounting the windows mount and running photorec again but it’s the same result. It doesn’t see the windows partition or the drive itself.
I thought I would give Gparted a shot, and Gparted can see all 4 partitions (nvme0n1p1, nvme0n1p2, nvme0n1p3, and nvme0n1p4) however, it displays the device name as nvme0n1p1 which is the first partition and I can’t seem to choose the other partitions to attempt data rescue on.
I can see them in the Gparted Window showing the device partitions, but can’t act on any of them, so i thought I would come back to Photorec to see if I can’t figure out why it isn’t seeing the windows partition whether I have it mounted or not.
Additional, before booting to USB key, I turned off bitlocker in windows, and disabled hibernation and fast startup.
Any advice you can provide to get Photorec to see the windows partition to recover this data would be greatly appreciated.
I accidentally deleted 100 GB of folders and files. Recovering right now. Seems to work! Thank you. However, many new folders and randomly named files. Do you have a strategy for finding what among thousands of pointless files (e.g. cached web-content…)?
@Bo
You will always see new folders and randomly named files, this is part of any data recovery process. You have to manually dig through to find all your important folders and files.
I downloaded, followed the install instructions, it installed, tried:
and got this message:
@J
Does the partition sda3 exist?
Hello everyone, I have a question, Can I install photorec on raspbian?
Greetings
@Alex
Try to install it via your package manager as shown in the guide.
Thanks, I will try :)
Wow, great writeup.
I had to pull the chip out of my Canon to make it visible as a recoverable disk, but once I did, thes instructions recovered every photo!
@Robert
Oh, great, we are glad that this guide helped you out. Many thanks for the feedback.
I tried to move photos from my camera to a new folder on my hard drive but the folder landed in the camera storage by mistake. So the photos were moved into the folder and I am unable to access the folder, which is also now no longer visible.
I have tried to recover the photos by directing PhotoRec to the folder by “sudo photorec nikon dsc coolpix l19ptp dcim 104 nikon” and have tried various spacing and / combinations but am not sure if I am on the right track re specifying the locality of the folder.
My operating system is Ubuntu 16.04 Unity.
@Jan
Specify the partition from which the files where deleted, this is the camera storage represented by a file under /dev/ filesystem. You can find more information about the mount point and dev file for your camera in Linux, possibly by searching the web.
Exactly – Do not panic! In bulk cases, deleted files can reanimate – even if you have cleared the trash or did not used the trash when deleting files.
For effective resuscitation deleted data should execute some actions. Do not be discouraged – for this, it is not necessary to be an expert in the field of information technology, you also do not need to pay hundreds of dollars to a specialist professional for restoration of your remote information.
@RECdexy
Okay, great, many thanks for sharing this useful information.
Hi,
It was really working superb. nice article i recovered my photos simply and very easily. thank you for sharing this post with us. keep moving
@yagnajee
It is great to know that this guide helped you, thanks for the feedback.
Hi,
I accidentally deleted the a picture folder that has many folders inside (like 001,002,003,004..etc), can it restore the whole folder structure? or just get the files back?
Thanks
by the way, I am using CentOS.
@Pedro
Yes, you can, simply follow the steps described above. Good luck!
Thanks a lot, thanks a lot! I’m a student in Turkey, so I can’t express myself but you saved me!
@Faruk
Welcome, thanks for the feedback.
not working only creating a lots of directory like recup_dir.(1..33) . inside that directory nothing found useful to recover the files or folder…
@niraj
Did you specify the type of files you want to recover, i mean the extensions? It worked fine for me, however, if you have stored more files recently on the partition you are trying to recover from, your files deleted earlier on get overwritten.
Try to use it on another partition and see if it works. Thanks for the feedback.