WordPress 5 recently released with some core changes, such as the Gutenberg editor. Many of our readers might want to test it on their own server. For those of you, in this tutorial we are going to setup WordPress 5 with LEMP on Ubuntu 18.04.
Read Also: Install WordPress with Nginx, MariaDB 10 and PHP 7 on Debian 9
For people who are not aware, LEMP is a popular combination of Linux, Nginx, MySQL/MariaDB and PHP.
Requirements
- A dedicated server or a VPS (Virtual Private Server) with Ubuntu 18.04 minimal installation.
IMPORTANT: I suggest you to go for Bluehost Hosting, which offers us a special discount for our readers, and it also comes with a 1 Free Domain, 1 IP address, Free SSL and 24/7 support for life.
This tutorial will guide you through the installation of all the required packages, creating your own database, preparing vhost and completing the WordPress installation via browser.
Installing Nginx Web Server on Ubuntu 18.04
First we will prepare our web server Nginx. To install the package, run the following command:
$ sudo apt update && sudo apt upgrade
$ sudo apt install nginx
To start the nginx service and automatically start it upon system boot, run the following commands:
$ sudo systemctl start nginx.service
$ sudo systemctl enable nginx.service
Creating Vhost for WordPress Website on Nginx
Now we will create vhost for our WordPress website. Create the following file using your favorite text editor:
$ sudo vim /etc/nginx/sites-available/wordpress.conf
In the example below, change example.com with the domain you wish to use:
server {
    listen 80;
    listen [::]:80;
    root /var/www/html/wordpress;
    index  index.php index.html index.htm;
    server_name example.com www.example.com;

     client_max_body_size 100M;

    location / {
        try_files $uri $uri/ /index.php?$args;
    }

    location ~ \.php$ {
    include snippets/fastcgi-php.conf;
    fastcgi_pass             unix:/var/run/php/php7.2-fpm.sock;
    fastcgi_param   SCRIPT_FILENAME $document_root$fastcgi_script_name;
    }
}
Save the file and exit. Then enable the site with:
$ sudo ln -s /etc/nginx/sites-available/wordpress.conf /etc/nginx/sites-enabled/
Then reload nginx with:
$ sudo systemctl reload nginx
Installing MariaDB 10 on Ubuntu 18.04
We will use MariaDB for our WordPress database. To install MariaDB run the following command:
$ sudo apt install mariadb-server mariadb-client
Once the installation is complete, we will start it and configure it to start automatically on system boot:
$ sudo systemctl start mariadb.service
$ sudo systemctl enable mariadb.service
Next secure your MariaDB installation by running the following command:
$ sudo mysql_secure_installation
Simply answer the questions in the prompt to complete the task.
Creating WordPress Database for Website
After that we will prepare the database, database user and password for that user. They will be used by our WordPress application so it can connect to the MySQL server.
$ sudo mysql -u root -p
With the commands below, we will first create database, then a database user and its password. Then we will grant the user privileges to that database.
CREATE DATABASE wordpress;
CREATE USER 'wp_user'@'localhost' IDENTIFIED BY ‘secure_password’;
GRANT ALL ON wordpress.* TO 'wp_user'@'localhost' ;
FLUSH PRIVILEGES;
EXIT;
Installing PHP 7 on Ubuntu 18.04
Since WordPress is application written in PHP, we will install PHP and the required PHP packages to run WordPress, use the command below:
$ sudo apt install php-fpm php-common php-mbstring php-xmlrpc php-soap php-gd php-xml php-intl php-mysql php-cli php-ldap php-zip php-curl
Once the install is complete, we will start the php-fpm service and enable it:
$ sudo systemctl start php7.2-fpm
$ systemctl enable php7.2-fpm
Installing WordPress 5 on Ubuntu 18.04
From this point on, starts the easy part. Download the latest WordPress package with the following wget command:
$ cd /tmp && wget http://wordpress.org/latest.tar.gz
Then extract the archive with:
$ sudo tar -xvzf latest.tar.gz -C /var/www/html
The above will create our document root that we have set in the vhost which is /var/www/html/wordpress. We will then need to change the ownership of the files and folders within that directory with:
$ sudo chown www-data: /var/www/html/wordpress/ -R
Now we are ready to run the installation of our WordPress. If you have used unregistered/non-existing domain, you can configure your hosts /etc/hosts file with the following record:
192.168.1.100 example.com
Presuming that your server’s IP address is 192.168.1.100 and that the domain you are using is example.com That way your computer will resolve example.com on the given IP address.
Now load your domain into a browser, you should see the WordPress installation page:

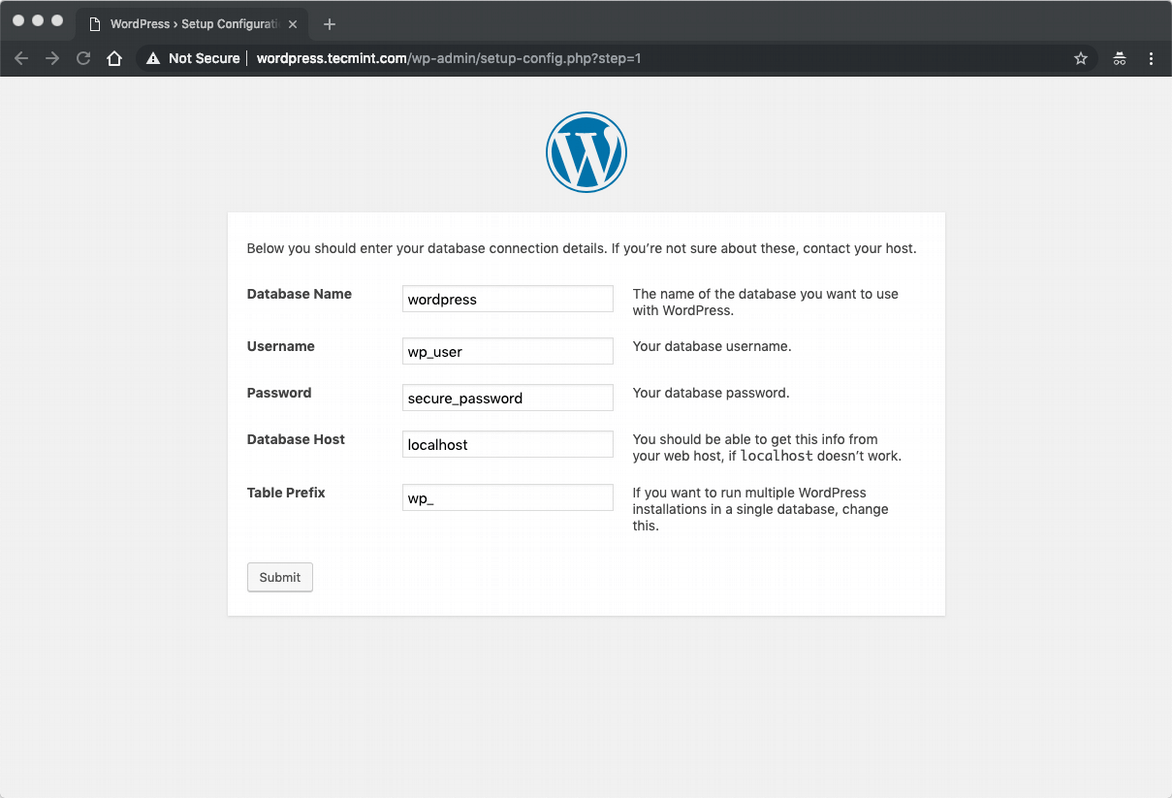
On the next page input the database credentials that we have setup earlier:
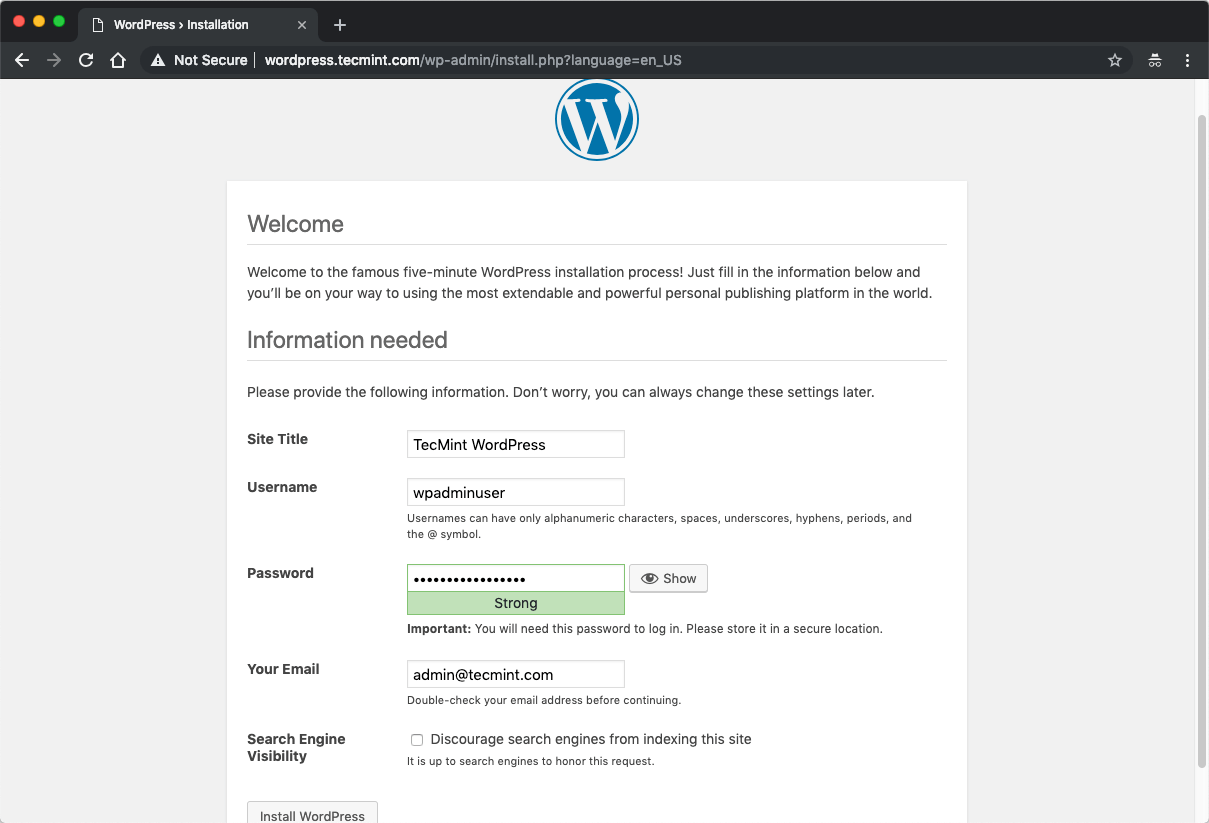
Submit the form and on the next screen configure your website title, admin user and email:
Your installation is now complete and you can start managing your WordPress website. You can start by installing some fresh new theme or extending the site functionality via plugins.
Conclusion
That was it. The process of setting up your own WordPress installation on Ubuntu 18.04. I hope the process was easy and straightforward.


No info on what special permissions need to be set for the WordPress install in order to allow updates, plugin deletion, etc. Could you please either do an additional article on that or add it to this one?
is MariaDB really better if compare with MySQL 5.7? seems other blogs are disagree…..
Can you compare performance with SlickStack LEMP next time bro
I’ve tried following your guide but Nginx just servers the PHP files are downloads and is not passing it over to the PHP-FPM. Did you have to change something else?