Xrdp is an open-source equivalent of Microsoft’s Remote Desktop Protocol (RDP). With xrdp installed on a Linux system, users can remotely access the Linux desktop using an RDP client as we shall demonstrate later in this article. It’s completely free to download and use.
Without much further ado, let’s see how you can install Xrdp on Ubuntu Desktop 20.04 and 18.04.
Prerequisites
This guide assumes that you already have a copy of the Ubuntu 20.04 or Ubuntu 18.04 desktop already installed. If you have a minimal installation – without a GUI – then installing a desktop environment (such as GNOME) is recommended.
To install the Ubuntu desktop environment, run the command:
$ sudo apt install ubuntu-desktop
Step 1: Install Xrdp on Ubuntu 20.04
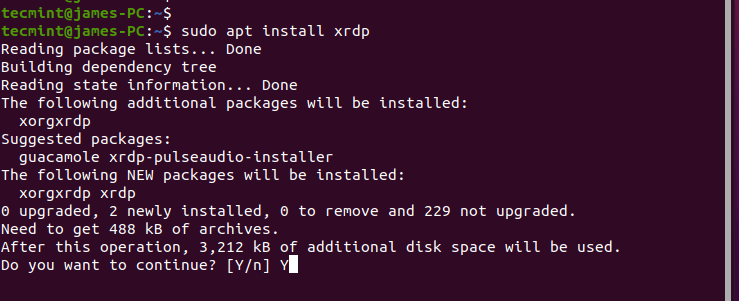
To start off, launch your terminal and invoke the following command to install Xrdp on your system.
$ sudo apt install xrdp
When prompted, just hit 'Y' and press enter to continue with the installation.
Xrdp service starts automatically upon installation. You can verify this by running the command:
$ sudo systemctl status xrdp
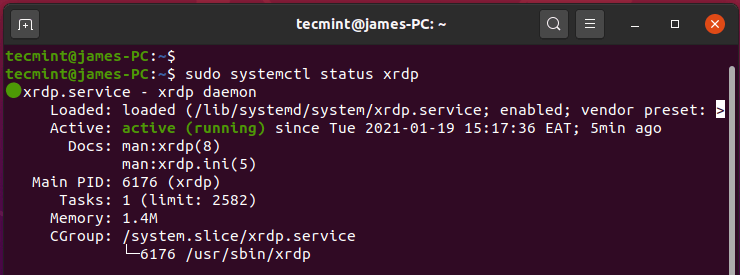
The output confirms, without a doubt, that the xrdp daemon is active and running.
Step 2: Configure Xrdp on Ubuntu 20.04
When Xrdp is installed, an SSL certificate key – ssl-cert-snakeoil.key – is placed in the /etc/ssl/private/ folder. We need to add the xrdp user to the ssl-cert group to make the file readable to the user.
$ sudo adduser xrdp ssl-cert

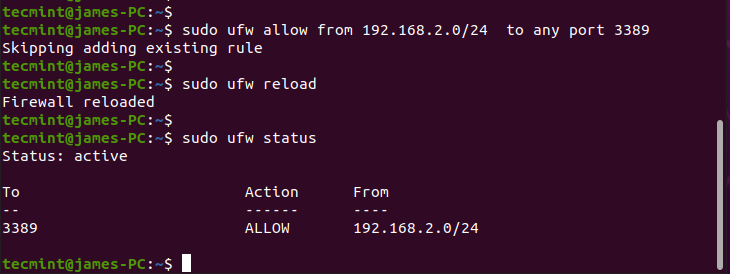
Xrdp listens on port 3389 and if you are behind a UFW firewall, you need to open the port to allow inbound traffic from an RDP client. In this example, I will allow traffic from my entire subnet to the Ubuntu system.
$ sudo ufw allow from 192.168.2.0/24 to any port 3389
Thereafter, reload the firewall and confirm if the port has been opened.
$ sudo ufw reload
$ sudo ufw status
Step 3: Access Remote Ubuntu Desktop with RDP Client
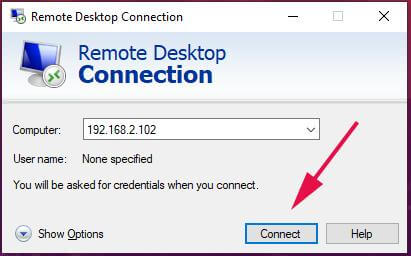
In this step, we are going to access the Ubuntu desktop system from Windows 10 using the Remote Desktop Client. But before we do so, ensure that you first log out of Ubuntu 20.04. This because Xrdp only supports one Xsession.
Next, launch your client and key in your remote system’s IP address, and click the ‘Connect’ button.
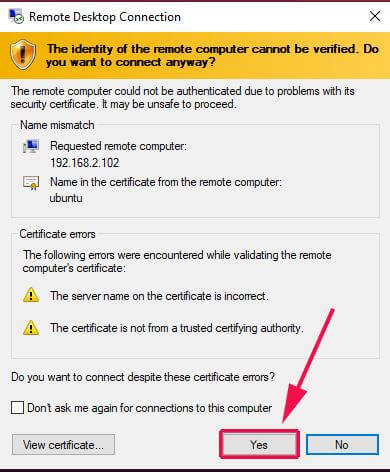
On the pop-up that requires you to verify the identity of your remote system, ignore the certificate errors and click on the ‘Next’ button to proceed with the connection.
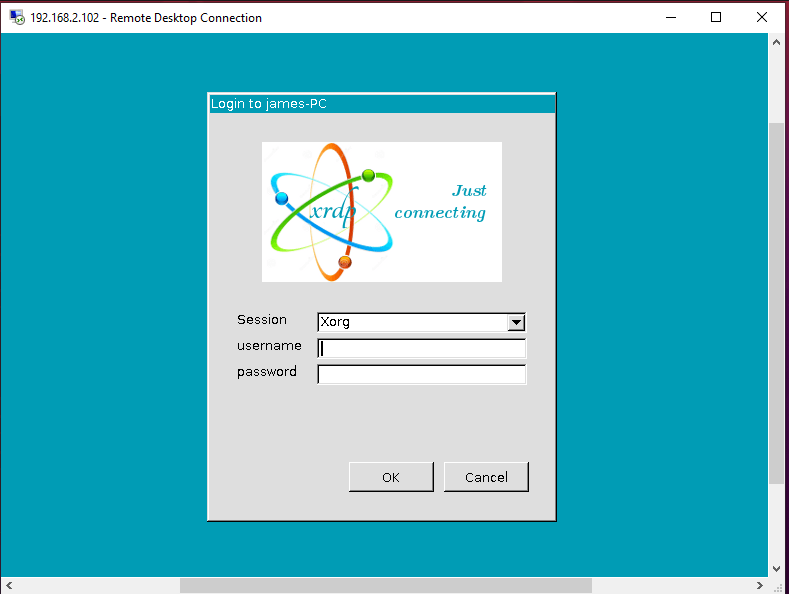
On the Xrdp login page, provide your login credentials and click ‘Ok’.
NOTE: At this point, you might encounter a blank black screen, instead of an Ubuntu desktop background. In fact, I personally encountered it and after some digging, I discovered a nifty workaround.
Fix Black Ubuntu Screen
The solution is quite simple. Head over to the remote system and edit the /etc/xrdp/startwm.sh script.
$ sudo vim /etc/xrdp/startwm.sh
Add these lines just before the lines that test & execute Xsession as shown in the screenshot below.
unset DBUS_SESSION_BUS_ADDRESS
unset XDG_RUNTIME_DIR

Save the file and exit. Then restart the Xrdp service.
$ sudo systemctl restart xrdp
Next, reinitiate the connection. After the initial authentication, you will be required to authenticate again as shown.
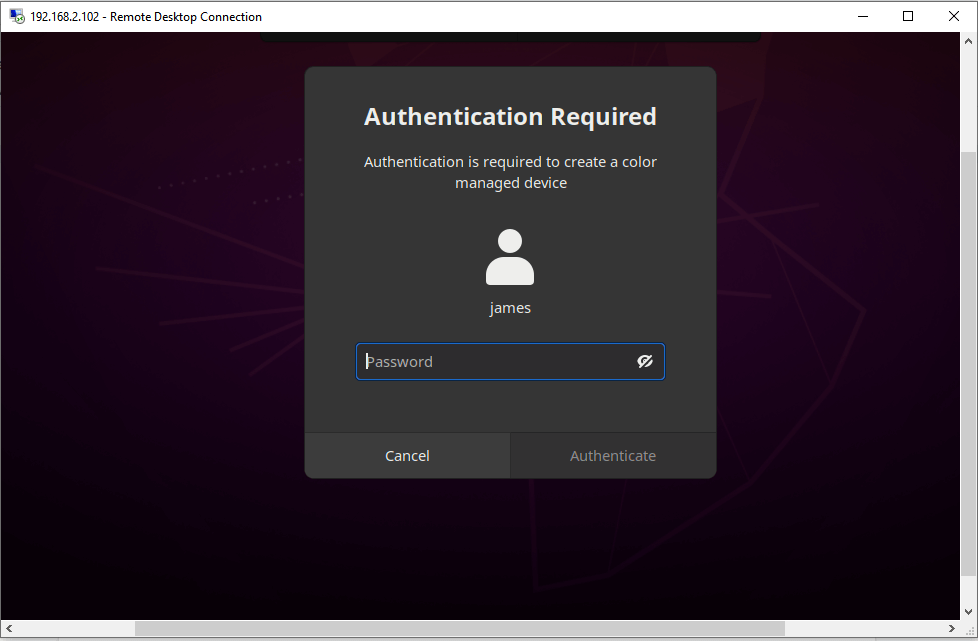
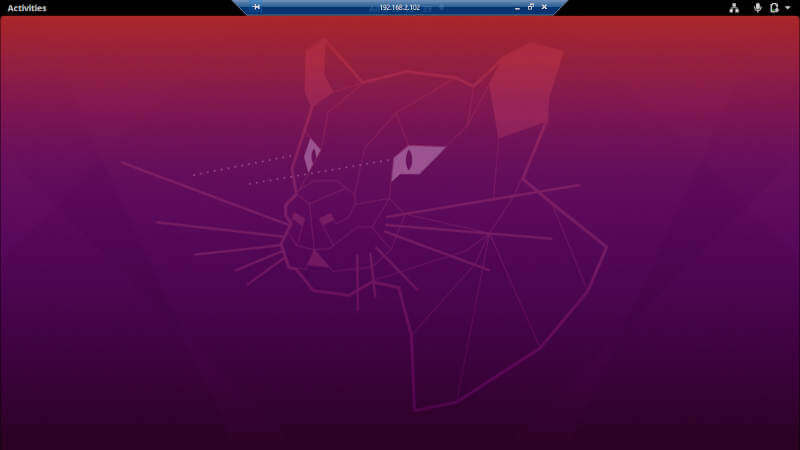
Provide your credentials and click ‘Authenticate’ and finally, this ushers you to the desktop screen of the remote Ubuntu desktop system as shown.
We’d love to hear your feedback and, more specifically, the challenges that you encountered. We hope that this guide was useful.






It worked on the first try. Thanks in particular for the fix for the dark screen.
You rock!
I have been to tons of other articles and most of them do not have the step about fixing the black screen which was the issue I was having.
Congrats on having the best guide in my opinion.
Thank you! this worked like a charm!
You’re welcome, Adam. Keep it Tecmint!
When running the command to install it keeps asking for credentials again and again.
How to fix it??
James, thanks for this post and the hours of my life you saved.
Awesome! thanks.
Hi, just some addition to my previous comments, now I’ve tried to install xrdp according to those instructions on a fresh Jetson Nano with the latest image from Nvidia, running Ubuntu 18.04 LTS.
and nothing worked, opposed to the successful trial with Xubuntu 20.04 LTS described in my previous comment. Windows RDP just opens for ~1 sec, the Nvidia logo appears, and then it closes immediately.
so after some digging, I came across another post handling this issue, and this time with success:
https://gist.github.com/hehuan2112/54cca01be23973a9f8b369e8d0df216e
it is very simple, the Xfce package has to be installed and configured too in order for xrdp to be able to run properly!!!
so the following 3 commands will do it:
Dear James, please add this to your description! This is the main reason for the failure of the other guys complaining it doesn’t work. xrdp needs xfce to establish a session. For whatever reason xfce has been there on your test machine, so this issue didn’t appear to you, and of course, it was also present on Xubuntu 20.04 LTS, because it’s based on xfce, but not on a Jetson Nano running native Ubuntu 18.04LTS!
@Wolfgang,
Thanks for the tip, will add it to the article…
Just installed xrdp according to your post on a Jetson Nano running Xubuntu 20.04 Focal Fossa, and it worked like a dream! Only skipped the first step “sudo apt install ubuntu-desktop“, no need on Xubuntu.
https://forums.developer.nvidia.com/t/xubuntu-20-04-focal-fossa-l4t-r32-3-1-custom-image-for-the-jetson-nano/121768
the only thing that got me was the xrdp user, tried first to log in from Windows 10 RDP client with my default Xubuntu user from installation, which did NOT work, so had to create a separate user for this.
and without your workaround, it worked while a monitor was still connected to the Jetson Nano, of course in a new session. Booting up without a monitor and without the workaround ended in a black screen, but after applying the suggested changes to /etc/xrdp/startwm.sh this also worked immediately. For those who dislike vim (like me…), nano is the easier to use alternative for editing this file…
and maybe also worth mentioning, disconnecting RDP and reconnecting again with the same user and password ends up in the very same session, everything that was there before is still there!
Thanks a lot for the great work!
Hi,
The xrp tutorial works as expected and thank you very much for the detailed guide.
However, the xrdp seems to start a new desktop session and does not mirror the current window that’s being displayed on my device. For example, if I have firefox open on my device and I use xrdp to remote into my device with the same user credentials that are currently logged into the PC, should it not mirror the same screen and have firefox open on the xrdp session? Like how RDP works on Windows.
I have only started learning Linux recently so I’m still new to how things work.
Hi, your workaround got me up and running. However, I cannot work on this basis, due to an extremely slow response. The screen takes up to 30 secs to update. Does anybody have a clue how to solve that?
I got a blue screen, even using that workaround :(
Same here, just blue screen, how to solve it?
It works! You’re Great!
You’re welcome, Tommy. Keep it Tecmint for more of these guides. :-)
Just set up a VM with Ubuntu 20.04.2 Server to test this process and I have to say it worked perfectly. I did not have any black screen issues that needed fixing and was able to mstsc indirectly from my laptop without a problem.
Maybe an addition to this guide would be how to install different desktop environments?
Also is it possible for the console to continue to boot in text mode but with xrdp functioning be able to just RDP to a desktop when required?
Thanks for this cool and simple guide.
As a side tip, I had to run ‘sudo apt-get install ubuntu-software‘ to then allow me to use the GUI Software tool to add additional applications on the desktop.
Doesn’t work at all.
I see an only a black screen in RDP.
Hey, please check the workaround provided towards the end of the article.
Guys, the workaround for the black screen is absolutely awesome.
It can only come from someone who knows this stuff.
Thanks a lot!
Thanks so much for your feedback A.