This tutorial describes how to join an Ubuntu machine into a Samba4 Active Directory domain in order to authenticate AD accounts with local ACL for files and directories or to create and map volume shares for domain controller users (act a as file server).
Requirements:
Step 1: Initial Configurations to Join Ubuntu to Samba4 AD
1. Before starting to join an Ubuntu host into an Active Directory DC you need to assure that some services are configured properly on local machine.
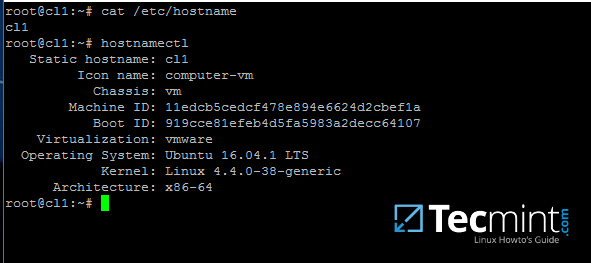
An important aspect of your machine represents the hostname. Setup a proper machine name before joining the domain with the help of hostnamectl command or by manually editing /etc/hostname file.
# hostnamectl set-hostname your_machine_short_name
# cat /etc/hostname
# hostnamectl
2. On the next step, open and manually edit your machine network settings with the proper IP configurations. The most important settings here are the DNS IP addresses which points back to your domain controller.
Edit /etc/network/interfaces file and add dns-nameservers statement with your proper AD IP addresses and domain name as illustrated on the below screenshot.
Also, make sure that the same DNS IP addresses and the domain name are added to /etc/resolv.conf file.
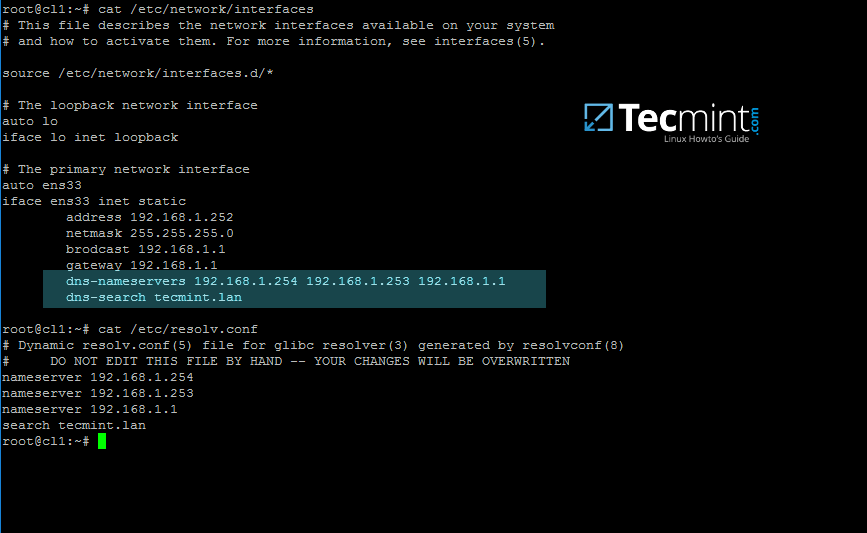
On the above screenshot, 192.168.1.254 and 192.168.1.253 are the IP addresses of the Samba4 AD DC and Tecmint.lan represents the name of the AD domain which will be queried by all machines integrated into realm.
3. Restart the network services or reboot the machine in order to apply the new network configurations. Issue a ping command against your domain name in order to test if DNS resolution is working as expected.
The AD DC should replay with its FQDN. In case you have configured a DHCP server in your network to automatically assign IP settings for your LAN hosts, make sure you add AD DC IP addresses to the DHCP server DNS configurations.
# systemctl restart networking.service
# ping -c2 your_domain_name
4. The last important configuration required is represented by time synchronization. Install ntpdate package, query and sync time with the AD DC by issuing the below commands.
$ sudo apt-get install ntpdate
$ sudo ntpdate -q your_domain_name
$ sudo ntpdate your_domain_name

5. On the next step install the software required by Ubuntu machine to be fully integrated into the domain by running the below command.
$ sudo apt-get install samba krb5-config krb5-user winbind libpam-winbind libnss-winbind

While the Kerberos packages are installing you should be asked to enter the name of your default realm. Use the name of your domain with uppercases and press Enter key to continue the installation.

6. After all packages finish installing, test Kerberos authentication against an AD administrative account and list the ticket by issuing the below commands.
# kinit ad_admin_user
# klist

Step 2: Join Ubuntu to Samba4 AD DC
7. The first step in integrating the Ubuntu machine into the Samba4 Active Directory domain is to edit Samba configuration file.
Backup the default configuration file of Samba, provided by the package manager, in order to start with a clean configuration by running the following commands.
# mv /etc/samba/smb.conf /etc/samba/smb.conf.initial
# nano /etc/samba/smb.conf
On the new Samba configuration file add the below lines:
[global]
        workgroup = TECMINT
        realm = TECMINT.LAN
        netbios name = ubuntu
        security = ADS
        dns forwarder = 192.168.1.1

idmap config * : backend = tdb
idmap config *:range = 50000-1000000

   template homedir = /home/%D/%U
   template shell = /bin/bash
   winbind use default domain = true
   winbind offline logon = false
   winbind nss info = rfc2307
   winbind enum users = yes
   winbind enum groups = yes

  vfs objects = acl_xattr
  map acl inherit = Yes
  store dos attributes = Yes
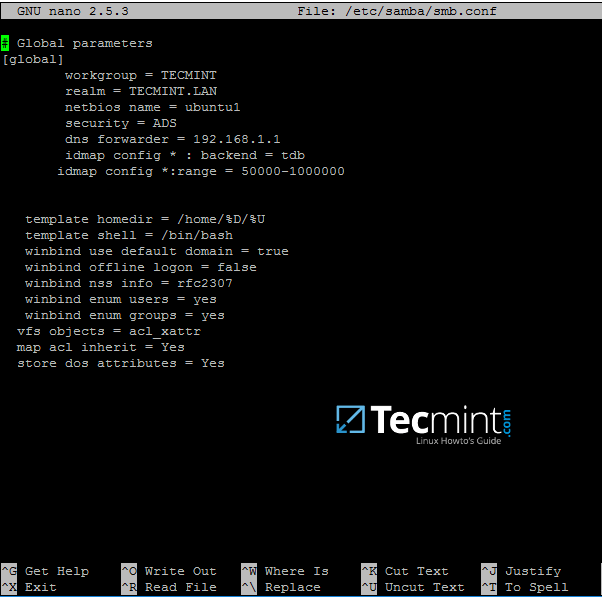
Replace workgroup, realm, netbios name and dns forwarder variables with your own custom settings.
The winbind use default domain parameter causes winbind service to treat any unqualified AD usernames as users of the AD. You should omit this parameter if you have local system accounts names which overlap AD accounts.
8. Now you should restart all samba daemons and stop and remove unnecessary services and enable samba services system-wide by issuing the below commands.
$ sudo systemctl restart smbd nmbd winbind
$ sudo systemctl stop samba-ad-dc
$ sudo systemctl enable smbd nmbd winbind
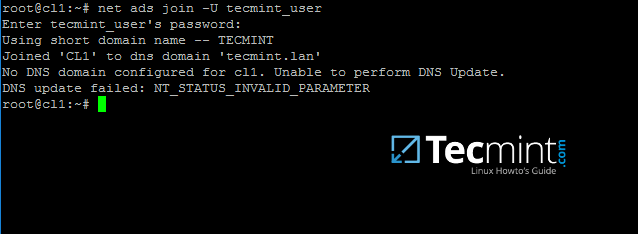
9. Join Ubuntu machine to Samba4 AD DC by issuing the following command. Use the name of an AD DC account with administrator privileges in order for the binding to realm to work as expected.
$ sudo net ads join -U ad_admin_user
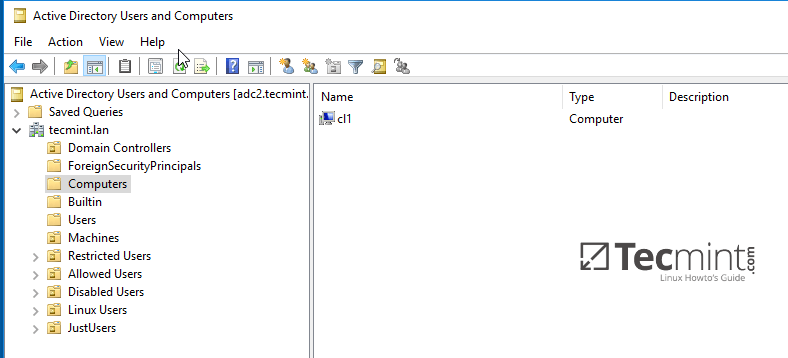
10. From a Windows machine with RSAT tools installed you can open AD UC and navigate to Computers container. Here, your Ubuntu joined machine should be listed.
Step 3: Configure AD Accounts Authentication
11. In order to perform authentication for AD accounts on the local machine, you need to modify some services and files on the local machine.
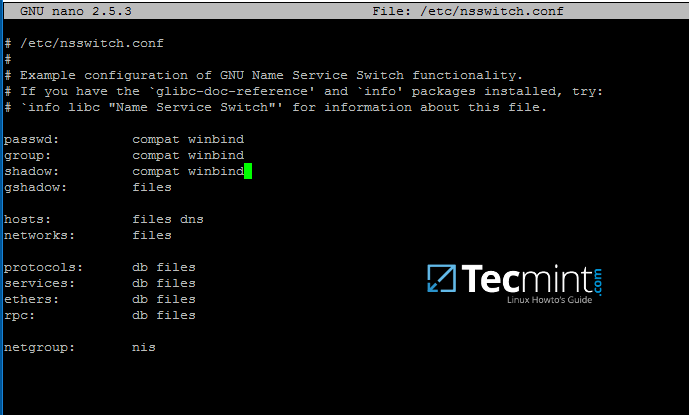
First, open and edit The Name Service Switch (NSS) configuration file.
$ sudo nano /etc/nsswitch.conf
Next append winbind value for passwd and group lines as illustrated on the below excerpt.
passwd:         compat winbind
group:          compat winbind
12. In order to test if the Ubuntu machine was successfully integrated to realm run wbinfo command to list domain accounts and groups.
$ wbinfo -u
$ wbinfo -g

13. Also, check Winbind nsswitch module by issuing the getent command and pipe the results through a filter such as grep to narrow the output only for specific domain users or groups.
$ sudo getent passwd| grep your_domain_user
$ sudo getent group|grep 'domain admins'

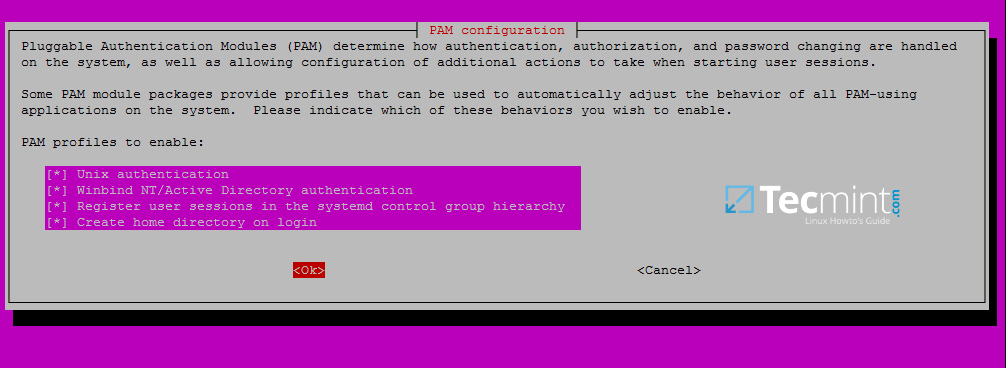
14. In order to authenticate on Ubuntu machine with domain accounts you need to run pam-auth-update command with root privileges and add all the entries required for winbind service and to automatically create home directories for each domain account at the first login.
Check all entries by pressing [space] key and hit ok to apply configuration.
$ sudo pam-auth-update
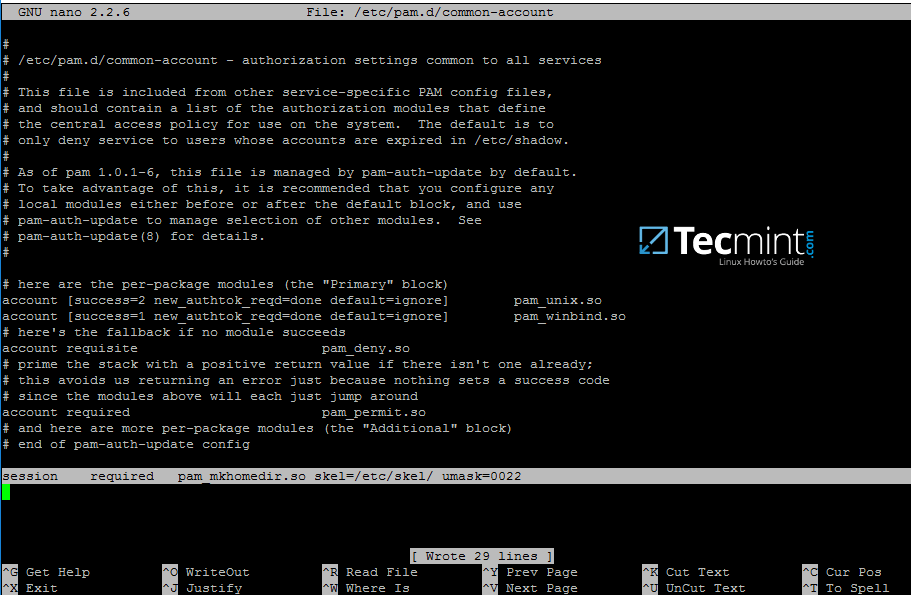
15. On Debian systems you need to manually edit /etc/pam.d/common-account file and the following line in order to automatically create homes for authenticated domain users.
session required pam_mkhomedir.so skel=/etc/skel/ umask=0022
16. In order for Active Directory users to be able to change password from command line in Linux open /etc/pam.d/common-password file and remove the use_authtok statement from password line to finally look as on the below excerpt.
password [success=1 default=ignore] pam_winbind.so try_first_pass

17. To authenticate on Ubuntu host with a Samba4 AD account use the domain username parameter after su – command. Run id command to get extra info about the AD account.
$ su - your_ad_user

Use pwd command to see your domain user current directory and passwd command if you want to change password.
18. To use a domain account with root privileges on your Ubuntu machine, you need to add the AD username to the sudo system group by issuing the below command:
$ sudo usermod -aG sudo your_domain_user
Login to Ubuntu with the domain account and update your system by running apt-get update command to check if the domain user has root privileges.

19. To add root privileges for a domain group, open end edit /etc/sudoers file using visudo command and add the following line as illustrated on the below screenshot.
%YOUR_DOMAIN\\your_domain\ group ALL=(ALL:ALL) ALL

Use backslashes to escape spaces contained into your domain group name or to escape the first backslash. In the above example the domain group for TECMINT realm is named “domain admins”.
The preceding percent sign (%) symbol indicates that we are referring to a group, not a username.
20. In case you are running the graphical version of Ubuntu and you want to login on the system with a domain user, you need to modify LightDM display manager by editing /usr/share/lightdm/lightdm.conf.d/50-ubuntu.conf file, add the following lines and reboot the machine to reflect changes.
greeter-show-manual-login=true
greeter-hide-users=true
It should now be able to perform logins on Ubuntu Desktop with a domain account using either your_domain_username or your_domain_username@your_domain.tld or your_domain\your_domain_username format.