Monit is a free open source and very useful tool that automatically monitors and manages processes, files, directories, checksums, permissions, filesystems, and services like Apache, Nginx, MySQL, FTP, SSH, SMTP, and so on in a UNIX/Linux based systems and provides an excellent and helpful monitoring functionality to system administrators.
The monit has a user-friendly web interface where you can directly view the system status and setup up processes using a native HTTP(S) web server or via the command line interface. This means you must have web server like Apache or Nginx installed on your system to access and view the monit web interface.
[ You might also like: 20 Command Line Tools to Monitor Linux Performance ]
What Monit Can Do
Monit has the ability to start a process if it is not running, restart a process if not responding, and stop a process if uses high resources. Additionally, you can also use Monit to monitor files, directories, and filesystems for changes, checksum changes, file size changes, or timestamp changes.
With Monit, you can able to monitor remote hosts’ TCP/IP port, server protocols, and ping. Monit keeps its own log file and alerts about any critical error conditions and recovery status.
This article is written to describe a simple guide on Monit installation and configuration on RHEL-based and Debian-based Linux distributions.
Step 1: Installing Monit in Linux
By default, the Monit monitoring program is not available from the default system base repositories, you need to add and enable a third-party epel repository to install the monit package under RHEL-based distributions such as CentOS, Rocky Linux, and AlmaLinux.
--------- On RHEL 9 based Systems ---------
# dnf install https://dl.fedoraproject.org/pub/epel/epel-release-latest-9.noarch.rpm

--------- On RHEL 8 based Systems ---------
# dnf install https://dl.fedoraproject.org/pub/epel/epel-release-latest-8.noarch.rpm

--------- On RHEL 7 based Systems ---------
# yum install https://dl.fedoraproject.org/pub/epel/epel-release-latest-8.noarch.rpm
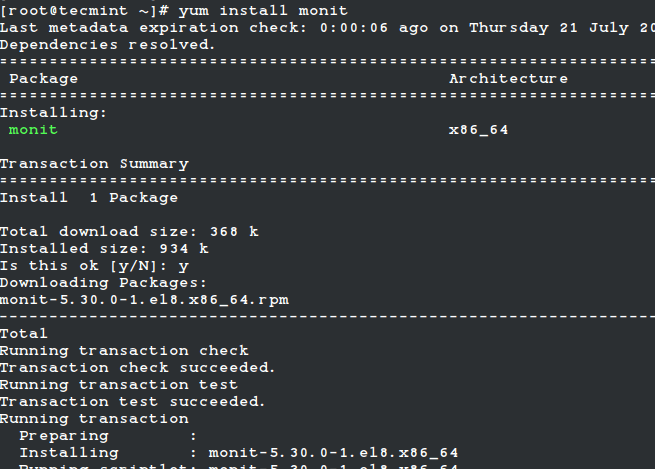
Once you’ve added the epel repository, install the Monit package by running the following yum command.
# yum install monit
OR
# dnf install monit  [On Fedora Linux]
For Ubuntu/Debian/Linux Mint user’s can easily install using the apt command as shown.
$ sudo apt install monit
Step 2: Configuring Monit in Linux
Monit is very easy to configure, in fact, the configuration files are created to be very easily readable and making them easier for users to understand. It is designed to monitor the running services every 2 minutes and keeps the logs in “/var/log/monit“.
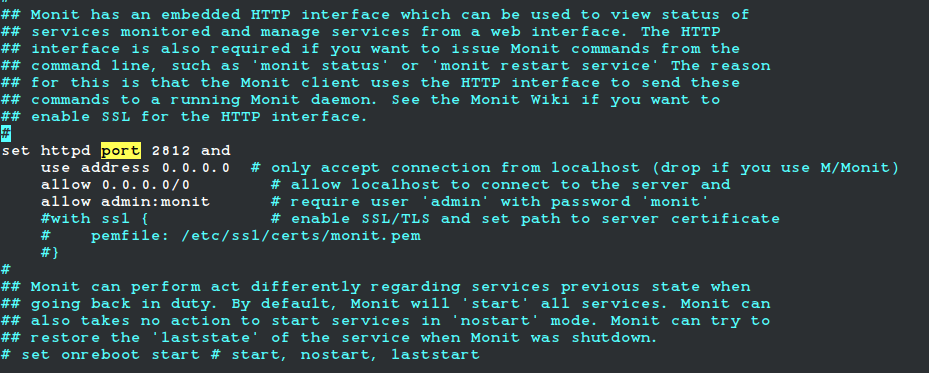
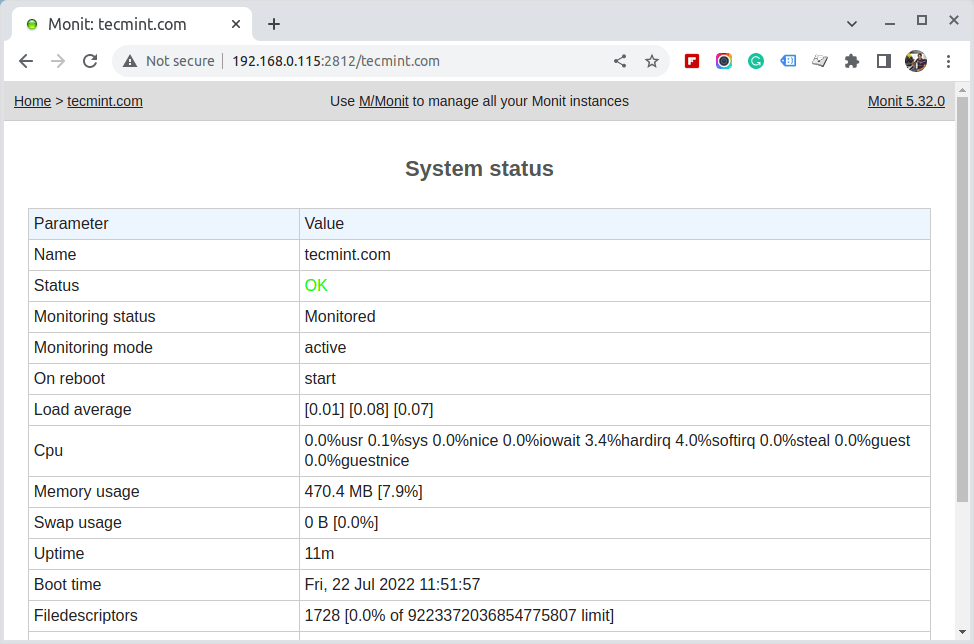
Monit has a web interface that runs on port 2812 using a web server. To enable the web interface you need to make changes in the monit configuration file.
The main configuration file of monit located at /etc/monit.conf under (RedHat/CentOS/Fedora) and /etc/monit/monitrc file for (Ubuntu/Debian/Linux Mint).
Open this file using your choice of editor.
# vi /etc/monitrc
Or
$ sudo nano /etc/monit/monitrc
Next, uncomment the following section and add the IP address or domain name of your server, allow anyone to connect and change the monit user and password or you can use default ones.
set httpd port 2812 and
     use address 0.0.0.0  # only accept connections from localhost
     allow 0.0.0.0/0        # allow localhost to connect to the server and
     allow admin:monit      # require user 'admin' with password 'monit'
     allow @monit           # allow users of group 'monit' to connect (rw)
     allow @users readonly  # allow users of group 'users' to connect readonly
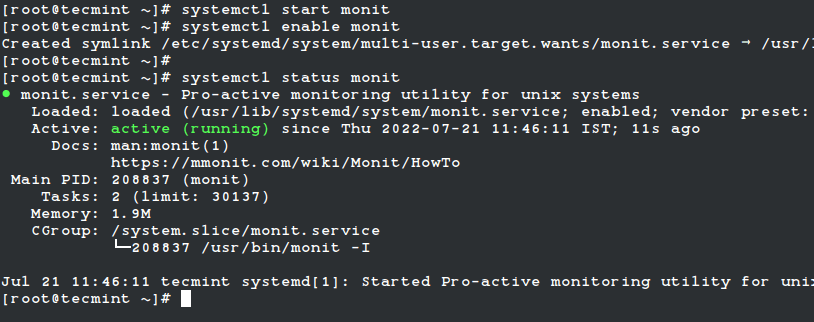
Once you’ve configured it, you need to start, enable and verify the monit service to reload the new configuration settings.
# systemctl start monit
# systemctl enable monit
# systemctl status monit
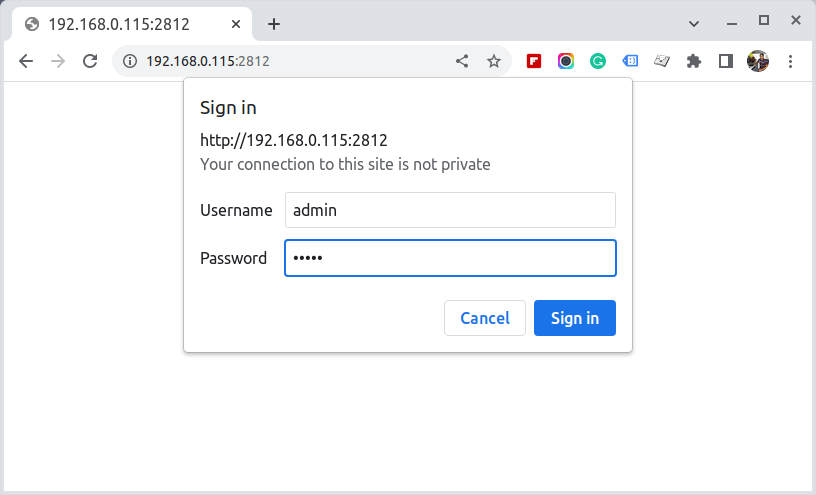
Now, you will be able to access the monit web interface by navigating to the following URLs.
http://localhost:2812
OR
http://ip-address:2812
Or
http://example.com:2812
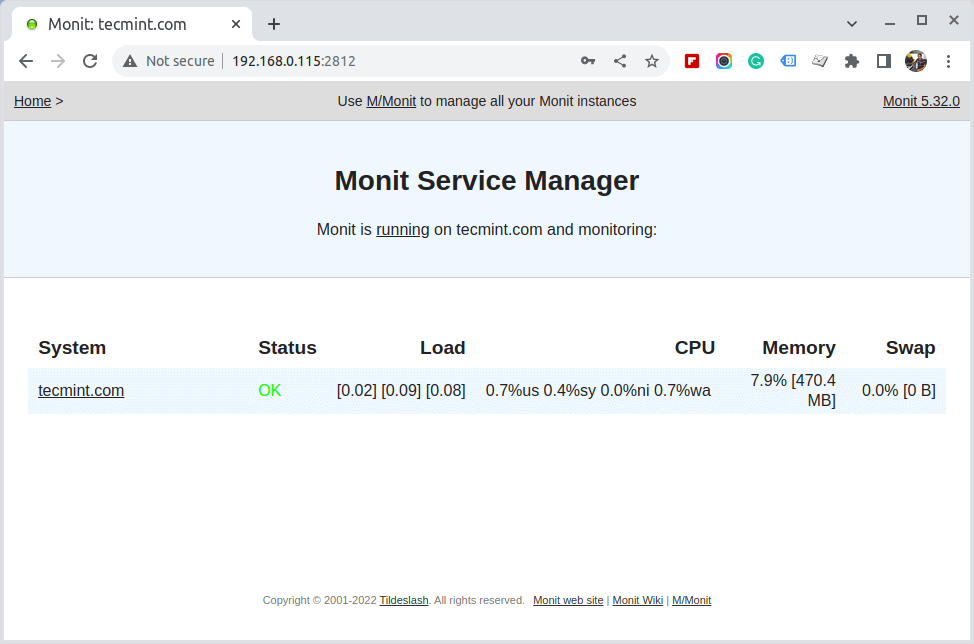
Then enter the user name as “admin” and password as “monit“. You should get a screen similar to the one below.
Step 3: Adding Linux Services to Monit Monitoring
Once the monit web interfaces are correctly set up, start adding the programs that you want to monitor into the /etc/monitrc under (RedHat/CentOS/Fedora) and /etc/monit/monitrc file for (Ubuntu/Debian/Linux Mint) at the bottom.
Following are some useful configuration examples for monit, which can be very helpful to see how a service is running, where it keeps its profile, how to start and stop a service, etc.
Monitor Apache in Monit
check process httpd with pidfile /var/run/httpd.pid
group apache
start program = "/usr/bin/systemctl httpd start"
stop program = "/usr/bin/systemctl httpd stop"
if failed host 127.0.0.1 port 80
protocol http then restart
if 5 restarts within 5 cycles then timeout
Monitor Apache2 in Monit
check process apache with pidfile /run/apache2.pid
start program = "/usr/bin/systemctl apache2 start" with timeout 60 seconds
stop program  = "/usr/bin/systemctl apache2 stop"
Monitor Nginx in Monit
check process nginx with pidfile /var/run/nginx.pid
start program = "/usr/bin/systemctl nginx start"
stop program = "/usr/bin/systemctl nginx stop"
Monitor MySQL in Monit
check process mysqld with pidfile /var/run/mysqld/mysqld.pid
group mysql
start program = "/usr/bin/systemctl mysqld start"
stop program = "/usr/bin/systemctl mysqld stop"
if failed host 127.0.0.1 port 3306 then restart
if 5 restarts within 5 cycles then timeout
Monitor SSH in Monit
check process sshd with pidfile /var/run/sshd.pid
start program "/usr/bin/systemctl sshd start"
stop program "/usr/bin/systemctl sshd stop"
if failed host 127.0.0.1 port 22 protocol ssh then restart
if 5 restarts within 5 cycles then timeout
Once you’ve configured all programs for monitoring, check monit syntax for errors. If found any errors fix them, it’s not so tough to figure out what went wrong. When you get a message like “Control file syntax OK“, or if you see no errors, you can proceed ahead.
# monit -t
Or
$ sudo monit -t
After fixing all possible errors, you can type the following command to start the monit service.
# systemctl monit restart
OR
$ sudo systemctl monit restart
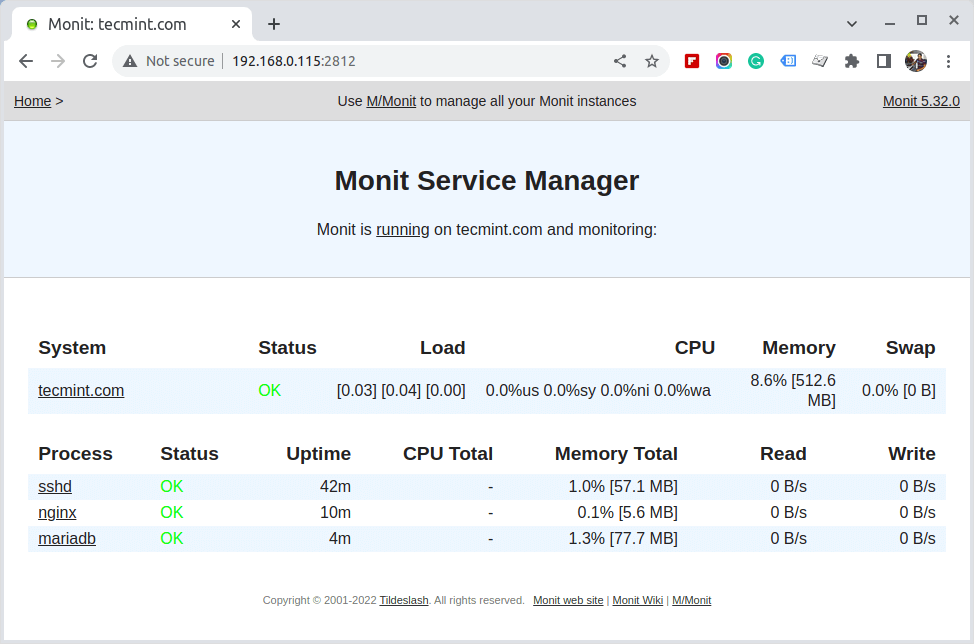
This is how looks monit after adding all Linux services for monitoring.


Is it possible to collect telemetry data through Monit? I mean to know whether Monit can be used as a replacement for Opentelemetry.
Yes, to monitor multiple hosts from a single dashboard you need to install M-monit, an enterprise application, with a one-time license fee (it is not expensive).
We use Mmonit at my work to monitor over 100 hosts, has email and slack notifications and metric charts, an excellent monitoring tool that’s much easier to set up and maintain than Nagios.
What are the disadvantages of MONIT?
Very helpful documentation on monit. I have a problem sending email alerts for events/service changes and I am getting the error message in the apigee-monit.log –
[EST Feb 22 23:34:38] error : Mail: STARTTLS required but the mail server doesn’t support it
Alert handler failed, retry scheduled for next cycle.
How can I work around this error ?
Do it monitor multi remote servers ?
@Quang,
Unfortunately, no its build to monitor remote servers, for that there is Nagios, you can install and monitor multiple remote Linux and Windows machines. For installation check out this article – https://www.tecmint.com/install-nagios-in-linux/
yes, but i see monit has useful function auto restart service when fail or not running, that a great !!!
have nagios-plugin do that?
@QuangPH,
No nagios plugin doesn’t provide auto restart of services functionality..
This tutorial is very good. I’m using Debian8, Nginx and ISPConfig. The article does not cite whether it needs or works with Apache or Nginx. So, will it work to monitor any service, either one or the other, and the rest, correct?
Not able to install the monit package.. can you please help?
Last login: Wed Apr 20 14:00:19 2016 from 192.168.124.1
[root@www ~]# yum install monit -y
Loaded plugins: product-id, refresh-packagekit, security, subscription-manager
This system is not registered to Red Hat Subscription Management. You can use subscription-manager to register.
Local-Repo | 2.9 kB 00:00
Setting up Install Process
No package monit available.
Error: Nothing to do
[root@www ~]# yum install monit* -y –nogpgcheck
Loaded plugins: product-id, refresh-packagekit, security, subscription-manager
This system is not registered to Red Hat Subscription Management. You can use subscription-manager to register.
Setting up Install Process
No package monit* available.
Error: Nothing to do
[root@www ~]# rpm -q monit*
package monit* is not installed
[root@www ~]# rpm -ivh monit*
error: File not found by glob: monit*
[root@www ~]#
[root@www ~]#
[root@www ~]#
[root@www ~]# yum –enablerepo=epel install monit
Loaded plugins: product-id, refresh-packagekit, security, subscription-manager
This system is not registered to Red Hat Subscription Management. You can use subscription-manager to register.
[root@www ~]# yum –enablerepo=epel install monit -y –nogpgcheck
Loaded plugins: product-id, refresh-packagekit, security, subscription-manager
This system is not registered to Red Hat Subscription Management. You can use subscription-manager to register.
@Asif,
First register your RHEL distributions to RHN subscription management portal to install and get updates for new packages, here is the guide on how to register RHEL distribution to RHN network https://www.tecmint.com/enable-redhat-subscription-reposiories-and-updates-for-rhel-7/
I am looking for a tool that lists/logs all “read / write / sent / received” activities of any process in detail additionally.
Is that possible with this tool?
It would also be nice to restrict a critical process instead of deleting it like security tools like to do. I am also looking for a tool that monitors installation activities and maybe backups modified system values or at least let me know. Could anyone give me an advisement?
I need also be sure about any access for example keyboard and mouse or other peripherals. Those psycho attacks are state of the art and there is no easy way to get sure about it so far or I just haven t found the right tool yet.
I will have a look if anyone has a suggestion for me later on. Thanks for reading :)
If “yum install monit” doesn’t work, try with “yum –enablerepo=epel install monit”
Nice tutorial, just a small typo here: ” following command to stat the monit service”
@Octopus,
Thanks for pointing out that typo, corrected in the article..
Thanks for this article btw ;)
Typo:
tail -f /var/log/monit
must be
tail -f /var/log/monit.log
Right?
Hi,
Can you please tell me how to send alert through monit if someone ssh server.
Thanks
@Abhishek,
To get alerts about your server, just add the email address in monit.conf file.
Is monit able to monitor logging of services?
For instance, if a service hangs (stops logging) but the process is still running so it still has a pid. Will it be able to monitor that and force a kill on the pid and initiate a restart?
@Stefan,
It’s just a monitoring tool that monitors and alerts about the services which are in critical state, it doesn’t take any actions like you saying, you’ve to kill and restart manually..
can you send me step by step installation monit. on Ubuntu 12.04 32 desktop
The given instructions also works on Ubuntu 12.04 32-bit Desktop. Have you tried these instructions?
Hi Ravi,
Thx for this post. It really helps. i’m using Ubuntu 12.10 server, and i was wondering if it should be “mysql” instead of “mysqld” on the third and fourth row for the MySql monitoring services :
check process mysqld with pidfile /var/run/mysqld/mysqld.pid
group mysql
start program = “/etc/init.d/mysqld start”
stop program = “/etc/init.d/mysqld stop”
if failed host 127.0.0.1 port 3306 then restart
if 5 restarts within 5 cycles then timeout
Because when i use “mysqld” an error occur.
thx a lot
I am unable to access the webUI page and the message I am getting is “The connection was interrupted”and firewall is disabled already. below is my configuration:
set httpd port 2812 and
use address 172.16.172.200 # only accept connection from localhost
allow 172.16.172.200 # allow localhost to connect to the server and
allow admin:monit # require user ‘admin’ with password ‘monit’
allow @monit # allow users of group ‘monit’ to connect (rw)
allow @users readonly # allow users of group ‘users’ to connect readonly
Any help would be appreciated
check system is not working for the remote host neither the running services are showing up in Monit window
how to monitor windows machine with monit ???
Very nice. I’m quite new to linux and this tutorial got me through the basics without getting bogged down in all the different things that you can use monit for.
I appreciated you specifying the commands for the different linux versions. Often tutorials on websites assume you are using a certain flavor of linux, but never mention what that flavor is.
I have written an article for moit and mmonit, to control your monit instance through web interface. hope this will help some one.
http://techinfozone.net/install-configure-monit-linux-server/
http://techinfozone.net/install-configure-mmonit-rhel-x86_64-step-setp/
how to install it on server i have logged into my server using ssh, installed the monit , the monit status command showing everything fine in the ssh console,but i am unable to access the web panel from browser as http://www.abasc.com:2812 nothing happes just keep on loading
Have you opened port 2812 on firewall?
thanks that was the problem, now worked
Hi,do you know how can i show the server’s time in the browser’s panel?
i monitored all services using monit tool except
tomcat server i create tomcat as service also but process Id not created how to monitor tomcat using monit tool this is i am using tomcat script
#!/bin/bash
# description: Tomcat Start Stop Restart
# processname: tomcat
# chkconfig: 234 20 80
JAVA_HOME=/usr/sunjdk/jdk1.7.0_25
PATH=$PATH:$HOME/bin:$JAVA_HOME/bin
export JAVA_HOME
export PATH
CATALINA_HOME=/tomcat-7.0.27/
case $1 in
start)
sh /tomcat-home/bin/startup.sh
;;
stop)
sh /tomcat-home/bin/shutdown.sh
;;
restart)
sh /tomcat-home/bin/shutdown.sh
sh /tomcat-home/bin/startup.sh
;;
esac
exit 0
please guide me
Hi,
I have issue with my monit configuration. When I include specific file to include in the monitrc file it does not start but if I include the fulle directory like “include /etc/monit.d/*”. It work perfectly.
Pleass advise.
Thanks.
Hi,
I have an issue to access monit GUI after start the monit service.
In monit.conf i keep the config file as default
set httpd port 2812 and
use address localhost # only accept connection from localhost
allow localhost # allow localhost to connect to the server and
allow admin:monit # require user ‘admin’ with password ‘monit’
allow @monit # allow users of group ‘monit’ to connect (rw)
allow @users readonly # allow users of group ‘users’ to connect readonly
And try to access using server ip i.e: 10.1.30.3:2812 but the page is unable to connect
In /var/log/monit it shows denied connection from non-authorized client
Do u have any idea on above issue?
Ur help is highly appreciated
Thank You very much..
How to add multiple mysql remote services
create separate services for MySQL and define each IP address in the code that you wish to monitor.
How to monitor remote hosts….?
For remote host monitoring, just replace the IP with remote host in each code that you want to monitor the respective service.
Thank you very much….!
how to monitor multiple mysql remote services…..?
Can you give me the code to monitor MySQL on another computer on the same network?
I am using this code:
check host remote with address 192.168.0.187
if failed icmp type echo count 3 with timeout 3 seconds then alert
if failed port 3306 protocol mysql with timeout 15 seconds then alert
But, connection failed. It says “cannot open connection to INET via TCP.” What to do?
The code is already given above, just replace IP there and make sure port 3306 is opened on that remote machine.
And of course I see the M/Monit banner just after I hit send :)
Pretty cool. Is it possible to monitor a bunch of servers on the front page?
Yes! you can monitor bunch of server by simply creating each block for each service, like this.
Great article, I just implemented this on a few VM’s. Thank you very much!
Greate .