Rclone is a command line program written in Go language, used to sync files and directories from different cloud storage providers such as: Amazon Drive, Amazon S3, Backblaze B2, Box, Ceph, DigitalOcean Spaces, Dropbox, FTP, Google Cloud Storage, Google Drive, etc.
As you see, it supports multiple platforms, which makes it a useful tool to sync your data between servers or to a private storage.
Rclone comes with the following features
- MD5/SHA1 hash checks at all times for ensuring file integrity integrity.
- Timestamps are preserved on files.
- Partial syncs supported on a whole file basis.
- Copy mode for new or changed files.
- One way sync to make a directory identical.
- Check mode – hash equality check.
- Can sync to and from network, eg two different cloud accounts.
- (Encryption) backend.
- (Cache) backend.
- (Union) backend.
- Optional FUSE mount (rclone mount).
How to Install rclone in Linux Systems
The installation of rclone can be completed in two different ways. The easier one is using their installation script, by issuing the following command.
# curl https://rclone.org/install.sh | sudo bash
What this script does is to check the OS type on which it is ran and download the archive related to that OS. Then it extracts the archive and copies rclone binary to /usr/bin/rclone and gives 755 permissions on the file.
In the end, when the installation is complete, you should see the following line:
Rclone v1.44 has successfully installed.
Now run “rclone config” for setup, Check https://rclone.org/docs/ for  more details.
The second way to install rclone is by issuing the following commands.
# curl -O https://downloads.rclone.org/rclone-current-linux-amd64.zip
# unzip rclone-current-linux-amd64.zip
# cd rclone-*-linux-amd64
Now copy the binary file and give it executable permissions.
# cp rclone /usr/bin/
# chown root:root /usr/bin/rclone
# chmod 755 /usr/bin/rclone
Install rclone manpage.
# mkdir -p /usr/local/share/man/man1
# cp rclone.1 /usr/local/share/man/man1/
# mandb
How to Configure rclone in Linux Systems
Next what you will need to do is run the rclone config to create your config file. It will be used for authentication for future usage of rclone. To run the configuration setup run the following command.
# rclone config
You will see the following prompt:
2018/11/13 11:39:58 NOTICE: Config file “/home/user/.config/rclone/rclone.conf” not found - using defaults
No remotes found - make a new one
n) New remote
s) Set configuration password
q) Quit config
n/s/q>
The options are as follows:
- n) – Create new remote connection
- s) – set password protection for your configuration
- q) – exit the config
For the purpose of this tutorial lets press "n" and create new connection. You will be asked to give the new connection a name. After that you will be prompted to select the type of storage to be configured:
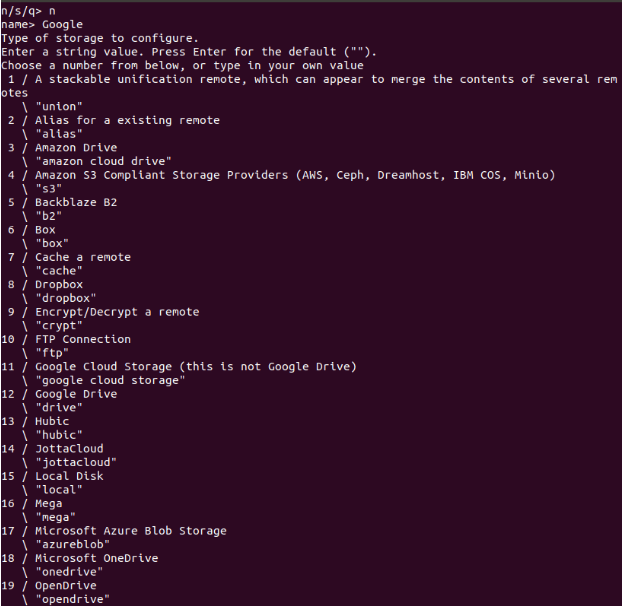
I have named by connection “Google” and selected “Google Drive”, which is under the number 12. The rest of the questions you can answer by simply leaving the default answer, which is an empty “”.
When asked to, you may select “autoconfig”, which will generate all the required info to connect to your Google Drive and give rclone permissions to use data from Google Drive.
The process looks something like this:
Google Application Client Secret - leave blank normally.
client_secret>
Scope that rclone should use when requesting access from drive.
Choose a number from below, or type in your own value
 1 / Full access all files, excluding Application Data Folder.
   \ "drive"
 2 / Read-only access to file metadata and file contents.
   \ "drive.readonly"
   / Access to files created by rclone only.
 3 | These are visible in the drive website.
   | File authorization is revoked when the user deauthorizes the app.
   \ "drive.file"
   / Allows read and write access to the Application Data folder.
 4 | This is not visible in the drive website.
   \ "drive.appfolder"
   / Allows read-only access to file metadata but
 5 | does not allow any access to read or download file content.
   \ "drive.metadata.readonly"
scope> 1
ID of the root folder - leave blank normally.  Fill in to access "Computers" folders. (see docs).
root_folder_id>
Service Account Credentials JSON file path - needed only if you want use SA instead of interactive login.
service_account_file>
Remote config
Use auto config?
 * Say Y if not sure
 * Say N if you are working on a remote or headless machine or Y didn't work
y) Yes
n) No
y/n> y
If your browser doesn't open automatically go to the following link: http://127.0.0.1:53682/auth
Log in and authorize rclone for access
Waiting for code...
Got code
Configure this as a team drive?
y) Yes
n) No
y/n> n
--------------------
[remote]
client_id =
client_secret =
scope = drive
root_folder_id =
service_account_file =
token = {"access_token":"XXX","token_type":"Bearer","refresh_token":"XXX","expiry":"2018-11-13T11:57:58.955387075Z"}
--------------------
y) Yes this is OK
e) Edit this remote
d) Delete this remote
y/e/d> y
How to Use rclone in Linux Systems
Rclone has quite a long list of available options and commands to be used with. We will try to cover some of the more important ones:
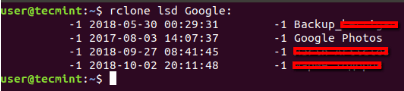
List Remote Directory
# rclone lsd <remote-dir-name>:
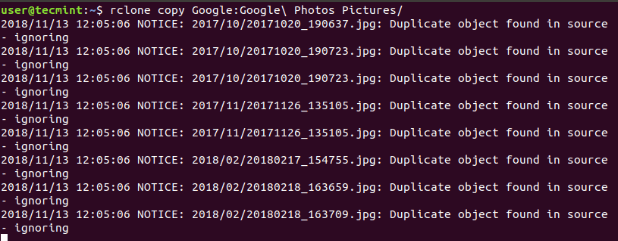
Copy Data with rclone
# rclone copy source:sourcepath dest:destpath
Note that if rclone finds duplicates, those will be ignored:
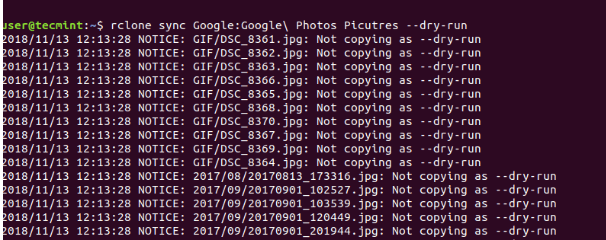
Sync data with rclone
If you want to sync some data between directories, you should use rclone with sync command.
The command should look like this:
# rclone sync source:path dest:path [flags]
In this case the source is synced to destination, changing the destination only! This method skips unchanged files. Since the command can cause data loss, you can use it with “–dry-run” to see what exactly will be copied and deleted.
Move Data with rclone
To move data, you can use rclone with move command. The command should look like this:
# rclone move source:path dest:path [flags]
The content from the source, will be moved (deleted) and placed on the selected destination.
Other useful rclone Commands
To create a directory on destination.
# rclone mkdir remote:path
To remove a directory.
# rclone rmdir remote:path
Check if files on source and destination match:
# rclone check source:path dest:path
Delete files:
# rclone delete remote:path
Each of rclone commands can be used with different flags and includes its own help menu. For example, you can do a selective delete using the delete option. Lets say you want to delete files larger than 100M, the command would look like this.
# rclone --min-size 100M delete remote:path
It is highly recommend to review the manual and help for each command to get the most of rclone. The full documentation of rclone is available at: https://rclone.org/
Conclusion
rclone is a powerful command line utility to help you manage data between different Cloud storage providers. While in this article we scratched just the surface of rclone capabilities, there is much more to be achieved with it especially when used in combination with cron service (for example).
What if I want to do this in my cloud server which does not have a browser? It has a command line only.
Thanks for sharing this awesome post guide with us. I really believe that these code snippets will be very helpful. But, I have a concern that my website is hosted on DigitalOcean. Not the conventional DigitalOcean but the managed DigitalOcean web server which is powered by Cloudways.
So, the details mentioned here will do any benefit to me as I am running on the managed DO server.
@Kimberly,
That doesn’t matter, whatever be the hosting, if Linux installed on the machine, these instructions will work without any issues..