Filesystem quota is a standard built-in feature found in Linux Kernel. Quotas determine the amount of space a file should have to support user activities. The disk quotas also limit the number of files a user can create on the system.
Filesystems that support the quota system include xfs, ext2, ext4, and ext3 to mention a few. The assignment of quotas is specific to the filesystem and for each user. This article bears all you need to know about working with the quota filesystem in a multi-user Ubuntu environment.
The assumption here is that you are using the Ubuntu system with a user (tecmint) given sudo rights. The ideas shared here can work on any Linux distro as long as you use the right implementation technique.
Step 1: Installing Quota in Ubuntu
For quotas to be ready and usable, install the quota command-line tool using the apt command, but before that, you need to update the system software packages.
$ sudo apt update
Now use the following command to install the quota package on Ubuntu.
$ sudo apt install quota
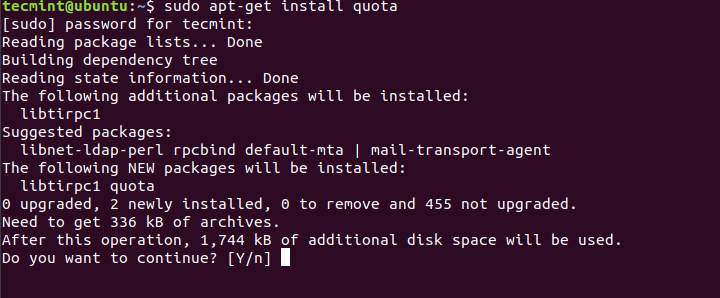
Press Y, and then ENTER for the installation process to start.
Confirm the installation version by running the command below. Your version number may differ from what you see below.
$ quota --version

Step 2: Installing the Module for Quota Kernel
For those running a cloud-based virtual system, the default Ubuntu installation may be missing the kernel modules that support the use of quota. You must confirm using the find tool and ensure that the two modules, quota_v1, and quota _v2, are inside the /lib/modules directory.
$ find /lib/modules/`uname -r` -type f -name '*quota_v*.ko*'
This should be the outcome of the above command.

Do not worry about the kernel versions as long as the two modules are present. If not found, use the following command to install quota kernel modules as shown.
$ sudo apt install linux-image-extra-virtual
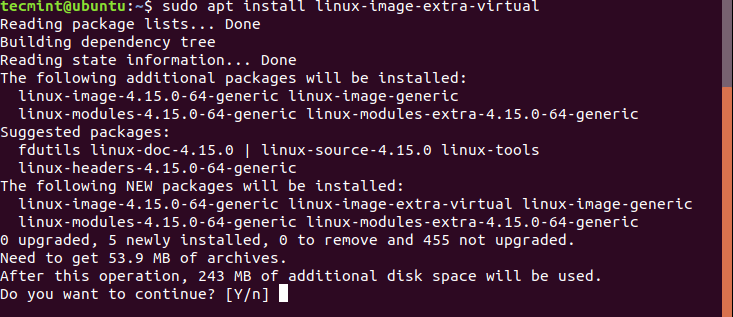
You will get the right modules that you need for quota implementation.
Step 3: Updating Filesystem Mount Options
For the quotas to be active on a specific system, it must be mounted with related quota options. You can do this by updating the file system entry found in the /etc/fstab file.
$ sudo nano /etc/fstab
You should be ready to edit the file appropriately. The difference between a fstab file and a desktop one is the difference in how the / or root file system represents the entire disk space. Replace the line (/) that points to the root system using the lines below.
LABEL=cloudimg-rootfs / ext4 usrquota,grpquota 0 0
The lines will change to allow the userquota and grpquota to be accessible. You can leave one that is not part of the final configuration. If the fstab had some options, add the new options at the end of the line. As you do the appending, separate the new items with a comma but with no spacing between them.
Remount the filesystem for the changes to take effect.
$ sudo mount -o remount /
NOTE: confirm no spaces exist between the options in the /etc/fstab to avoid such errors.
mount: /etc/fstab: parse error
The verification of the use of new options when mounting the filesystem in the /proc/mounts file is done through grep. The command shows the root file system entry in the file.
$ sudo cat /proc/mounts | grep ' / '

From the output, you can see the two options that we set up. It is time to turn on the quota system.
Step 4: Enabling Disk Quotas on Ubuntu
First, you must run the quotacheck command.
$ sudo quotacheck -ugm /
The command creates two files a quota user and a quota group that have information on the limit and usage of the filesystem. These files have to be present before you start using the quota.
Here is a definition of the parameters:
-u: symbolizes a user-based quota file will be created.-g: indicates that a group-based quota file will be created.-m: disables remounting of the file system as a read-only while at the same time giving accurate results in an environment where the user keeps saving files. The m option is not mandatory during setup.
When there is no need to enable the use of quotas based on user or group, there is no need to run the quotacheck option. Confirm this by listing the root directory using the ls command.
$ ls /
Sample Output
aquota.group  bin   dev  home        initrd.img.old  lib64       media  opt   root  sbin  srv  tmp  var      vmlinuz.old
aquota.user   boot  etc  initrd.img  lib             lost+found  mnt    proc  run   snap  sys  usr  vmlinuz
Failure to include the u and g parameters in the quotacheck command, the corresponding files will be missing.
Now we’re ready to turn on quota on the root (/) filesystem with the following command.
$ sudo quotaon -v /
Step 5: Configure Quotas for a Single User
We can use the edquota and setquota commands to set them for users or groups.
Using edquota
The edquota commands edits quotas, for instance, we can edit a quota belonging to a tecmint user using:
$ sudo edquota -u tecmint
Using the -u option specifies that the quota belongs to a user. Use the -g option if you need to edit a quota that belongs to a group. The command will open a file using your choice of text editor.
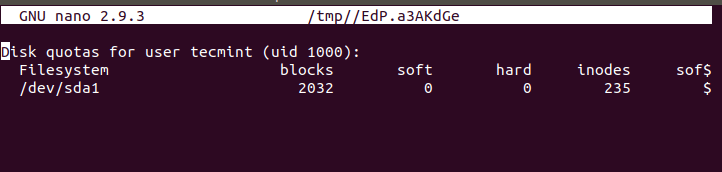
The output lists the username, uid, the filesystem with active quotas, and the usage of blocks and inodes. A quota based on inodes limits the number of files and directories users can create irrespective of the size they use on the disk. Most Admins prefer the block-based quota that controls the disk space.
NOTE: The use of blocks does not show how it can change depending on different factors such as the command-line tool reporting them. Within the context quotas on Ubuntu, we can assume that a single block is the same as one kilobyte of disk space.
Using the command line above, the user will use 2032 blocks, which is the same as 2032KB of space on the /dev/sda1. The 0 value disables both soft and hard limits.
Every quota set allows for setting up soft and hard limits. A user who goes above the soft limit may be over her quota, but not barred from using more spaces or inodes. The user in such a case has seven days to redeem their soft limit space, failing to do that makes it difficult to save or create files.
A hard limit means the creation of new blocks or inodes stops the moment you hit the limit. Users will report seeing warnings or errors while performing regular tasks.
We can update tecmint’s block quota to have a soft limit of 100MB and 110MB for the hard limit.

After editing, close the file and check the new user quota limit settings using the quota command.
$ sudo quota -vs tecmint

NOTE: Giving your users an opportunity to analyze their quotas without invoking the sudo command, they must be given access to read quota files during the creation phase in step four. One easy way of doing so is to create a user’s group and give the group access so you can add users to it.
Using setquota
setquota updates the quota information using a single command without any interactive setup. The command requires the username and setting of both the soft and hard limits the block and inode will use. You will also need to declare the file system the quota will use.
$ sudo setquota -u tecmint 200M 220M 0 0 /
The command doubles the block-based quota limits to 200 megabytes and 220 megabytes. The two 0 0 indicate that both the hard and soft limits are not set, it is a requirement even when there is no need to set inode-based quotas.
As usual, use the quota command to verify your progress.
$ sudo quota -vs tecmint

Step 6: Generating Quota Reports
Generating a quota report must indicate usage from all users. The command repquota is used.
$ sudo repquota -s /
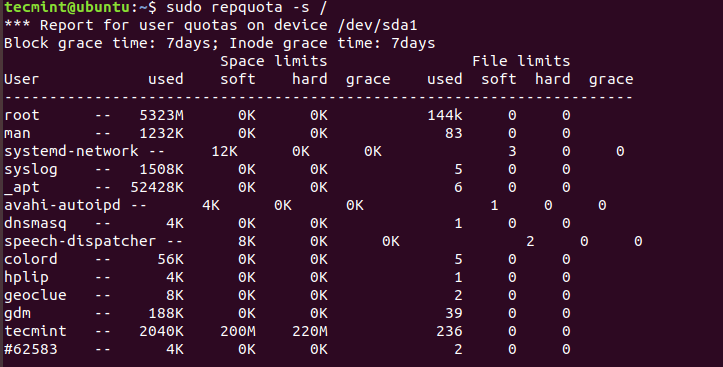
The output above is a report on the / root filesystem. The -s instructs repquota to give results in a human-readable format.
The default Block grace time is 7 days. The grace column alerts the user on the number of days before the denial of access to the resource disk.
Step 7: Set the Configuration Grace Periods
The grace period is the time a user gets permission to work beyond the default timing.
$ sudo setquota -t 864000 864000 /
The command instructs the block and inode to have a grace period of 864000 seconds an equivalent of 10 days. The setting will affect all users, therefore, values need to be set even when there will be no use of blocks and inodes. The time value must be in seconds.
Confirm the changes and see if they took effect using the command:
$ sudo repquota -s /
Common Errors Messages
quotaon: cannot find //aquota.group on /dev/vda1 [/]
quotaon: cannot find //aquota.user on /dev/vda1 [/]
The above error is common if you try to turn on quotas using the command qoutaon before an attempt to check the status of a quota using the command quotacheck.
quotaon: using //aquota.group on /dev/vda1 [/]: No such process
quotaon: Quota format not supported in kernel.
quotaon: using //aquota.user on /dev/vda1 [/]: No such process
quotaon: Quota format not supported in kernel.
This error tells the Administrator that the kernel does not support it or you could have the wrong version on the machine (we have quota_v1 and quota_v2). For Ubuntu, such errors are typical on a cloud-based virtual server.
Fix the error by installing the Linux-image-extra-virtual package using the apt command.
quota: Cannot open quotafile //aquota.user: Permission denied
quota: Cannot open quotafile //aquota.user: Permission denied
quota: Cannot open quotafile //quota.user: No such file or directory
The error is notable when the current user does not have permission to read quota files. As an Administrator, you only need to make the correct permission changes or use sudo when you need to access files in a quota system or file.
Conclusion
At the top of the article, we started with quota command-line tools and the verification of the kernel version and went further to explain how to set up a block-based quota for a single user and how to generate a report on a filesystem quota usage.
The article also covers common errors and how to avoid them by using an extra package or verifying the kernel version on your system.


Hi! How are you?
I have a virtual machine with Ubuntu Server 20.04 in Azure. I followed the steps until I got to edit the /etc and /fstab file but I don’t know how it should be modified. Currently, my fstab file looks like this:
As I understand the line UUID = b1983cef-43a3-46ac-a083-b5e06a61c9fd / ext4 usrquota, rw, grpquota, discard, quota, relatime 0 should leave the following: LABEL = cloudimg-rootfs / ext4 usrquota, grpquota 0 0 ??
Thank you very much for your help.