Ubuntu 24.04 LTS, codename Noble Numbat, was released on April 25, 2024, and is now available for download from the official Ubuntu website and its mirrors. This release will receive official security and maintenance updates for five years, until April 2029.
Some key points about Ubuntu 24.04 LTS:
- Release date: April 25, 2024
- Codename: Noble Numbat
- Support period: 5 years (until April 2029)
- Download from: https://ubuntu.com/download/desktop or official mirrors
Ubuntu has long been recognized as one of the most popular and widely used Linux distributions among desktop users.
However, it has experienced fluctuations in its popularity, particularly during the period when it introduced significant changes to its desktop experience with the user interface.
A key feature of this new Ubuntu release is that it comes out at the same time (or almost the same time) as other popular versions like Kubuntu, Lubuntu, Xubuntu, and Ubuntu Studio.
This gives users more options for desktop environments, all with official support. The support period can differ (usually 3 years for non-LTS and 5 years for LTS versions), but releasing them together makes it easier for both individuals and companies to choose.
Ubuntu 24.04 Features
Here are some noticeable changes in Ubuntu 24.04 (Noble Numbat):
- Modern Desktop – Ubuntu 24.04 utilizes GNOME 46, offering a refined interface, improved multitasking, and better performance.
- Revamped Installer – The installer boasts a fresh look, improved accessibility, and even supports easier deployment for businesses.
- Upgraded App Center – The App Center features a new Flutter-based interface for smoother navigation, clearer categories, and user ratings.
- Enhanced Security – As an LTS release, Ubuntu 24.04 prioritizes stability with the latest Linux kernel 6.8 for improved security and hardware compatibility.
- Window Tiling Assistant – GNOME 46 introduces advanced window tiling, allowing efficient snapping of windows to various screen sections, including corners.
- Granular Update Control – Separate stability and cutting-edge updates offer users more control over what gets installed.
- Year 2038 Fix (ARM) – The year 2038 issue is addressed on ARM architecture, ensuring accurate timekeeping for future users.
- Minimal Default Installation – The default Ubuntu Desktop installation is now minimal, with options to add applications like LibreOffice or Thunderbird.
Ubuntu has one of the most simple and straightforward installers among all Linux distributions which makes the job of installing the system on hardware very easy even for a beginner or an uninitiated Linux or Windows user with just a few clicks.
System Requirements
Following are the minimum system requirements for installing Ubuntu 24.04 Desktop:
- A 2 GHz dual-core processor
- 4 GB of RAM
- 25 GB of free hard drive space.
This tutorial will cover fresh installation of Ubuntu 24.04 and with a basic walk through and a few system tweaks and applications.
Step 1: Installing Ubuntu 24.04 Desktop
1. Download the Ubuntu ISO image from the Ubuntu website, and then use a USB Linux Installer to burn the ISO to a USB stick.
2. After creating a bootable Ubuntu USB drive, restart your computer and go into the BIOS or boot menu by pressing the designated key (usually F2, F12, or Del) during startup. Choose the USB drive as the boot device and press Enter.
3. The USB content is loaded into your RAM memory until it reaches the installation screen where you will be given the option to “Try Ubuntu” or “Install Ubuntu“.
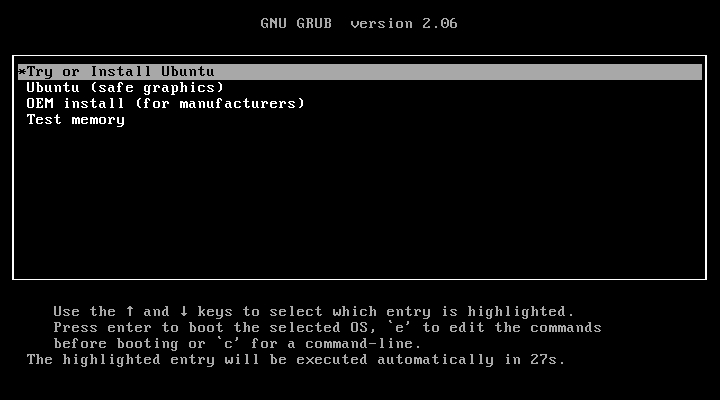
4. The next step asks you to test Ubuntu before installing it, choose “Try Ubuntu“, which allows you to use Ubuntu from the USB drive without making any changes to your computer’s hard drive.

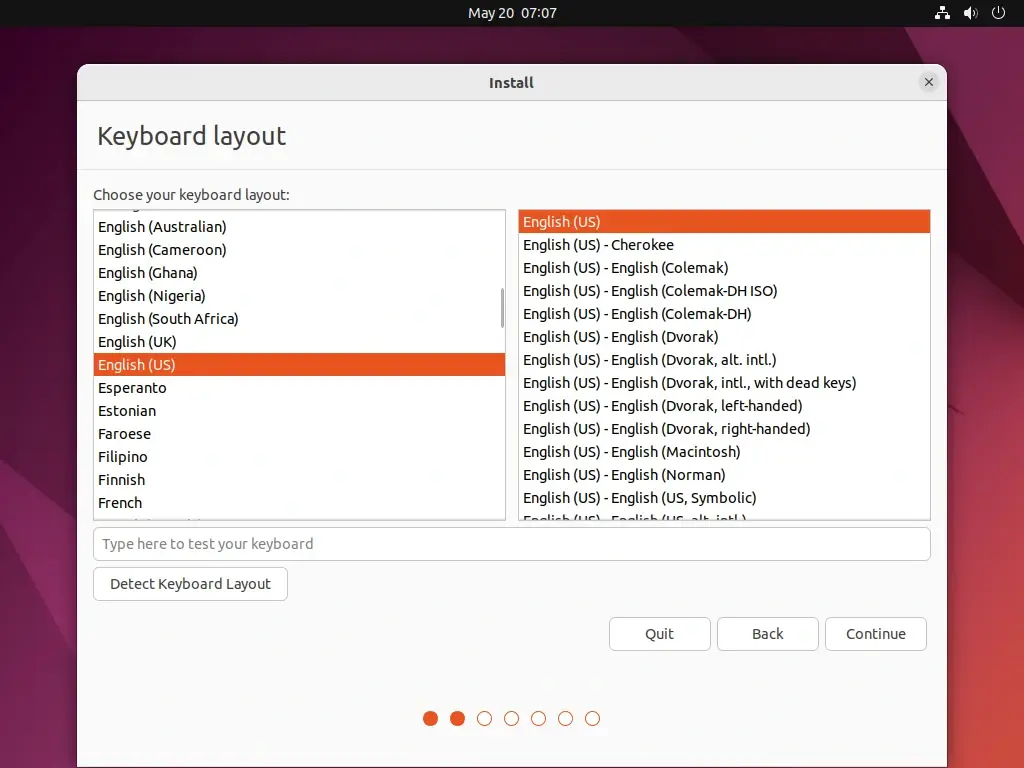
5. If you’re ready to install Ubuntu, select “Install Ubuntu” and follow the on-screen instructions to select your language, and keyboard layout.
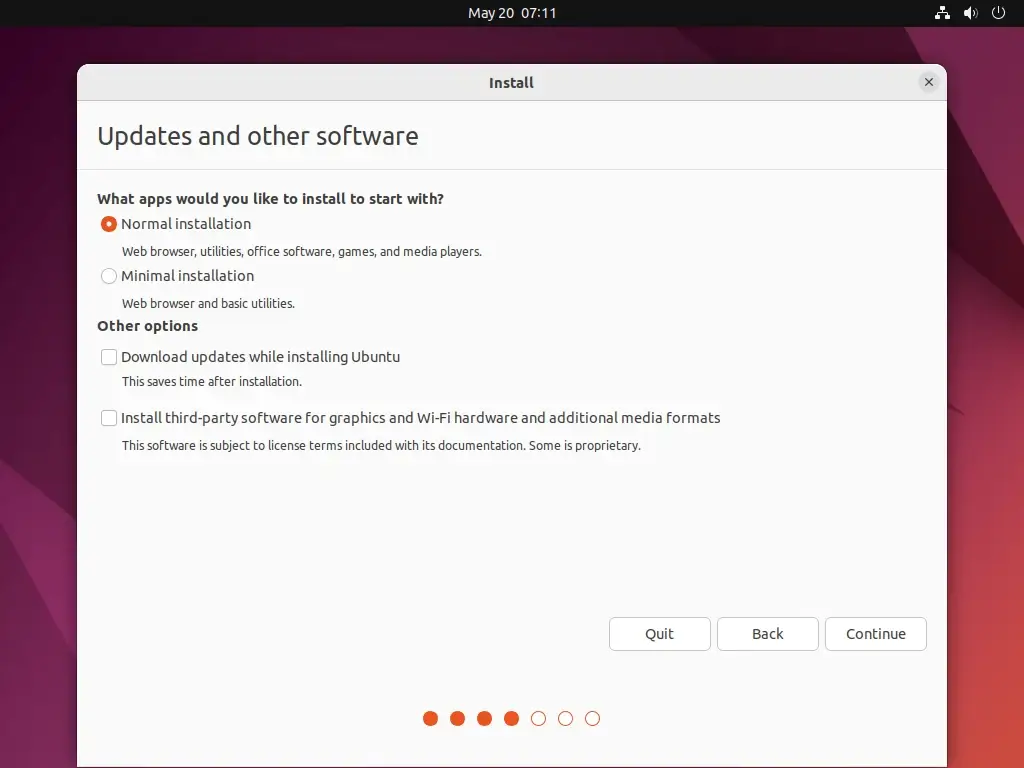
6. Next, choose “Normal installation” to install the full Ubuntu desktop with office software, games, and media players. You will also have the option to download updates and third-party software during the installation process.
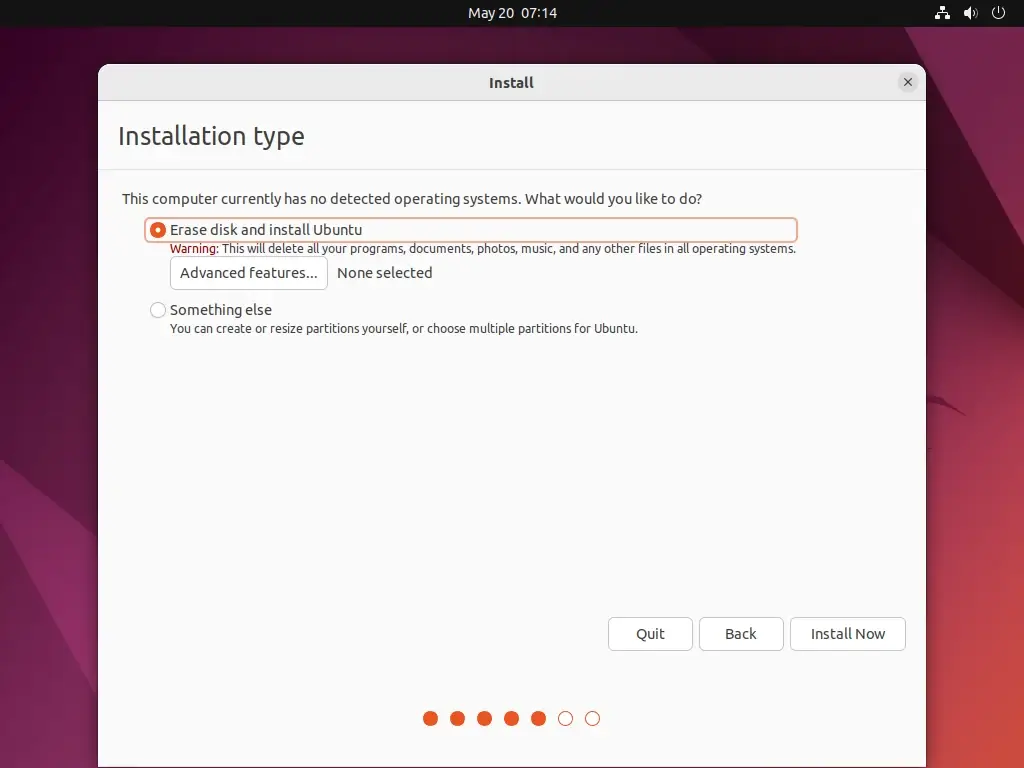
7. Ubuntu will prompt you to choose how you want to partition your disk. You can select “Erase disk and install Ubuntu” to use the entire disk or choose “Something else” for manual partitioning.
If you’re new to partitioning, it’s recommended to select the “Erase disk and install Ubuntu” option.
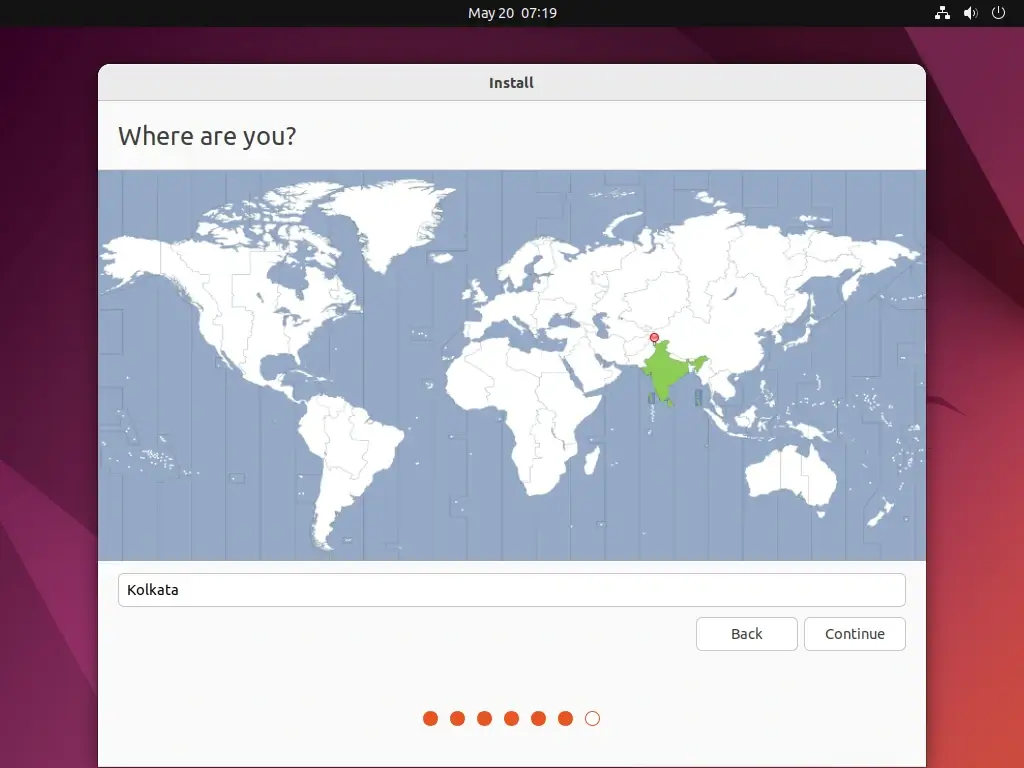
8. After your disk has been sliced hit on Install Now button. In the next stage choose your Location from the map – Location will have an impact on your system time also so be advised to choose your true location.
9. Next, enter your name, desired username, password, and computer name to create a user account for Ubuntu.
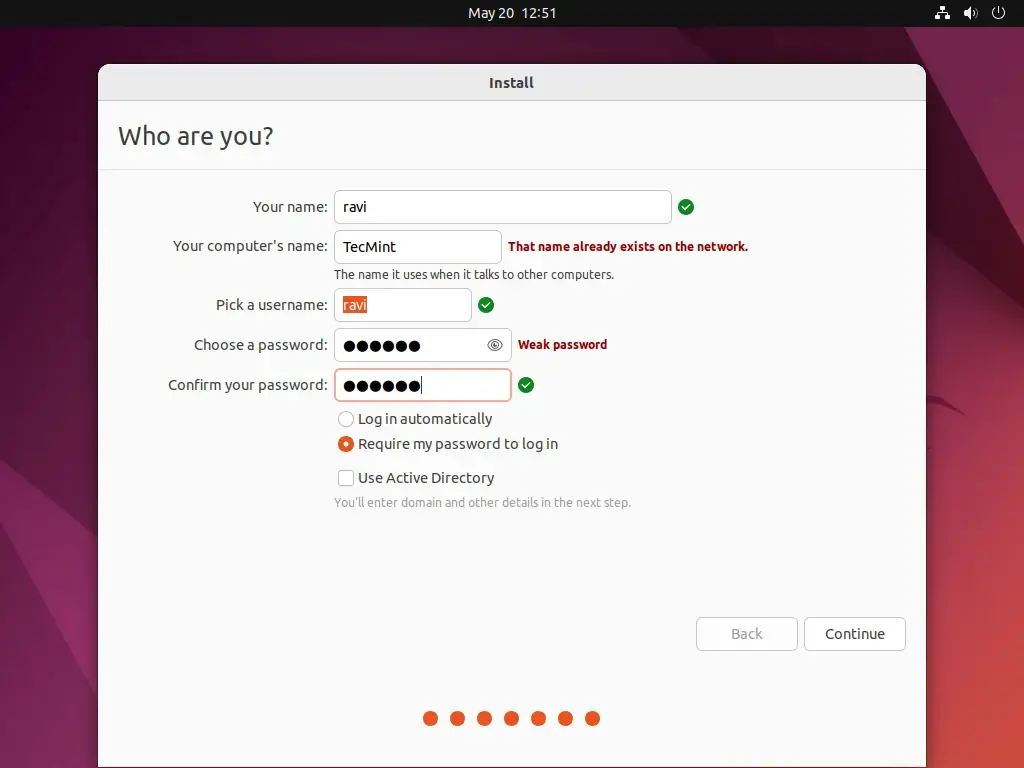
10. Review your settings and click “Continue” to begin the installation process.

The installer now starts copying system files to your hard drive while it presents you with some information about your brand new Ubuntu LTS for 5 years support system.
After the installer finishes his job click on Restart Now prompt and press Enter after a few seconds for your system to reboot.
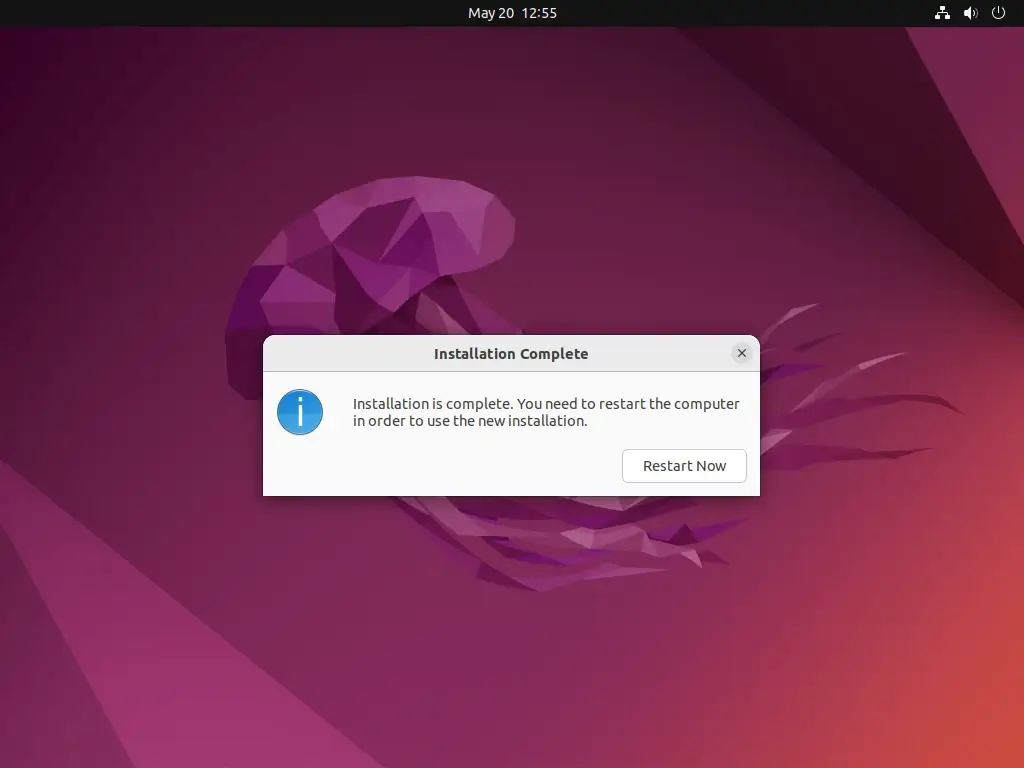
Congratulations!! Ubuntu 24.04 is now installed on your machine and is ready for daily usage.
Step 2: System Update and Basic Software
After first logging into your new system is time to review your software sources to ensure you have all necessary repositories enabled, including main, universe, restricted, and multiverse.
Check for Updates
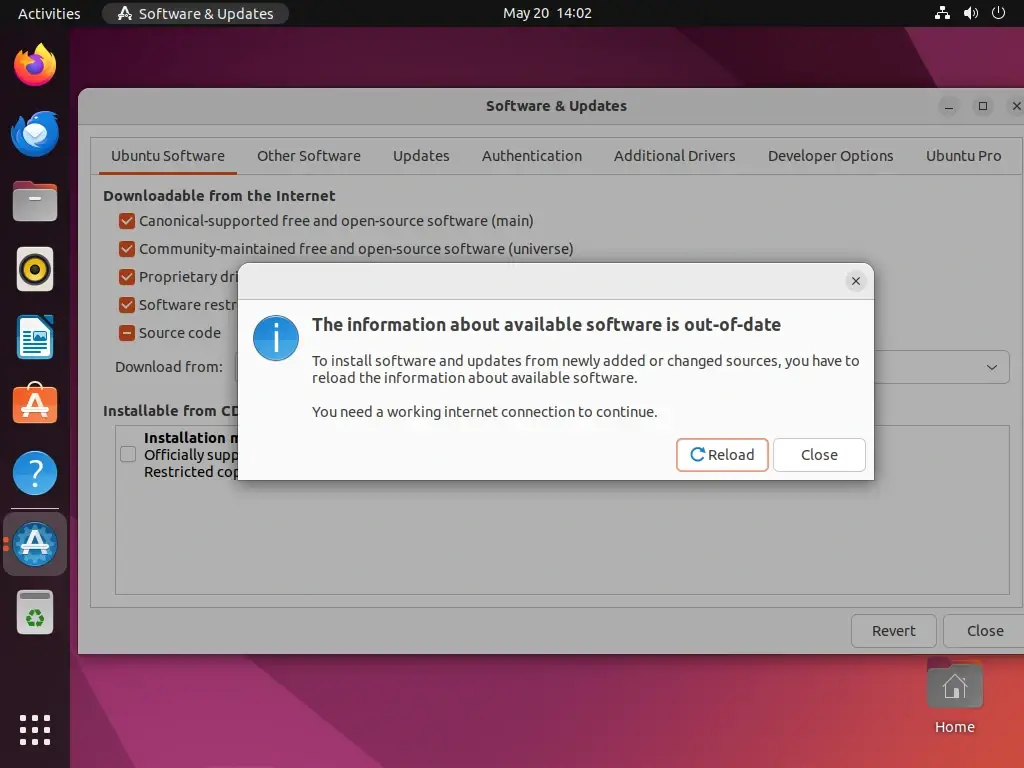
Open “Software & Updates” from the applications menu, go to the “Ubuntu Software” tab, and ensure that all the checkboxes for the Ubuntu repositories are checked.
You may also check the “Source Code” option if you want access to source packages.
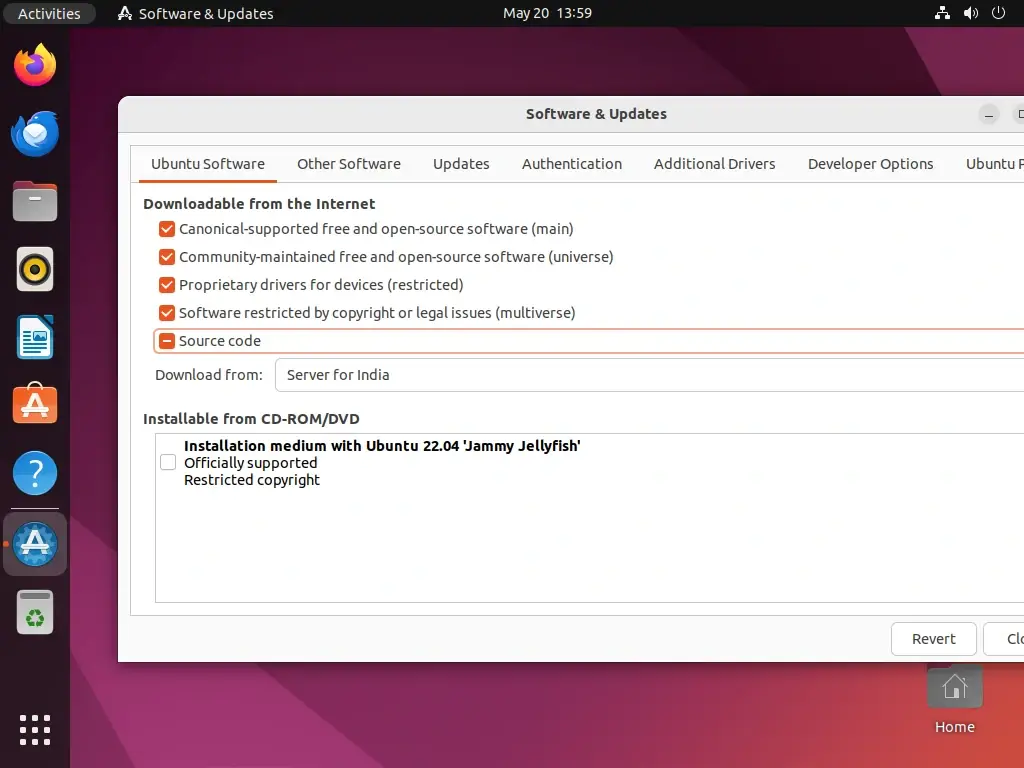
After making any changes to the software sources, click “Close” and then “Reload” to update the software repositories.
Next, open a terminal and issue the following commands to keep your system secure and protected against potential vulnerabilities.
sudo apt-get update
sudo apt-get upgrade
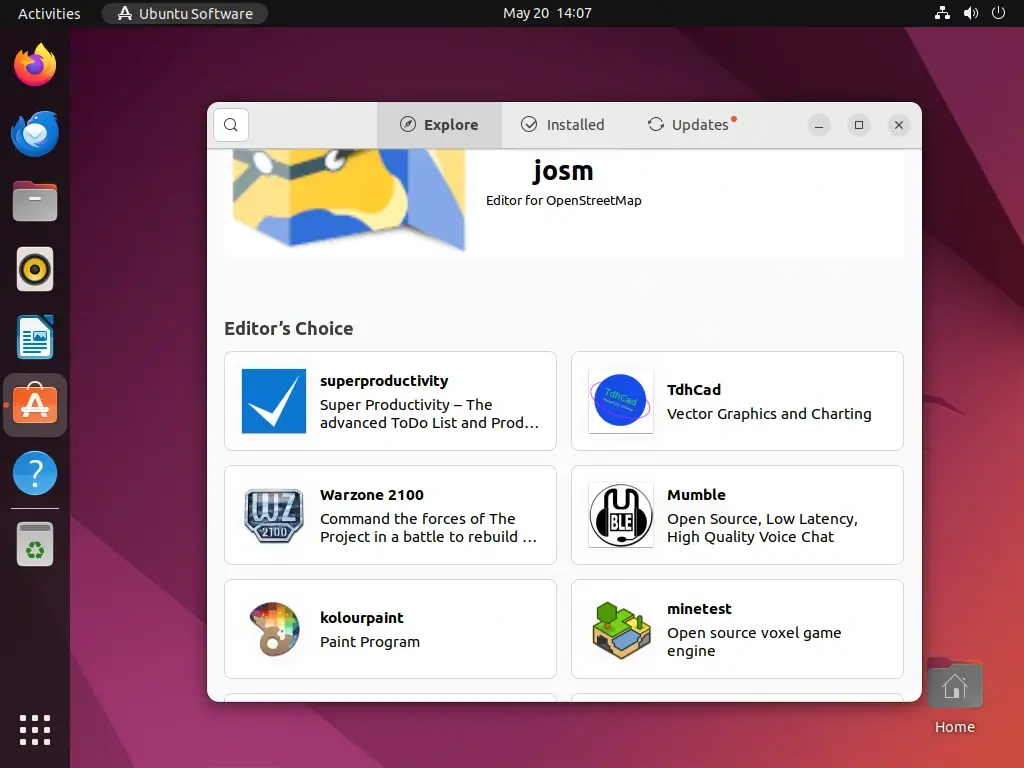
Install Basic Software
For basic user usage, type “Ubuntu Software” in the search bar, press Enter to open it, and browse through the search results to find the software you’re looking for.
Enable ‘Minimize on Click
If you prefer to minimize windows by clicking on the app icon, you can enable this feature using a simple command in the terminal:
gsettings set org.gnome.shell.extensions.dash-to-dock click-action 'minimize'
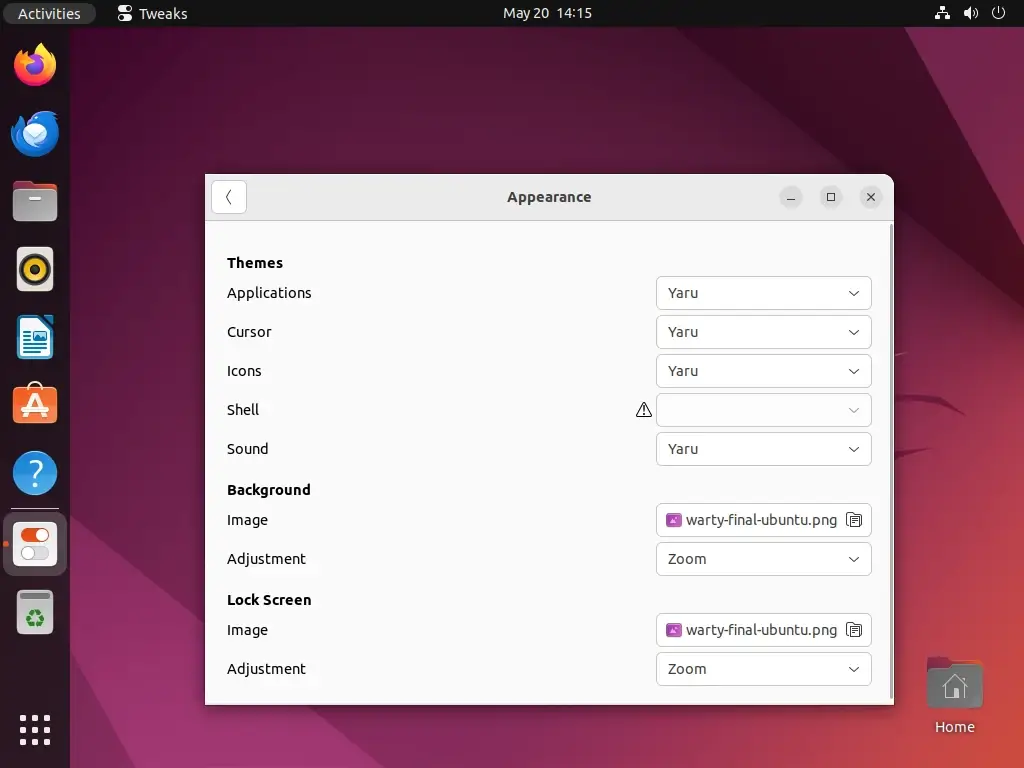
Install GNOME Tweaks
GNOME Tweaks is a powerful tool that allows for extensive customization options such as changing themes, fonts, window behavior, and more.
You can install GNOME Tweaks through the Ubuntu Software app and access it from the applications grid by searching for “tweaks“.
Enable Night Light
You might want to turn on the “night light” setting in GNOME, which helps to lower the amount of blue light that comes from your screen. This can be good for your sleep. You can find this setting in the “Screen Display” part of your Settings.

Customize Desktop Environment
Ubuntu offers different desktop environments like GNOME, KDE, and Xfce. You can install and switch between these environments based on your preferences using terminal commands as shown.
Install KDE on Ubuntu:
sudo apt install kubuntu-desktop
Install Xfce on Ubuntu:
sudo apt install xubuntu-desktop
Install Snap Packages
You might want to try installing Snap packages, a new way of packaging software for Linux. It lets you get lots of different software applications and tools easily.
sudo apt install snapd
That’s all for basic Ubuntu installation and minimal software required for average users to browse the Internet, instant messaging, listen to music, watch movies, YouTube clips, or write documents.


Is this version of Ubuntu suitable for a 32-bit desktop?
@Mihal,
No, Ubuntu 24.04 is not suitable for 32-bit desktops. Starting with Ubuntu 20.04, Canonical dropped support for 32-bit (i386) architecture, so the latest versions, including 24.04, are only available for 64-bit systems.
The windows in Ubuntu 20.04 LTS don’t resemble this at all, and it’s crucial to encrypt your hard disk, yet this possibility isn’t even mentioned in the installation tutorial… it’s disappointing!”
Hi,
I’ve installed Ubuntu 14.04 LTS. It successfully installed in my amd64 system. But there is a problem in booting process. When I choose to boot the Ubuntu from GRUB as a normal boot, it can be stucked with a black screen. But when I boot it in recovery mode, it boots properly.
Where may be the problem?
Can you please help me?
Hi
I installed ubuntu 14.04 as per your instructions (something else and three partitions – root, swap, home) but after the restart , it couldnt find my hard drive and kept booting into setup.
So i tried the erase and install ubuntu default option and everything seemed to work fine.
and lsblk in terminal shows
sda1 512mb /boot/efi
sda2 4.7 gb swap
sda3 442 gb /media/temp/5f4a7464-4ce6-4b53-97de-dadb38461b0
sda4 18.1 gb /
my question is does this mean that it requires a boot partition , and how come it isnt mentioned in the guide ?
No,the installation does not require a separate /boot partition, but if you want to create it, just do it! If the /boot partition is not manually created, then it resides inside /(root) partition by default! If you installed using this guide and you could’nt boot then it was surely another issue with the installation or you did not handle partitions according to this guide!
Alright, i did follow the guide as written , its just that i noticed the boot partition needing to be there in your 15.04 installation . Anyways , thanks for your explanation . :)
After a clean install of Ubuntu 14.0.4 from windows 8, I cannot log in. I insert my password but it makes the drum sound and returns to the login screen. Cannot figure out what’s going on since I am a Linux newbie so would appreciate any help. Thanks in advance.
What you describe seems to be a bug with logging on Ubuntu. I can’t help you much with this issue! Anyway try to press ctrl+alt+F1 to enter a terminal session, login with your system sudo credentials and verify /home/$USER permissions to belong to your login user, and, also, install ubuntu-session with sudo apt-get install ubuntu-session command!
HI Chris,
I’ve the same problem here.
Previously, I’ve installed the 32-bit ISO image into the AMD64 based Laptop.
After that, When I installed amd64 ISO image into my laptop. The problem is go away.
I hope, you should follow my instructions to get rid of this problem.
Thank You.
How do you restore an Ubuntu LTS when the archives are no longer available in common nodes? ‘d like to restore Saucy but I’m getting errors that some archives have been removed from saucy-translations & saucy-multiversion. I’ve tried different mirror sites but nothing works.
Looks like the official support for Ubuntu 13.10 (Saucy Salamander) has expired and Canonical had disabled the sources! I don’t think you can do much, but to upgrade to a newer version or a LTS version!
Nice installation guide, I’m having one problem, when i choose encrypt home drive, i cannot log into the encrypted home drive O.o, any ideas?
Hello;
I have upgraded my ubuntu 12.04 to 14.04 (64bits) and now I want to create a separate partition in order to install on it a Windows system but really I don’t know how to do it since I am a beginner on Linux. So I downloaded Gparted to see my partitions and I got 2 partitions and one as unknown :
1st partition : /dev/sda1 which has a file system ext4 and has the largest size on my laptop (924 GiB, and my hard drive’s size is about 1TB) and has a flag “boot”
2nd partition : /dev/sda2 which has a file system “extended” and a size of 7.89 GiB
3rd partition : /dev/sda5 with a “!” concatenated to its name and a file system “unknown” and has the same size of 2nd partition.
So, I want at first to resize my partition (the 1st one) and then to have a standard partition (boot, home and swap) after which I want to create a separate partition for Windows to install an XP or Win7 on it.
Can you please help me?
Hello,
If I understood you correctly, you have two hard drives. If you look at the designations they should show as “sda1” and “sdb1” (minus the quotes).
So lets say that your first hard drive (IDE or SATA) 1 [Master] is windows XP “sda1”.
Your second hard drive (IDE or SATA) 2 [Slave] is where you want to place Ubuntu “sdb1”.
Keep your both drives connected when doing the install.
So during part 6 (six), you want to select “Something else”
Look closely at the drives. There is a possibility that the 1st drive [Master] shows sda1, sda2, sda3 etc… meaning the first drive [master] has three partitions. That’s all fine.
What you will be looking for is “sdb1”, the second drive, that should be all one partition, then you follow the above steps closely for partitioning the drive sdb1.
JUST MAKE SURE that you know what drive XP is on [Master or Slave], you don’t want to overwrite that XP drive.
Again, Master should be “sda1″ Windows XP and Slave sdb1 will then be Ubuntu.
Also on newer Mother Boards there can be both SATA and IDE ports then you will see more then one Master if there is an IDE and SATA installed drive installed.
Don’t worry about this, just Pay Attention to the 120Gb drive that has nothing on it.
Back in the day I have seen the first drive as ‘sda0″ { that is a zero not an letter O } Goofy US ASCII for zero with no slash. That should not be an issue for you though.
With the Master and Slave drives connected and with XP being on your Master drive; Ubuntu should see it and add it to the Grub2 boot menu so you can select from one or the other OS. If not, then someone can chime in here on how to add XP to the Grub2 boot menu. You can Google ” adding windows to grub menu ” again minus the quotes.
I myself have 6 different operating systems on my main computer since I do tech support for a gaming company. XP, Vista, Win7, Win8, Ubuntu 14.04 and Mac. Yep Mac, kernel panics and all. Windows 10 is next, they skipped 9.
Now, if anyone wants to add to or correct anything here I will not be offended.
Good Luck Echha
G
p.s. You can do the install without the XP drive installed but you will have to manually add XP to the Grub2 boot menu. There are some small programs that you can install in XP that will let you edit the Grub boot menu to add or remove what you want, even which one boots as a default and even fancy boot menus. So after the Ubuntu install reconnect the XP drive then install and run the Grub2 editor.
Just a quick comment on the Grub2 Menu. Remember the computer has to find the Grub boot in order for you to be able to boot one or the other OS. It has been a while, but if I remember correctly the Grub edit program will help you find the Grub2 boot and set it so the computer will find it after the Bios Post boot.
Hollo, Linux users
Yesterday I tried to install Ubuntu 14.04 on my computer, the hard drive is 120 Gb IDE hard drive from Samsung, I went to the installation procedure a couple times, but it failed to boot. when it says installation complete, restart computer, when I hit restart, my BIOS is unable to find the operating system, it says Intel boot agent is exiting, … press any key, etc. So after installing Ubuntu on my system my computer refuses to boot.
I tried to install Ubuntu on a hard drive which I was using as a second hard drive for windows XP machine. This hard drive had four partitions. I had already disconnected the primary hard drive on which XP was running.
I am a first time user of Linux. Where may be the problem?
Yes…you’re right …I recommend swap only if you have less then 2GB of RAM. Actually on new systems with more than 8GB of RAM i disable swap completely or just make one swap partition, no more than 2G RAM. The problem changes if you use a SSD disk…you can use it for swap space due to its increased speed ….but still, if your system has min 8GB of RAM use SSD swap no more than 2GB.
Also swap problem is relative ;) it depends on how you intend to use your system…and if it truly needs lot of swap!
Nice guide, but why do you recommend 2xRAM for the swap partition size?
I think is too much for swap, usually this measure it was for old PCs, in the past with PCS having less than 2GB ram memory, may be was a good size.
Present day, we see 8, 16, 32GB ram memory, even more in PCS, laptops etc…
My recommend it’s to use same size of ram memory, and even probably you will never see too much use…
If you are not sure about this, you can check your swap use:
> cat /proc/swaps
> free -m
or
> vmstat
Check how much size and when is your swap used and you will know if you need all of this GB or not.
;)
bye.
@lymus: You can install Ubuntu in dual-boot with Windows with no problem….just create at least two partitions: on one, first, install Windows, and then use the other partition to install Ubuntu.
Wow thats complicated compared to a windows installation. I’m way to scared of losing data. I think they have a bit of work to do on the installation process if they want to attract xp users who like myself have limited knowledge of ubuntu. All this partitiong and mounting means nothing to me and as I said i’m way to scared of losing data, why can’t it install alongside existing data?
Believe me, its very easy as compared to win to use. Its fast to install, boot. So many drivers are already bundled. Its easy to connect via usb, LAN or whatever. U nothing hv to do actually.
@ Josh : “/” means the root which means its the top level of a linux folder structure.If you are creating the swap space you better choose “Use as” Field as swap. then the mount point field will get Dim (No selections). This applies only when you are creating a swap space. Other than that you should go with the “Mount point” as /.
For ex : you can create /Home, /var
Hey,
I have gone through the steps and i would like to know why don’t you create a /boot.
Forget it..
I’ve found that the “home” is not under “device”, it’s under “places”.
And the size is just right.
Thank you for the helpful guide..
This is my first time installing Ubuntu.
Thank you so much for this helpful guide that help a newbie like me installing.
I need to ask something.
I’ve followed the guide and successfully installed ubuntu.
But, there is one thing that is wrong:
I cannot see my partition. There is only one named “Computer” that have the same size as the root partition “/” when I set it up.
But where are the other partition?
Great stuff! Worked like a charm. Thank you.
I’m new to Ubuntu, but I have followed the guide to the letter. Every time I try to create a “swap area” I get a pop-up saying “The mount point you entered is invalid.
Mount points must start with “/”. They cannot contain spaces.” all the guides i’ve seen show the “swap area” without the “/” symbol?
What about on servers?