How to Upgrade Linux Mint 20.3 to Linux Mint 21

If you do not wish to do a fresh Linux Mint 21 Vanessa installation, you can simply upgrade from an earlier version.

In this article, we will walk you through the steps to upgrade Linux Mint 20.3 (the latest minor version of the 20.x version) to Linux Mint 21.

Before you proceed, note that this is a major upgrade and it is bound to take several hours. Besides, after initiating the upgrade process, the upgrade tool will require your current Linux Mint installation to be up to date (you will have to install updates where necessary) and to prepare system snapshots as well.

So, do not rush, kindly do not take shortcuts that may negatively affect the whole upgrade process. Now let’s get started!

Step 1: Install mintupgrade Tool

First, open a terminal, run the following commands to refresh your apt-cache, and install the mintupgrade upgrade tool:

$ sudo apt update
$ sudo apt install mintupgrade
Install Mintupgrade Tool

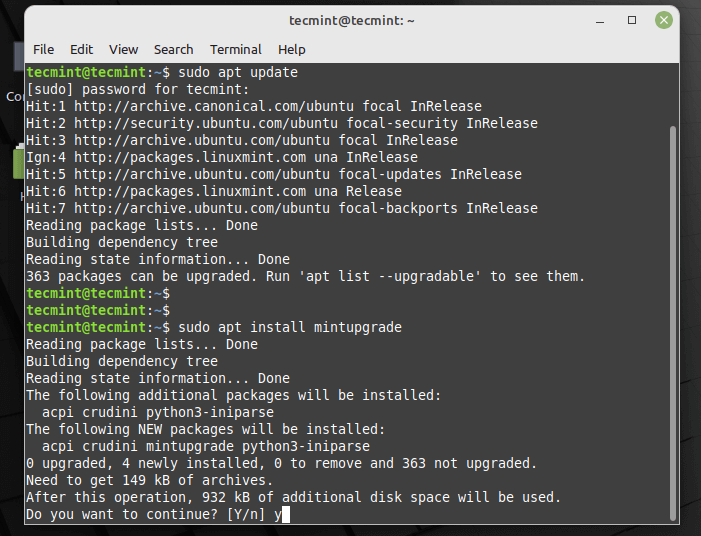
In case you fail to find mintupgrade in the repositories, you need to switch to the default Linux Mint mirror and refresh the apt-cache.

Step 2: Upgrading to Linux Mint 21

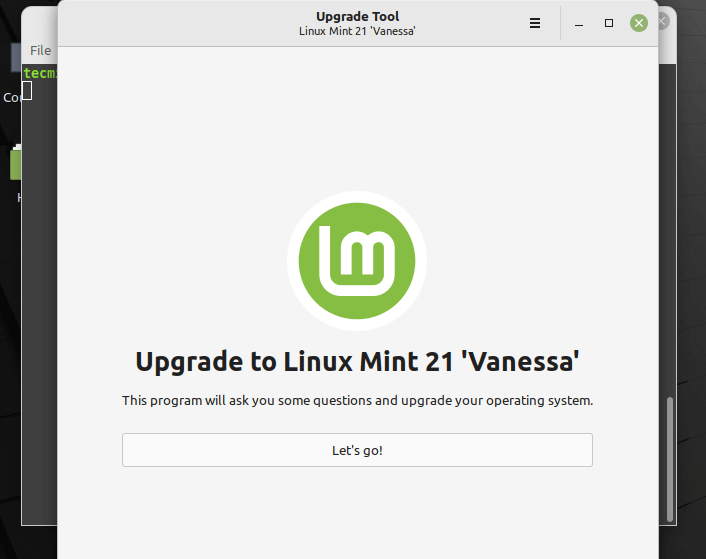
Now type the following command to launch the mintupgrade upgrade tool:

$ sudo mintupgrade
Upgrade to Linux Mint 21

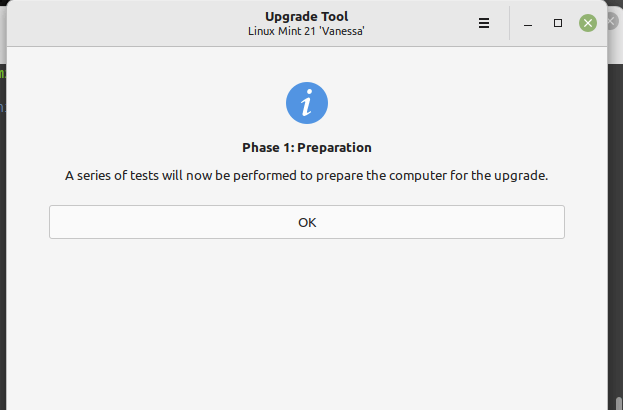
Once launched, as phase once in the whole upgrade process, the upgrade tool will perform several tests to prepare the system for the upgrade. One test is checking if your computer is connected to a power source.

Linux Mint 21 Upgrade Preparation

If your computer isn’t connected to a power source, the upgrade tool will complain as shown in the following screenshot. So you have to do the needful.

Connect Linux Mint to Power Source

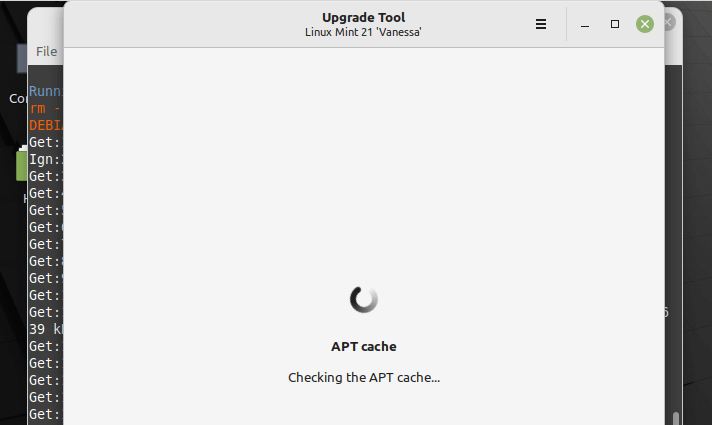
If all the tests are fine, the upgrade tool will run the apt update in the background to fetch the latest version of the package list from configured software repositories, you can see the details from the terminal.

Linux Mint 21 APT Cache

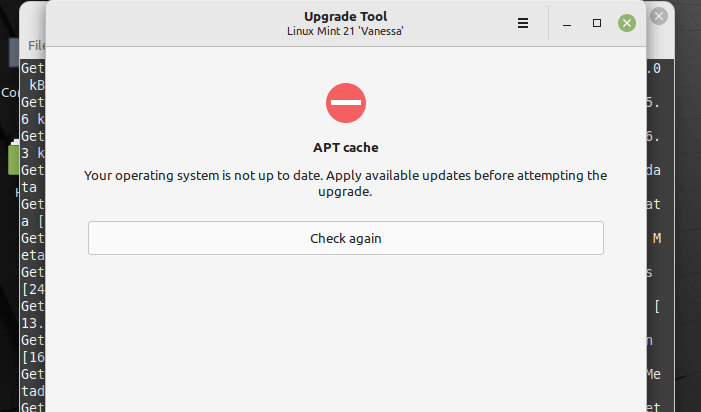
In case your operating system is not up to date, as shown in the following screenshot, you must apply the available updates before running the upgrade. You can click Check again to apply the updates.

Linux Mint 21 Updates

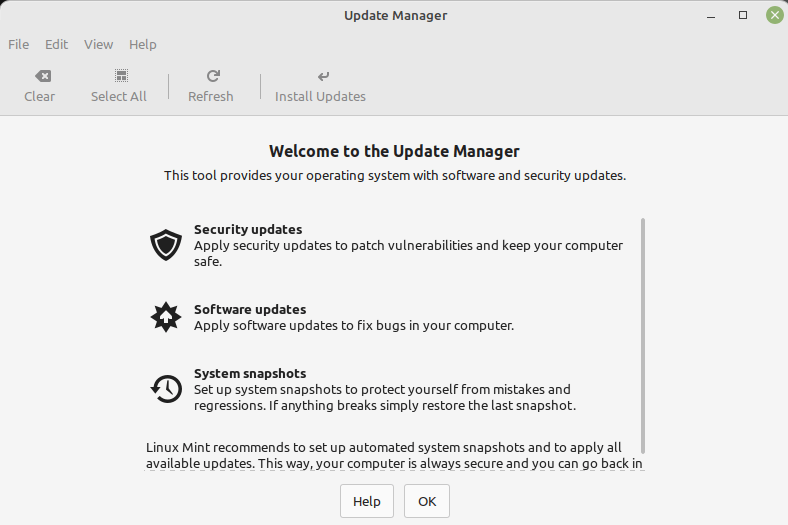
The upgrade tool will try to open the update manager, if it doesn’t, you can open it manually by searching it in the system menu. Click OK in the following window and proceed to run the updates by clicking Install Updates.

Install Linux Mint Updates

Once the update is complete, you need to reboot the system to apply the changes.

Linux Mint Reboot
Linux Mint Reboot

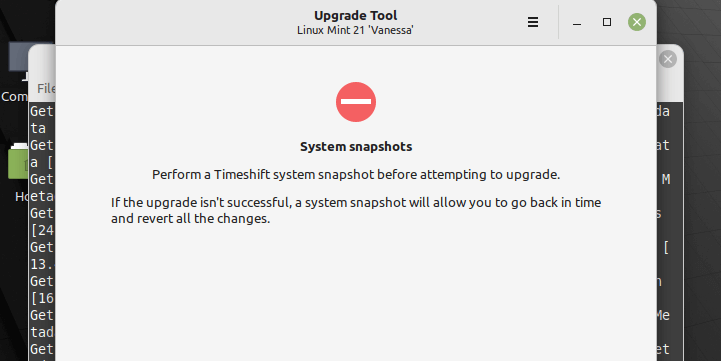
Next, create a system snapshot using Timeshift. If the upgrade fails for one reason or the other, you can restore your system using the snapshot.

Linux Mint System Snapshots

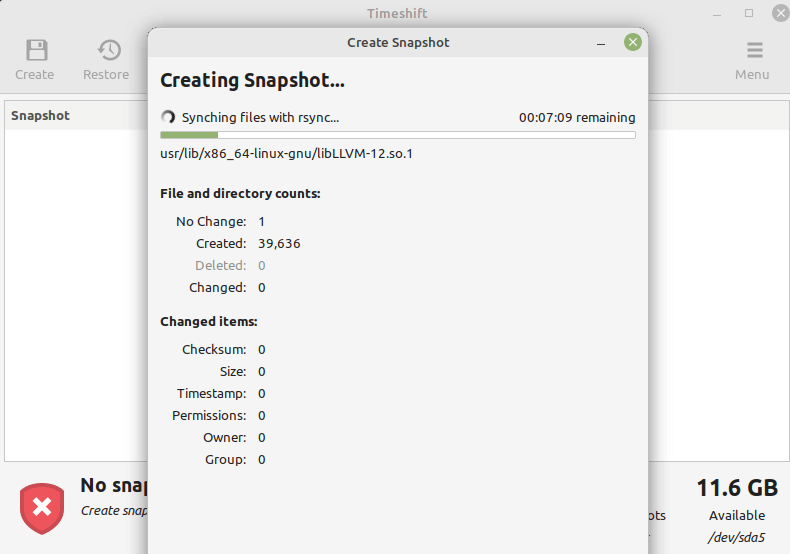
On the Timeshift main interface, click on Create and it will start creating the system snapshot.

Create Linux Mint Snapshot

Next, the upgrade tool will search for packages as shown in the following screenshot.

Linux Mint Packages Search

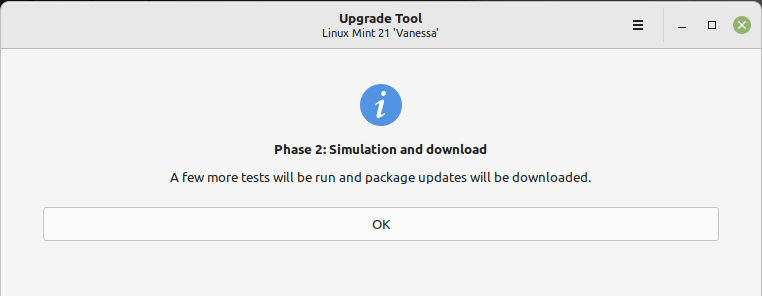
In the second phase, the upgrade tool will perform more tests and the package updates will be downloaded.

Linux Mint Upgrade Tests

Once the simulation is complete, the system will display all the changes to be applied: packages to be updated, those added, those that are kept as well as those that are deleted.

Linux Mint Upgrade Simulation

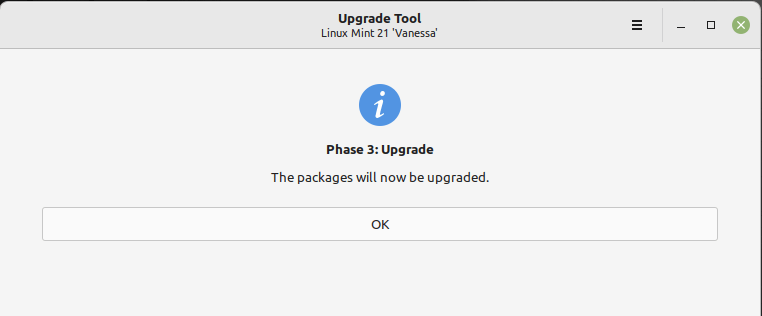
Once all the updates have been downloaded, the last phase is to install them – the actual system upgrade. Click Ok to start the upgrade of packages.

Linux Mint Upgrade
Linux Mint Upgrade

When the upgrade process is complete and successful, you need to uninstall the mintupgrade tool and reboot your computer with these commands:

$ sudo apt remove mintupgrade
$ sudo reboot

That’s it! We hope the upgrade process went on smoothly for you and that now you have Linux Mint 21, Vanessa, on your computer. You can seek help if you have questions or if you encounter any challenges with the upgrade, via the feedback form below.

If you read this far, tweet to the author to show them you care. Tweet a thanks
Aaron Kili
Aaron Kili is a Linux and F.O.S.S enthusiast, an upcoming Linux SysAdmin, web developer, and currently a content creator for TecMint who loves working with computers and strongly believes in sharing knowledge.

Each tutorial at TecMint is created by a team of experienced Linux system administrators so that it meets our high-quality standards.

Join the TecMint Weekly Newsletter (More Than 156,129 Linux Enthusiasts Have Subscribed)
Was this article helpful? Please add a comment or buy me a coffee to show your appreciation.

106 thoughts on “How to Upgrade Linux Mint 20.3 to Linux Mint 21”

  1. Got the RED X shield the other day and can’t update or upgrade. Have searched and tried may suggestions but will not update nor upgrade. Any suggestions? Thank you

    Reply
  2. I reached the end of the upgrade from 17.3 to 18 but the upgrade ended on: Download complete and in download only mode.

    45-AIO-M870 ~ $ 
    

    Do I need to type anything else to finish or just exit the Terminal?

    Reply
  3. + Checking your Linux Mint codename…

    + Checking your Linux Mint edition…

    ————————————————
    !! ERROR: Your edition of Linux Mint is ‘KDE’. It cannot be upgraded to Linux Mint 18 ‘Sarah’.
    !! Exiting.
    ————————————————

    Reply
    • Our new concern now is how will move from 18 to 19. Inside the revision I use standard update but for main revision I use reformat and install all automatically using teejee Aptik Migration Utility.

      Reply
      • @Bernard

        Once Linux Mint 19 is out(stable version), we will definitely prepare an article about how to upgrade from 18 or a another previous version to it. Thanks for the feedback.

        Reply
  4. Initializing machine ID from D-Bus machine ID.
    Adding the “systemd-journal” group (GID 127) …
    Finished.
    An immediate password change is required (forced by root)
    chfn: PAM: The authentication token is no longer valid; new is required
    adduser: “/ usr / bin / chfn -f systemd Time Synchronization systemd-timesync” returned the error code 1. Completing.
    dpkg: systemd package processing error (–configure):
    the subprocess installed post-installation script returned the error code 1
    Errors occurred while processing:
    systemd
    E: Sub-process / usr / bin / dpkg returned an error code (1)

    ————————————————
    !! ERROR: Failed to upgrade some of the packages. Please review the error message, use APT to fix the situation and try again.
    !! Exiting.
    ————————————————

    $ sudo apt install -f
    

    apt-get: relocation error: /usr/lib/i386-linux-gnu/libapt-pkg.so.5.0: symbol _ZNKSt7__cxx1112basic_stringIcSt11char_traitsIcESaIcEE7compareERKS4_, version GLIBCXX_3.4.21 not defined in file libstdc ++. so.6 with link time reference
    tiger @ asusik ~ $ mintupgrade upgrade
    Traceback (most recent call last):
    File “/ usr / bin / mintupgrade”, line 3, in
    import sys, os, apt
    File “/usr/lib/python3/dist-packages/apt/__init__.py”, line 23, in
    apt_pkg import
    ImportError: /usr/lib/i386-linux-gnu/libapt-pkg.so.5.0: symbol _ZNKSt7__cxx1112basic_stringIcSt11char_traitsIcESaIcEE7compareERKS4_, version GLIBCXX_3.4.21 not defined in file libstdc ++. So.6 with link time reference

    So, instead of beauty and simple guide, upgrade process fail.
    Bad. Very bad.

    Reply
    • @tiger

      So bad, hope you backep up your files before performing the upgrade. Try to find out more why the upgrade failed, from the Linux Mint forum.

      Reply

Got something to say? Join the discussion.

Thank you for taking the time to share your thoughts with us. We appreciate your decision to leave a comment and value your contribution to the discussion. It's important to note that we moderate all comments in accordance with our comment policy to ensure a respectful and constructive conversation.

Rest assured that your email address will remain private and will not be published or shared with anyone. We prioritize the privacy and security of our users.