Moodle is a free, feature-rich, open-source learning management system (LMS), which is used by many online schools and universities as well as private educators.
Moodle is extremely customizable and it is meant to meet the requirements of a wide range of users including teachers, students, and administrators.
Moodle Features
Some of the most noticeable features that Moodle has are:
- Modern and easy-to-use interface
- Personalized dashboard
- Collaborative tools
- All-in-one calendar
- Easy file management
- Simple text editor
- Notifications
- Progress tracking
- Customizable site design/layout
- Multiple supported languages
- Bulk course creation
- Quizzes
- User roles
- Plugins for additional functionalities
- Multimedia integration
The latest stable Moodle version (4.3.3) was released just recently on 12 February 2024.
Hardware Requirements
The release has the following hardware requirements:
- Disk Space: 200MB for the Moodle code, plus as much as you need to store content. 5GB is probably a realistic minimum.
- Processor: 1 GHz (min), 2 GHz dual-core or more recommended.
- Memory: 512MB (min), 1GB or more is recommended. 8GB plus is likely on a large production server.
Software Requirements
The release has the following software requirements:
- Web Server: Moodle is compatible with web servers such as Apache or NGINX.
- PHP: Moodle requires a supported version of PHP (usually 7.2 or later) along with necessary extensions like XML, JSON, and others.
- Database: Moodle supports databases like MySQL, MariaDB, or PostgreSQL.
It’s crucial to review the official documentation for detailed and up-to-date system requirements based on the specific version of Moodle you intend to install.
In this tutorial, I will show you how to install Moodle LMS (Learning Management System) on RedHat-based distributions such as CentOS, Fedora, Rocky & AlmaLinux and Debian-based distributions such as Ubuntu using LAMP or LEMP (Linux, Apache/Nginx, MySQL/MariaDB and PHP) stack with subdomain moodle.tecmint.com and IP address 192.168.0.3.
Important: The commands will be executed with root user or sudo privileges, so make sure that you have full access to your system.
Step 1: Installing LAMP or LEMP Environment
LAMP/LEMP is a stack of open-source software designed to build and host websites. It uses Apache/Nginx as a web server, MariaDB/MySQL for a relational database management system and PHP as an object-oriented programming language.
You can use the following single command to install LAMP or LEMP stack in your respective Linux operating systems as shown:
Installing LAMP Stack
sudo yum install httpd php mariadb-server       [On RedHat-based systems]
sudo apt install apache2 php mariadb-server     [On Debian-based systems]
Installing LEMP Stack
sudo yum install nginx php php-fpm mariadb-server     [On RedHat-based systems]
sudo apt install nginx php php-fpm mariadb-server     [On Debian-based systems]
Step 2: Installing PHP Extensions and Libraries
Next, you need to install the following recommended PHP extensions and libraries to run Moodle error-free.
--------------------- On RedHat-based systems ---------------------
sudo yum install php-iconv php-mbstring php-curl php-opcache php-xmlrpc php-mysqlnd php-openssl php-tokenizer php-soap php-ctype php-zip php-gd php-simplexml php-spl php-pcre php-dom php-xml php-intl php-json php-ldap wget unzip
--------------------- On Debian-based systems ---------------------
sudo apt install graphviz aspell php-pspell php-curl php-gd php-intl php-mysqlnd php-xmlrpc php-ldap
Step 3: Configure PHP Settings
Now open and modify PHP settings in your php.ini or .htaccess (Only if you don’t have access to php.ini) file as shown below.
Important: If you’re using an older PHP version, then some of the following PHP settings are removed and you won’t find them in your php.ini file.
memory_limit = 256M
max_execution_time = 300
post_max_size = 100M
upload_max_filesize = 100M
max_input_vars = 3000
date.timezone = "Your/Timezone"
Make sure to replace “Your/Timezone” with your actual timezone, for example, “America/New_York“.
On the Nginx web server, you need to enable the following variable in the php.ini file as well.
cgi.fix_pathinfo=1
After making the above changes, restart the web server as shown:
--------------- For Apache ---------------
sudo systemctl restart httpd.service	[On RedHat-based systems]
sudo systemctl restart apache2.service 	[On Debian-based systems]

--------------- For Nginx ---------------
sudo systemctl restart nginx.service
sudo systemctl restart php-fpm.service
Step 4: Install Moodle in Linux
Now we are ready to prepare our Moodle files for installation. For that purpose, navigate to the web root directory of your Apache or Nginx server. You can do this via:
cd /var/www/html              [For Apache]
cd /usr/share/nginx/html      [For Nginx]
Next, go to the Moodle download page and grab the latest Moodle (i.e. version cd /var/www/html at the time of writing this article) archive or with the help of following the wget command.
sudo wget https://download.moodle.org/download.php/direct/stable403/moodle-latest-403.zip
Now unzip the downloaded archive, this will create a new directory called “moodle” and move all of its contents to the web server’s root web directory (i.e. /var/www/html for Apache or /usr/share/nginx/html for Nginx) using following series of command.
sudo unzip moodle-latest-403.zip
sudo cd moodle
sudo cp -r * /var/www/html/           [For Apache]
sudo cp -r * /usr/share/nginx/html    [For Nginx]
Now let’s fix the file ownership to the webserver user, depending on your distribution Apache might be running with user “apache” or “www-data” and Nginx running as a user nginx.
To fix the file ownership, run the following command.
sudo chown -R apache: /var/www/html	[On RedHat-based systems]
sudo chown -R www-data: /var/www/html 	[On Debian-based systems]
OR
sudo chown -R nginx: /usr/share/nginx/html/ [For Nginx]
Moodle also uses a data directory meant to keep teachers’ and students’ data. For example, this directory will keep videos, documents, presentations, and others.
For security purposes, you should create that directory outside of the web directory root. In this tutorial, we will create a separate moodledata directory.
sudo mkdir /var/www/moodledata              [For Apache]
sudo mkdir /usr/share/moodledata            [For Nginx]
And again fix the folder ownership with:
sudo chown -R apache: /var/www/moodledata	[On RedHat-based systems]
sudo chown -R www-data: /var/www/moodledata 	[On Debian-based systems]
OR
sudo  chown -R nginx: /usr/share/moodledata     [For Nginx]
Step 5: Create Moodle Database
Moodle uses a relational database to store its data so we will need to prepare a database for our installation, but before that, we need to start and secure the mysql installation by running the following command.
sudo systemctl restart mariadb.service
sudo mysql_secure_installation
The above mysql installation script is used to improve the security of your MySQL installation, which is typically run after a fresh MySQL installation to perform several security-related tasks such as setting root password, removing anonymous users, disallowing root login remotely, removing test database, and reload privilege.
Once your mysql installation is secure, you can log in to the MySQL database server with the root user account using elevated privileges (sudo).
sudo mysql -u root -p
Enter your password and proceed. Now create a new database called “moodle”:
create database moodle;
Now let’s grant a user “moodle” with all privileges on the database moodle:
grant all on moodle.* to moodle@'localhost' identified by 'password';
flush privileges;
quit;
Step 6: Start the Moodle Installation
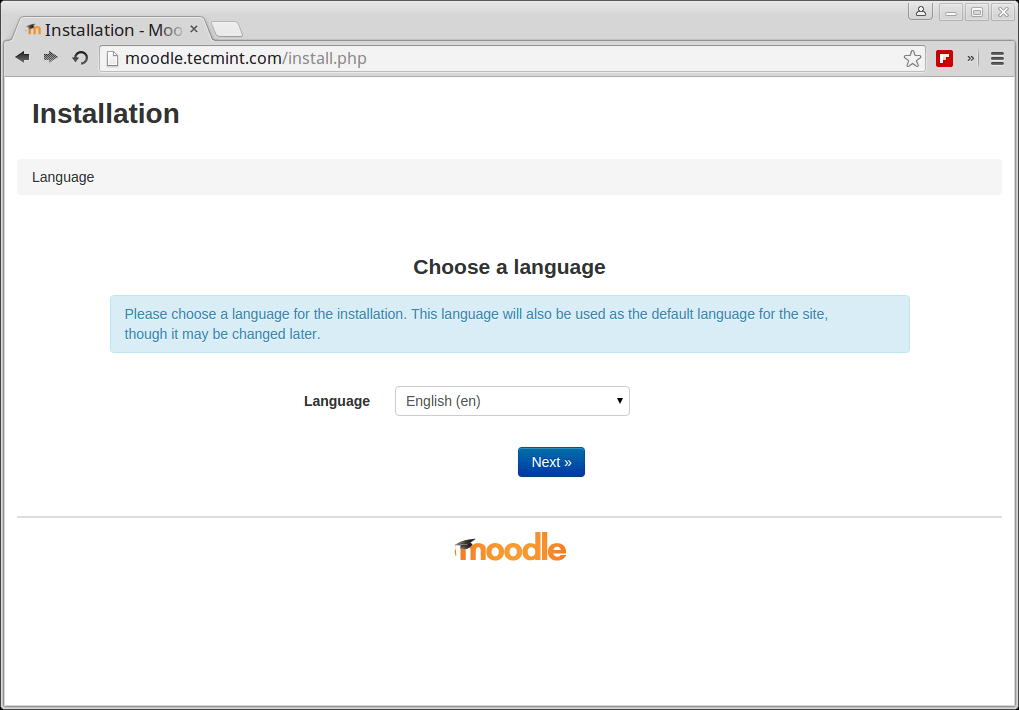
We are now ready to continue with the installation of Moodle. For that purpose open your IP address or hostname in a browser. You should see the Moodle’s installer. It will ask you to choose the language for your installation:
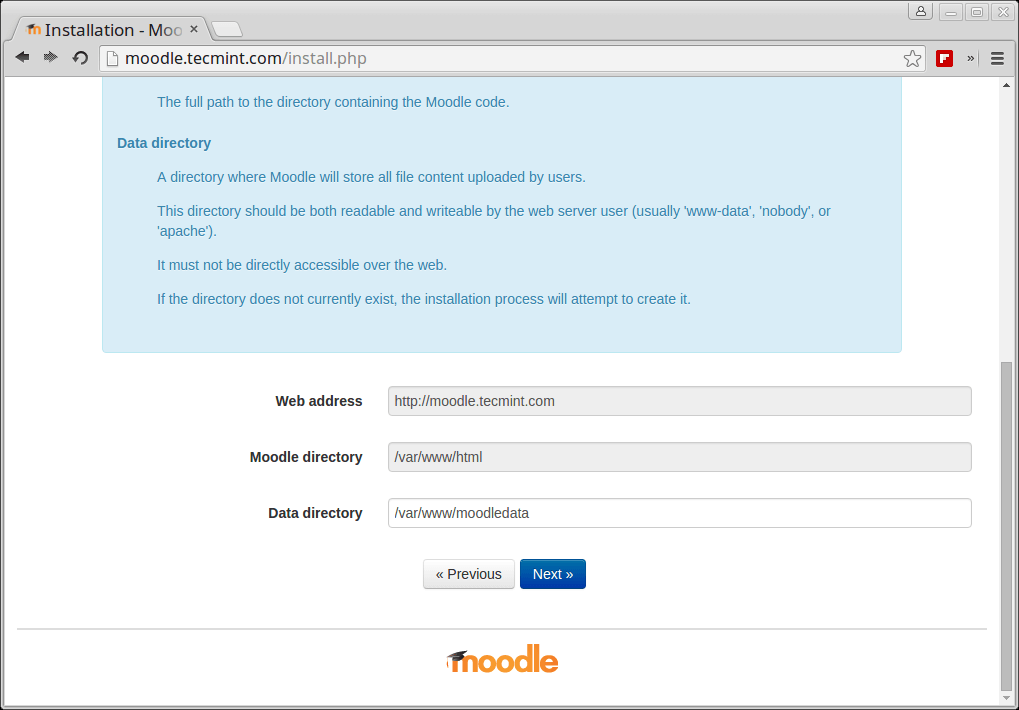
In the next step, you will be selecting the path for your Moodle data directory. This directory will contain the files uploaded by teachers and students.
For example, videos, PDFs, PPT, and other files you upload on your website. We have already prepared this directory earlier, you just need to set the Moodle data dir to /var/www/moodledata or /usr/share/moodledata.
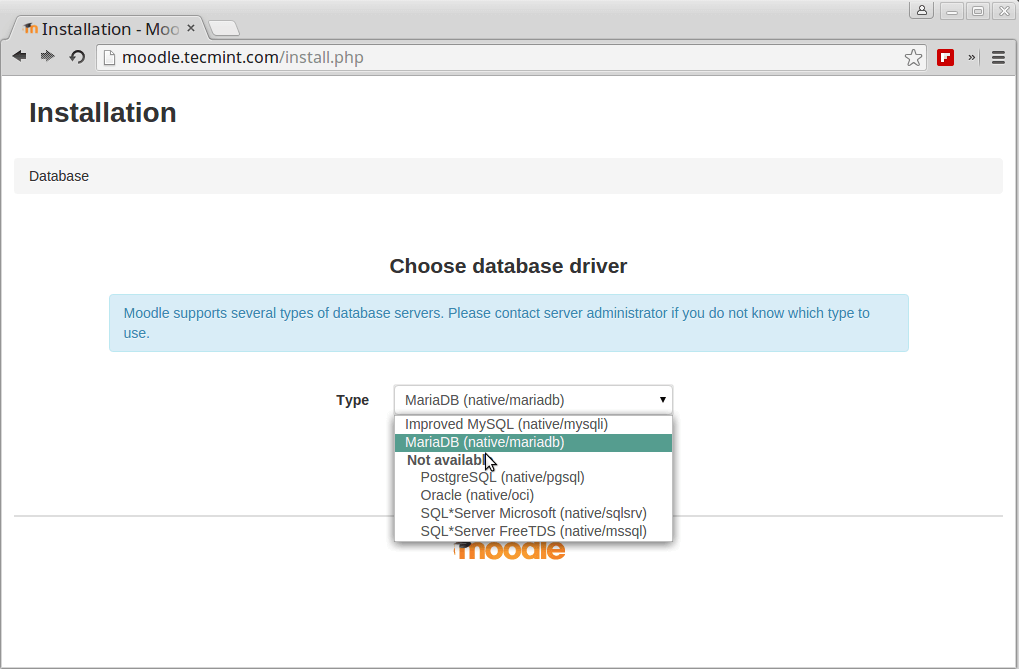
Next, you will be selecting the database driver.
- For MySQL – Select Improved MySQL driver.
- For MariaDB – Select native/mariadb driver.
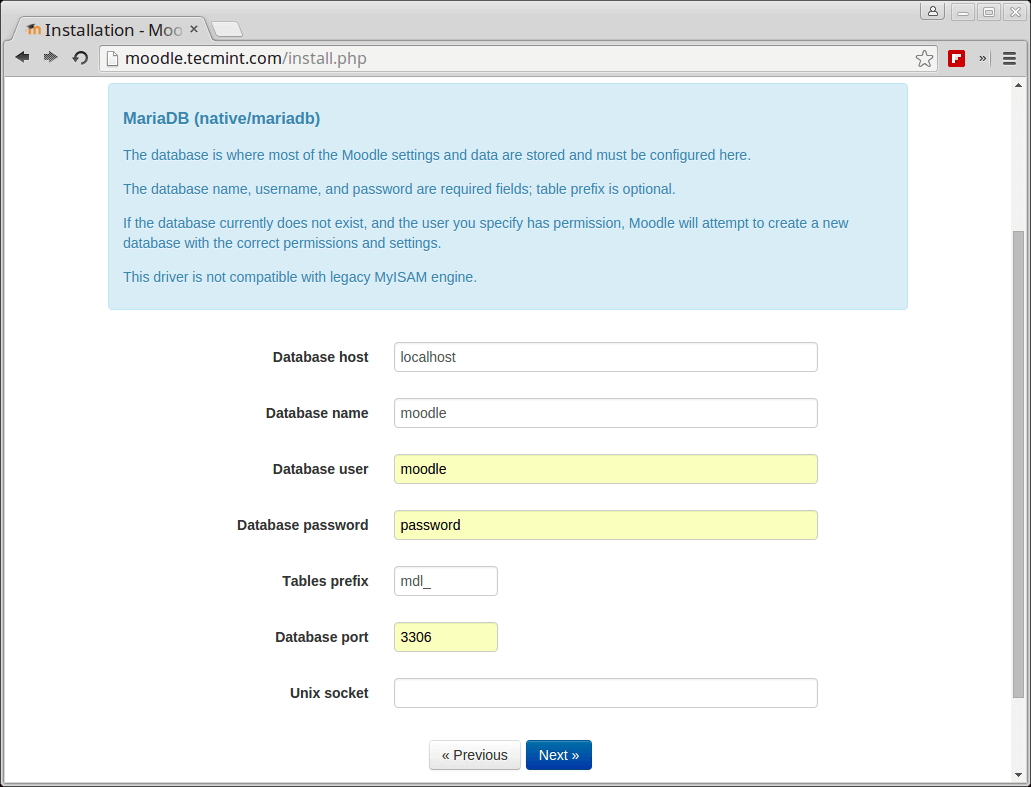
After that, you will be prompted for the MySQL credentials that Moodle will be using. We already prepared those earlier:
Database Name: moodle
Database User: moodle
Password: password
Once you have filled in the details, continue to the next page. The page will show you the copyrights related to Moodle:
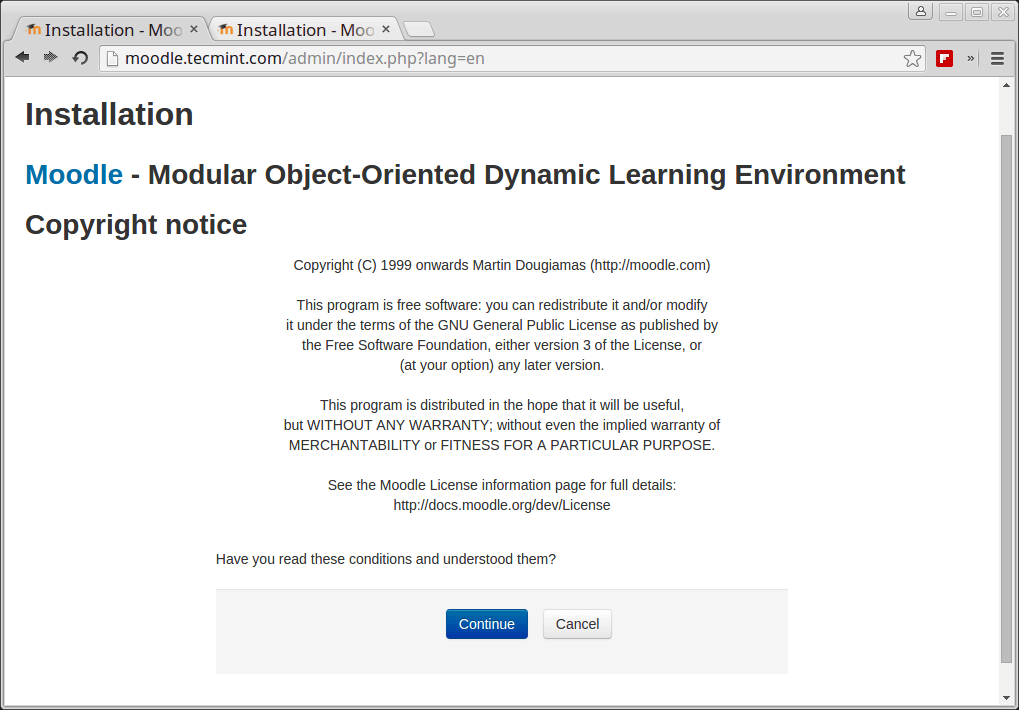
Review those and continue to the next page. On the following page, Moodle will perform system checks for your server environment. It will inform you if there are missing modules/extensions on your system. If such are to be found, click on the link next to each extension that is shown as missing and you will be provided with instructions on how to install it.
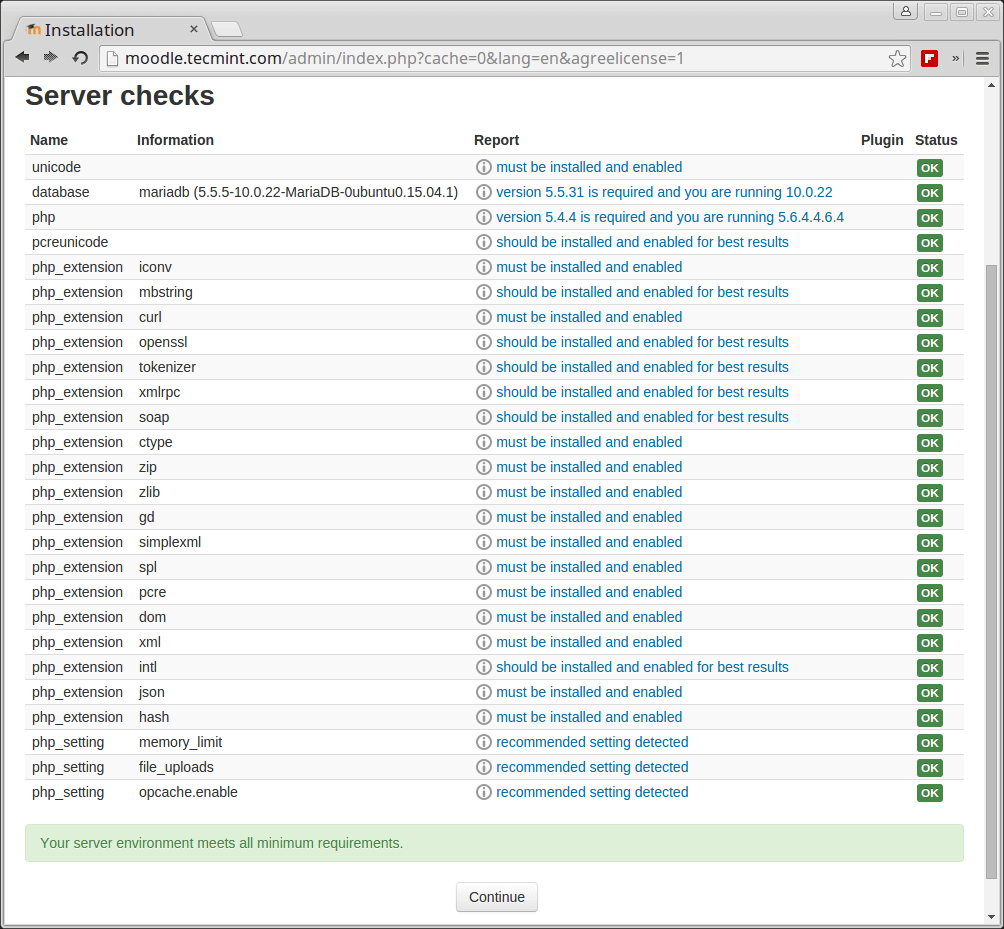
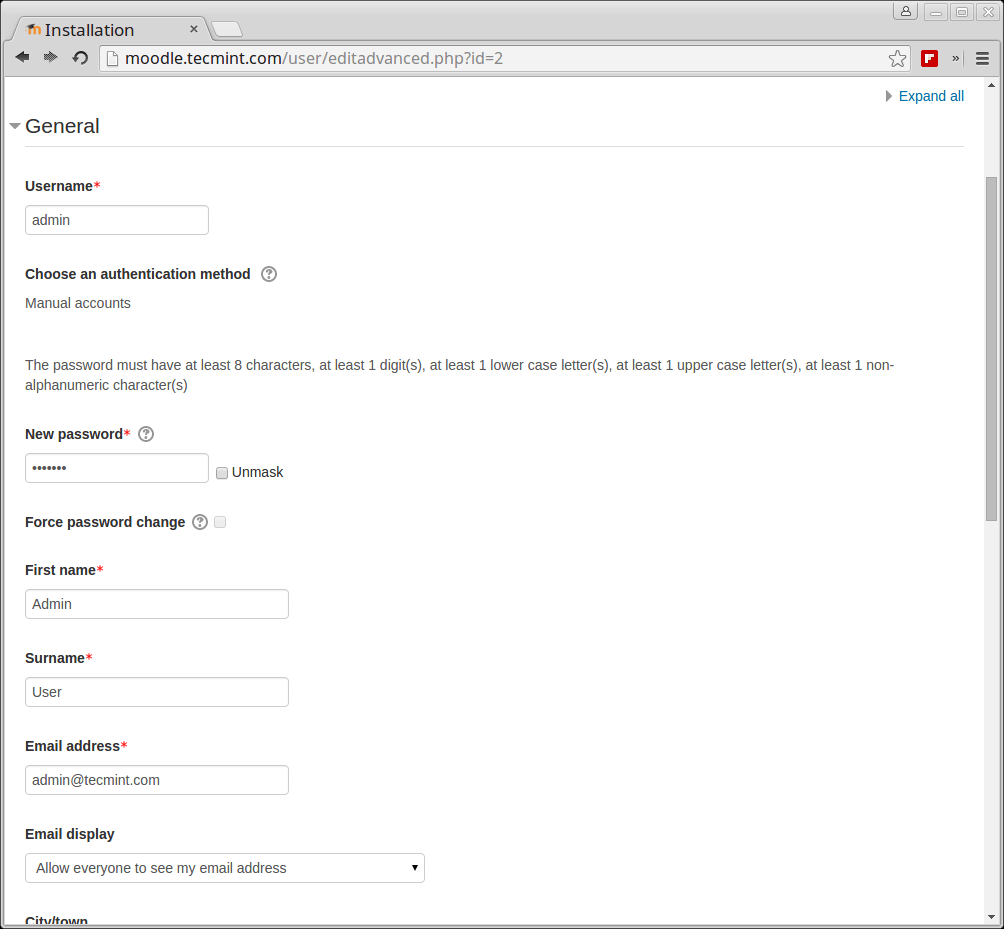
If everything is good, proceed to the next page, where the installer will populate the database. This process may take longer than expected. After that, you will be asked to configure the administrative user. You will need to fill in the following details:
- Username – the username with which the user will log in
- Password – password for the above user
- First name
- Surname
- Email address for the administrative user
- City/town
- Country
- Timezone
- Description – enter information about yourself
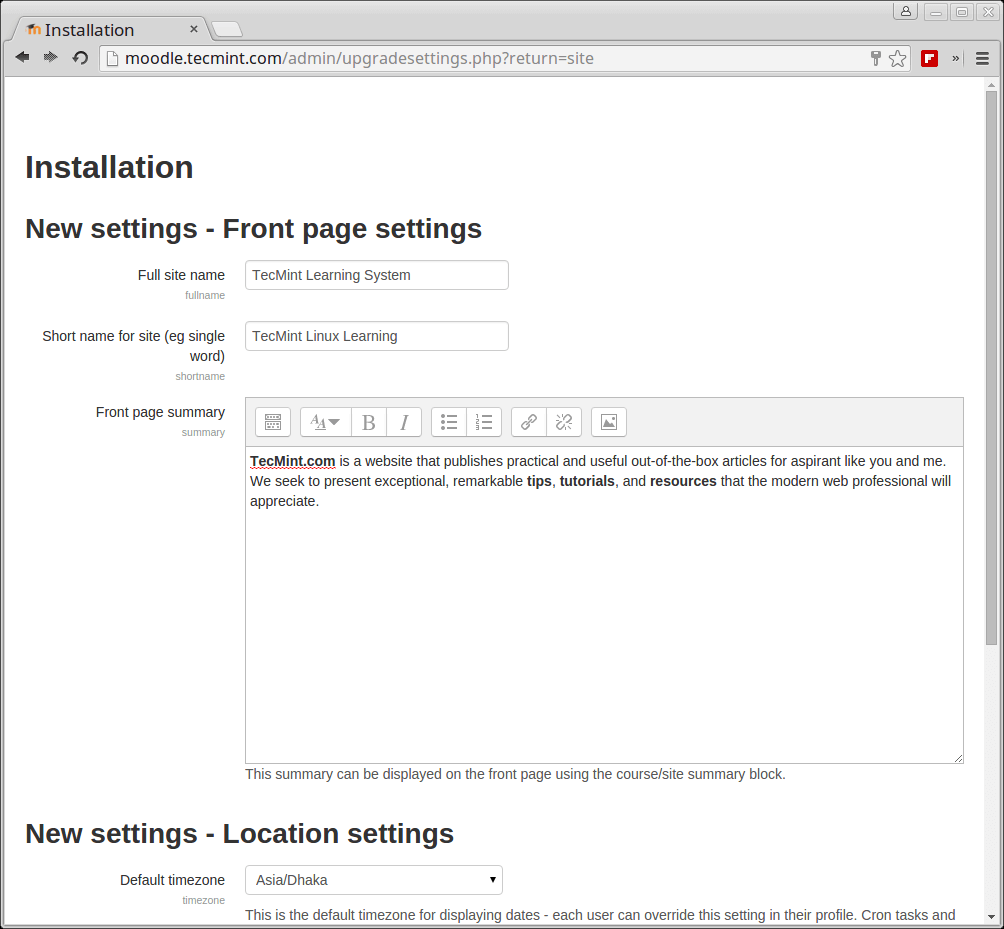
After you have configured your site administrator’s profile, it’s time to set up some info about the site. Fill in the following information:
- Full site name
- Short name for the site
- Front page summary – information that will be displayed on the site frontpage
- Location Settings
- Site registration – choose the registration type be self-registration or via email.
When you have filled in all that information, the installation is complete and you will be taken to the administrator profile:
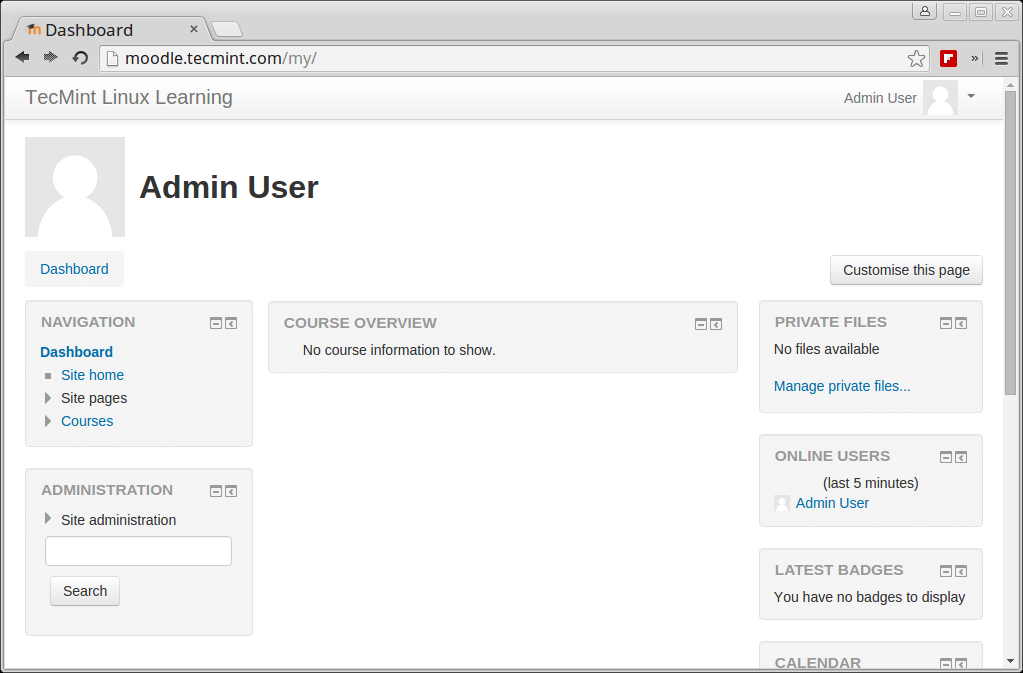
To access the Moodle administrative dashboard go to http://your-ip-address/admin. In my case, this is:
http://moodle.tecmint.com/admin
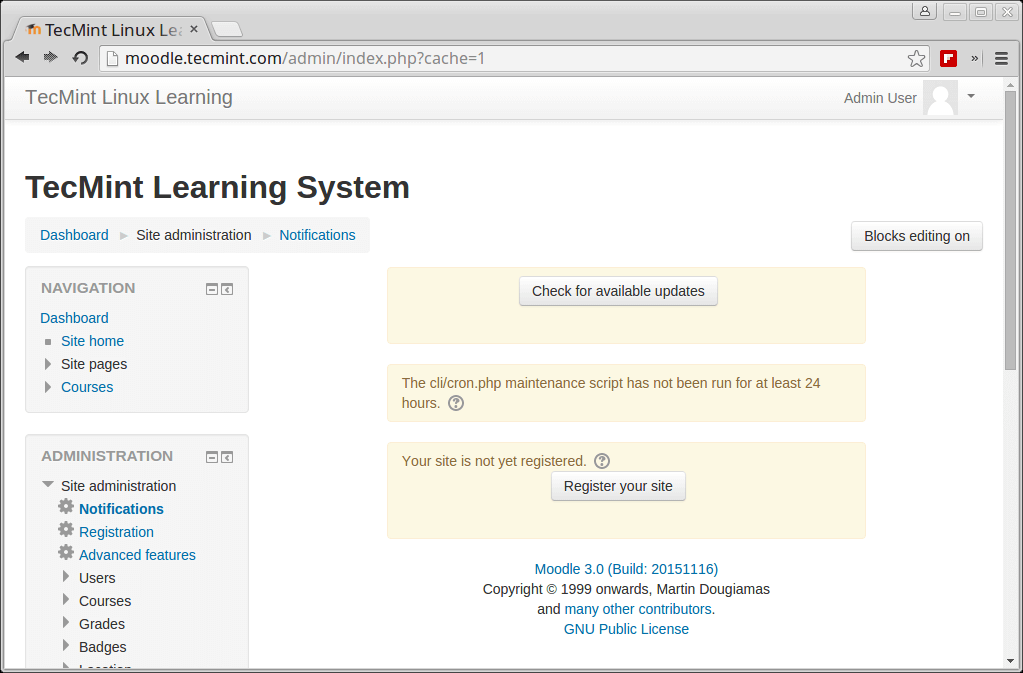
Now your Moodle installation is complete and you can start managing your website and create your first courses, and users or simply customize your site settings.
In case you have any questions or comments related to Moodle’s installation, please submit them in the comment section below.


Very transparent guide on installing and configuring Moodle on Linux. Courses creation features are also easy to progress. Thanks for great explanation. I was searching for Litmos and came here. Along the search, I came across with Teachr. What is your review on this as many people are saying that it is very good.
In the meantime, I came across a similar product Teachr and it also seems to be good for my requirements.
Hi, Please, I need a complete guide on installing and configuring Moodle on Linux or windows. I intend using it locally for computer based test, however, If I can an idea to run it on the internet that will be fine as intended extending it to distance learning student
@Yusufu,
This guide is complete with all the steps needed to setup Moodle on a public domain, just check and give it a try to setup.
@Ravi,
Many thanks for the information. I will try the procedure.
Please, for now I only need to install and configure Moodle on LAN to be used local for CBT for my student, will this guide help?
@Ravi,
Sorry, I really wat to know the advantage or disadvantages of installing Moodle on windows and Linux. Which one do you recommend. Are the installation process the same?
@Yusufu,
You can check out advantage and disadvantage of Moodle at official site, and about installation instructions, I suggest you to go for Linux, because this article only shows Linux installation, and Windows installation steps are different.
I was not able to create the ‘moodledata’ directory; after setting SELinux to permissive, I was able to. I was getting the following error, “Data directory (/var/www/moodledata) cannot be created by the installer. I had to add SELinux label to the /var/www/moodle directory and I was able to proceed. semanage fcontext -a -t httpd_sys_rw_content_t /var/www/moodledata.
Thank for the tutorial though.
@Earl,
Yes that correct the installer won’t able to create ‘moodledata’ directory if SELinux set to permissive, that’s the reason either you’ve to disable it or set SELinux rule on httpd to allow modifications to directory..
Thanks for the tip..:)
Thanks Ravi, thanks to you I have moodle up and running :)
@Earl,
I am glad that my article helped you to setup moodle without any problems, thanks and keep visiting Tecmint..
Hi,
Thanks a lot.
STEP five(5) is Missing !
@Jalal,
Actually there isn’t any STEP missing, the numbering added wrongly, thanks for pointing out..