As Linux users, we interact with the text files on a regular basis. One of the common operations we perform on these files is text filtering. Linux provides many command-line utilities for text filtering, such as – grep, fgrep, sed, awk, and the list goes on.
However, in this guide, we will discuss one more text-filtering utility called cut, which is used to remove a particular section from the input line. The cut command performs filtering based on the byte position, character, field, and delimiter.
In this beginner’s guide, we will learn about the cut command with examples in the Linux command line. After following this guide Linux command line users will be able to use the cut command efficiently in their day-to-day life.
cut Command Syntax
The syntax of the cut command is just like any other Linux command:
$ cut <OPTIONS>... [FILE-1] [FILE-2] ...
In the above syntax, the angular bracket (<>) represents the mandatory arguments whereas the square bracket ([]) represents the optional parameters.
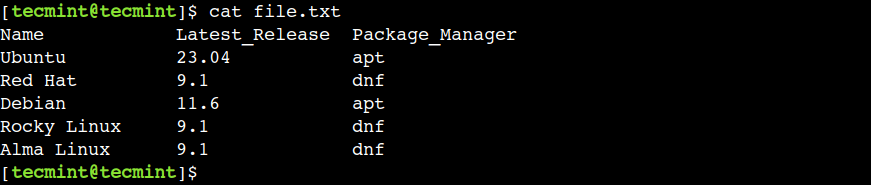
Now that we are familiar with the syntax of the cut command. Next, let’s create a sample file to use as an example:
$ cat file.txt
1. Print First Byte of File
The cut command allows us to extract the text based on byte position using the -b option.
Let’s use the below command to extract the first byte from each line of the file:
$ cut -b 1 file.txt
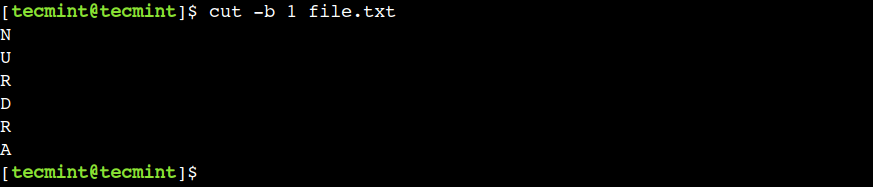
In this example, we can see that the cut command shows only the first character because all characters are one byte long.
2. Print Multiple Bytes of File
In the previous example, we saw how to select a single byte from the file. However, the cut command also allows us to select multiple bytes using the comma.
Let us use the below command to select the first four bytes from the file:
$ cut -b 1,2,3,4 file.txt
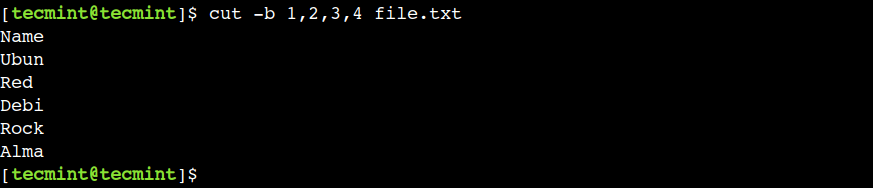
In this example, we have selected the consecutive bytes but that is not mandatory. We can use any valid byte position with the cut command.
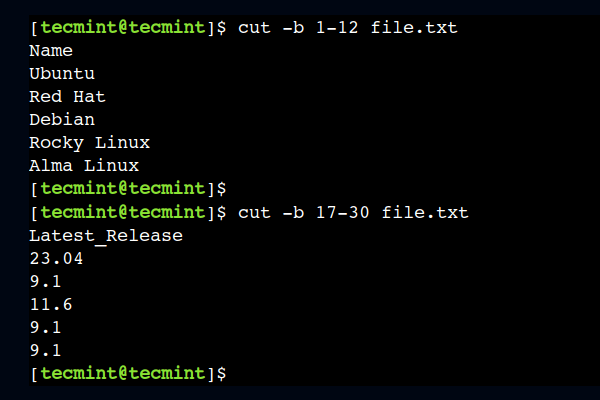
3. Print a Range of Bytes of File
In the previous example, we used commas to select consecutive bytes. However, that approach is not suitable if we want to select a large number of bytes consecutively. In such cases, we can use the hyphen (-) to specify the byte range.
To understand this, let’s use the 1-12 as a byte range to select the first twelve bytes from each line:
$ cut -b 1-12 file.txt
In a similar way, we can select a byte range from the middle as well. For example, the below command selects bytes from column numbers 17 to 30:
$ cut -b 17-30 file.txt
4. Print Specify Start Byte Position of File
Sometimes, we want to extract all the text from a certain byte position. In such cases, we can omit the end byte position.
For example, we can use the following command to print all bytes starting from position 17:
$ cut -b 17- file.txt
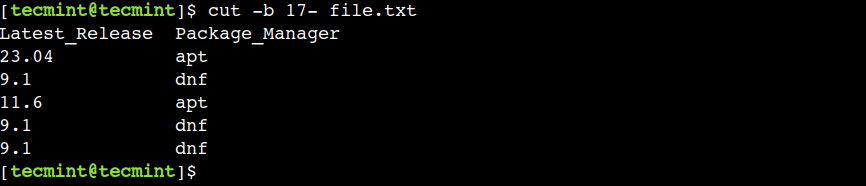
In the above command, 17 represents the starting byte position whereas the hyphen (-) represents the end of the line.
5. Print Specify End Byte Position of File
In a similar way, we can also specify the end byte position only. For example, the below command prints all the bytes from the start of the line till the 12th column:
$ cut -b -12 file.txt
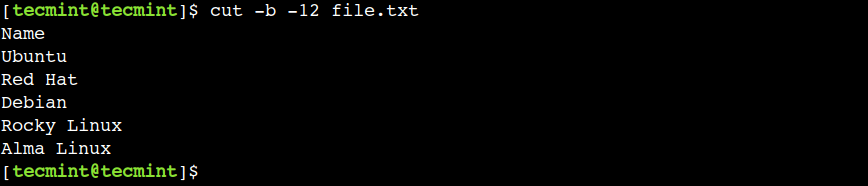
In the above command, the hyphen (-) represents the start of the line whereas 12 represents the end byte position.
6. Cut First Byte by Character Position
In the last few sections, we saw how to perform text extraction based on byte position. Now, let’s see how to perform the text extraction by character position.
To achieve this, we can use the -c option to cut the first byte from the following multi-byte string:
$ echo école | cut -b 1

�
In the above output, we can see that, the cut command shows a question mark instead of the character é. This happens because we are trying to print the first byte from the multi-byte character.
Now, let’s use the -c option to cut the same multi-byte character and observe the result:
$ echo école | cut -c 1

é
In the above output, we can see that now the cut command shows the expected output.
It is important to note that, not all versions of the cut commands support the multi-byte characters. For example, Ubuntu and its derivatives don’t support multi-byte characters.
To understand this, let’s run the same command on the Linux Mint which is derived from Ubuntu:

Here we can see that, the cut command treats both multi-byte characters and single-byte characters the same. Hence it doesn’t generate the expected output.
7. Cut a String by Delimiter in Linux
By default, the cut command uses a TAB character as a delimiter. However, we can override this default behavior using the -d option.
Oftentimes, the -d option is used in combination with the -f option which is used to select a particular field.
To understand this, let’s use the space character as a delimiter and print the first two fields using the -f option:
$ cut -d " " -f 1,2 file.txt
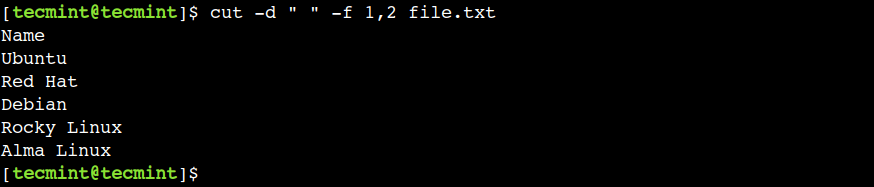
In the above example, we have used the comma with the -f option to select multiple fields.
8. Print All Bytes or Characters Except Selected Ones
Sometimes, we want to print all the characters except a few ones. In such cases, we can use the --complement option. As the name suggests, this option prints all the columns except the specified ones.
$ cut -c 1 --complement file.txt
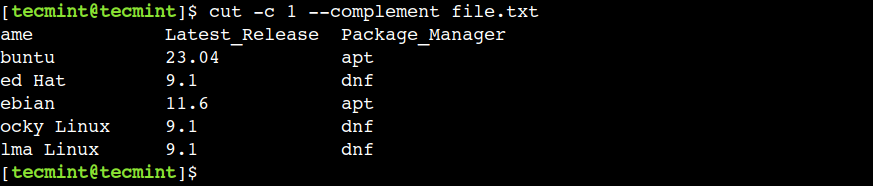
In the above output, we can see that the --complement option prints all the characters except the first character.
It is important to note that, in this example, we have used commas to select multiple fields. However, we can also use the other supported ranges as well. We can refer to the first few examples of this tutorial to understand more about the ranges.
Conclusion
In this beginner’s guide, we discussed the practical examples of the cut command with text filtering based on the byte position, character position, and delimiter.
Do you know of any other best example of the cut command in Linux? Let us know your views in the comments below.


