DBeaver is an open-source, fully-featured, and cross-platform universal database management tool and SQL client that runs on Linux operating systems, Windows, and macOS. It supports more than 80 database management systems including PostgreSQL, MySQL, Oracle, SQL Server, SQLite, DB2, MS Access, and a lot more.
DBeaver Features
DBeaver has the following key features:
- It supports any database management system having a JDBC driver, but can also handle other external data sources with or without a JDBC driver.
- It has a well-designed and implemented user interface (UI) for usability.
- It provides a powerful SQL editor with auto-completion of keywords, schema names, table names, and column names.
- It ships with several plugins for different database systems and management utilities for ERD generation, data import and export(in an appropriate format), data transfer, mock data generation, and much more.
- It supports extensions for integration with Excel, Git, and many other tools.
- It also supports cloud data sources.
- Additionally, it supports monitoring database connection sessions and lots of other advanced database administration features.
DBeaver is available in two flavors: DBeaver Community Edition which is free for use and DBeaver Enterprise Edition which is a paid-for version (you need a license to use it); however a trial version is available.
In this article, we shall show various ways to install DBeaver Community Edition on Linux systems. Before we proceed, note that DBeaver requires Java 11 or higher to run, importantly, starting version 7.3.1 all DBeaver distributions include OpenJDK 11 bundle.
Installing DBeaver Community Edition via Snap
Snaps are a cool and easy way to install and run applications on Linux operating systems because they ship with all the dependencies of an application. To run snaps, your Linux system must have snapd installed.
DBeaver has a snap which you can install as follows. The commands below show how to install snapd and DBeaver snap (dbeaver-ce). If you already have snapd installed, simply copy and run the command to install the dbeaver-ce:
--------- On Ubuntu/Debian/Mint ---------
$ sudo apt update && sudo apt install snapd
$ sudo snap install dbeaver-ce

--------- On n RHEL-based Systems ---------
$ sudo dnf install snapd
$ sudo ln -s /var/lib/snapd/snap /snap
$ sudo snap install dbeaver-ce

--------- On Arch Linux ---------
$ git clone https://aur.archlinux.org/snapd.git
$ cd snapd
$ makepkg -si
$ sudo systemctl enable --now snapd.socket
$ sudo ln -s /var/lib/snapd/snap /snap
$ sudo snap install dbeaver-ce
Installing DBeaver Community Edition via a Package Manager
DBeaver is also available as a 64-bit DEB or RPM package. On Debian and its derivatives such as Ubuntu and numerous others, you can install and upgrade DBeaver from the official Debian repository by running the following commands:
$ wget -O - https://dbeaver.io/debs/dbeaver.gpg.key | sudo apt-key add -
$ echo "deb https://dbeaver.io/debs/dbeaver-ce /" | sudo tee /etc/apt/sources.list.d/dbeaver.list
$ sudo apt-get update && sudo apt-get install dbeaver-ce
Besides, on Ubuntu and its derivatives including Linux Mint, Kubuntu, you can use the PPA repository to install and upgrade DBeaver as follows:
$ sudo add-apt-repository ppa:serge-rider/dbeaver-ce
$ sudo apt-get update
$ sudo apt-get install dbeaver-ce
To install DBeaver via the DEB or RPM 64-bit package installer, download it, and install it using the appropriate package manager as follows.
--------- On Ubuntu/Debian/Mint ---------
$ wget -c https://dbeaver.io/files/dbeaver-ce_latest_amd64.deb
$ sudo dpkg -i dbeaver-ce_latest_amd64.deb

--------- On RHEL-based Systems ---------
$ wget -c https://dbeaver.io/files/dbeaver-ce-latest-stable.x86_64.rpm
$ sudo rpm -ivh dbeaver-ce-latest-stable.x86_64.rpm
Once you have successfully installed DBeaver, search and open it from the system menu.
How to Use DBeaver in Linux
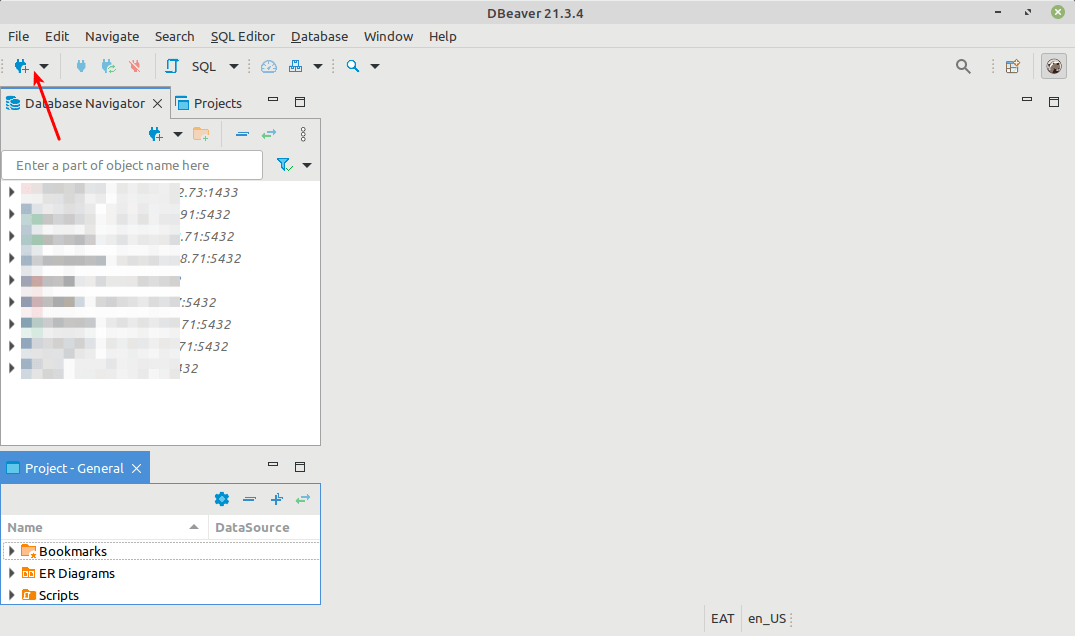
To create a new database connection click on the highlighted button in the following screenshot or click Databases, then select New Database Connection.
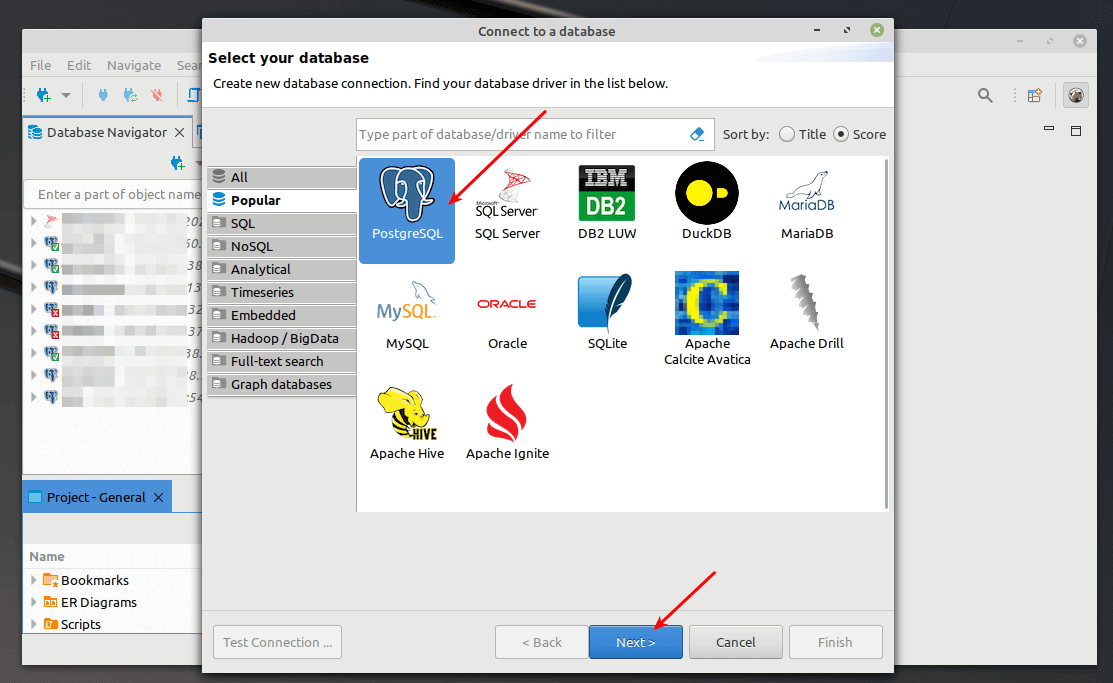
Find your database driver from the list of databases as shown in the following screenshot. Then click Next. At this point, DBeaver will attempt to download and install the selected driver, ensuring that your computer is connected to the Internet.
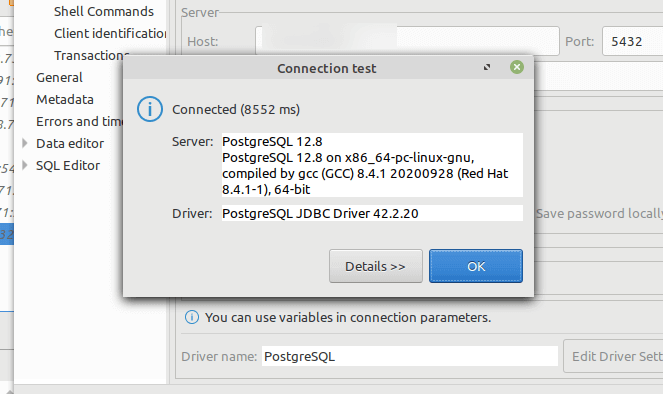
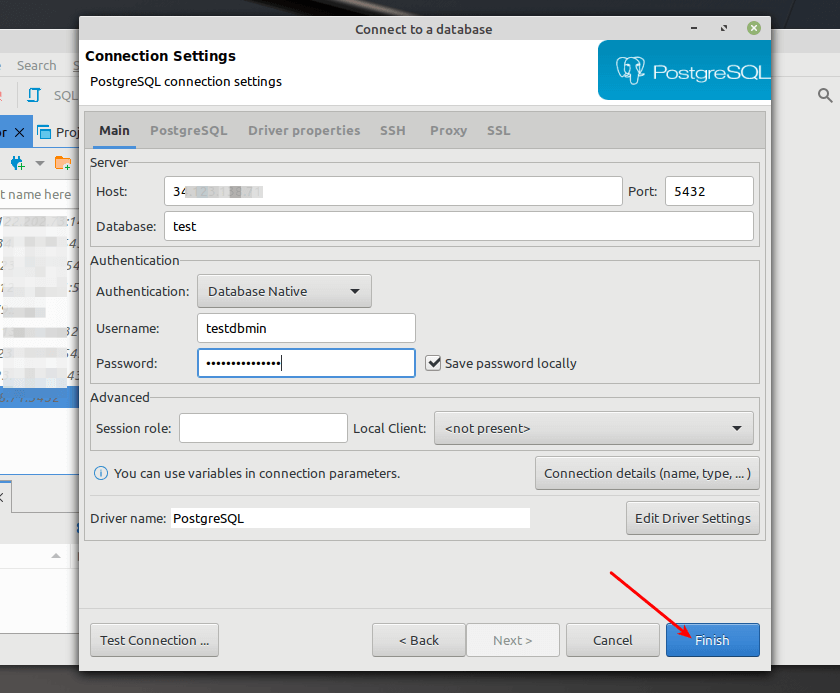
Next, enter the database connection settings (database Host, Database name under Server settings, Username, and user’s Password under Authentication settings). Then click Test Connection.

If the database connection settings are correct, you should see the database server details like so. Click OK to continue.
Now complete the database connection setup by clicking Finish as shown in the following screenshot.
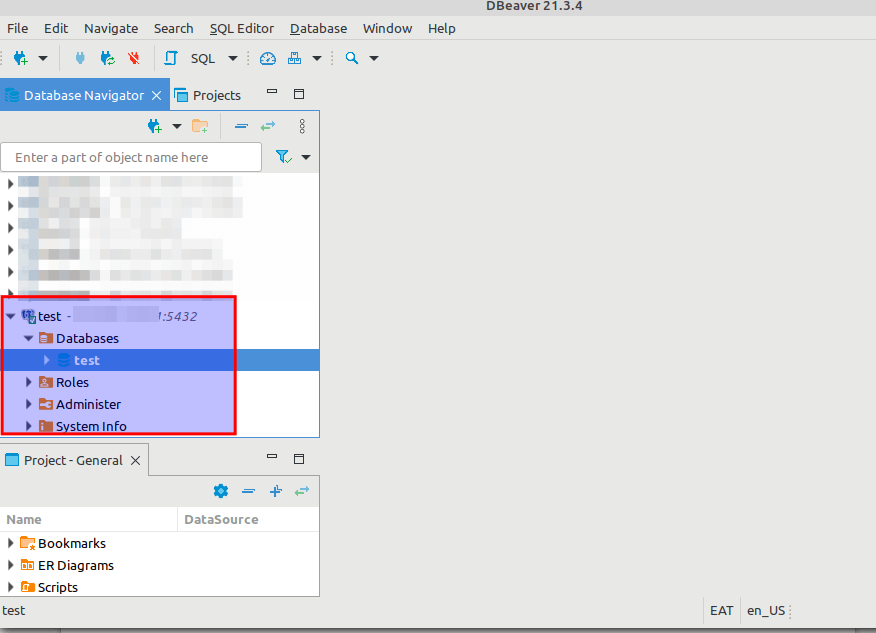
Your new database connection should now appear under the Database Navigator as shown below. To open the SQL editor, right-click on the database name, then select SQL editor, then Open SQL script.
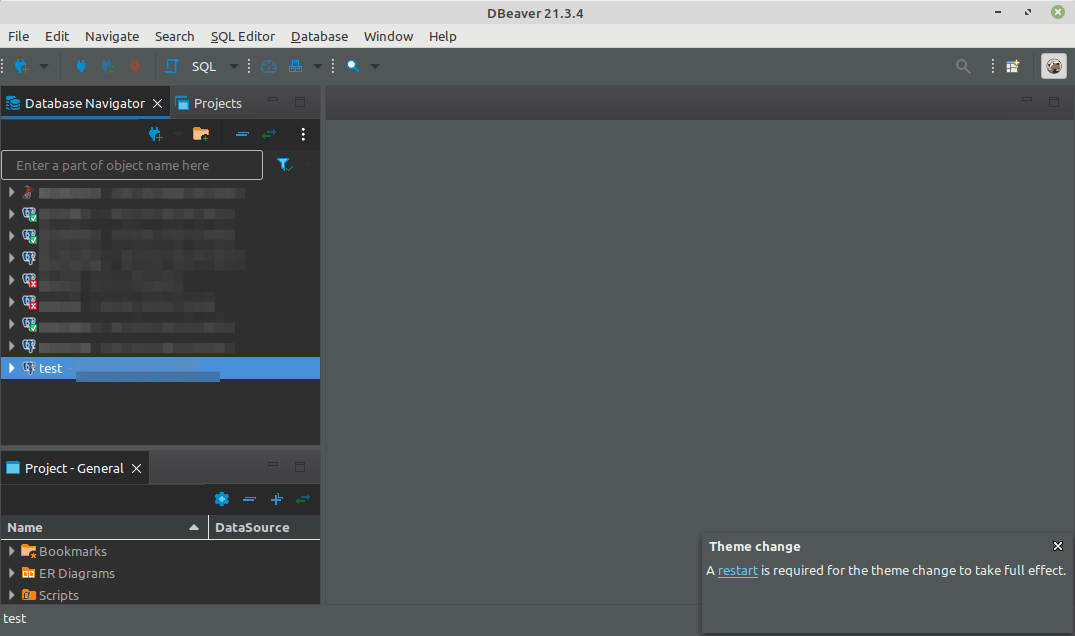
Last but not least, if you love dark mode or theme, you can switch to it. Simply click on Windows –> Preferences, then click on Appearance. Then under the Theme setting, select Dark, then click Apply and Close.
That’s all we had for you in this guide. To find more information about DBeaver including the documentation, check out the official DBeaver website. You can drop any comments about this guide in the comments section below.