Gentoo is a free and open-source Linux distribution known for its high performance, high reconfigurability, and stability. It uses the portage package management system for managing software packages.
Unlike major Linux distributions such as Ubuntu, Debian, or Red Hat, Gentoo does not provide an OS installer. Just like Arch Linux, Gentoo is built from the ground up and is considered one of the most complex operating systems to install.
Instead, Gentoo provides a comprehensive guide called Gentoo Handbook that walks you through the installation process. In this guide, we will demonstrate the installation of Gentoo using a Live GUI image. We will configure disk partitioning using an MBR partition scheme and a customized Kernel image provided by Gentoo developers.
This is the first part of a two-part series since the installation of Gentoo is quite lengthy. So, buckle up and enjoy the ride 🙂
1. Download Gentoo and Boot ISO Image
To kickstart this guide, head over to the Gentoo Download page and grab the last released LiveGUI ISO image.
With the Live image downloaded, reach out for your USB drive and use a tool such as Rufus to make a bootable medium from the ISO images or use popular USB creator tools to create a bootable USB medium from an ISO file.
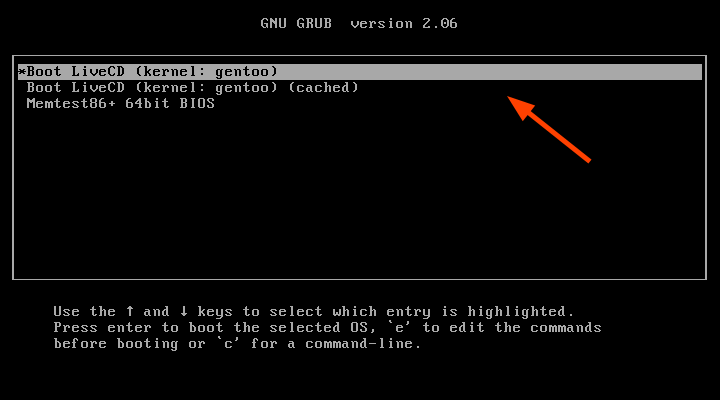
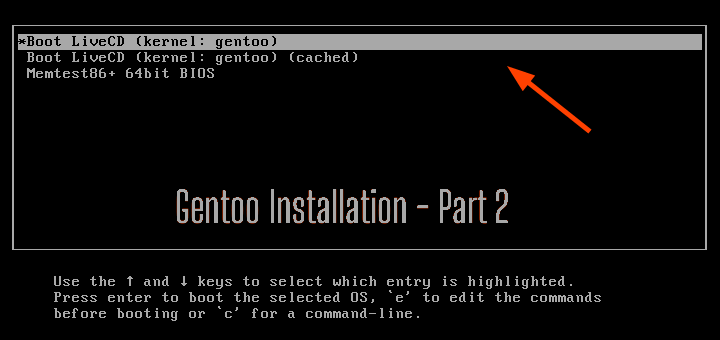
Next, plug the USB drive into your PC and restart. Be sure to configure the BIOS and set the bootable medium to the highest boot priority. Once the system boots, this is what you will see on the screen. The first option comes pre-selected. So hit ENTER.
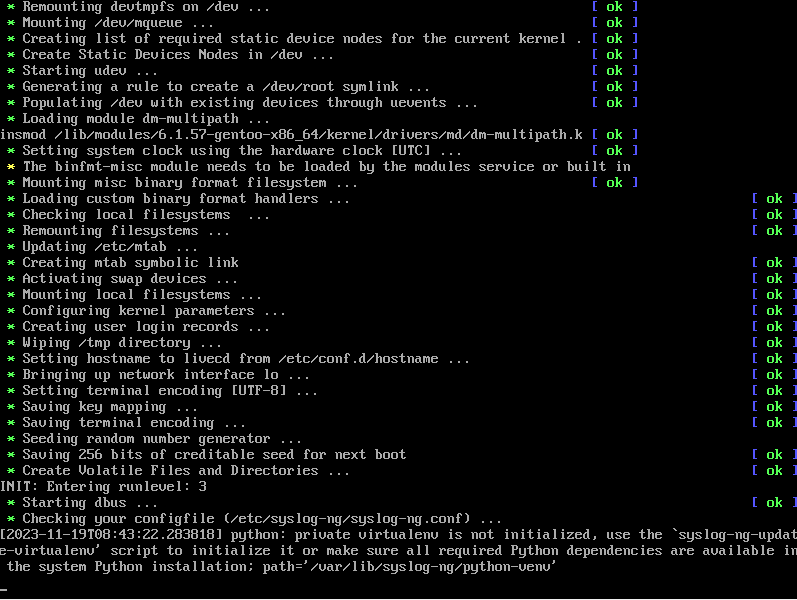
Thereafter, you’ll get a barrage of boot messages on your screen.
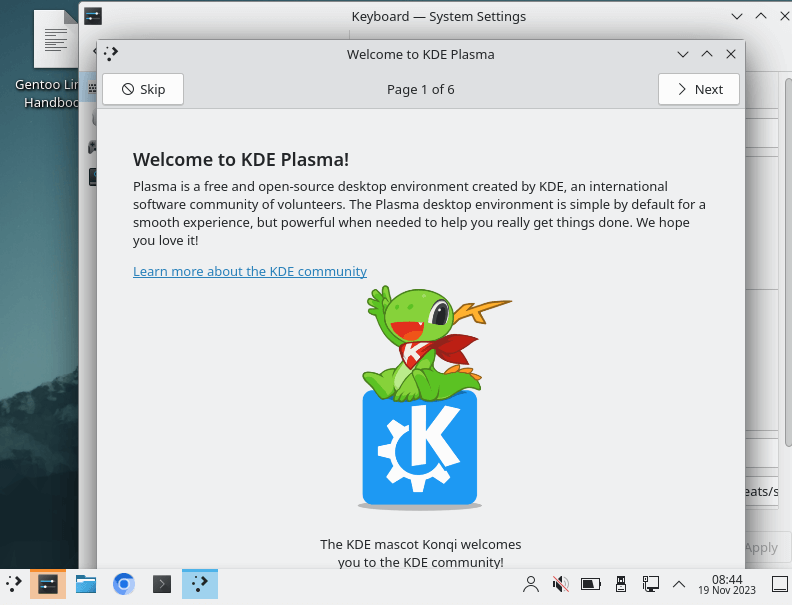
Finally, the Live GUI screen will come into view.
2. Configure Networking in Gentoo
If your system is already plugged into a network running a DHCP server using an Ethernet card, chances are that automatic network configuration has been set.
In this case, the active network interface has acquired a valid IP address from the DHCP server. If that’s the case, you’ll be able to run common network commands such as ping, ip, ifconfig, and ssh to mention a few.
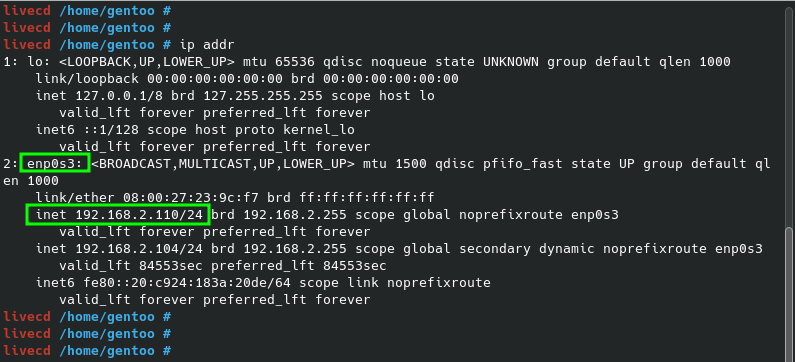
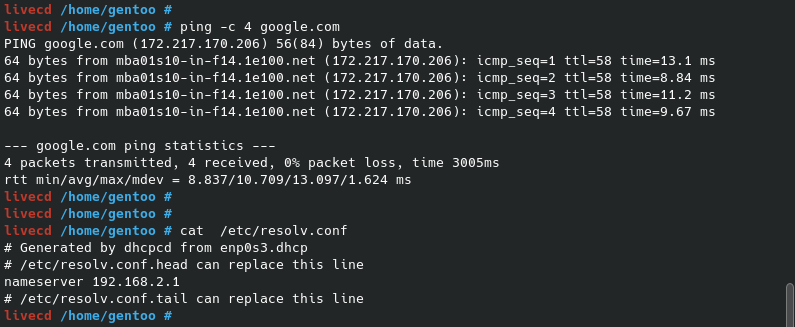
In our case, the system has automatically acquired an IP address from the network via DHCP. To get started with working on the command line, switch to the root user.
sudo su
To check the IP address, we will run the command:
ip addr
From the output, you can see that the active interface (enp0s3) has obtained the IP 192.168.2.110 with a /24 CIDR.
You can check for internet connectivity using the ping command as follows.
$ ping -c 4 google.com
From the output, you can see that we get a positive reply from Google’s DNS.
3. Create Disk Partitions and Filesystems
The next step is to configure disk partitions and file systems. You can view the current partition layout using the fdisk command as shown.
$ fdisk /dev/sda
From the output, we have a system with a hard disk of 42.83GB.
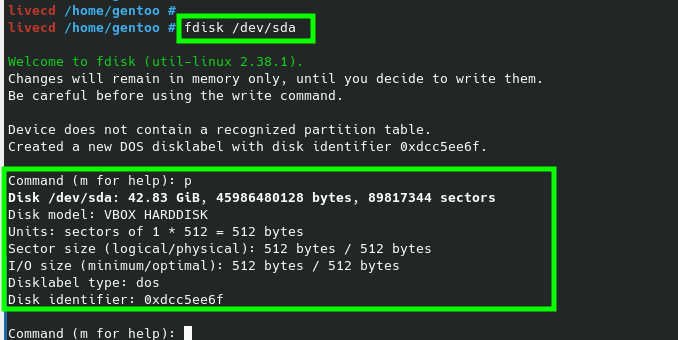
You can configure your hard drive with either MBR for BIOS (Legacy Boot) configuration or GPT for UEFI.
In this guide, we will opt to create disk partitions with MBR for BIOS configuration.
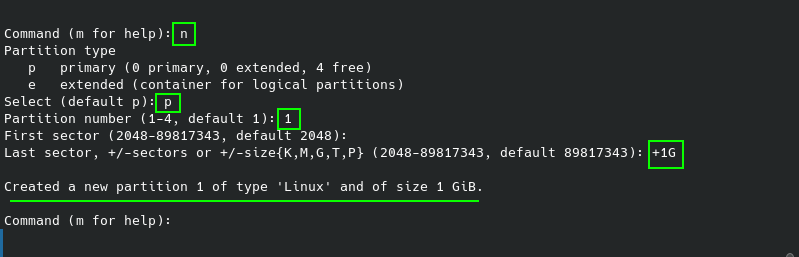
Here is the disk partition layout.
/dev/sda1	1G	boot
/dev/sda2 	4G	swap space
/dev/sda3	37G	Root partition
Create Boot Partition
To create the boot partition, type 'n' for the new partition. Then type 'p' to select the primary partition. Next, type 1 to specify the partition number. Alternatively, you can press ENTER since this is automatically selected for you. Hit ENTER when prompted for the First Sector.
Next, specify the disk size by prepending it with a (+) sign followed by the numeric size followed by 'G' for Gigabytes. You will get a confirmation that a new Linux partition has been created with the disk size specified.
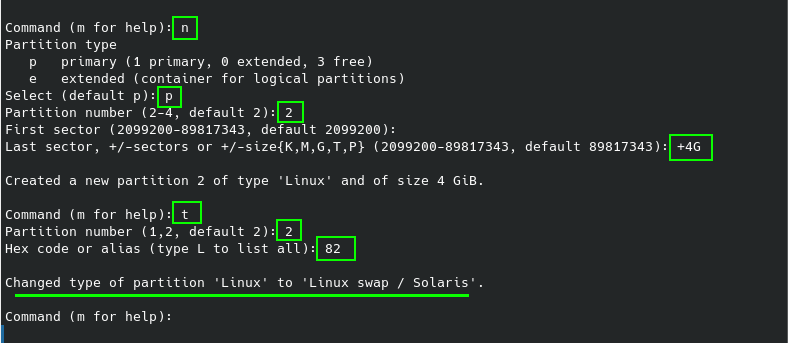
Create Swap Space
To configure the swap space, repeat the same steps up to the first sector. Next, specify the disk size as +4G and hit ENTER.
Since the partition type created is of type ‘Linux‘, press 't' to change this to a different one. Provide the partition number (In this case '2') and then provide the code that corresponds to Swap (In this case 82).
NOTE: You can view all the partition types by typing 'L'.
Create Root Partition
For the root partition, specify the partition number as '3' or simply press ENTER to accept the default number (3), define the disk size (in this case +37G), and hit ENTER.
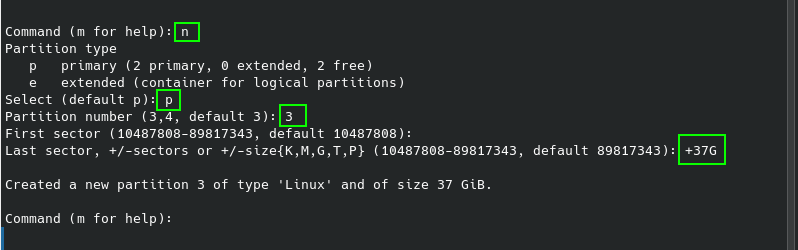
To view the partitions created, type 'p' and press ENTER. If you are satisfied with the partitions made, type 'w' and hit ENTER to save the disk partitions permanently.

After the partitions are created, the next step is to format them into the appropriate filesystems.
Linux supports a wide range of filesystems, some of which are only suited for specific purposes. Stable filesystems for amd64 systems include Ext3, Ext4, BTRFS, XFS, ZFS and ReiserFS.
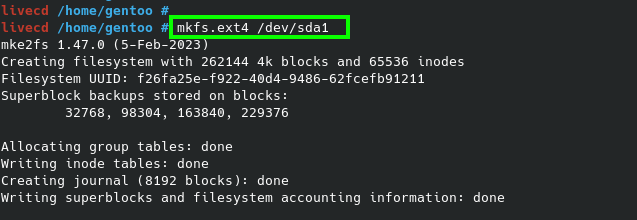
For the /boot partition, we will format it as an EXT4 filesystem.
mkfs.ext4 /dev/sda1
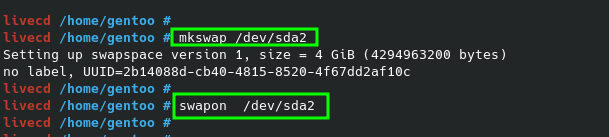
To set up the swap partition, use the mkswap command as shown.
mkswap /dev/sda2
Then activate it using the swapon command.
swapon /dev/sda2
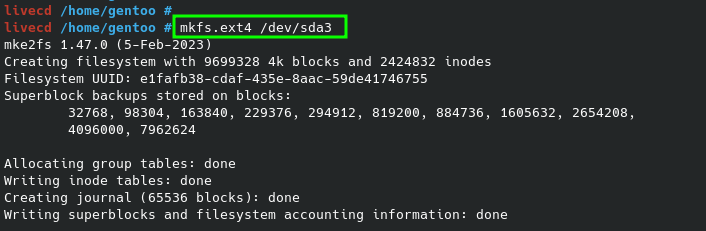
Lastly, format the root partition as an EXT4 filesystem.
mkfs.ext4 /dev/sda3
4. Mount the Root Partition
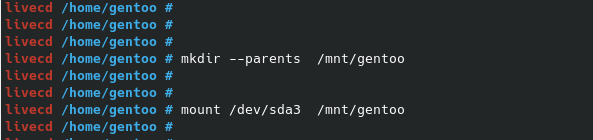
The next step is to mount the root partition. But first, let’s create a mount point for the partition.
mkdir --parents /mnt/gentoo
The --parents option creates parent directories. Next, mount the partition using the command as shown.
mount /dev/sda3 /mnt/gentoo
5. Configure Date and Time
Before installing Gentoo, ensure that the time and date settings are correct. To check the current date and time, run the date command.
date
If the date displayed is more than a few minutes off than what is expected, update the time automatically using the chronyd command-line utility.
chronyd -q
The command will rectify any existing time skew found. When you run the command again, you will notice that the time skew will be about 0.01 of a second which is a very slim difference that is not likely to impact any system processes or operations.

6. Download and Extract Gentoo Stage 3 Tarball File
A stage 3 tarball in Gentoo is simply an archive that ships with a profile-specific minimal Gentoo environment.
Downloading and decompressing the tarball file yields crucial system-wide directories such as /usr, /etc, /dev, /bin, /lib, /proc, /var, and many others which provide an almost complete functional system.
The only important parts that will be missing (and which will be installed in the second part of this guide) are the kernel and the bootloader.
To get started with extracting a stage 3 tarball file, navigate to the root directory.
cd /mnt/gentoo
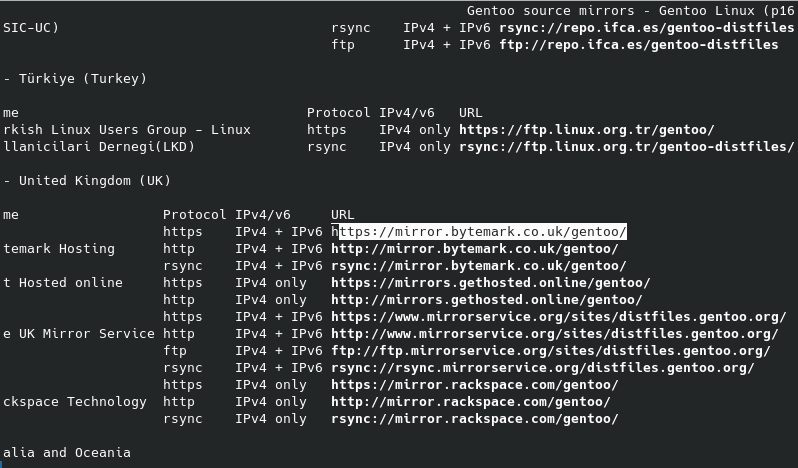
Run the command below to navigate to the Gentoo Mirror list
links https://www.gentoo.org/downloads/mirrors/
Select your preferred Country mirror, and hit ENTER.
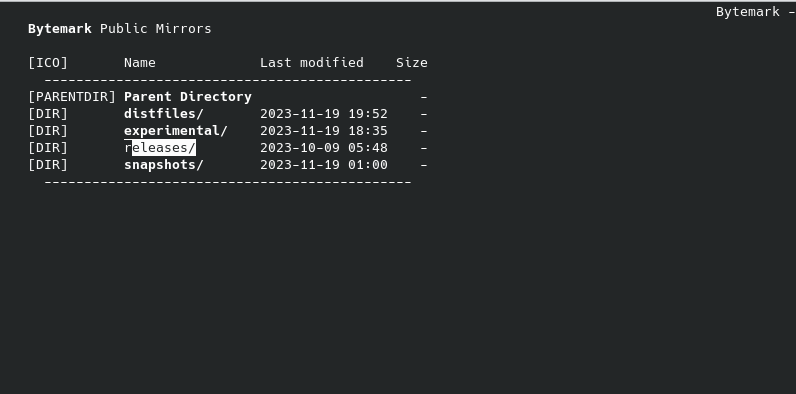
Next, navigate to the ‘Releases‘ section.
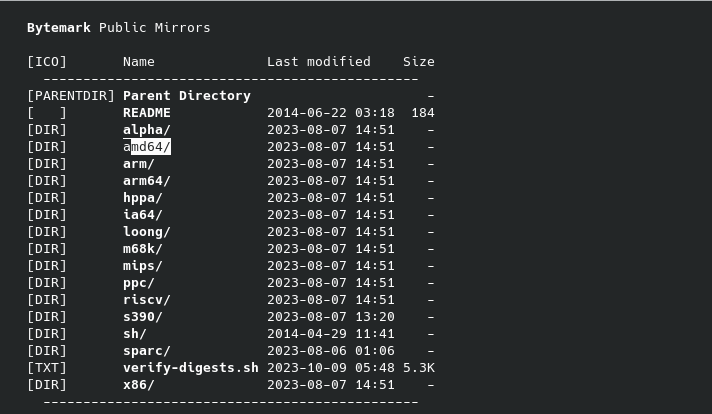
Select the ‘amd64’ architecture option.
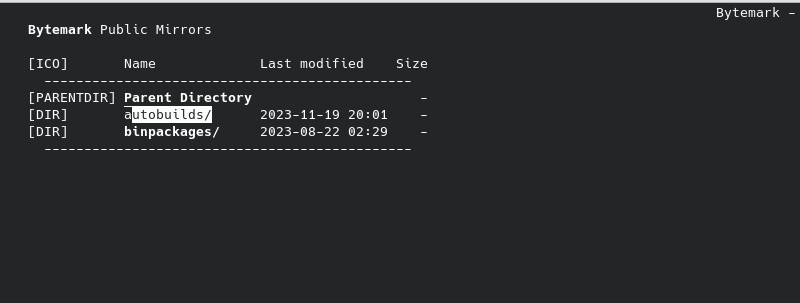
Next, select the `autobuilds` option.
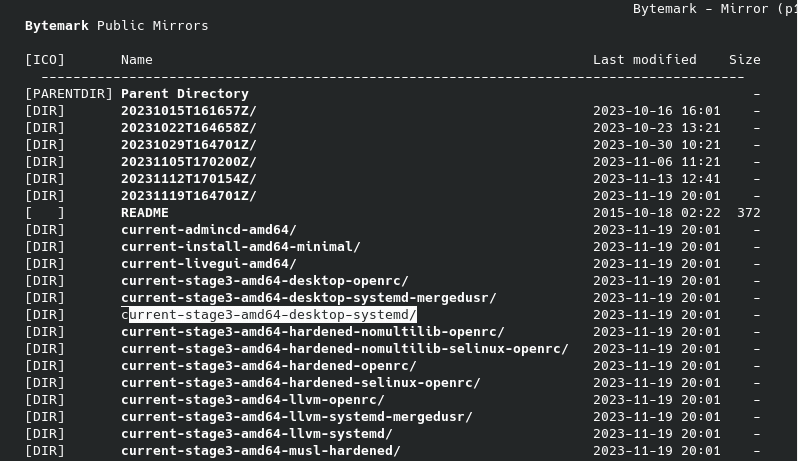
Next, select the stage3 desktop systemd option since we are running a GUI system.
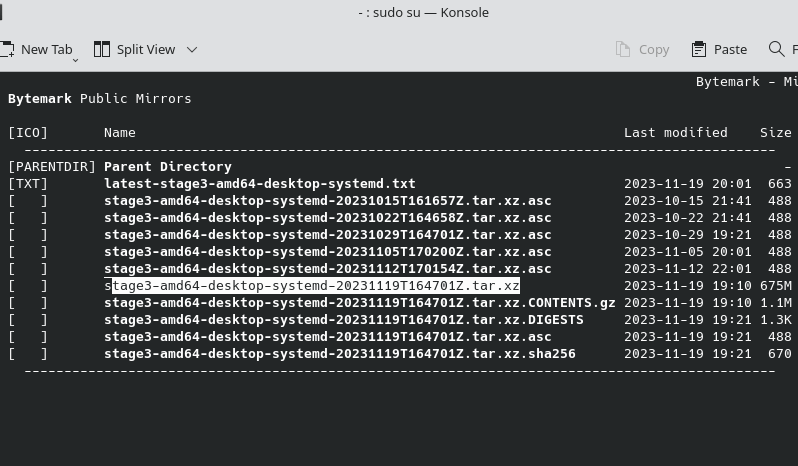
Navigate to the stage3 tarball file and hit ENTER to download it.
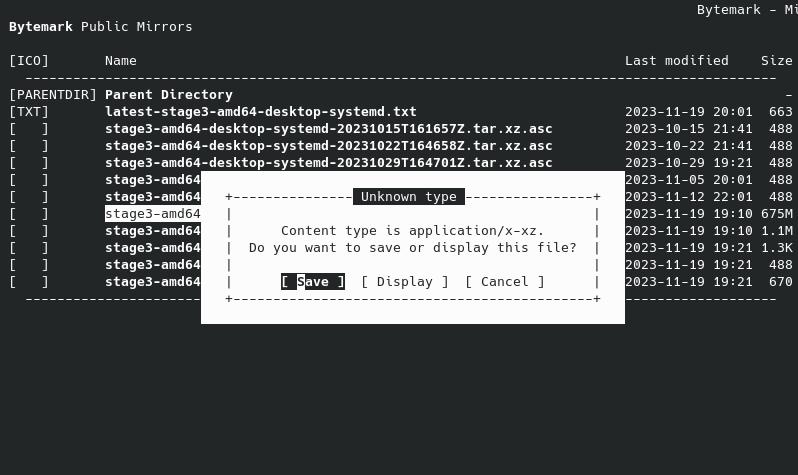
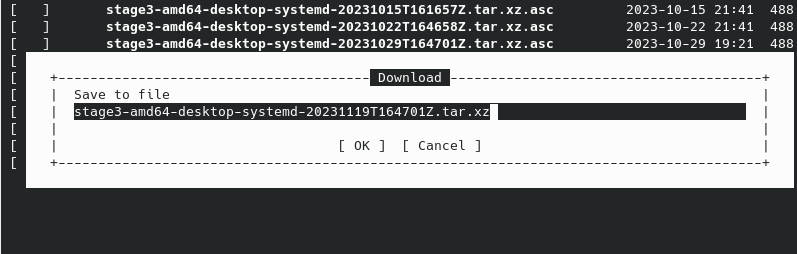
Choose the ‘Save’ option on the pop-up dialogue that appears.
Confirm the name of the file and press ENTER.
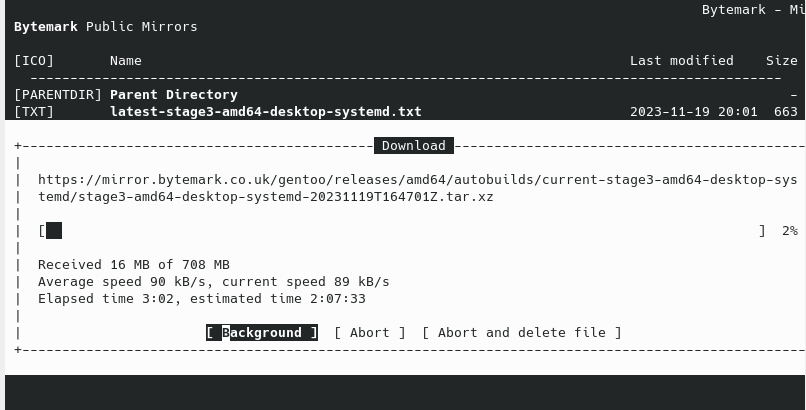
The download will start and a progress bar will indicate the download progress. This might take a while depending on the internet speed.
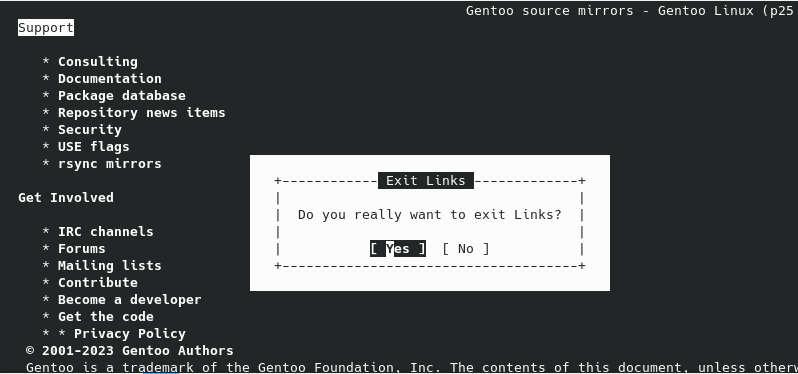
Once the download completes, select `Yes` to exit from the Gentoo Mirrors command-line interface.
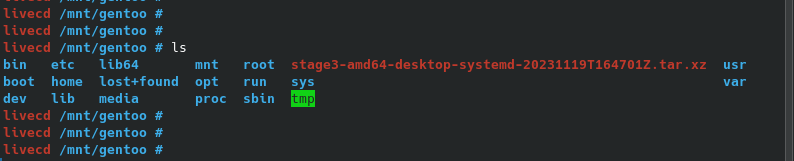
Finally, unpack the downloaded stage tarball file to the system.
tar xpvf stage3-*.tar.xz --xattrs-include='*.*' --numeric-owner
Once extracted, you will see additional system directories as shown.
This concludes Part 1 of the Gentoo installation guide. You now have a minimal Gentoo environment installed on your computer, but the installation process is far from complete. To proceed with the installation, follow the ‘Install Gentoo Linux – Part 2‘ tutorial.


I try “tar xvjpf” not working but tar xpvf working.
Step 6.21
# emerge gentoo-sources
emerge: there are no ebuilds to satisfy “gentoo-sources”.
Ce-i de facut?
emerge –sync
I’m a Linux noob but Gentoo and Arch Linux just make me barf. It’s easier to to just repackage, re-brand and re-roll your own distro based on an existing one. The amount of time and punishment it takes to learn the Linux kernel, File system, Daemons, Partitions etc.. A newb like me would rather just based a distro on an existing one. It’s cheap, it’s dirty, it’s under handed but it’s free so why not.
What is the su – password???
sudo su
You need to use the SU or root password. While installing from the USB, cd or DVD, enter the command:
The script will ask you for a new password.
Thanks! I used this guide to install Gentoo in the club!
You forgot to include the step for mounting the partitions. There is just a screenshot but you skipped that step in your guide.
Kinda ruined the whole guide for me because it seemed so thorough that I didn’t question it until I kept running out of space trying to install the kernel and had to go back only to see you completely left that step out. I finally found it in the tiny font of the screenshot.
Good effort though but you should really fix that if you are going to call it an installation guide because without the step it makes it awfully confusing considering there is a step along with each screenshot for everything else. It’s supposed to be an installation guide “with” screenshots, right?
I also have the same problem, is it the mount to /dev/sda4 you’re talking about?
Thanks for posting.
It was very useful to me.
I’m not linux specialist, so step-by-step manual is good for beginer.
Thanks.
Good luck i havent tried gentoo in ages it had an installer back then i believe this was hmm perhaps 7 years ago give or take now i miss it and its capabilities trying it again alongside my windows good luck CJ this guide makes it much easier in case a hiccup browser next to u for reference :) if using live dvd tat is
I’ve attempted to install Gentoo at least a dozen times since 2005 and have met with failure each time. I recently decided to give it another try and I’m going to use your tutorials. Wish me luck.
Wow! Very complicated but much appreciated. I just followed the links in this tutorial, and will do so again for part 2, but I learned a little bit. Thanks for posting this.