In Linux, there are a couple of file-sharing protocols used to share storage and files across a network. The most widely used ones are Samba and NFS.
Samba is a popular open-source application suite that works in a client-server architecture. It offers cross-platform compatibility enabling seamless file sharing across Linux, Windows, and macOS operating systems. A file share hosted on a Linux system can be accessed from diverse platforms, thus fostering collaboration.
Another widely used file-sharing protocol is NFS, short for Network File Share. Just like Samba, it works on a client-server model and allows a user to share directories and files across a network with multiple remote client users.
In this guide, we will check out how to install the NFS server and client on RHEL-based distributions such as Fedora, CentOS Stream, Rocky Linux, and AlmaLinux.
NFS Services
Currently, there are 3 versions of NFS, the latest one being NFSv4 which includes features such as the ability to work over the internet and across a firewall. In addition, there is NFSv3 and NFSv2 which is the oldest protocol.
The NFS service is made up of the NFS Server and client. The NFS server comprises the following key files:
- nfs-server – This allows client systems to access the NFS-shared files.
- rpcbind – converts RPC programs to universal addresses.
- nfs-idmap – Carries out the translation of the user and group IDs to names and user and group names into IDs.
- portmap – This is a server that converts RPC program numbers to IP port numbers.
- nfslock – In case of an NFS server crash, the nfslock starts the required RPC processes.
NFS Configuration Services
Here are some of the key configuration files for NFS:
- /etc/exports – The main configuration file, which stipulates the filesystems or directories to be exported and accessed by remote users.
- /etc/fstab – This is a file that contains entries of mounted partitions. In NFS, the file contains entries of NFS share directories or filesystems which are permanently mounted and can persist a reboot.
- /etc/sysconfig/nfs – It defines the ports needed during the running of RPC services.
NFS Server and Client Setup
To set up NFS shares, we’ll need at least two Linux/Unix machines. Here in this tutorial, I’ll be using two servers.
- NFS Server – RHEL 9 with IP 10.128.15.213
- NFS Client – RHEL 9 with IP 10.128.15.214
Install NFS on Server and Client
To start off, you need to log into both nodes (NFS server and client) and install the NFS services. First, update the package information as shown. The following dnf command will also upgrade all the exciting packages to their latest versions.
$ sudo dnf update
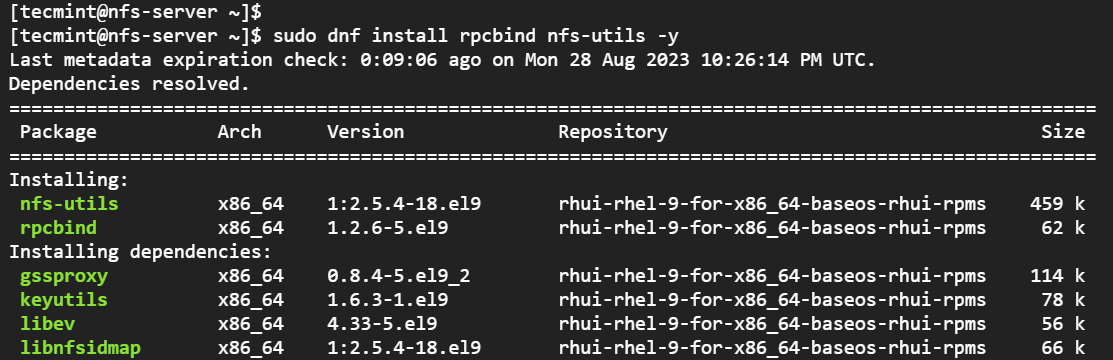
Once the update is complete, proceed and install the requisite NFS services.
$ sudo dnf install rpcbind nfs-utils -y
The next step is to enable the NFS services as shown.
$ sudo systemctl enable nfs-server
$ sudo systemctl enable rpcbind
Be sure to also start the NFS services.
$ sudo systemctl enable nfs-server
$ sudo systemctl enable rpcbind
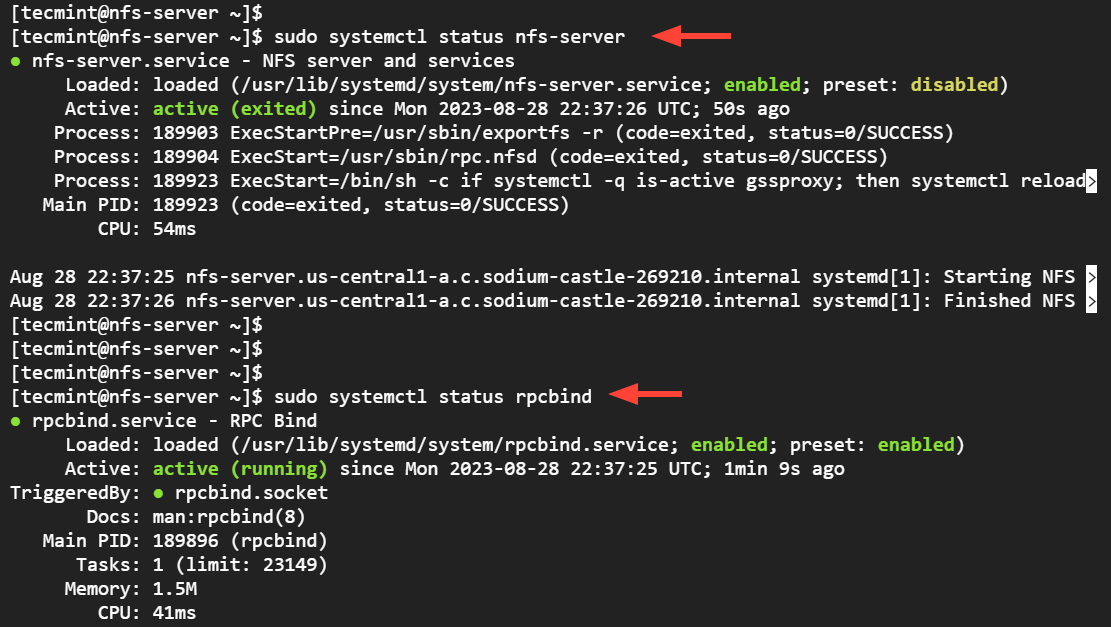
It’s crucial to verify that all the NFS services are running.
$ sudo systemctl status nfs-server
$ sudo systemctl status rpcbind
Be sure to also configure the firewall in order to allow inbound NFS services as follows.
$ sudo firewall-cmd --permanent --add-service={nfs,rpc-bind,mountd}
$ sudo firewall-cmd --reload
Create an NFS Share Directory
With all the NFS services installed and running as expected, it’s time to create the NFS share directory, which is the directory that will contain files that will be accessed by NFS clients in the network.
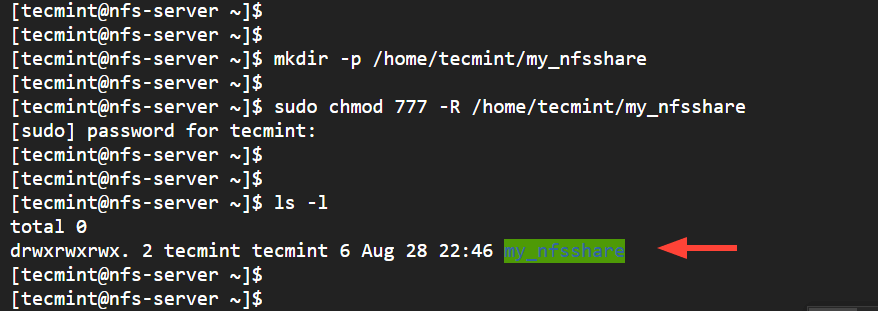
In this case, we will create an NFS share directory called my_nfsshare in our home directory.
$ mkdir -p /home/tecmint/my_nfsshare
Next, assign directory permissions. For demonstration purposes, we will assign global permissions that will accord NFS clients read, write, and execute permissions.
$ sudo chmod 777 -R /home/tecmint/my_nfsshare
Export an NFS Share Directory
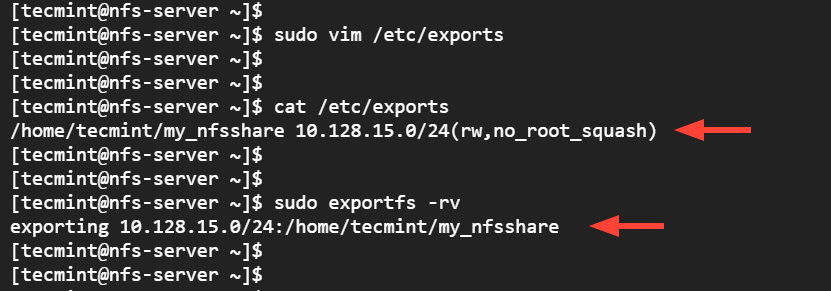
The next step is to export the NFS share directory. In order to achieve this, we need to make an entry in the /etc/exports file. Therefore, access the file using your preferred text editor. In this case, we will use the Vim editor.
$ sudo vim /etc/exports
Add the following entry. Be sure to replace the server-ip with your NFS server’s IP address.
/home/tecmint/my_nfsshare server-ip/24(rw,no_root_squash)
Finally export the NFS share directory or filesystem.
$ sudo exportfs -rv
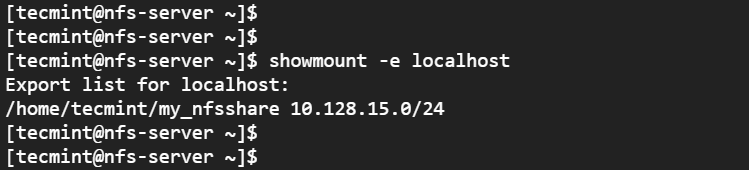
Run the following command to view the NFS shares.
$ showmount -e localhost
Configure NFS Client
The remaining phase of this exercise is to configure the NFS client in order to access the shared directory. First, confirm that you can view the export list or NFS shares on the NFS server.
# showmount -e 10.128.15.213

The next step is to mount the NFS share from the server to the client. To do this, we first need to create a mount directory. In this case, we will create a directory called nfs_backup.
# mkdir nfs_backup
Thereafter, we will mount the NFS share to the mount directory that we have just created in the root home directory
# mount -t nfs 10.128.15.213:/home/tecmint/my_nfsshare ~/nfs_backup
To persist the NFS share, edit the /etc/fstab file.
# vim /etc/fstab
Then add the following entry.
10.128.15.213:/home/tecmint/my_nfsshare /root/nfs_backup nfs defaults 0 0

Save and exit the configuration file.
Testing NFS Setup
The last step is to verify if the NFS setup is working as expected. We will create a few files on the server and verify their availability on the NFS client side.
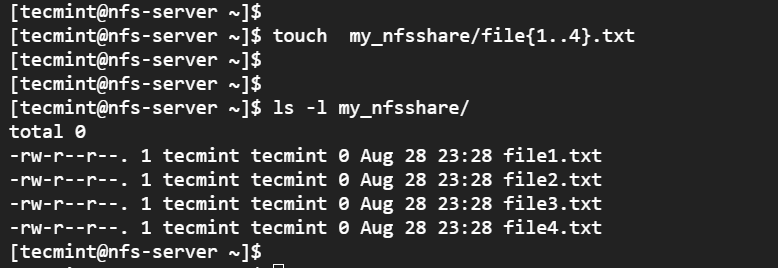
On the server side, we will create the files in the NFS share directory.
$ sudo touch my_nfsshare/file{1..4}.txt
To verify that the files have been created, we will execute the ls command:
$ ls -l my_nfsshare/
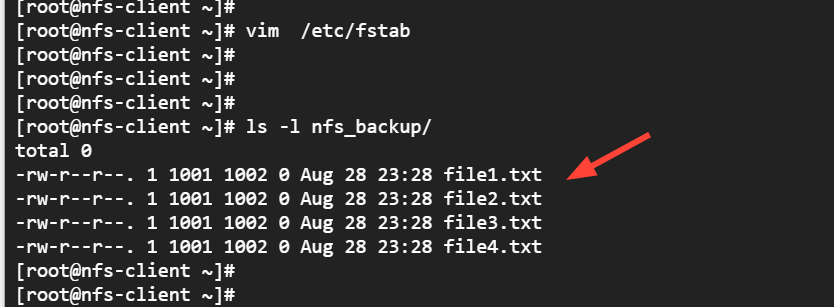
Back to the client side, verify that the files are available in the mount directory without any service refresh or restart of any services as seen in the following output.
$ ls -l nfs_backup/
Removing NFS Mount
If you no longer need the mounted directory on your system, you can unmount them from the client side using the following umount command:
$ umount ~/nfs_backup
NFS Share Commands
Some more important commands for NFS.
- showmount -e – Shows the available shares on your local machine
- showmount -e ip-address – Lists the available shares at the remote server
- showmount -d – Lists all the sub-directories
- exportfs -v – Displays a list of shared files and options on a server
- exportfs -a – Exports all shares listed in /etc/exports, or given name
- exportfs -u – Unexports all shares listed in /etc/exports, or given name
- exportfs -r – Refresh the server’s list after modifying /etc/exports
Conclusion
This wraps up our guide on how to install the NFS server and client on RedHat-based distributions. We have installed the NFS services on the server, created an NFS share directory, and finally mounted the share directory on the client. Lastly, we verified the NFS setup by accessing the file created on the server from the client side.