NFS (Network File Share) is a protocol that allows you to share directories and files with other Linux clients in a network. The directory to be shared is usually created on the NFS server and files are added to it.
The client systems mount the directory residing on the NFS server, which grants them access to the files created. NFS comes in handy when you need to share common data among client systems especially when they are running out of space.
This guide will comprise 2 main sections: Installing and configuring the NFS Server on Ubuntu 22.04, 20.04, and 18.04 and installing the NFS client on the client Linux system.
Installing and configuring NFS Server on Ubuntu
To install and configure the NFS server, follow the steps outlined below.
Step 1: Install NFS Kernel Server in Ubuntu
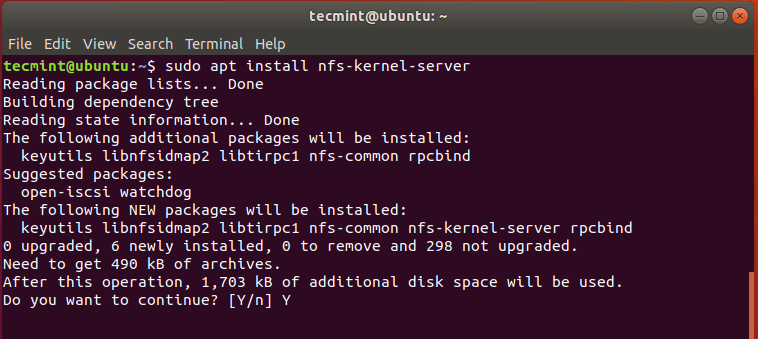
The first step is to install the nfs-kernel-server package on the server. But before we do this, let’s first update the system packages using the following apt command.
$ sudo apt update
Once the update is complete, proceed and install the nfs-kernel-server package as shown below. This will store additional packages such as nfs-common and rpcbind which are equally crucial to the setup of the file share.
$ sudo apt install nfs-kernel-server
Step 2: Create an NFS Export Directory
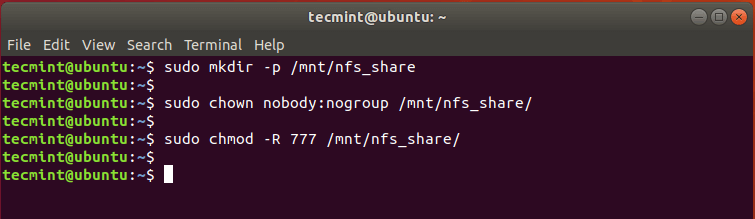
The second step will be creating a directory that will be shared among client systems. This is also referred to as the export directory and it’s in this directory that we shall later create files that will be accessible by client systems.
Run the command below by specifying the NFS mount directory name.
$ sudo mkdir -p /mnt/nfs_share
Since we want all the client machines to access the shared directory, remove any restrictions in the directory permissions.
$ sudo chown -R nobody:nogroup /mnt/nfs_share/
You can also tweak the file permissions to your preference. Here’s we have given the read, write and execute privileges to all the contents inside the directory.
$ sudo chmod 777 /mnt/nfs_share/
Step 3: Grant NFS Share Access to Client Systems
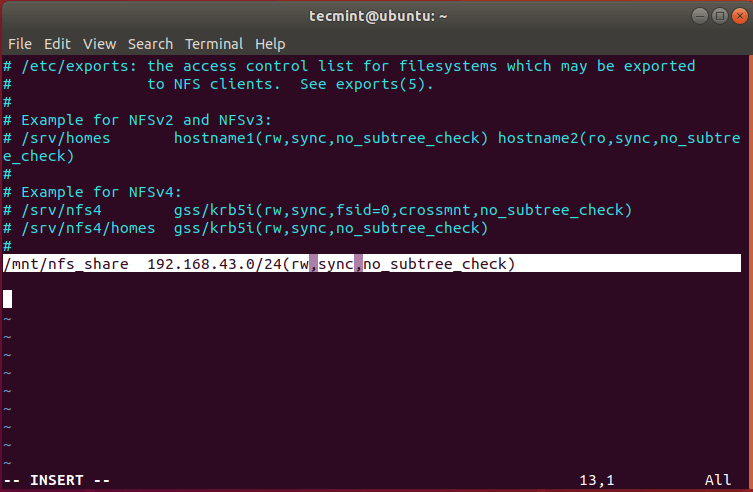
Permissions for accessing the NFS server are defined in the /etc/exports file. So open the file using your favorite text editor:
$ sudo vim /etc/exports
You can provide access to a single client, multiple clients, or specify an entire subnet.
In this guide, we have allowed an entire subnet to have access to the NFS share.
/mnt/nfs_share 192.168.43.0/24(rw,sync,no_subtree_check)
Explanation about the options used in the above command.
- rw: Stands for Read/Write.
- sync: Requires changes to be written to the disk before they are applied.
- No_subtree_check: Eliminates subtree checking.
To grant access to a single client, use the syntax:
/mnt/nfs_share client_IP_1 (re,sync,no_subtree_check)
For multiple clients, specify each client on a separate file:
/mnt/nfs_share  client_IP_1 (re,sync,no_subtree_check)
/mnt/nfs_share  client_IP_2 (re,sync,no_subtree_check)
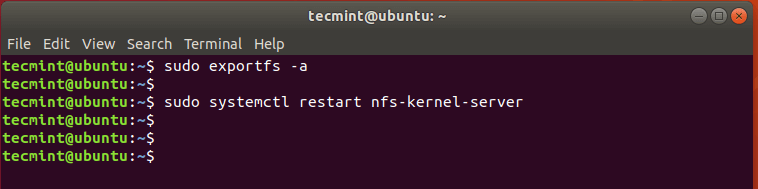
Step 4: Export the NFS Share Directory
After granting access to the preferred client systems, export the NFS share directory and restart the NFS kernel server for the changes to come into effect.
$ sudo exportfs -a
$ sudo systemctl restart nfs-kernel-server
Step 5: Allow NFS Access through the Firewall
For the client to access the NFS share, you need to allow access through the firewall otherwise, accessing and mounting the shared directory will be impossible. To achieve this run the command:
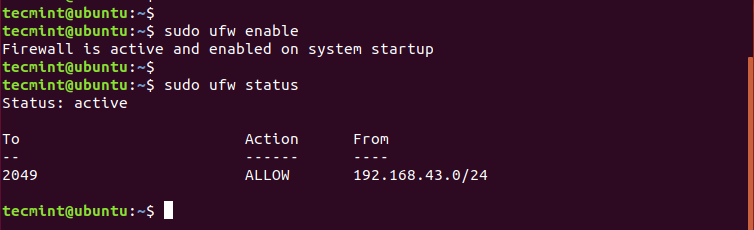
$ sudo ufw allow from 192.168.43.0/24 to any port nfs
Reload or enable the firewall (if it was turned off) and check the status of the firewall. Port 2049, which is the default file share, should be opened.
$ sudo ufw enable
$ sudo ufw status
Install the NFS Client on the Client Systems
We’re done installing and configuring the NFS service on the Server, let’s now install NFS on the client system.
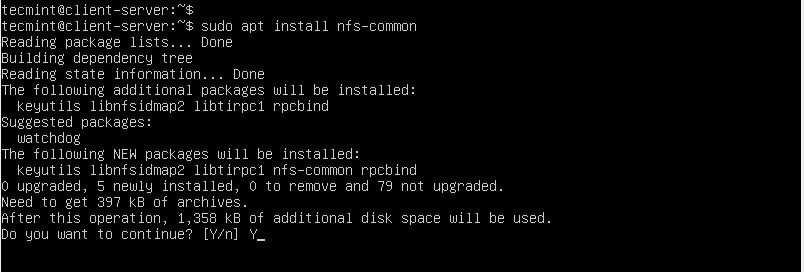
Step 1: Install the NFS-Common Package
As is the norm, begin by updating the system packages and repositories before anything else.
$ sudo apt update
Next, install nfs-common packages as shown.
$ sudo apt install nfs-common
Step 2: Create an NFS Mount Point on Client
Next, you need to create a mount point on which you will mount the nfs share from the NFS server. To do this, run the command:
$ sudo mkdir -p /mnt/nfs_clientshare
Step 3: Mount NFS Share on Client System
The last step remaining is mounting the NFS share that is shared by the NFS server. This will enable the client system to access the shared directory.
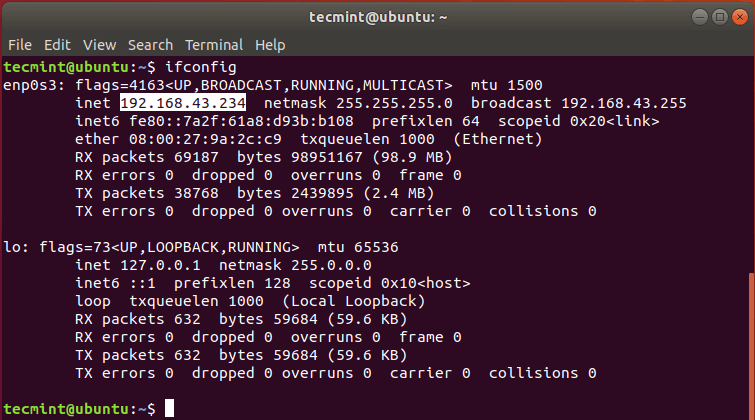
Let’s check the NFS Server’s IP address using the ifconfig command.
$ ifconfig
To achieve this run the command:
$ sudo mount 192.168.43.234:/mnt/nfs_share /mnt/nfs_clientshare
Step 4: Testing the NFS Share on the Client System
To verify that our NFS setup is working, we are going to create a few files in the NFS share directory located in the server.
$ cd /mnt/nfs_share/
$ touch file1.txt file2.txt file3.txt
Now head back to the NFS client system and check if the files exist.
$ ls -l /mnt/nfs_clientshare/
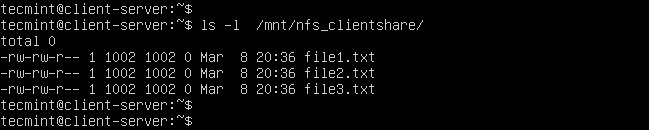
Great! The output confirms that we can access the files we just created on the NFS server!
And that’s about it. In this guide, we walked you through the installation and configuration of the NFS server on Ubuntu 22.04, Ubuntu 20.04, and Ubuntu 18.04. NFS is rarely used nowadays and has been relegated in favor of the more robust and secure Samba share protocol.


Very useful article that has really helped me out with some testing I’m doing in my job.
Thank you for taking the time to produce a detailed but also to-the-point article on how to export an NFS share and access it, very grateful! :-D
Great article, is it possible to mount this share on a windows server or desktop?
It’s not true that “NFS is rarely used nowadays”. The only reason to use Samba is having to share files with Microsoft Windows systems. If all the machines that need to share files are running Linux, NFS is a more efficient solution than Samba and is also simpler to install.
I’m adding a new cluster, and I want to share /data of an old cluster with the new cluster too.
I’m trying to set up NFS on two computer clusters. Let’s say A and B (new) for each head node in the cluster. Compute nodes A1, A2 shares /home and /data from A, and compute nodes B1, B2 shares /home from B but /data from “A”.
In another word, cluster A, B shares its own /home, but /data of A is shared through the whole cluster A and B. In order to do this, I did set up NFS and IP/Mask with the following way to achieve the goal (All computers are connected to one network switch).
A with one external IP/24 (eht0) and one with 10.0.0.1/16 (eth1). exports setup of A:
stab of A
A1 IP with 10.0.0.2/16, A2 IP with 10.0.0.3/16 fstab of A1’s
B with its one external IP/24 (eht0) and one with 10.0.1.1/24 (eth1).
exports setup of B
fstab of B
B1 with 10.0.1.2/24, B2 with 10.0.1.3/24 … 10.0.1.1:/home /home nfs 10.0.0.1:/data /data nfs
I thought my goal can be achieved simply by IP/Mask, but it doesn’t work. I can mount /data of A on B’s compute nodes, but I cannot mount /home of its own B on B’s compute nodes.
How can I set up the network and NFS to achieve my goal?
Hi,
"sudo: ufw command not found"Can I help me?
I need free access to specific IP.
Hey Pedro, it seems the UFW firewall is not installed on your system, in which case you need to install it using the command:
Then enable it as follows:
Hi James,
Thank you for this useful tutorial. It worked for me like a charm on Ubuntu. But I would like to get a step further and, there, I fail. Would you be able to help? Let me explain:
I want to share over NFS the content of my secondary drive. On my NFS server, this drive, called NewVolume, is mounted on /media/solaris/NewVolume as soon as I try to access it under user ‘Solaris’.
When I try to export /media/solaris/NewVolume (or any subfolder of it) in /etc/exports, the ‘showmount -e‘ shows me that it works. But when I try to mount /media/solaris/NewVolume on any folder on my NFS client side, it tells me that the NFS server does not allow…
So I tried a trick: I mounted /media/solaris/NewVolume on /mnt/nfs_share/newvolume. From my NFS client, I can indeed see the ‘newvolume‘ folder in /mnt/nfs_clientshare (and I can see the content of /media/solaris/NewVolume in /mnt/nfs_share/newvolume in my NFS server) but /mnt/nfs_clientshare/newvolume is empty!
Any hint towards a solution is welcome.
Thanks in advance,
Deepop
I noticed that when the client machine is restarted, I need to rerun the mount command.
Is there a way to retain the mount after restarts? like editing fstab or something?
Thanks :)
You don’t really NEED to add/enable a firewall port if the firewall is disabled on your system. I wasn’t too careful and broke my ssh connection by enabling the firewall. Please specify in the tutorial to ONLY do that if the firewall is currently ACTIVE. Otherwise, great tutorial! Thanks!
Didn’t work on KVM based VM.
This worked for me.
Is the parameter “re” a typing mistake ??
@Myri,
The command is correct in the article.
This is the most helpful tutorial for setting up NFS on ubuntu. But it didn’t work for me until, besides opening port 2049 for NFS, I opened port 111 for RPC. Until I figured that out, showmount just failed with some unhelpful RPC error.
Hey Dennis, that’s a bit strange that you had to open port 111. But either way, I’m glad you finally hacked it.
+1 for mentioning you needed 111. I also needed it but didn’t figure that out until I read your comment and later was tailing /var/log/syslog. It also wanted a 16bit port number up at 40699, I think. When I then ran
rpcinfo -p, it showed me that 111 was for portmapper and the 40699 port was being used by mountd. So I had to do something like:Thanks to James for the original article. Very useful for setting up an NFS path between my OSX laptop and an Ubuntu VM running on my laptop. I was then able to do programming and testing that would have been much harder if I had to rely on standalone components.
Thank you Rich for your valueable input.