The Apache HTTP server is a free, open source, powerful, stable, reliable and most widely-used cross-platform web server, which runs on Unix-like systems such as Linux and Windows operating systems. It offers many strong features containing dynamically loadable modules, powerful media support, and immense integration with other popular software. It also works as a reverse proxy for other servers, for example application servers such as Nodejs, Python and more.
In this article, we will explain how to install an Apache web server on Ubuntu 18.04. We will also look at how to manage the Apache service via systemd and create virtual hosts for setting up websites.
Step 1: Installing Apache on Ubuntu 18.04
1. Apache is available from the official Ubuntu software repositories, first start by updating your system’s package index and then install Apache package as well as dependencies using the APT package manager.
$ sudo apt update
$ sudo apt install apache2
Once you have successfully installed Apache web server, take a note of these Apache important default files and directories.
- Main config files directory: /etc/apache2/.
- Main config file: /etc/apache2/apache2.conf.
- Additional configuration snippets: /etc/apache2/conf-available/ and /etc/apache2/conf-enabled/.
- Per-site virtual hosts configuration snippets: /etc/apache2/sites-available/ and /etc/apache2/sites-enabled/.
- Configuration snippets for loading modules: /etc/apache2/mods-available/ and /etc/apache2/mods-enabled/.
- Web DocumentRoot: /var/www/html/.
- Log files(error and access logs) directory: /var/log/apache/.
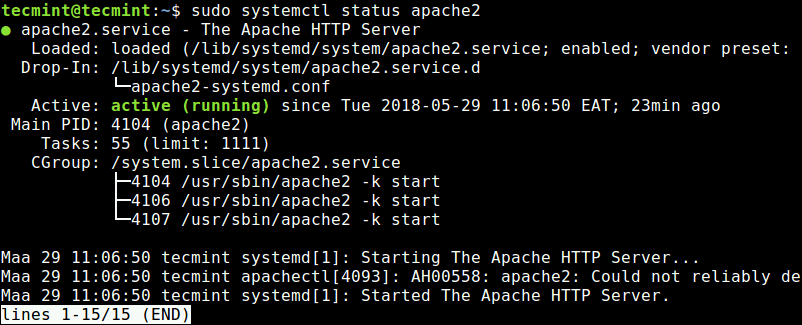
2. After the Apache installation process, the web server service should be started automatically, you can check if it is up and running with the following command.
$ sudo systemctl status apache2
3. Now that your Apache web server up and running, let’s go over some basic management commands to manage the Apache service using these following commands.
$ sudo systemctl status apache2
$ sudo systemctl stop apache2
$ sudo systemctl start apache2
$ sudo systemctl restart apache2
$ sudo systemctl reload apache2
$ sudo systemctl enable apache2
$ sudo systemctl disable apache2
4. Next, if you have the UFW firewall enabled and running on your system, you need to open the ports 80 and 443 to allow client requests to Apache web server via HTTP and HTTPS respectively, then reload the firewall settings using following commands.
$ sudo ufw allow 80/tcp
$ sudo ufw allow 443/tcp
$ sudo ufw  reload
Step 2: Checking Apache Web Server on Ubuntu 18.04
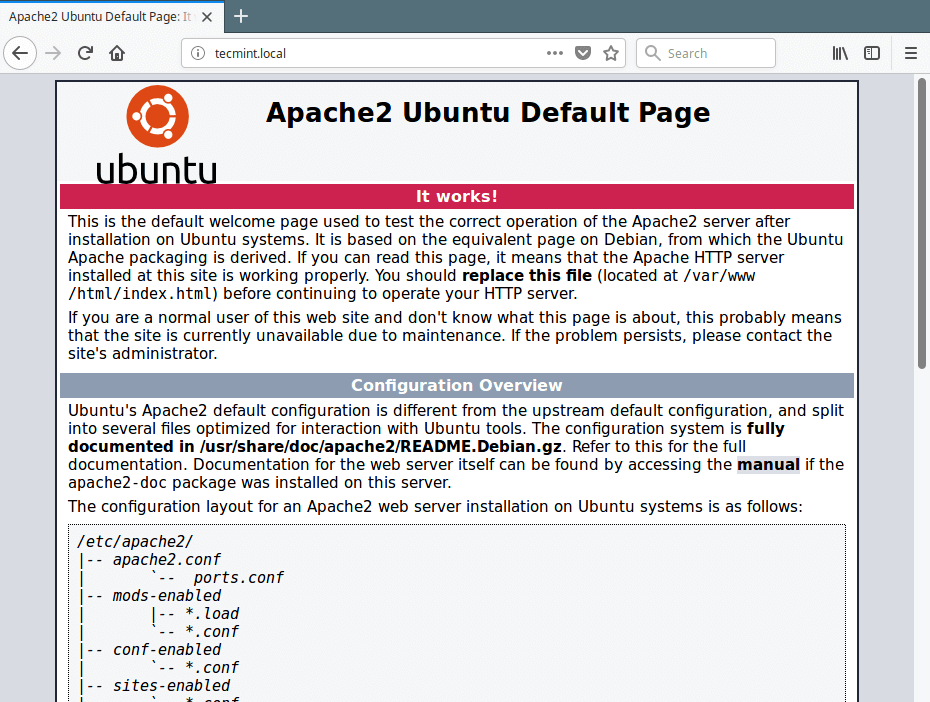
5. Now test if your Apache2 installation is working well; open a web browser and enter the following URL to access the Apache default web page.
http://domain_name/
OR
http://SERVER_IP/
If you see this page, it means your Apache web server is working fine. It also shows some basic information about important Apache configuration files and directory locations.
Note: If you want to use a dummy domain name such as tecmint.local, which is not a fully registered domain, you can setup a local DNS using the /etc/hosts file on the machine where you will access the Apache default web page.
$ sudo vim /etc/hosts
Then add the following line at the bottom of the file, make sure to replace 192.168.56.101 and tecmint.local with your server’s IP address and local domain name.
192.168.56.101 tecmint.local
Step 3: Setting Up Apache Virtual Hosts on Ubuntu 18.04
6. Next, we will explain how to create virtual hosts in Apache HTTP server (similar to Nginx server blocks) for your websites. For example, if you have a site called example.com that you want to host on your VPS using Apache, you need to create a virtual host for it under /etc/apache2/sites-available/.
First start by creating your document root directory for your domain example.com, where your site’s files will be stored.
$ sudo mkdir -p /var/www/html/example.com/
7. Then set the appropriate permissions on the directory as shown.
$ sudo chmod -R 775 /var/www/html/example.com/
$ sudo chown -R www-data:www-data /var/www/html/example.com/
8. Next, create a test html index page for your site in the root directory of your website.
$ sudo vim /var/www/html/example.com/index.html
Inside, add the following sample HTML code.
<html>
    <head>
        <title>Welcome to Example.com!</title>
    </head>
    <body>
        <h1>The example.com virtual host is working!</h1>
    </body>
</html>
Save and close the file when you are finished.
9. Now create a example.com.conf virtual host file for your site under /etc/apache2/sites-available/ directory.
$ sudo vim /etc/apache2/sites-available/example.com.conf
Paste in the following configuration directive, which is similar to the default, but updated with new new directory and domain name.
<VirtualHost *:80>
    ServerName example.com
    ServerAlias www.example.com
    ServerAdmin [email protected]
    DocumentRoot /var/www/html/example.com/
    ErrorLog ${APACHE_LOG_DIR}/example.com_error.log
    CustomLog ${APACHE_LOG_DIR}/example.com_access.log combined
</VirtualHost>
Save and close the file when you are finished.
10. Now enable your site configuration using the a2ensite utility.
$ sudo a2ensite example.com.conf
11. Next, test your Apache2 config for any errors, if all is Ok, restart the apache2 service, as shown.
$ sudo apache2ctl configtest
$ sudo systemctl restart apache2
12. Since the domain name example.com is a dummy domain (not a fully registered domain), you also need to setup local DNS by adding it the /etc/hosts file.
$ sudo vim /etc/hosts
Then add the following line at the bottom of the file, make sure to replace 192.168.56.101 and example.com with your server’s IP address and local domain name.
192.168.56.101 example.com
Save the file and exit.
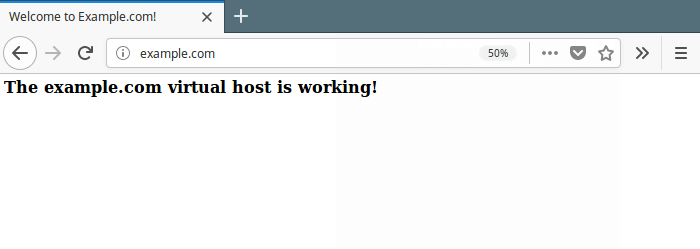
13. Finally open a web browser and access the test site’s index pages using the following URLs, as shown in the screenshot.
http://example.com
That’s it! In this article, we have explained how to install Apache web server on Ubuntu 18.04. We also looked at how to manage the Aapche2 process via systemd, and create and enable per-site virtual host configurations. If you have any queries, use the comment form below to contact us.


Step 3, point 6 – you refer nginx there ;)
@MIcheal
Ooops, the directory is suppose to be /etc/apache2/sites-available/ not /etc/nginx/sites-available/. Many thanks for pointing this out. We will correct it as soon as possible.