Apache web server is one of the most popular and widely used web servers for hosting files and websites. It’s easy to install and configure to meet your hosting needs. However, the default settings are not secure to offer the much-needed protection that your site needs.
In this guide, we look at some of the Apache server hardening tips and tricks that you can implement to strengthen the security of your web server.
1. How to Hide Apache Version and OS Information
By default, the Apache web server displays its version in case you browse the wrong URL of a website. Below is an example of an error page indicating that the page cannot be found on the site. The last line indicates the Apache version, the host OS, the IP address, and the port it is listening on.
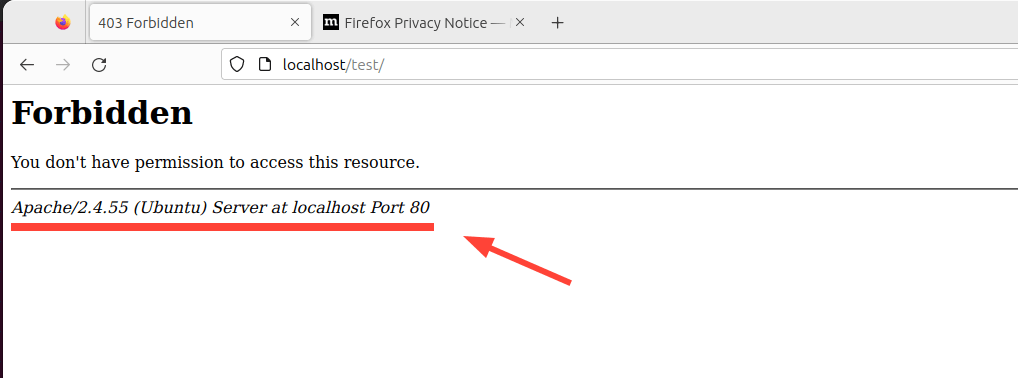
It’s never a good idea to display your web server’s information, as this can be a gift to hackers during their reconnaissance mission. To add a layer of security and make it harder for hackers, it’s recommended to hide the web server information.
To do this, open the default Apache configuration file on Debian-based distributions.
$ sudo vim /etc/apache2/apache2.conf
For RHEL-based systems such as RHEL, Fedora, CentOS, Rocky, and AlmaLinux.
$ sudo vim /etc/httpd/conf/httpd.conf
Add the following lines at the end of the file.
ServerTokens Prod
ServerSignature Off
Save the changes and restart the Apache web server.
$ sudo systemctl restart apache2   [On Debian, Ubuntu and Mint]
$ sudo systemctl restart httpd     [On RHEL/CentOS/Fedora and Rocky/AlmaLinux]
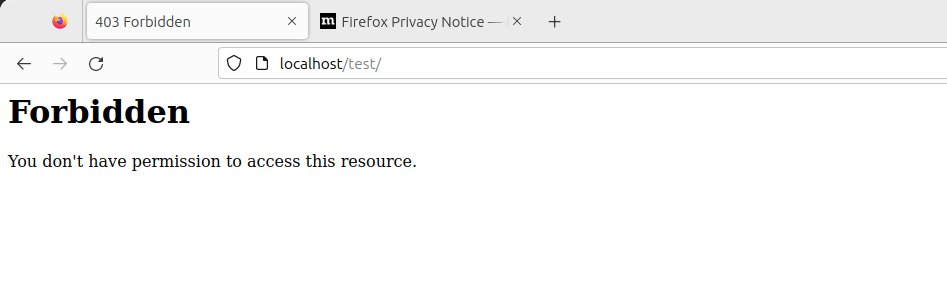
Now reload the site and, this time around, the web server information will not be displayed.
2. Disable Directory Listing in Apache
By default, Apache allows directory listing, and visitors might see whatever files or directories you might have on your Document Root directory.
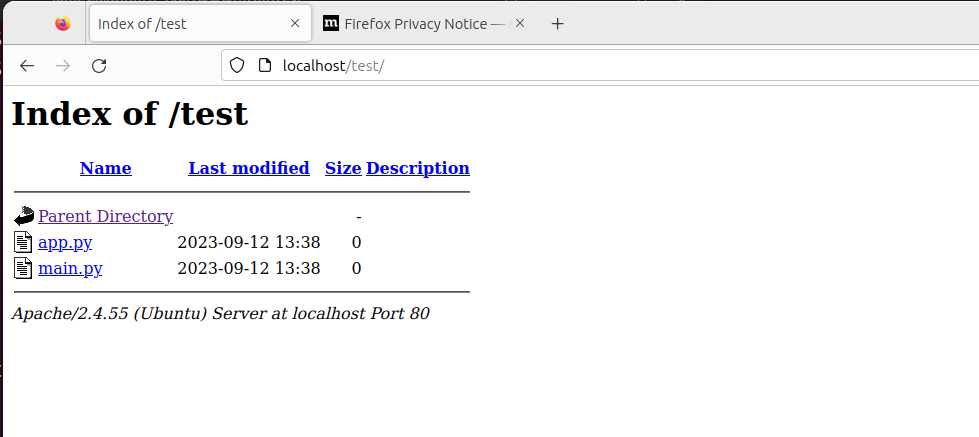
To demonstrate this, we will create a directory called test.
$ sudo mkdir -p /var/www/html/test
Next, we will navigate into the directory and create a few files.
$ cd /var/www/html/test
$ sudo touch app.py main.py
Now, if we access the URL, http://localhost/test we will be able to view the directory listing.
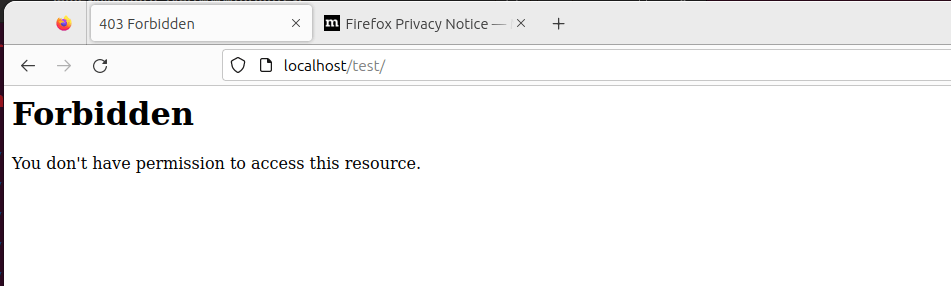
To disable directory listing, head over to Apache’s main configuration file and search for the ‘Directory‘ attribute. Set the ‘Options‘ parameter to '-Indexes' as shown.
<Directory /opt/apache/htdocs>
Options -Indexes
</Directory>
Reload Apache, and this time around, when you visit the URL, the directories will no longer be displayed.
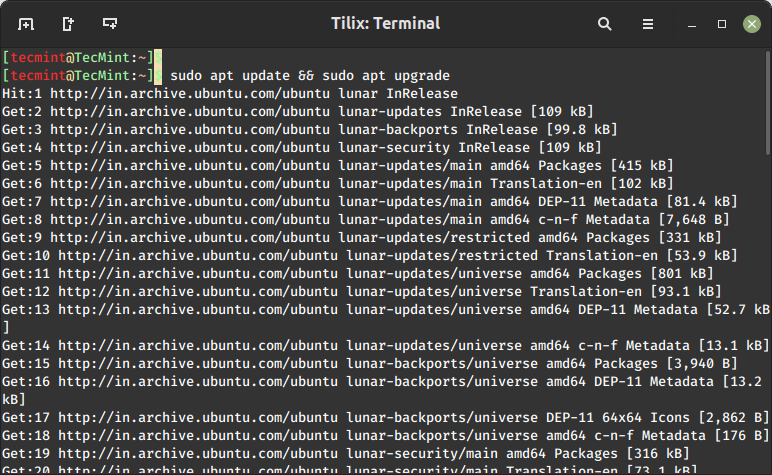
3. Regularly Update Apache
It’s always recommended to keep all your applications up to date, as the latest applications come with bug fixes and security patches that address underlying vulnerabilities present in older software versions.
As such, regularly upgrading your applications to their latest versions is recommended.
$ sudo apt update && sudo apt upgrade [On Debian, Ubuntu and Mint]
$ sudo dnf upgrade                    [On RHEL/CentOS/Fedora and Rocky/AlmaLinux]
4. Use HTTPS Encryption on Apache
Apache, by default, uses HTTP protocol which is a weak and insecure protocol that is prone to eavesdropping. To improve your site’s security and, more so, improve your Google SEO rankings, consider encrypting your site using an SSL certificate.
By so doing, it switches the default HTTP protocol to HTTPS, thereby making it harder for anyone to intercept and decipher communication being sent back and forth from the server.
Check out how to secure the Apache web server using Let’s Encrypt SSL on Linux.
- How to Secure Apache with Let’s Encrypt SSL Certificate on RHEL
- How to Secure Apache with Free Let’s Encrypt SSL Certificate on Ubuntu and Debian
5. Enable HTTP Strict Transport Security (HSTS) for Apache
In addition to encrypting your website with a TLS/SSL certificate, consider implementing the HSTS web security mechanism on top of HTTPS.
HTTP Strict Transport Security (HSTS) is a policy mechanism that protects websites from man-in-the-middle attacks & cookie hijacking. This happens when attackers downgrade the HTTPS protocol to the insecure HTTP protocol.
HSTS enables the web server to strictly declare that web browsers should only interact with it via HTTPS, and never through the HTTP protocol.
To enable HSTS, ensure that your website is running HTTPS and has a valid TLS/SSL certificate.
Next, enable the headers module for Apache:
$ sudo a2enmod headers
Then reload Apache to apply the changes.
$ sudo systemctl restart apache2
Next, access your domain’s virtual host configuration file.
$ sudo vim /etc/apache2/sites-available/mydomain.conf
Next, add this line within the <VirtualHost *:443> block:
Header always set Strict-Transport-Security "max-age=31536000; includeSubDomains"
This looks as follows.
<VirtualHost *:443>
        # .....
        # ....
        Header always set Strict-Transport-Security "max-age=31536000; includeSubDomains"
</VirtualHost>
The max-age parameter instructs web browsers to only access your site using HTTPS for the next one year (31536000 = 1 year).
Finally, restart Apache for the HSTS policy to take effect.
$ sudo systemctl restart apache2
6. Enable HTTP/2 on Apache
In 2015, HTTP/2 was released, which is a new version of the HTTP protocol that seeks to address or resolve multiple problems that the creators of HTTP/1.1 did not foresee.
While HTTP/1.1 is still widely in use, it is associated with performance issues associated with the use of multiple TCP connections to process multiple requests from the browser, which leads to high resource overhead on the client side, leading to degraded network performance.
As applications grew in complexity and functionality, HTTP/2 was created to solve the shortcomings of HTTP/1.1 which include long HTTP headers, slow web page loading speeds, and general performance degradation.
HTTP/2 provides more protection and privacy than its predecessor. Equally important, is enhanced performance through the use of multiplexed streams of data. With HTTP/2 a single TCP connection ensures effective bandwidth utilization, even when transmitting multiple streams of data.
Check out how to enable HTTP/2 on the Apache web server using:
7. Restrict Access to Sensitive Directories in Apache
Another security measure you might take is to limit access to directories that might contain sensitive information such as user data, logs, and configuration files.
<VirtualHost *:80>
    ServerName example.com
    DocumentRoot /var/www/html

    # Other virtual host settings

    <Directory /var/www/html/sensitive_directory>
        Require all denied
    </Directory>
</VirtualHost>
In the above configuration the Require all denied denies access to anyone trying to access files in /sensitive_directory.
Save the changes and exit the file. Then restart Apache for the changes to come into effect.
8. Disable the ServerSignature Directive in Apache
The ServerSignature directive in the Apache configuration file appends a footer to server-generated documents that bear information about your web server’s configuration such as the version and the OS on which it is running. Exposing crucial details about your web server to malicious actors will significantly increase the chances of an attack.
To prevent exposure of such information, you need to disable this directive in the Apache configuration file:
ServerSignature Off
Save the changes and once again restart Apache for the changes to come into effect.
$ sudo systemctl restart apache2
9. Set the ‘ServerTokens’ Directive to ‘Prod’
The ‘ServerTokens‘ directive controls what information the server sends including Apache version (major and minor version), OS, and the type of web server running.
The least amount of information that you would want to expose to the public is that the web server is Apache. Anything else would only expose your server to potential attacks. Therefore, it’s recommended to set the ‘ServerTokens‘ directive in the Apache configuration file to ‘prod‘.
ServerTokens Off
As always save the changes and be sure to restart Apache.
10. Secure Apache with Fail2ban
Fail2ban is an open-source intrusion prevention application that protects Linux systems from external threats including DoS and brute-force attacks. It works by constantly monitoring systems logs for nefarious activity and banning hosts that match patterns that mimic attack behavior.
Fail2ban can be configured to protect Apache from DoS attacks by constantly monitoring Apache logs for failed login attempts and temporarily banning offending IPs.
Check out how to install Fail2ban on Linux using:
11. Disable Unnecessary Modules
Apache modules are simply programs that are loaded to extend the functionality of the web server Functions extended by modules include basic authentication, content caching, encryption, security, etc.
It’s always recommended to disable all those modules that are not in use currently to minimize the chances of falling victim to an attack.
To view all enabled modules, run the command
$ apache2ctl -M

To check if a specific module is enabled, for example, the rewrite module, run the command.
$ apache2ctl -M | grep rewrite

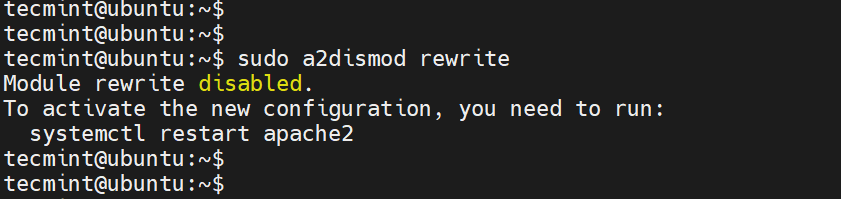
To disable the module, run the command:
$ sudo a2dismod rewrite
12. Use mod_security and mod_evasive Modules to Secure Apache
You can enable the mod_security and mod_evasive modules to secure Apache against brute-force attacks or DDoS attacks.
- The mod_security module acts like a web application firewall (WAF) and blocks suspicious and unwanted traffic to your site.
- The mod_evasive module safeguards your server from brute force and denial of service attacks (DoS).
Read more on how to protect Apache using mod_security and mod_evasive modules.
13. Restricted Unwanted Services in Apache
To further secure Apache, consider disabling certain services such as symbolic links and CGI execution if not currently required. By default, Apache follows symlinks, we can turn off this feature as well as the -Includes feature and CGI in one line.
To do this, add the line '-ExecCGI -FollowSymLinks -Includes' for the ‘Options’ directive in the ‘Directory‘ section.
<Directory /your/website/directory>
Options -ExecCGI -FollowSymLinks -Includes
</Directory>
This can also be achieved at a directory level. For example, here, we are turning off Includes and Cgi file executions for the “/var/www/html/mydomain1” directory.
<Directory "/var/www/html/mydomain1">
	Options -Includes -ExecCGI
</Directory>
Save the changes and restart Apache.
14. Limit File Upload Size in Apache
Another way of securing your web server is to limit the total size of the HTTP request body sent to the web server from a client. You can set it in the context of server, per-directory, per-file, or per-location.
For instance, if you want to allow file upload to a specific directory, say /var/www/domain.com/wp-uploads directory, and restrict the size of the uploaded file to 4M = 4194304Bytes, add the following directive to your Apache configuration file or .htaccess file.
<Directory "/var/www/domain.com/wp-uploads">
	LimitRequestBody  4194304
</Directory>
Save the changes and remember to restart Apache.
You can set it in the context of server, per-directory, per-file, or per-location. The directive wards off abnormal client request behavior which sometimes can be a form of denial-of-service (DoS) attack.
15. Enable Logging in Apache
Logging provides all the details about client requests and any other information pertaining to the performance of your web server. This provides useful information in case something goes awry. Enabling Apache logs, especially in virtual host files allows you to pinpoint an issue in case something goes wrong with the web server.
To enable logging, you need to include the mod_log_config module, which provides two main logging directives.
- ErrorLog – Specifies the path of the error log file.
- CustomLog – Creates and formats a log file.
You can use these attributes in a virtual host file in the virtual host section to enable logging.
<VirtualHost 172.16.25.125:443>
        ServerName example.com
        DocumentRoot /var/www/html/example/
        ErrorLog ${APACHE_LOG_DIR}/error.log
        CustomLog ${APACHE_LOG_DIR}/access.log combined
</VirtualHost>
The {APACHE_LOG_DIR} directive in Debian systems is defined as /var/log/apache2 path.
16. Run Apache as a Separate User and Group
Running Apache as a separate user and group is a common security practice. By doing so, you can isolate the web server process from other system processes and minimize potential damage if the web server is compromised.
First, you’ll want to create a new user and group specifically for Apache.
$ sudo groupadd apachegroup
$ sudo useradd -g apachegroup apacheuser
Next, you’ll need to edit the Apache configuration file to specify the new user and group.
User apacheuser
Group apachegroup
Since you’re changing the user and group that Apache runs as you might need to update the ownership of web directories and files to ensure that Apache can still read them.
$ sudo chown -R apacheuser:apachegroup /var/www/html
After making these changes, restart Apache to apply them:
$ sudo systemctl restart httpd      # For RHEL/CentOS
$ sudo systemctl restart apache2    # For Debian/Ubuntu
17. Protect DDOS Attacks and Hardening
Well, it’s true that you can’t fully protect your website from DDoS attacks. However, here are some guidelines that can help you mitigate and manage them.
- TimeOut – This directive allows you to specify the duration the server will wait for certain events to complete before returning an error. The default value is 300 seconds. For sites susceptible to DDoS attacks, it’s advisable to keep this value low. However, the appropriate setting largely depends on the nature of requests your website receives. Note: A low timeout might cause issues with some CGI scripts.
- MaxClients – This directive sets the limit on the number of connections that can be served simultaneously. Any new connections beyond this limit will be queued. It’s available in both the Prefork and Worker MPMs. The default value is 256.
- KeepAliveTimeout – This directive specifies the duration the server will wait for a subsequent request before closing the connection. The default value is 5 seconds.
- LimitRequestFields – This directive sets a limit on the number of HTTP request header fields accepted by clients. The default value is 100. If DDoS attacks are occurring due to an excessive number of HTTP request headers, it’s recommended to reduce this value.
- LimitRequestFieldSize – This directive sets a size limit for the HTTP request header.
18. Perform Regular Vulnerability Scans
Another way of safeguarding your web server is by carrying out regular vulnerability scanning tests. This helps identify potential security loopholes that might be exploited by hackers to gain access to sensitive files or inject malware.
Vulnerability scanning tools also help point out insecure configuration settings and help in auditing for compliance. Popular vulnerability scanning tools include Acutenix, Nessus, Nexpose, Sucuri, and many more.
Conclusion
These are some of the Apache hardening tips that you can implement on your web server to provide an extra layer of protection and keep intrusions at bay.


You use a double negative in first section which means it says the opposite than what I hope you mean:
It’s _not never_ good idea to display your web server’s information as this can be a good gift to hackers in their reconnaissance mission.
@Host,
Thanks for catching that! You’re absolutely right about the double negative. I’ll correct it to make sure the message is clear. Appreciate the feedback!
Please, update your “hardening tips” document. It’s funny to see that you still use and publish an article with deprecated options like
"Order deny,allow".Sorry, but this is useless and outdated. What has been updated on September 18?
Please update your information.
Thank you.
@Daniel,
Thank you for bringing this to our attention. We apologize for the oversight and understand the importance of providing accurate and up-to-date information.
We’ll review and update the ‘apache hardening tips‘ document promptly to ensure it reflects current best practices.
Your feedback is invaluable in helping us maintain the quality of our content.
The setting is in /etc/apache2/conf-available/sercurity.conf. if you open the file, you will know how to make it working.
Thanks for sharing such a usefull and Informative Post !
This helped me a lot but hiding Apache Version and OS Identity from Errors is not working for my Apache/2.4.18 (Ubuntu), but it worked on my Debian server..
HI!
On Step 5 I need to Change apache installation directory ownership recursively to the newly created non-privileged user ?
As I’m using Ubuntu would be /etc/apache2/
One better alternatives for SSL is to use a service like LetsEncrypt which is free.
Extremely easy to configure and globally recognized across browsers.
Thanks for the article, it really has been a useful article.
Its now not in apache2.conf . Please look for /etc/apache2/conf-available/security.conf
thanks for this amazing tutorial . IT REALLY HELPFULL!!
Thanks for this great tutorial, it really helped me! :)
Just correct the path of apache configuration please. it is:
not
@Garcia,
Thanks for finding this article useful, yes that was a typo, corrected the apache configuration file location in the writeup..
Hi
Can you please tell me if I want to change all my configuration are not set in httpd.conf, I want to save these anywhere else, how it can be possible.
Thanks
@Sanjay,
Take the backup of apache configuration file using following command before making any changes to the file.
Very well written tarunika. Thank you :)
Hi,
When i added ServerTokens Prod and ServerSignature off and restarted it but still i can see server information.
I am using Apache 2.4 and CentOS 7.
try:
sudo etc/init.d/apache2 force-reload
Put it at the end of the conf file worked for me.
Started at the beginning of the conf file did not work… tried to force reload, no result. At the end of the conf file the versions disappeared.
end of file work like charm for me also on Debian 8
Thank you so much for this. I really helps me to make my server performance and security better
yum –> dnf (new command)
Thank you so much! Really helpful!
Rich and informative post regarding Apache security tips. Great job!
How to hide server information in windows hosting in shared hosting? Is it the same process. Can we change make changes in robots.txt
@Inna,
No, you have to make changes in IIS Web server to hide server information….
I can really appreciate this, thanks and keep up the great work! :)
Thanks great article
This is a great list, thank you for putting it together. One thing you should add is to install csf (ConfigServer Security & Firewall).
Thanks verry good
I recommend you generate your SSL virtual host configuration using the following tool, to avoid the outdated SSL conection information specified above.
https://mozilla.github.io/server-side-tls/ssl-config-generator/
hai Tarunika ,
in our dept. need some standart security for hardening server, webserver, network, web application. btw your article is great for hardening web server. maybe you have another article for hardnening server and web application. can you tell me ? hehe
web application normally i use refference from OWASP , it’s great too. but i need some refference outside owasp. if you have the article about that please notify me via email.
thank you,
mahendra
really nice article, good job .
Thanks you. Very very goog article :)
I have modified /etc/apache2/apache2.conf file with following.
“ServerSignature Off”
“ServerTokens Prod”
After i restarted apache2 “service apache2 restart”
But still i am getting Apache Verion, IP, Port and OS details.
Could you please explain?
@Arun,
Yes, you’ve followed correct instructions, it should not be displayed, try cleaning your brower cache and check..or try from different machines..
Very good guide, short, easy to understand and well explained
Hey! Thanks for the secure apache servers tips awesome stuff about the topic.
Hey!
After i changed the user and group name my .htaccess wasn’t recognized anymore..
You know any workaround ?
@Arjuna,
Your .htaccess file must read by your Apache webserver to serve properly. Please set the correct user and group to your htaccess file…
hey there,
good stuff here :D
Nice Job, thank you! In Step 11, it’s not clear where these settings need to be applied, such as Timeout? Earlier steps are specific, later steps are missing some details. Please clarify.
Thanks again.
@Kurt,
All settings are applied on Apache master configuration file..
hello
how to show Apache Version and OS Identity after hide Apache Version and OS Identity?
and how to hide file from directory index but i can download it as in public directory index visitor?
to remove the server banner: http://docs.homelinux.org/apache:remove_server_header_field
Very well, it’s OK to apply our system.
Many thks.
Hi, When i request the application for the directories like resources, icons, js, images etc., it return HTTPStatus code 200 ok. i need it to return 404 not found.
say example http://201.10.13.114/resources/
However the directory listing is disabled. but the hacker can guess the existence of such directories.
Thanks, great tips.
I think the apt-get to the mod_security for debian is wrong in the article. It should be apt-get install libapache2-modsecurity
Claus, thanks for pointing our errors, we’ve fixed it now in the writeup..
Great job tarunika!!
Very good article. I’m facing a few of these
issues as well..
Thanks.
Nice Security Hardening Tips
Thank you very much! My first mini server will now do his first steps sheltered. I found very useful additional stuff about modsecurity for debian wheezy at http://www.linuxquestions.org/questions/blog/rearden888-507430/howto-set-up-modsecurity-on-debian-7-35569/
greets
Excellent work!
Great guide… thank u so much
Great…Seems you are an expert!!!
thanks,,
ready great post
Very good article.
Thank you for posting this :) .
Thank you very much !
Thanks
Wow, such nice article. saved my time.
Thanks.
Good one. If someone looking for in depth can visit my article – http://www.chandank.com/webservers/apache/apache-web-server-hardening-security
To additional stuff
# TraceEnable: the core server and mod_proxy to return a 405 (Method not allowed) error to the client
TraceEnable Off
# http://hynek.me/articles/hardening-your-web-servers-ssl-ciphers/
# https://www.ssllabs.com/downloads/SSL_TLS_Deployment_Best_Practices_1.2.pdf
# http://www.openssl.org/docs/apps/ciphers.html
# openssl ciphers -v
SSLHonorCipherOrder On
SSLCompression Off
SSLInsecureRenegotiation Off
SSLProtocol ALL -SSLv2
SSLCipherSuite TLSv1.2:TLSv1.1:RC4:SSLv3:TLSv1:!SSLv2:!eNULL:!aNULL:!MD5:!EXP:!ADH:!EDH:!3DES:!DES:!PSK:!SRP:!DSS
#
# OR
#
# ECDH+AESGCM:DH+AESGCM:ECDH+AES256:DH+AES256:ECDH+AES128:DH+AES:ECDH+3DES:DH+3DES:RSA+AES:RSA+3DES:!ADH:!AECDH:!MD5:!DSS
Yeah Lordbaco,
Thanks for tip, will definitely include in the list.
#1 –
you can find the apache2 security settings on ubuntu and debian in the config file:
/etc/apache2/conf.d/security
ServerSignature Off
ServerTokens Prod
In fedora, since ‘systemd’ is used as default init system, one will need to do:
# systemctl restart httpd
in order to restart apache and there is no such
# apt-get update apache2
you would do ‘apt-get install apache2’ so if it is installed and there is update available it will update the package.
@Abhishek, that’s reverse proxying as far as I can understand your question.
How to redirect Port in Apache httpd service.
when a client connect to the server default port 80, then it will automatically goes to another port.
how we do this ?
Check mod_proxy.
http://httpd.apache.org/docs/2.2/mod/mod_proxy.html
thanks
A few points: http.conf should be edited as rarely as possible on a debian system. /etc/conf.d/ exists for a reason.
#8 Turning off symlinks will break many web apps and some php libraries.
#11 Maxrequests depends on what you are running. If what you use takes a small amount of memory it can be larger but some web stores and some poorly written software I’ve come across can run a system out of memory with 256.
Becareful with LimitRequestFields since some apps require a lot of fields (learned this the hard way)
#13 Payment card industry standards (PCI-DSS) now require a minimum key size of 2048
Hi Mack,
Nice Suggestions and tips, Thanks.