Jitsi is a set of open-source, completely free, secure, easy-to-use and cross-platform video conferencing applications for web and mobile. It is stable and reliable and works on Linux, Windows, and Mac OS; Android, and iOS mobile operating systems. The two central applications to Jtisi are Jitsi Videobridge and Jitsi Meet.
Jitsi Videobridge is a WebRTC compatible server designed to route video streams amongst participants in a conference and Jitsi Meet, a WebRTC compatible JavaScript application that uses Jitsi Videobridge to provide high quality, scalable video conferences. Jitsi Meet is a simple, elegant, and secure alternative to Zoom, Skype, and Google Meet, which supports all common browsers and also mobile devices.
The other applications such as Jitsi Conference Focus, Jitsi Gateway to SIP, and Jibri Manage manages media sessions between each of the participants and the videobridge, allow regular SIP clients to join Jitsi Meet conferences, and enable recording and/or streaming a Jitsi Meet conference respectively. Another important tool external to Jitsi is Prosody, an XMPP server used for signaling.
There are many aspects of Jitsi that you need to understand. First of all, if you simply want to have a video conference without setting up any infrastructure, you can just navigate to meet.jit.si and have free video conferencing.
Secondly, you can self-host your own Jitsi server on your own infrastructure, meaning you get to implement extra security and have more control over your online communications. Thirdly, for developers, it supports integration into existing products to add video conferencing capabilities.
One of the key features of Jitsi is that you can connect it to your calendar such as Google Calendar and launch conferences directly from your calendar.
In this article, you will learn how to install the Jitsi Meet Video Conferencing platform on a Debian-based GNU/Linux system such as:
- Debian 10 (Buster) or later
- Ubuntu 18.04 (Bionic Beaver) or later
Setup Environment
For this guide, we are using the following testing environment.
- Domain Name: testprojects.me – a registered domain name.
- Server IP: 45.77.30.208 – a freshly installed VPS running Ubuntu 20.04 with 2GB RAM.
- Web Server: Nginx with free SSL certificate from Let’s Encrypt.
Step 1: Creating a Domain DNS A Record for Accessing Jitsi Meet
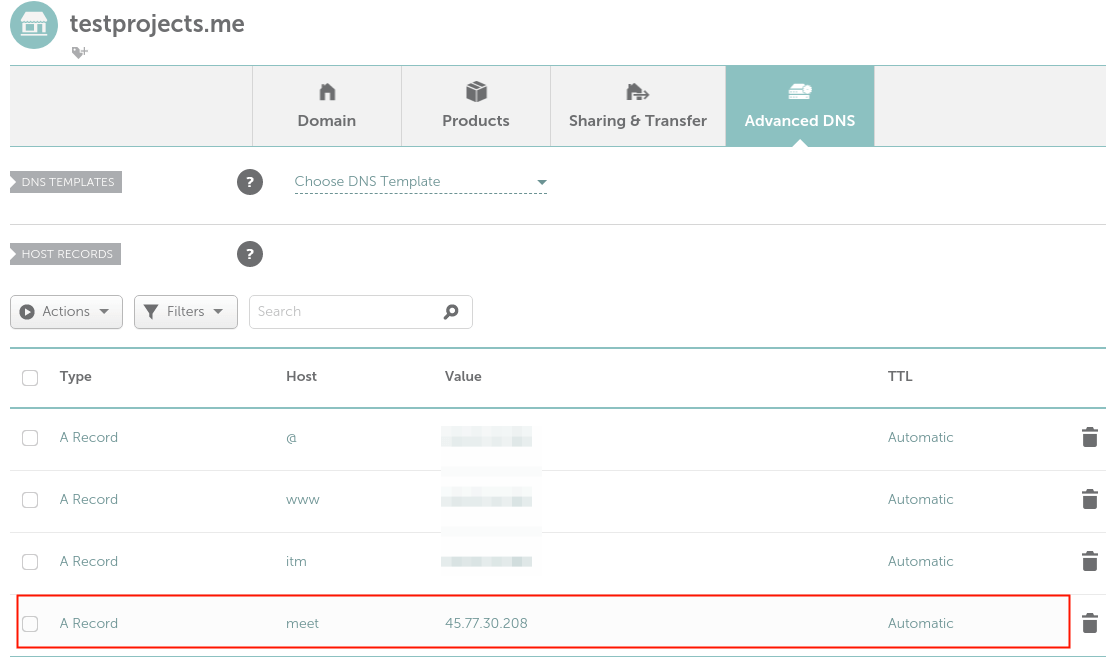
1. To start with, we will create a DNS A record for accessing the Jitsi Meet application. Our test domain is testprojects.me, so we need to create a subdomain, for example, meet.testprojects.me to enable team members to access Jitsi Meet to have conferences.
Let’s go to the domain name registration service provider’s web console and access the domain’s advanced settings, click Add New Record of type A and point the record to your server public IP address as shown in the following screenshot.
Step 2: Installing Jitsi in Ubuntu Server
2. Next, we need to install the Jitsi package from the official project repository. Let’s add the Jitsi repository to the package sources to make the Jitsi Meet packages available to install by running the following commands.
The curl command downloads and installs the Jitsi GPG package signing key and imports it into apt package manager configuration.
The echo command adds the official Jitsi package repository to the apt package management system and tells apt to utilize it to install the package.
$ curl https://download.jitsi.org/jitsi-key.gpg.key | sudo sh -c 'gpg --dearmor > /usr/share/keyrings/jitsi-keyring.gpg'
$ echo 'deb [signed-by=/usr/share/keyrings/jitsi-keyring.gpg] https://download.jitsi.org stable/' | sudo tee /etc/apt/sources.list.d/jitsi-stable.list > /dev/null
3. Next, update the APT package manager’s package listings from its known repositories, and install the Jitsi Meet package as follows.
$ sudo apt update
$ sudo apt install jitsi-meet
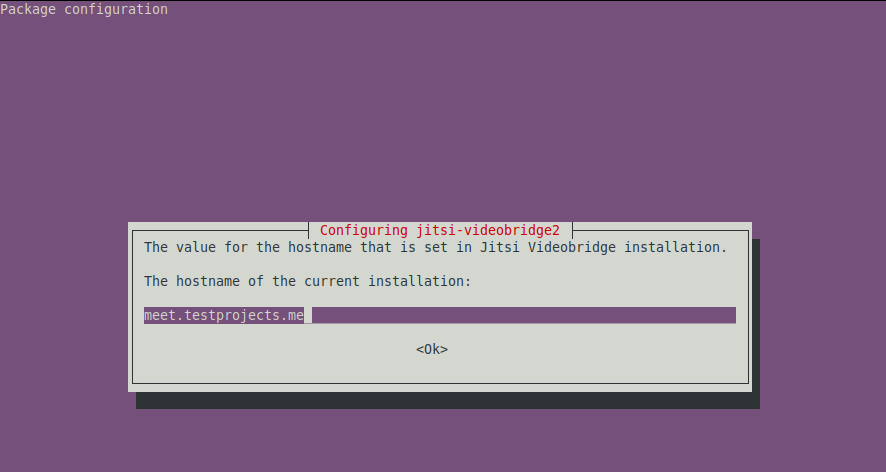
4. During the package installation, the installer prompts to configure the Jitsi Meet package, the first configuration window will prompt us to enter the hostname, set this to the subdomain for accessing Jitsi Meet, for example, meet.testprojects.me.
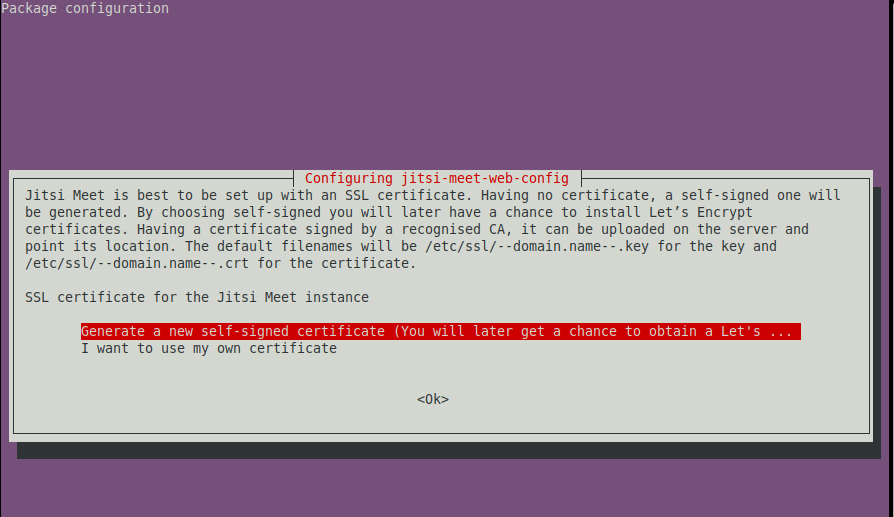
It also prompts about SSL/TLS certificate generation, so, select the first option to generate a self-signed certificate so that later on, we can get a chance to obtain a Let’s Encrypt free certificate recognized by all modern web browsers.
Once the installation is complete, we are ready to start using Jitsi Meet, however, the self-signed certificate that was generated will result in warnings being shown in our users’ browsers because they cannot verify the server’s identity. So we need to generate a Let’s Encrypt certificate as described next.
Step 3: Generating Let’s Encrypt Certificate for Jitsi Meet
5. To generate a Let’s Encrypt certificate, you need to install certbot tool on the server.
$ sudo apt install certbot
6. Then edit the file /usr/share/jitsi-meet/scripts/install-letsencrypt-cert.sh and replace all occurrences of ./certbot-auto with certbot, the default script doesn’t work well with Ubuntu 20.04 (read here for more information).
$ sudo nano /usr/share/jitsi-meet/scripts/install-letsencrypt-cert.sh
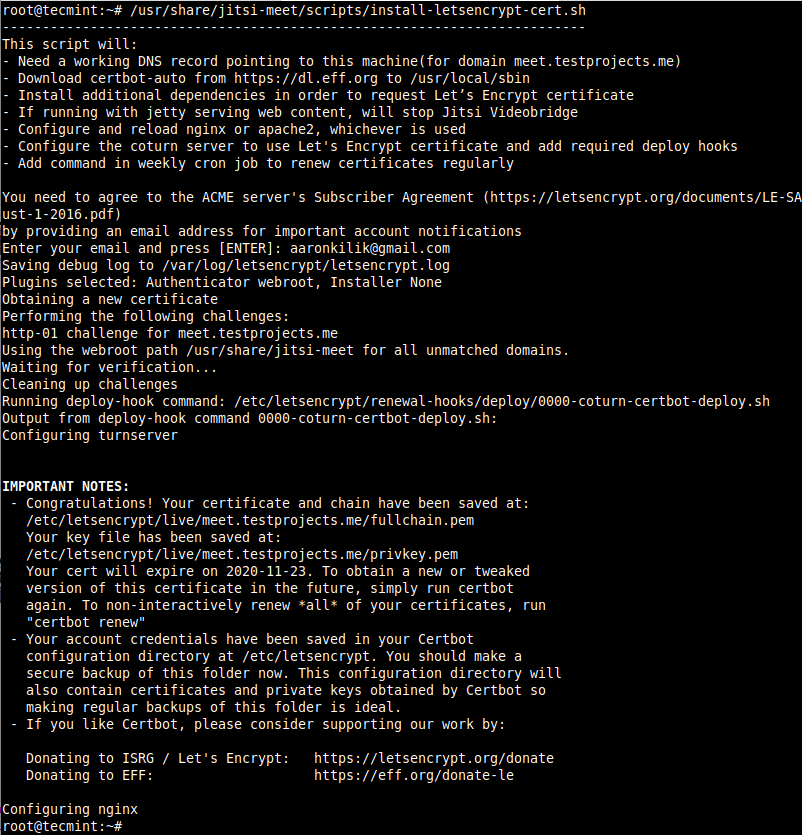
7. After editing the script, run the following command to generate a free SSL certificate for Jitsi Meet (provide a valid email address when asked).
$ sudo /usr/share/jitsi-meet/scripts/install-letsencrypt-cert.sh
8. If you having a UFW firewall running, before you can access Jitsi Meet from a web browser, you need to run the following commands to open the required ports in the firewall.
$ sudo ufw allow 80/tcp
$ sudo ufw allow 443/tcp
$ sudo ufw allow 4443/tcp
$ sudo ufw allow 10000/udp
$ sudo ufw reload
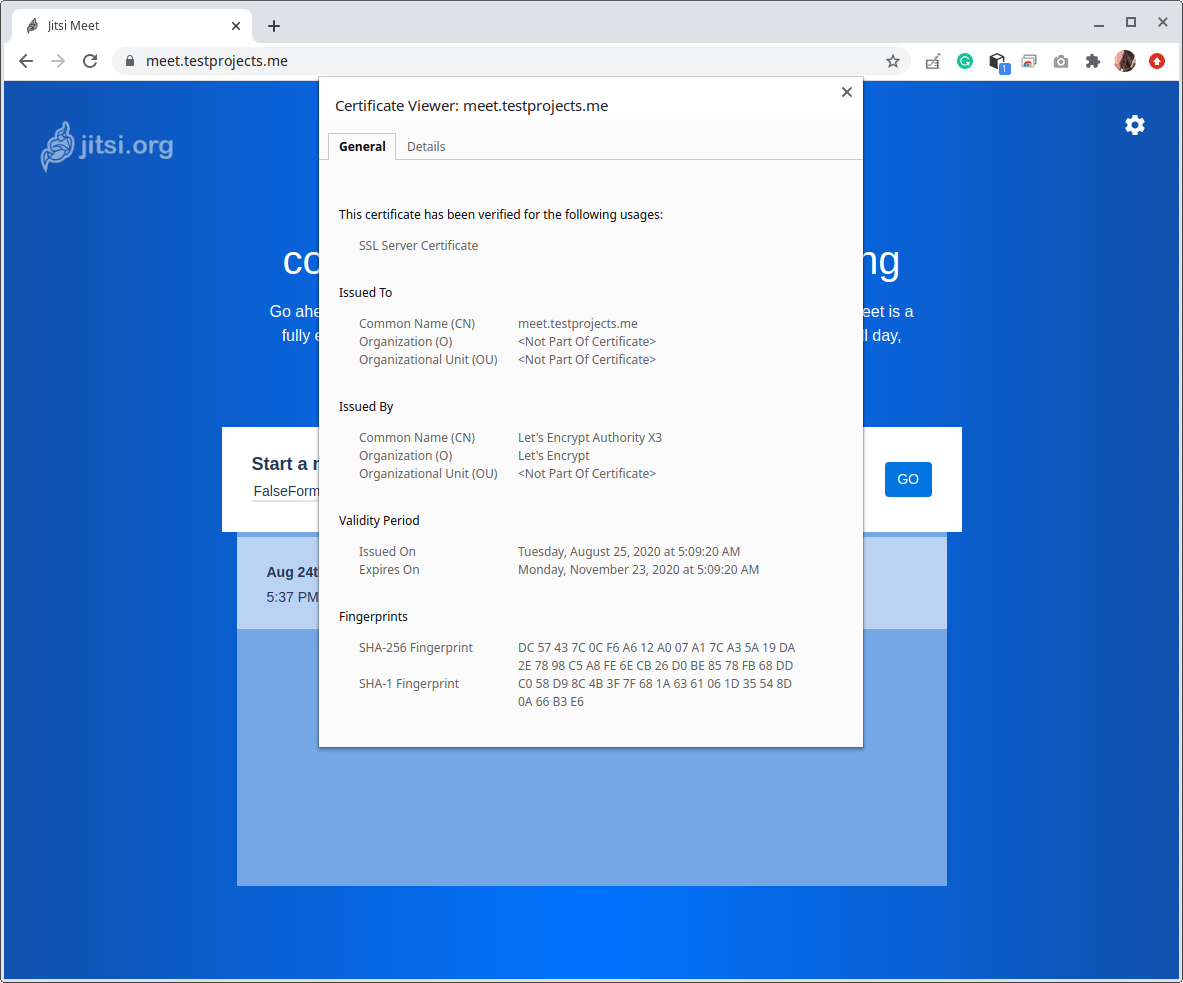
9. To confirm that Jitsi Meet is now using a valid Let’s Encrypt certificate, let’s open a web browser and use the subdomain to navigate.
http://meet.testprojects.me
It should automatically redirect to HTTPS.
With the above setup (which is the default setting), anyone who has access to our Jitsi Meet server will be able to start a meeting, especially if the server is open to the world, anyone can have a chat with anyone else. In the next section, we will cover how to limit the ability to start a conference/meeting only to registered users.
Step 4: Enabling Access Control for Jitsi Meet
10. To allow only authenticated users to create new video conference/meeting rooms, we need to make changes in the Prosody server configuration, which is in the /etc/prosody/conf.avail/meet.testprojects.me.cfg.lua file (the filename starts with the subdomain name or hostname we provided earlier on):
$ sudo nano /etc/prosody/conf.avail/meet.testprojects.me.cfg.lua
Look for the VirtualHost "meet.testprojects.me” block, replace anonymous authentication with internal_hashed password authentication as shown in the following screenshot.
authentication = "anonymous"
with
authentication = "internal_hashed"

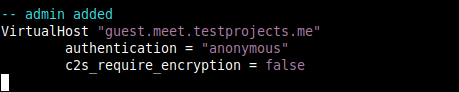
11. Next, enable anonymous login for guests by adding the following configuration to the end of the file. Note that the domain guest.meet.testprojects.me is internal to Jitsi, and does not require any extra web or DNS configurations.
VirtualHost "guest.meet.testprojects.me"
	authentication = "anonymous"
	c2s_require_encryption = false
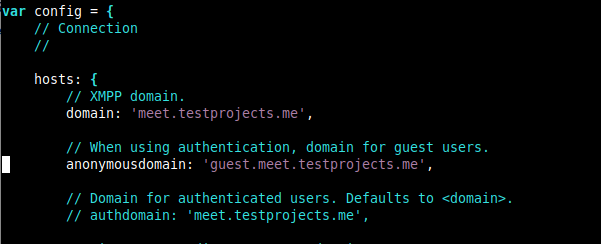
12. Next, we also need to make changes in the Jitsi Meet configuration file /etc/jitsi/meet/meet.testprojects.me-config.js, to enable the domain for guest users.
$ sudo nano /etc/jitsi/meet/meet.testprojects.me-config.js
Uncomment and change the line
// anonymousdomain: 'meet.example.com',
to
anonymousdomain: 'guest.meet.testprojects.me',
13. Furthermore, we need to make changes within the Jicofo configuration, inside the file /etc/jitsi/jicofo/sip-communicator.properties.
$ sudo nano /etc/jitsi/jicofo/sip-communicator.properties
Specify the main domain in an additional configuration property as shown in the following screenshot.
org.jitsi.jicofo.auth.URL=XMPP:meet.testprojects.me

With the above configuration, Jicofo will accept conference allocation requests only from the authenticated domain.
Step 5: Creating Users in Prosody to Enable Conferencing
14. Now let’s create a user in Prosody that will be allowed to create conference rooms, using the prosodyctl command as shown.
$ sudo prosodyctl register tecmint meet.testprojects.me S3cureP@sswd1
15. Finally, let’s restart all the Jitsi services to apply the recent changes using the systemctl command as shown.
$ sudo systemctl restart prosody && sudo systemctl restart jicofo && sudo systemctl restart jitsi-videobridge2
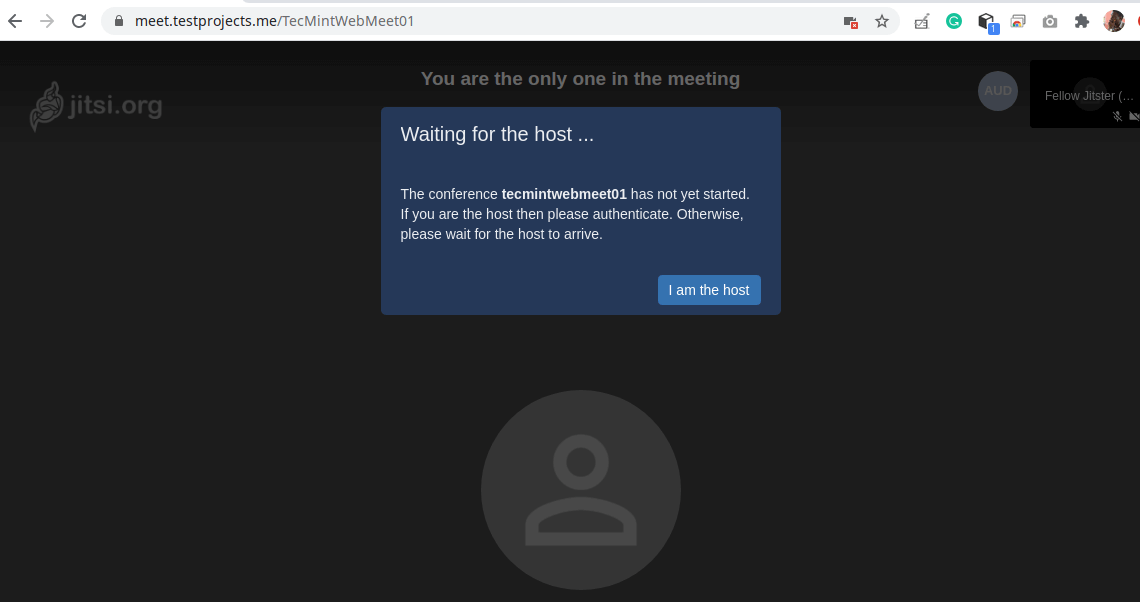
16. Now test if the user authentication configurations made above are working fine by going back to a web browser and try to start a new meeting as shown in the following screenshot.
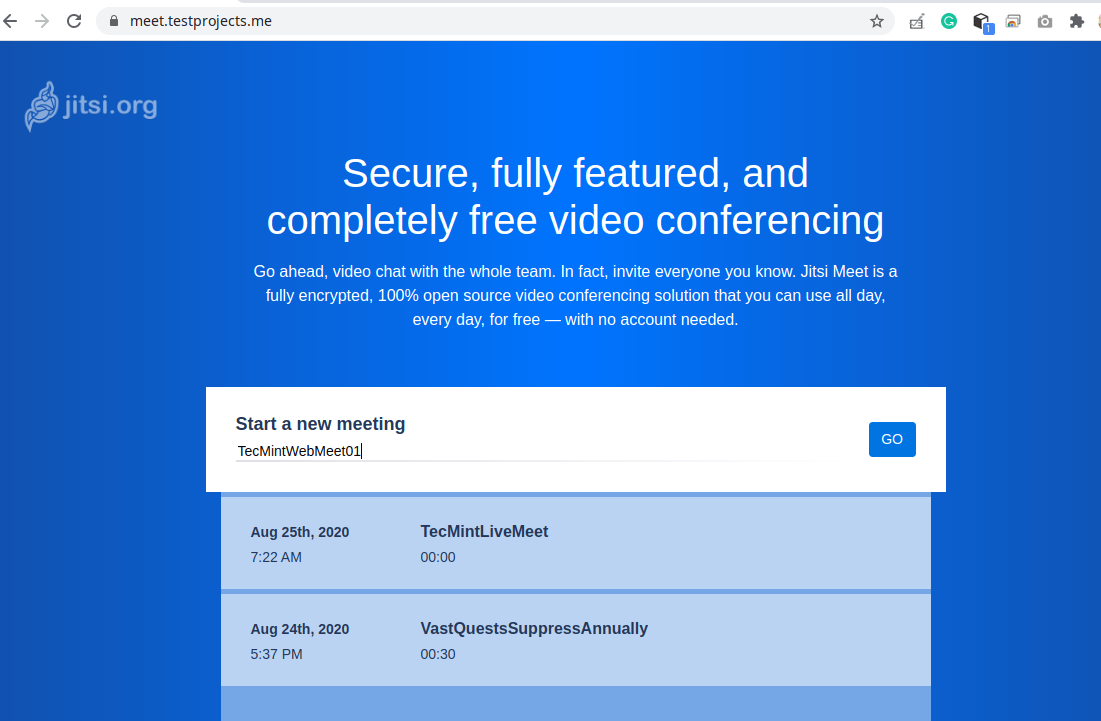
17. After a few seconds, the application will redirect to the conference room. Next, start the conference by clicking “I am the host”.
18. Then enter your username and password to authenticate and click OK.
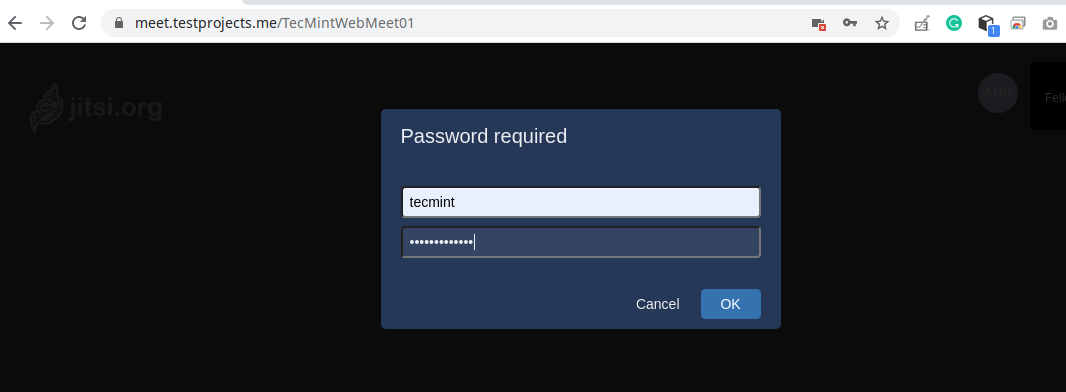
19. Now the meeting is ready to start. Invite more people using the provided link.

For more information and configuration options, see the Jitsi self-hosting guide for Debian/Ubuntu server from the Jitsi project site.


Facing problems.
After installing jitsi on my ubuntu 20 machine on the Apache server, it still shows the default apache server page instead of the jitsi meet meeting home page.
Please help
@King,
Remove the index.html from the root of the directory of Apache.
Hello, friends,
Actually, facing a problem after installation, I am using ubuntu 20.04 Linux. Every 20 Seconds automatically rejoining this jitsi server. I could not short out this issue, anyone can help me ???
Dear Aaron,
I followed your steps to set up the server with no luck. I would appreciate it if you email me your contact or I can schedule a call to see if you can help.
I truly appreciate your help
Dan
@Dan,
Please share your issue here, so that our editors or regular readers will help you with a solution…