MySQL is an open-source free relational database management system (RDBMS) released under GNU (General Public License). It is used to run multiple databases on any single server by providing multi-user access to each created database.
This article will walk through you the process of installing and updating the latest MySQL 8.0 version on RHEL/CentOS 8/7/6/ and Fedora using MySQL Yum repository via YUM utility.
Step 1: Adding the MySQL Yum Repository
1. We will use the official MySQL Yum software repository, which will provide RPM packages for installing the latest version of MySQL server, client, MySQL Utilities, MySQL Workbench, Connector/ODBC, and Connector/Python for the RHEL/CentOS 8/7/6/ and Fedora 30-35.
Important: These instructions only work on a fresh installation of MySQL on the server, if there is already a MySQL installed using a third-party-distributed RPM package, then I recommend you to upgrade or replace the installed MySQL package using the MySQL Yum Repository”.
Before Upgrading or Replacing an old MySQL package, don’t forget to take all important database backup and configuration files using our Backup MySQL Databases guide.
2. Now download and add the following MySQL Yum repository to your respective Linux distribution system’s repository list to install the latest version of MySQL (i.e. 8.0 released on 27 July 2018).
--------------- On RHEL/CentOS 8 ---------------
# wget https://repo.mysql.com/mysql80-community-release-el8-1.noarch.rpm
--------------- On RHEL/CentOS 7 ---------------
# wget https://repo.mysql.com/mysql80-community-release-el7-1.noarch.rpm
--------------- On RHEL/CentOS 6 ---------------
# wget https://dev.mysql.com/get/mysql80-community-release-el6-1.noarch.rpm
--------------- On Fedora 35 ---------------
# wget https://dev.mysql.com/get/mysql80-community-release-fc35-1.noarch.rpm
--------------- On Fedora 34 ---------------
# wget https://dev.mysql.com/get/mysql80-community-release-fc34-1.noarch.rpm
--------------- On Fedora 33 ---------------
# wget https://dev.mysql.com/get/mysql80-community-release-fc33-1.noarch.rpm
3. After downloading the package for your Linux platform, now install the downloaded package with the following command.
--------------- On RHEL/CentOS 8 ---------------
# yum localinstall mysql80-community-release-el8-1.noarch.rpm
--------------- On RHEL/CentOS 7 ---------------
# yum localinstall mysql80-community-release-el7-1.noarch.rpm
--------------- On RHEL/CentOS 6 ---------------
# yum localinstall mysql80-community-release-el6-1.noarch.rpm
--------------- On Fedora 35 ---------------
# dnf localinstall mysql80-community-release-fc35-1.noarch.rpm
--------------- On Fedora 34 ---------------
# dnf localinstall mysql80-community-release-fc34-1.noarch.rpm
--------------- On Fedora 33 ---------------
# yum localinstall mysql80-community-release-fc33-1.noarch.rpm
The above installation command adds the MySQL Yum repository to the system’s repository list and downloads the GnuPG key to verify the integrity of the packages.
4. You can verify that the MySQL Yum repository has been added successfully by using the following command.
# yum repolist enabled | grep "mysql.*-community.*"
# dnf repolist enabled | grep "mysql.*-community.*"      [On Fedora versions]

Step 2: Installing Latest MySQL Version
5. Install the latest version of MySQL (currently 8.0) using the following command.
# yum install mysql-community-server
# dnf install mysql-community-server      [On Fedora versions]
The above command installs all the needed packages for MySQL server mysql-community-server, mysql-community-client, mysql-community-common and mysql-community-libs.
Step 3: Installing Different MySQL Release Versions
6. You can also install different MySQL versions using different sub-repositories of MySQL Community Server. The sub-repository for the recent MySQL series (currently MySQL 8.0) is activated by default, and the sub-repositories for all other versions (for example, the MySQL 5.x series) are deactivated by default.
To install a specific version from a specific sub-repository, you can use --enable or --disable options using yum-config-manager or dnf config-manager as shown:
# yum-config-manager --disable mysql57-community
# yum-config-manager --enable mysql56-community
------------------ Fedora Versions ------------------
# dnf config-manager --disable mysql57-community
# dnf config-manager --enable mysql56-community
Step 4: Starting the MySQL Server
7. After successful installation of MySQL, it’s time to start and enable the MySQL server with the following commands:
# service mysqld start
# systemctl enable mysqld.service
You can verify the status of the MySQL server with the help of the following command.
# systemctl status mysqld.service
OR
# service mysqld status
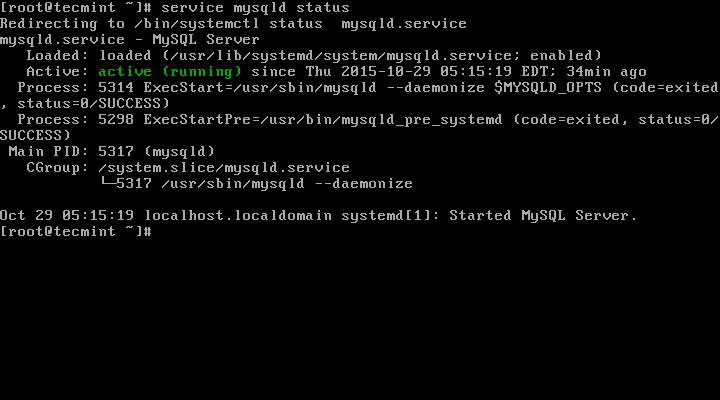
This is the sample output of running MySQL under my CentOS 7 box.
Redirecting to /bin/systemctl status  mysqld.service
mysqld.service - MySQL Server
   Loaded: loaded (/usr/lib/systemd/system/mysqld.service; enabled)
   Active: active (running) since Thu 2015-10-29 05:15:19 EDT; 4min 5s ago
  Process: 5314 ExecStart=/usr/sbin/mysqld --daemonize $MYSQLD_OPTS (code=exited, status=0/SUCCESS)
  Process: 5298 ExecStartPre=/usr/bin/mysqld_pre_systemd (code=exited, status=0/SUCCESS)
 Main PID: 5317 (mysqld)
   CGroup: /system.slice/mysqld.service
           └─5317 /usr/sbin/mysqld --daemonize

Oct 29 05:15:19 localhost.localdomain systemd[1]: Started MySQL Server.
8. Now finally verify the installed MySQL version using the following command.
# mysql --version

mysql  Ver 8.0.27 for Linux on x86_64 (MySQL Community Server - GPL)

Step 5: Securing the MySQL Installation
9. The command mysql_secure_installation allows you to secure your MySQL installation by performing important settings like setting the root password, removing anonymous users, removing root login, and so on.
Note: MySQL version 8.0 or higher generates a temporary random password in /var/log/mysqld.log after installation.
Use the below command to see the password before running MySQL secure command.
# grep 'temporary password' /var/log/mysqld.log
Once you know the password you can now run the following command to secure your MySQL installation.
# mysql_secure_installation
Note: Enter new Root password means your temporary password from a file /var/log/mysqld.log.
Now follow the onscreen instructions carefully, for reference see the output of the above command below.
Sample Output
Securing the MySQL server deployment.

Enter password for user root: Enter New Root Password

VALIDATE PASSWORD PLUGIN can be used to test passwords
and improve security. It checks the strength of password
and allows the users to set only those passwords which are
secure enough. Would you like to setup VALIDATE PASSWORD plugin?

Press y|Y for Yes, any other key for No: y

There are three levels of password validation policy:

LOW    Length >= 8
MEDIUM Length >= 8, numeric, mixed case, and special characters
STRONG Length >= 8, numeric, mixed case, special characters and dictionary                  file

Please enter 0 = LOW, 1 = MEDIUM and 2 = STRONG: 2
Using existing password for root.

Estimated strength of the password: 50
Change the password for root ? ((Press y|Y for Yes, any other key for No) : y

New password: Set New MySQL Password

Re-enter new password: Re-enter New MySQL Password

Estimated strength of the password: 100
Do you wish to continue with the password provided?(Press y|Y for Yes, any other key for No) : y
By default, a MySQL installation has an anonymous user,
allowing anyone to log into MySQL without having to have
a user account created for them. This is intended only for
testing, and to make the installation go a bit smoother.
You should remove them before moving into a production
environment.

Remove anonymous users? (Press y|Y for Yes, any other key for No) : y
Success.


Normally, root should only be allowed to connect from
'localhost'. This ensures that someone cannot guess at
the root password from the network.

Disallow root login remotely? (Press y|Y for Yes, any other key for No) : y
Success.

By default, MySQL comes with a database named 'test' that
anyone can access. This is also intended only for testing,
and should be removed before moving into a production
environment.

Remove test database and access to it? (Press y|Y for Yes, any other key for No) : y
 - Dropping test database...
Success.

 - Removing privileges on test database...
Success.

Reloading the privilege tables will ensure that all changes
made so far will take effect immediately.

Reload privilege tables now? (Press y|Y for Yes, any other key for No) : y
Success.

All done!
Step 6: Connecting to MySQL Server
10. Connect to a newly installed MySQL server by providing a username and password.
# mysql -u root -p
Sample Output:
Welcome to the MySQL monitor.  Commands end with ; or \g.
Your MySQL connection id is 11
Server version: 8.0.27 MySQL Community Server - GPL

Copyright (c) 2000, 2021, Oracle and/or its affiliates.

Oracle is a registered trademark of Oracle Corporation and/or its
affiliates. Other names may be trademarks of their respective
owners.

Type 'help;' or '\h' for help. Type '\c' to clear the current input statement.

mysql>
Step 7: Updating MySQL with Yum
11. Besides fresh installation, you can also do updates for MySQL products and components with the help of the following command.
# yum update mysql-server
# dnf update mysql-server       [On Fedora versions]
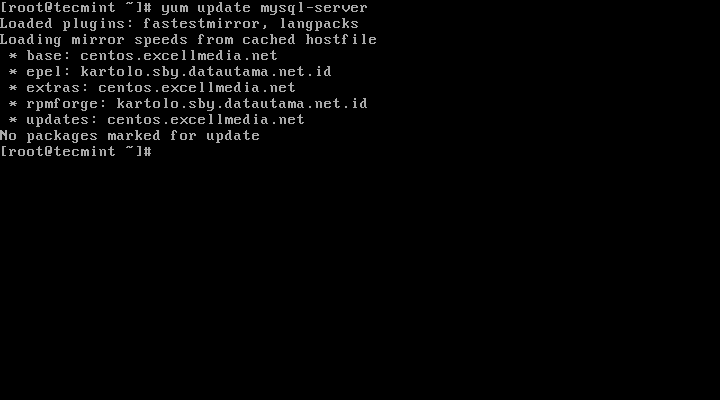
When new updates are available for MySQL, it will auto-install them, if not you will get a message saying NO packages marked for updates.
That’s it, you’ve successfully installed MySQL 8.0 on your system. If you’re having any trouble installing feel free to use our comment section for solutions.