LEMP is a popular stack that comprises open-source software that is collectively used to host and serve web applications, whether in production or any stage along the development cycle.
The terminology LEMP is an acronym for Linux, Nginx (pronounced as Engine X, hence the E) which is a web browser, MariaDB or MySQL – database, and PHP for processing dynamic content). LEMP stack is popularly used for hosting high-traffic and highly scalable web applications and websites.
In this guide, you will learn how to install the LEMP stack on Rocky Linux 8.4.
Prerequisites
Before setting out to install the LEMP stack, ensure that you have the following requirements in place.
- An Instance of Rocky Linux 8 with a sudo user configured.
- SSH access to the Rocky Linux instance.
Let’s get started…
Step 1: Install Nginx on Rocky Linux
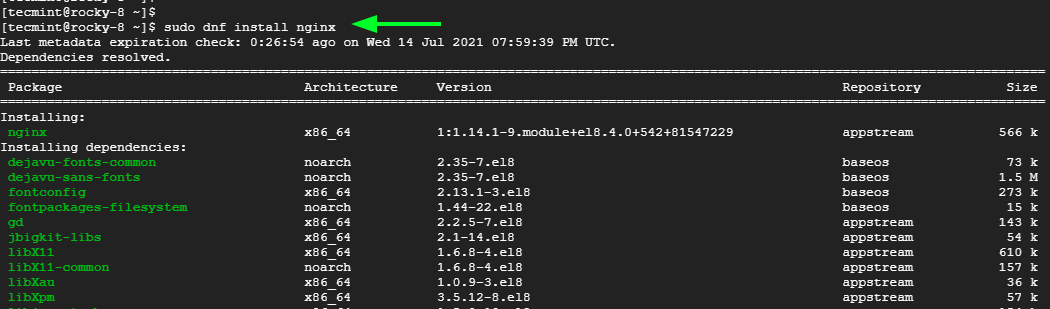
The first step is to install the first component of the LEMP stack which is the Nginx web server. First, upgrade the packages.
$ sudo dnf update -y
After the update is complete, install Nginx by running the following command. This installs Nginx alongside other dependencies required by the webserver.
$ sudo dnf install nginx
Once Nginx is in place, enable it to start on boot time and start the Nginx daemon.
$ sudo systemctl enable nginx
$ sudo systemctl start nginx
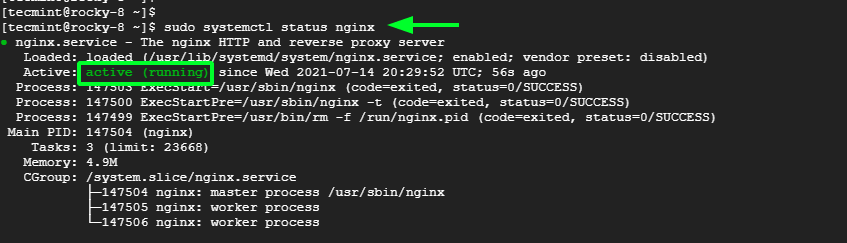
To confirm that the web server is running, execute the command:
$ sudo systemctl status nginx
From the output, we can conclude that the webserver is up and running.
If you are curious enough, you can check the version of Nginx as follows. The output indicates we are running Nginx 1.14.1.
$ nginx -v

nginx version: nginx/1.14.1
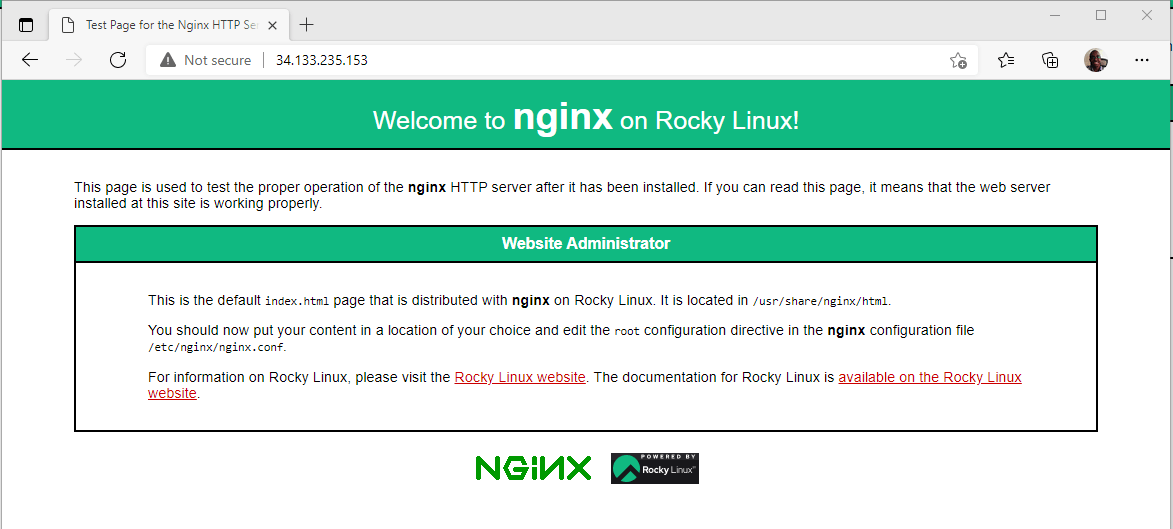
Additionally, you can confirm that the browser is working by browsing the URL shown. This will display the default Nginx Welcome page indicating that all is well.
http://server-ip or domain name
If you are having issues viewing the page, consider opening port 80 or allowing the HTTP traffic on the firewall.
$ sudo firewall-cmd --zone=public --add-service=http --permanent
Then reload the firewall and reload the page.
$ sudo firewall-cmd --reload
Step 2: Install MariaDB on Rocky Linux
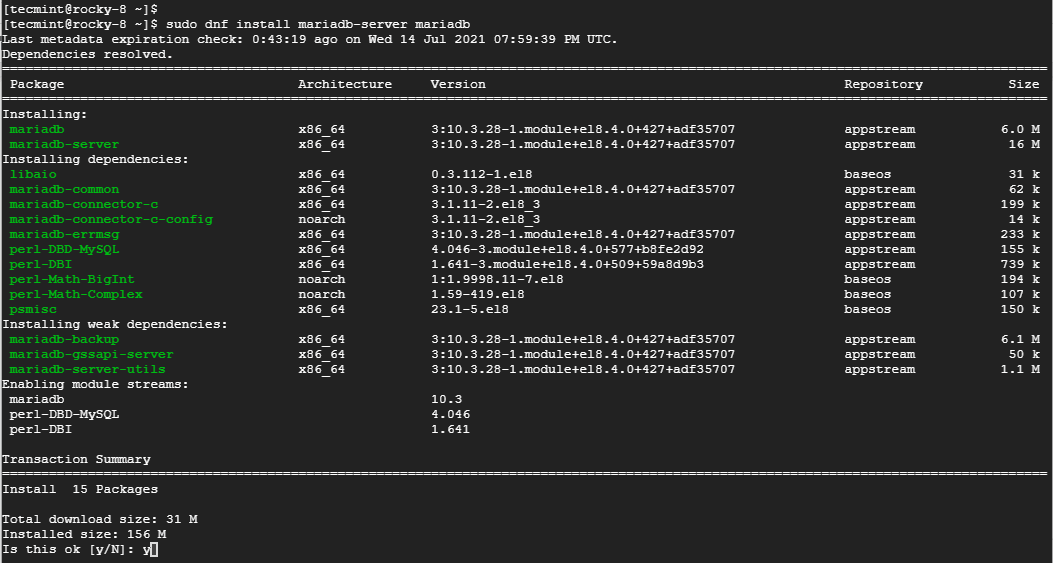
For this guide, we will install the MariaDB database. This is due to the optimized performance and wealth of storage engines it provides which makes it far more superior to MySQL.
To install the MariaDB database server, run the command:
$ sudo dnf install mariadb-server mariadb
Once done, enable and start MariaDB as shown.
$ sudo systemctl enable mariadb
$ sudo systemctl start mariadb
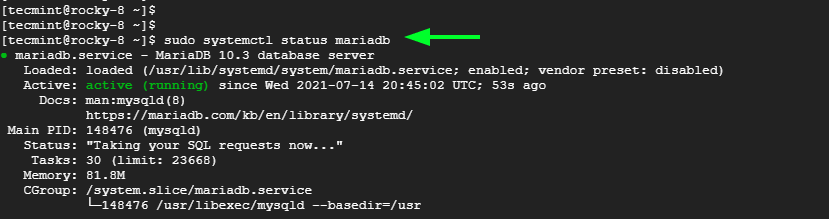
Then verify its status.
$ sudo systemctl status mariadb
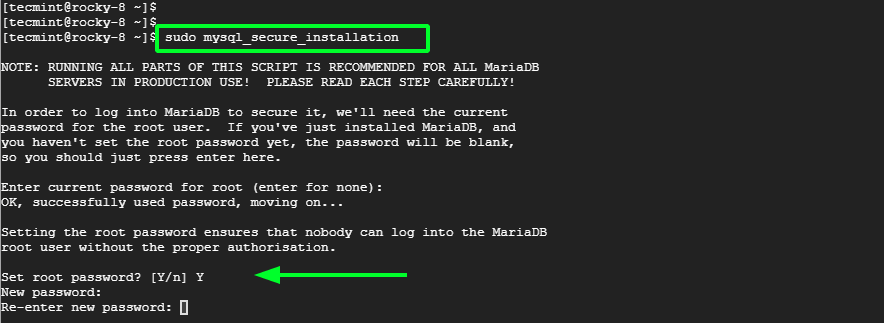
The default settings for MariaDB are not secure enough and your database can easily be breached. As a precaution to deter intruders at the most basic level, run the script below.
$ sudo mysql_secure_installation
Be sure to set up the Root password.
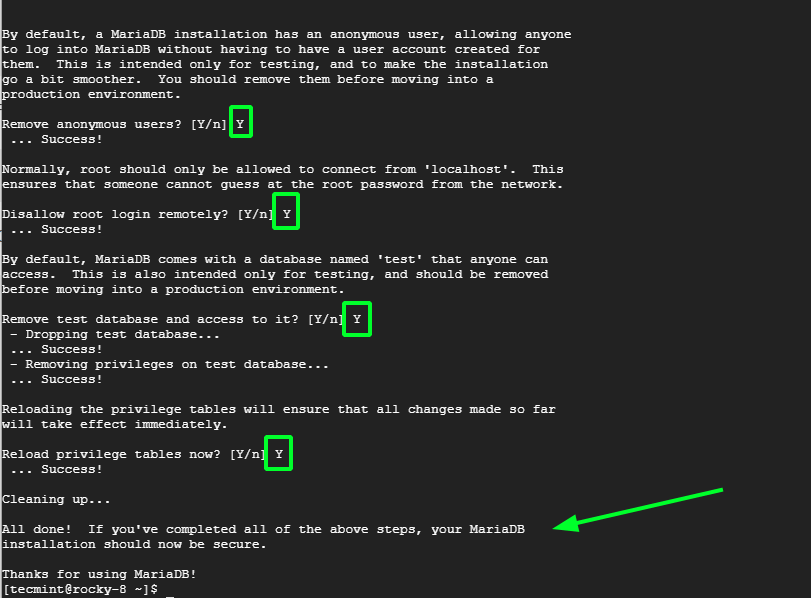
For the remaining prompts, simply type 'Y' to remove anonymous users, deny remote root login, remove the test database, and finally save the changes made.
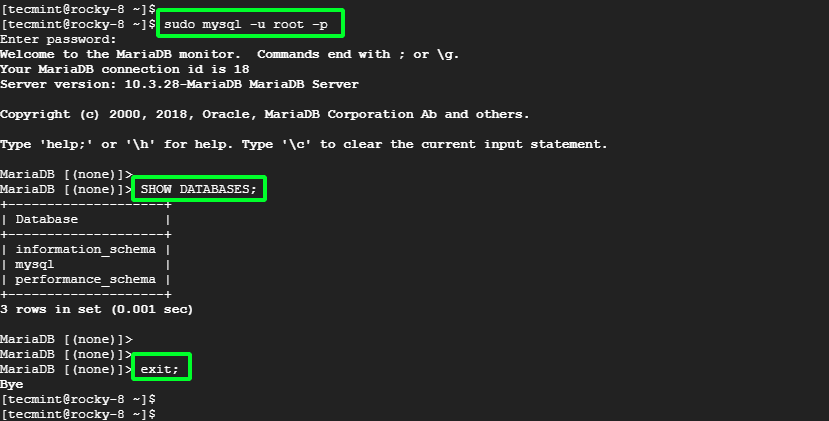
To login to the database server, run the command:
$ sudo mysql -u root -p
Provide the password and hit ENTER.
Step 3: Install PHP on Rocky Linux
The last component to install is PHP via PHP-FPM, which stands for FastCGI Process Manager. This is an efficient and highly advanced processor for PHP that provides features that guarantee optimal performance, and security for high-traffic websites.
To start off, we will install the Remi repository which is a third-party free repository that provides the latest PHP versions.
To enable the Remi repository, run the command:
$ sudo dnf install dnf-utils http://rpms.remirepo.net/enterprise/remi-release-8.rpm

Once the Remi repository is enabled, check out the list of PHP modules that are hosted using the command shown.
$ sudo dnf module list php
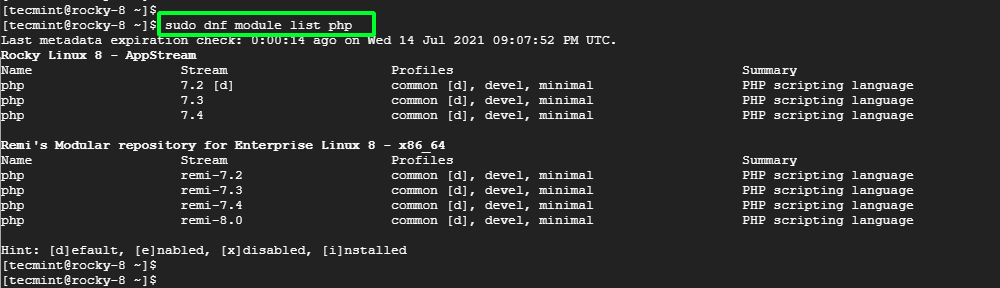
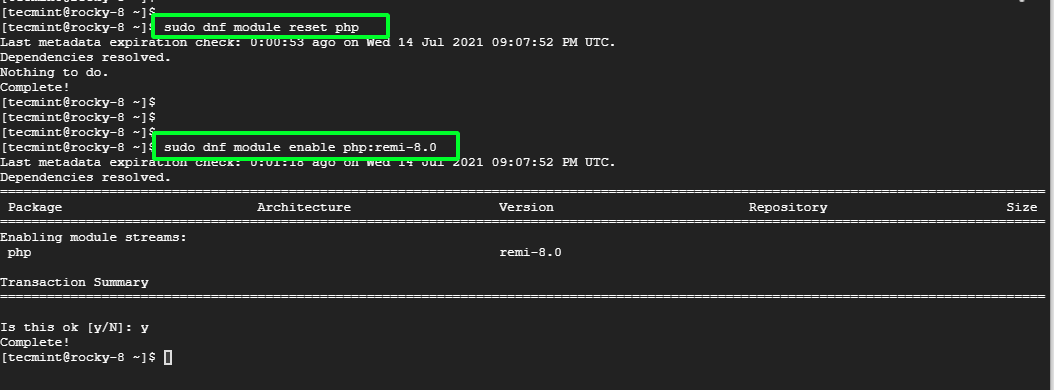
From the output, we can see that the default version is 7.2 – with the tag [d]. However, we are going to install the latest module which is Remi 8.0.
Therefore, reset the default PHP modules and enable the latest Remi PHP module.
$ sudo dnf module list reset php
$ sudo dnf module enable php:remi-8.0
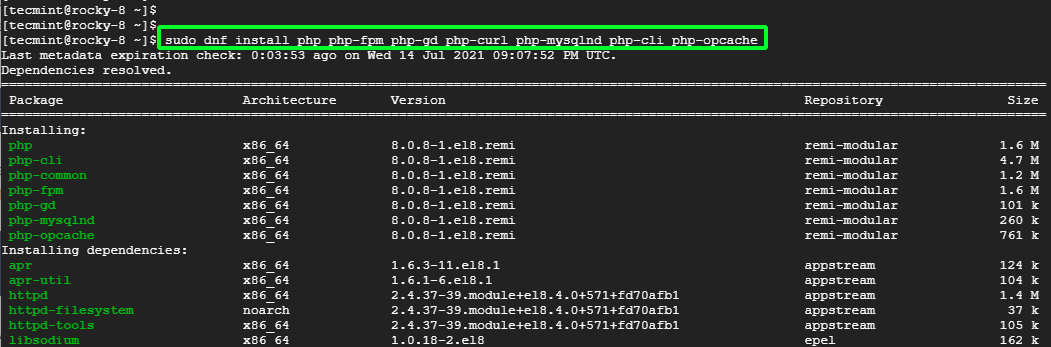
Next, update the system and install PHP and PHP-FPM alongside PHP extensions of your preference.
$ sudo dnf install php php-fpm php-gd php-mysqlnd php-cli php-opcache
Once the installation is complete, enable and start PHP-FPM as shown.
$ sudo systemctl enable php-fpm
$ sudo systemctl start php-fpm
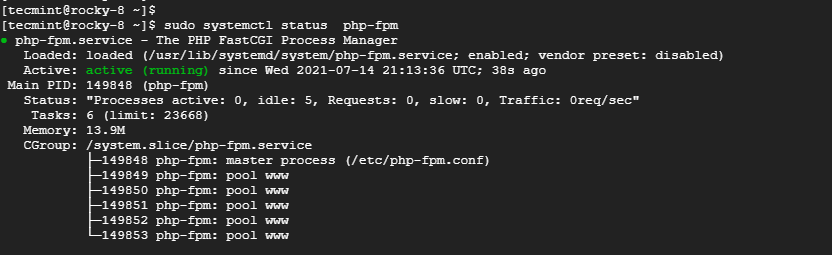
Next, verify the running status of PHP-FPM.
$ sudo systemctl status php-fpm
Normally, PHP-FPM runs as the Apache user, but since we are using Nginx, we need to set it to Nginx. So, open the following configuration file.
$ sudo vim /etc/php-fpm.d/www.conf
Set the user and group to Nginx.
user = nginx
Group = nginx
Thereafter, reload the PHP-FPM daemon.
$ sudo systemctl reload php-fpm
To confirm that we have installed the latest version of PHP, run the command.
$ php -v

Another nifty way of Testin PHP is by creating a simple PHP file and placing it in the webroot directory which is located in /usr/share/nginx/html. So, create a simple info.php file in the /usr/share/nginx/html webroot directory.
$ sudo vim /usr/share/nginx/html/info.php
Add the following content and save the file.
<?php

phpinfo();

?>
To effect the changes, reload the Nginx web server.
$ sudo systemctl restart nginx
Finally, access the following URL.
http://server-ip/info.php
A webpage with detailed information about the installed PHP version alongside other PHP extensions will be displayed.

At this point, our LEMP setup is complete. In the next step, we are going to host a sample site by configuring an Nginx server block.
Step 3: Configure Nginx Server Block in Rocky Linux
A server block allows administrators to host multiple websites on one server by defining different site document root directories. These are the directories that contain the website files.
Here, we will create a single Nginx server block file to host a sample website.
Step 1: Create a Website Directory
First up, create the site’s document directory which will contain the site’s data that will be available to site visitors. Assume you have a domain called example.com. Create the site’s domain directory as follows. Be sure to replace example.com with your site’s Fully Qualified Domain Name or registered domain.
$ sudo mkdir -p /var/www/example.com/html
Step 2: Set Ownership & Permissions on Website
The domain’s directory structure is now set to host the site’s files. Currently, it’s the root user that owns the files. We need to set the ownership such that it’s the regular user that owns the file.
To change the files’ ownership to the currently logged-in user, use the chown command.
$ sudo chown -R $USER:$USER /var/www/example.com/html
The $USER variable takes the value of the currently logged-in user and grants the user ownership to the html files and subdirectories. Additionally, grant read permission to the general web root directory so that site visitors can access the site pages.
$ sudo chmod -R 755 /var/www
The site directory is now well configured to serve the site’s web pages.
Step 3: Create a Demo Site
Let’s now create a sample test site. We will create a very basic index.html file in the domain’s html directory.
$ sudo vim /var/www/example.com/html/index.html
Paste the content below. As you can see, it’s quite basic as we are only using it for testing purposes.
<html>
  <head>
    <title>Welcome to Example.com!</title>
  </head>
  <body>
    <h1>Success! The server block is active!</h1>
  </body>
</html>
Save and exit the HTML file.
Step 4: Create a Nginx Server Block for Website
A server block file is a file that contains the site’s configuration. It spells out how the Nginx web server responds to requests from the site’s visitors. We will begin by creating two directories:
- /etc/nginx/sites-available – This is the directory that will hold the server block file.
- /etc/nginx/sites-enabled – The directory notifies Nginx that the server block file is ready to serve requests.
Therefore, create the directories as follows:
$ sudo mkdir /etc/nginx/sites-available
$ sudo mkdir /etc/nginx/sites-enabled
Thereafter, edit Nginx’s main configuration file.
$ sudo mkdir /etc/nginx/nginx.conf
Paste the following lines. The first line specifies the path to the directory containing additional configuration files. The second line increases the memory allocated to parsing domain names.
include /etc/nginx/sites-enabled/*.conf;
server_names_hash_bucket_size 64;
Save and exit.
Next, create a server block file.
$ sudo vim /etc/nginx/sites-available/example.com.conf
Paste the content below. Replace example.com with your Fully Qualified Domain name (FQDN) or server IP address.
server {
    listen  80;

    server_name example.com www.example.com;

    location / {
        root  /var/www/example.com/html;
        index  index.html index.htm;
        try_files $uri $uri/ =404;
    }

    error_page  500 502 503 504  /50x.html;
    location = /50x.html {
        root  /usr/share/nginx/html;
    }
}
Save and exit the file.
Step 5: Enable Nginx Server Block
Finally, we need to enable the server block file. To do so, we’ll create a symbolic link for the server block file to the sites-enabled directory.
$ sudo ln -s /etc/nginx/sites-available/example.com.conf /etc/nginx/sites-enabled/example.com.conf
Then restart Nginx for the changes to be effected.
$ sudo systemctl restart nginx
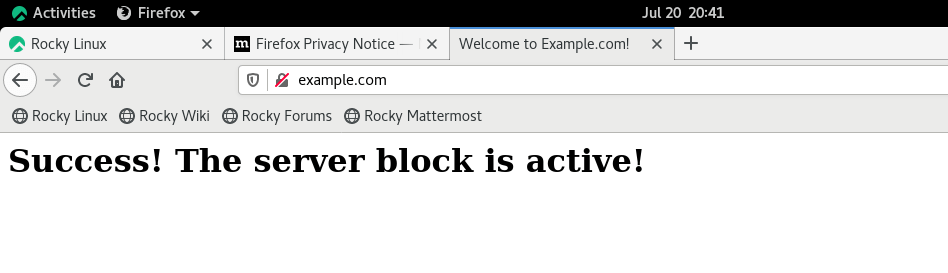
Step 6: Test Nginx Website
To test the configuration launch your browser and visit your site’s domain
http://example.com
This should display the server block’s site as we configured in Step 3.
And this wraps it up. In this guide, we have walked you through the installation of the LEMP stack on Rocky Linux 8 and went a step further to create and configure a server block file where we hosted a custom website.