MariaDB is a popular alternative to the MySQL database management system. It is developed by the original MySQL developers and is meant to remain open source.
MariaDB is fast and reliable, supports different storage engines and has plugins which makes it perfect for wide range of use cases.
In this tutorial we are going to show you how to install MariaDB server on your RHEL 8. We will be installing MariaDB 10.3.10 version.
Note: This tutorial presumes that you have an active RHEL 8 subscription and that you have root access to your RHEL system. Alternatively you can use a privileged user and run the commands with sudo.
Installing MariaDB Server
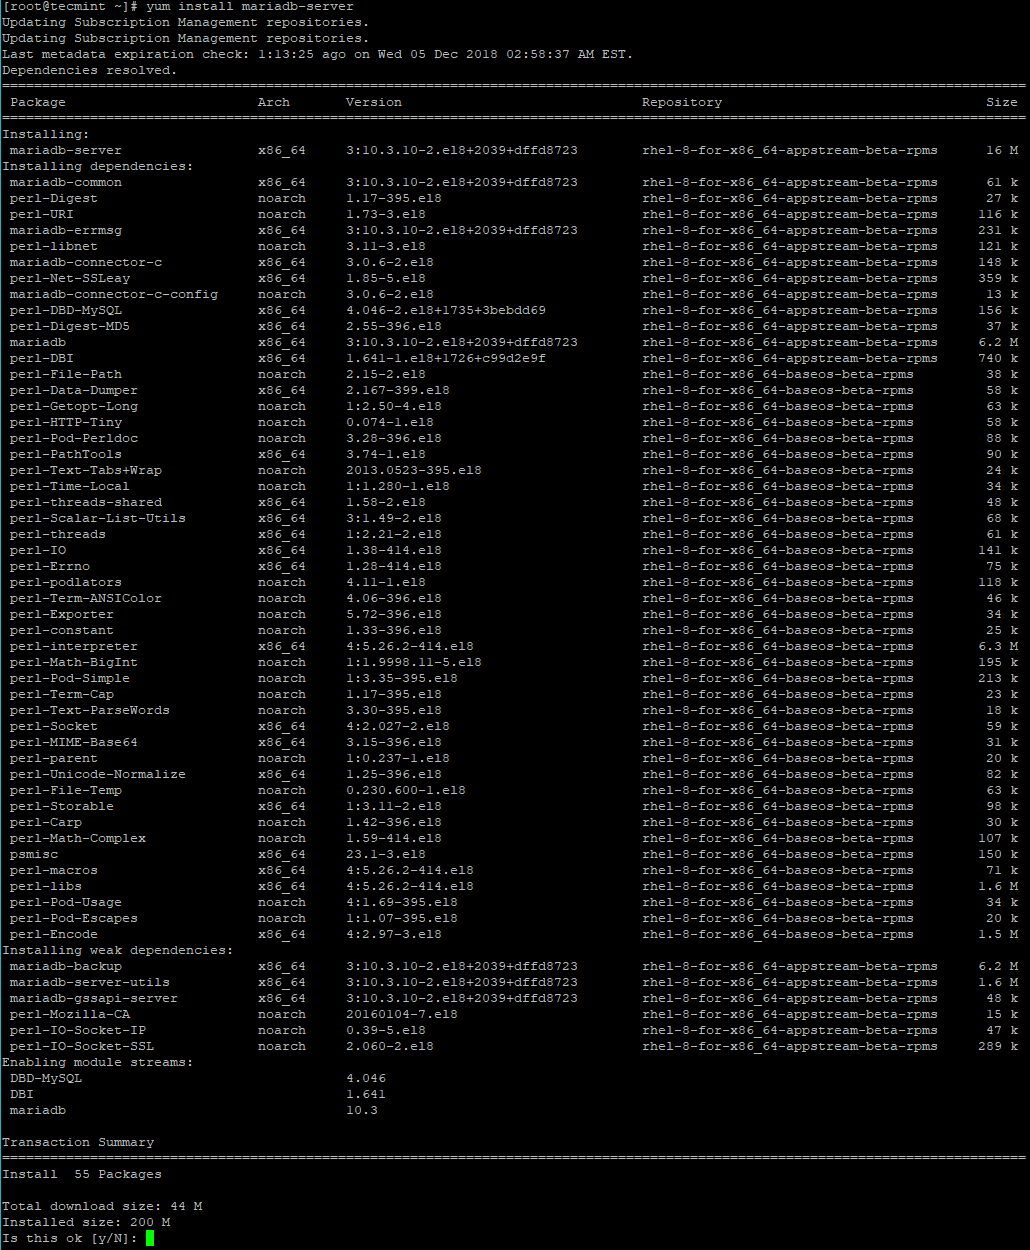
To install the MariaDB server, we will use the following yum command to complete the installation.
# yum install mariadb-server
This will install the MariaDB server and all the required dependencies.
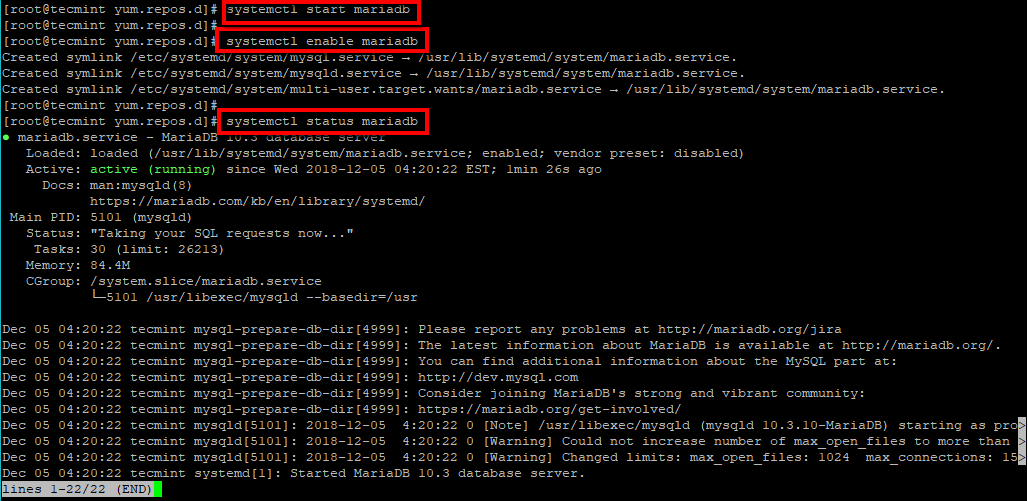
Once the installation is complete, you can start the MariaDB service with:
# systemctl start mariadb
If you want to have the MariaDB service started automatically after each system boot, you can run the following command:
# systemctl enable mariadb
Verify the status of the MariaDB service with:
# systemctl status mariadb
Secure MariaDB Installation
Now that we have our service started, it is time to improve its security. We will setup root password, disable remote root login, remove test database and anonymous user. Finally we will reload all privileges.
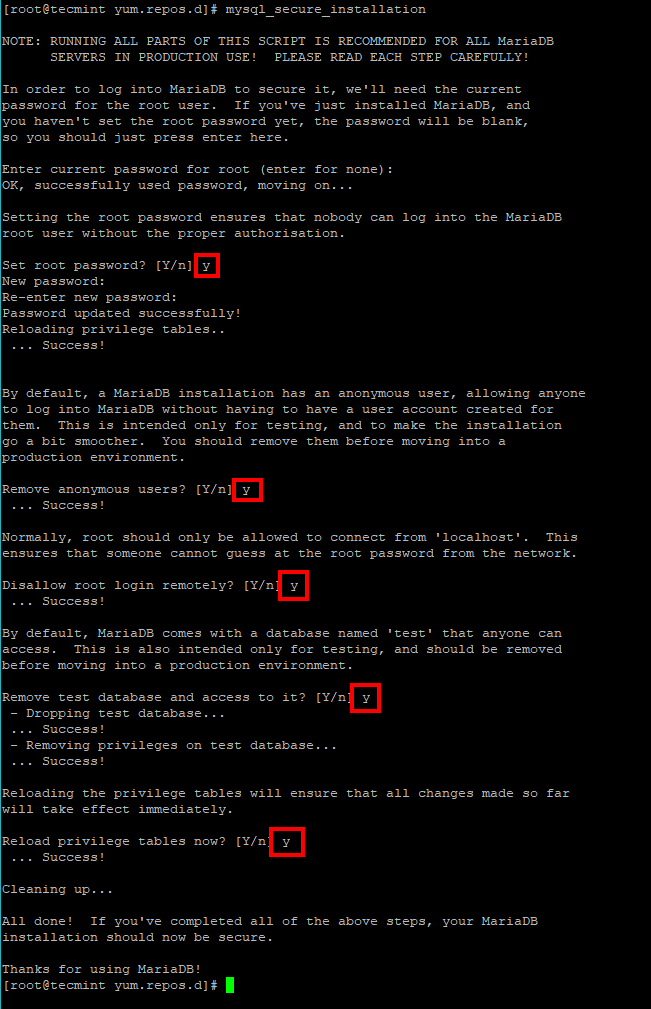
For that purpose, simply run the following command and answer the questions accordingly:
# mysql_secure_installation
Note that the root user’s password is empty, so if you want to change it, simply press “enter”, when prompted for the current password. The rest you can follow the steps and answers on the image below:
Access the MariaDB Server
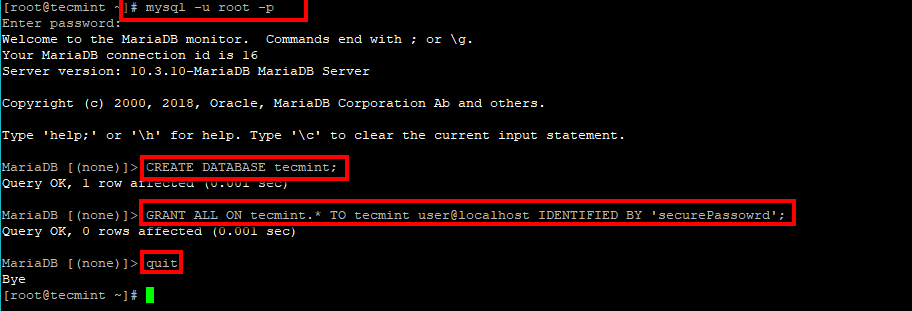
Let’s go a little deeper and create a database, user and give privileges to that user over the database. To access the server with console, you can use the following command:
# mysql -u root -p
When prompted, enter the root password that you set earlier.
Now let’s create our database. For that purpose at the MariaDB prompt, run the following command:
MariaDB [(none)]> CREATE DATABASE tecmint;
This will create new database named tecmint. Instead of accessing that database with our root user, we will create separate database user, that will have privileges to that database only.
We will create our new user called tecmint_user and grant it privileges on the tecmint database, with the following command:
MariaDB [(none)]> GRANT ALL ON tecmint.* TO tecmint_user@localhost IDENTIFIED BY 'securePassowrd';
When creating your own user, make sure to replace “securePassword” with the password you wish to give to that user.
When you have finished with the above commands, type “quit” at the prompt to exit MariaDB:
MariaDB [(none)]> quit;
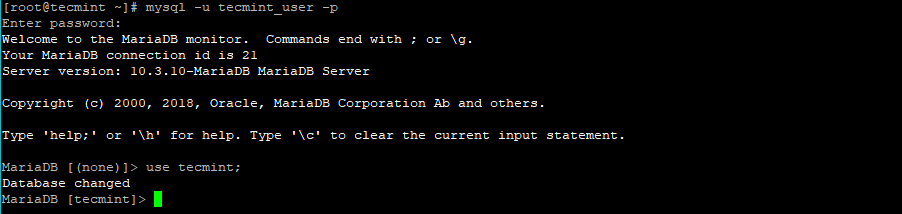
Now you can use the new user to access the tecmint database.
# mysql -u tecmint_user -p
When prompted enter the password for that user. To change the used database, you can use the following at the MariaDB prompt:
MariaDB [(none)]> use tecmint;
This will change the current database to tecmint.
Alternatively, you can issue the mysql command by specifying the database name as well as shown.
# mysql -u tecmint_user -p tecmint
That way when you enter the user’s password, you will directly be using the tecmint database.
Find Out More About MariaDB
Here you have learned some of the basics of MariaDB, but there is plenty more to explore. If you want to enhance your database knowledge you can checkout our guides here:
- Learn MySQL / MariaDB for Beginners – Part 1
- Learn MySQL / MariaDB for Beginners – Part 2
- MySQL Basic Database Administration Commands – Part III
- 20 MySQL (Mysqladmin) Commands for Database Administration – Part IV
- 15 Useful MariaDB Performance Tuning and Optimization Tips – Part V
This is it. In this tutorial, you learned how to install and secure MariaDB server and create your first database. If you have any questions, feel free to post them in the comment section.