Memcached is an opensource, high-performance, and superfast in-memory key-value store that is designed for speeding up web applications. Among the popular web applications that rely on Memcached include FaceBook, Reddit, and Twitter.
In this article, you will learn how to install and configure a Memcached caching system on CentOS 8 Linux (same instructions also work on RHEL 8 Linux).
Installing Memcached in CentOS 8
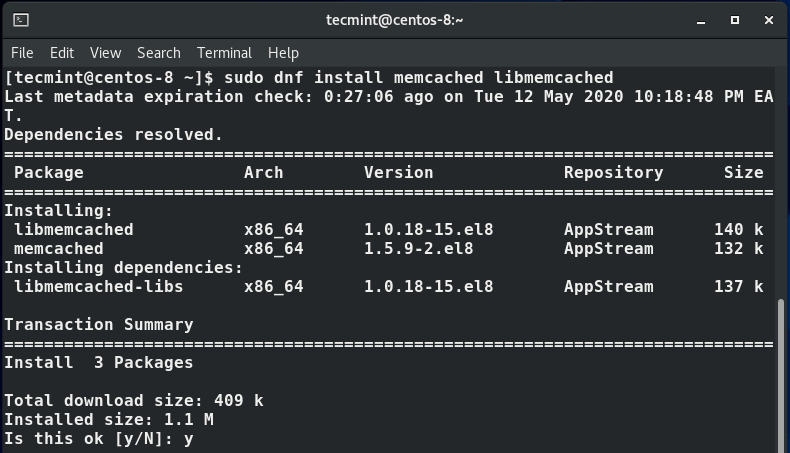
By default, Memcached packages are included in CentOS 8 repositories. With this in mind, we are going to use the default dnf package manager to install Memcached alongside other packages.
$ sudo dnf install memcached libmemcached
To view detailed information about the Memcached package, run the following rpm command.
$ rpm -qi
The command will display details such as the version, release, architecture type, licensing, and release date of the package as shown below.

Configuring Memcached in CentOS 8
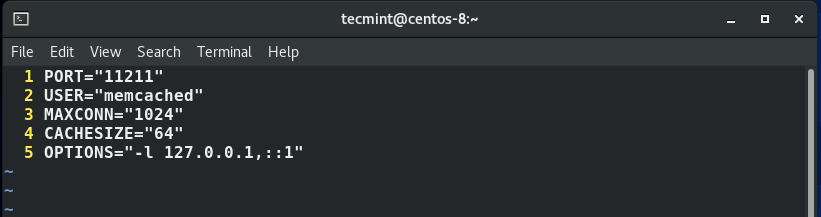
Now that we are done installing Memcached, we need to configure it so that other applications can interact with it. The configuration of Memcached is located in the /etc/sysconfig/memcached file.
By default, Memcached listens to port 11211 and is configured to listen only to the localhost system as shown in line number 5.
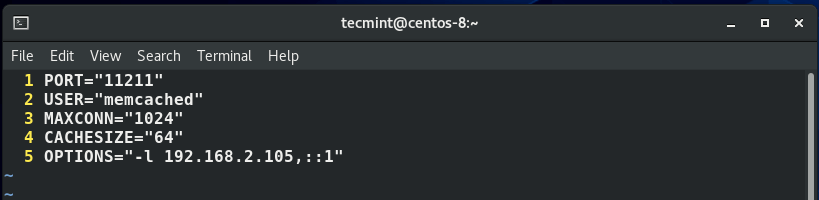
To configure Memcached so that applications from the remote systems can connect to the server, you need to change the localhost address 127.0.0.1 to the address of the remote host.
Let’s assume that we are in a private local network. Our Memcached server IP is 192.168.2.101 while the remote client’s IP where the application connecting to Memcached is 192.168.2.105.
We are going to replace the localhost address with the remote client’s IP 192.168.2.105 as shown.
Next, we need to open port 11211 on the firewall to allow traffic from the client host.
$ sudo firewall-cmd --add-port=11211/tcp --zone=public --permanent
$ sudo firewall-cmd --reload
To confirm that port 11211 is opened on the firewall, execute the command.
$ sudo firewall-cmd --list-ports | grep 11211

Perfect!, the output confirms that the port is opened. Traffic from the remote client can now access the Memcached server.
Having wound up with the settings and configurations, start and enable Memcached as shown.
$ sudo systemctl start memcached
$ sudo systemctl enable memcached
To verify the status of Memcached, run the command.
$ sudo systemctl status memcached
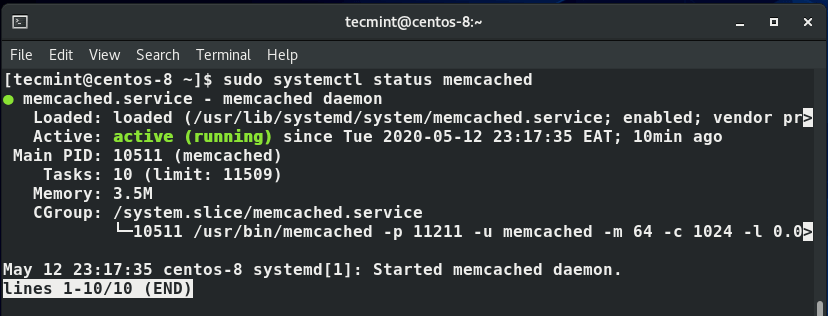
The output is a confirmation that Memcached is up and running.
Enable Memcached for Applications
If you are running a PHP powered application such as Drupal, Magento or WordPress, install the php-pecl-memcache extension for your application to seamlessly communicate with the Memcached server.
$ sudo dnf install php-pecl-memcache
If you are running a Python application, use the pip package installer to install the following Python libraries.
$ pip3 install pymemcache --user
$ pip3 install python-memcached --user
And that’s it. In this guide, you learned how to install Memcached caching system on CentOS 8 server. For more information about Memcached check out the Memcached Wiki.


I can start the single instance but I tried starting creating another instance by creating a file as /etc/memcached.11212 and running service memcached@11212 and it shows an error as:
Can you explain how I can start the second instance? I have my firewall off, I have no service running at 11212, etc
Thanks,
Sadashiv