NextCloud is an open-source, on-premise file share and collaborative platform that allows you to save your files and access them across multiple devices such as PCs, smartphones, and tablets.
As a popular self-hosting platform that works much like DropBox, it allows you to seamlessly collaborate on various projects, manage your calendar, send and receive emails as well as make video calls.
In this guide, you will learn how to install NextCloud on CentOS 8.
Prerequisites:
Since we will be accessing NextCloud via a browser, it’s crucial to ensure that the LAMP stack is already installed on CentOS 8. LAMP is short for Linux, Apache, MySQL / MariaDB and PHP.
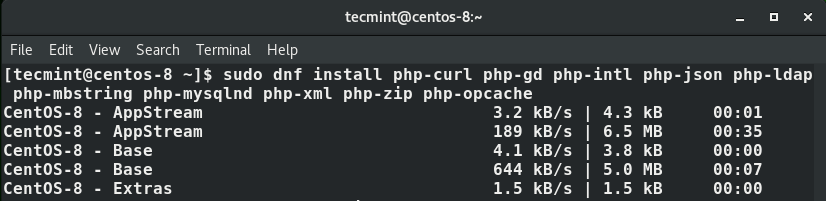
Step 1: Install Additional PHP Modules
Some requisite PHP modules are required for NextCloud to function as expected. Install them as shown below.
$ sudo dnf install php-mysqlnd php-xml php-zip php-curl php-gd php-intl php-json php-ldap php-mbstring php-opcache
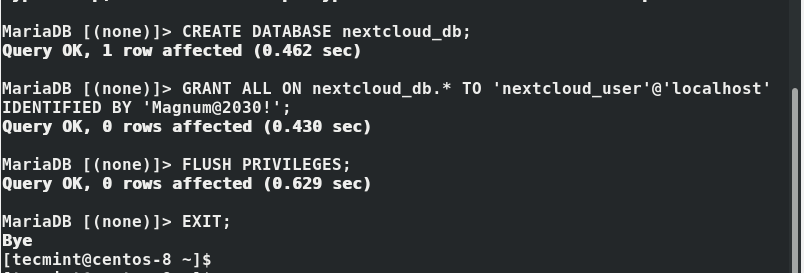
Step 2: Create a NextCloud Database
After installing the necessary PHP modules, create a database that will contain NextCloud’s data by log in to the MariaDB database engine using the command below and provide the password.
$ mysql -u root -p
Upon logging in, create a database and a database user for NextCloud using the commands below.
MariaDB [(none)]> CREATE DATABASE nextcloud_db;
MariaDB [(none)]> GRANT ALL ON nextcloud_db.* TO ‘nextcloud_user’@’localhost’ IDENTIFIED BY ‘StrongP@ssword’;
MariaDB [(none)]> FLUSH PRIVILEGES;
MariaDB [(none)]> EXIT;
Step 3: Install NextCloud on CentOS 8
The next step requires you to download NextCloud zipped file from NextCloud’s official site. By the time of writing down this guide, the latest version of NextCloud is 18.0.1.
To download NextCloud, run the following wget command.
$ sudo wget https://download.nextcloud.com/server/releases/nextcloud-18.0.1.zip
Unzip the file to the /var/www/html/ path.
$ sudo unzip nextcloud-18.0.1 -d /var/www/html/
Next, create a directory to store the admin user data.
$ sudo mkdir -p /var/www/html/nextcloud/data
Then modify NextCloud’s directory permissions so that the Apache user can append data into it.
$ sudo chown -R apache:apache /var/www/html/nextcloud/
Step 4: Setting Up SELinux and Firewall for NextCloud
You need to make a few configurations for SELinux so that it can handle Nextcloud without any problems. So run the commands below.
$ sudo semanage fcontext -a -t httpd_sys_rw_content_t '/var/www/html/nextcloud/data'
$ sudo semanage fcontext -a -t httpd_sys_rw_content_t '/var/www/html/nextcloud/config(/.*)?'
$ sudo semanage fcontext -a -t httpd_sys_rw_content_t '/var/www/html/nextcloud/apps(/.*)?'
$ sudo semanage fcontext -a -t httpd_sys_rw_content_t '/var/www/html/nextcloud/3rdparty(/.*)?'
$ sudo semanage fcontext -a -t httpd_sys_rw_content_t '/var/www/html/nextcloud/.htaccess'
$ sudo semanage fcontext -a -t httpd_sys_rw_content_t '/var/www/html/nextcloud/.user.ini'
$ sudo restorecon -Rv '/var/www/html/nextcloud/'
To allow external users to access NextCloud from your server, you need to open the webserver port 80. So run the commands below.
$ sudo firewall-cmd --add-port=80/tcp --zone=public --permanent
$ sudo firewall-cmd --reload
Step 5: Finalizing the NextCloud Installation
To complete NextCloud setup, launch your browser and browse the server’s IP address a shown.
http://server-IP/nexcloud
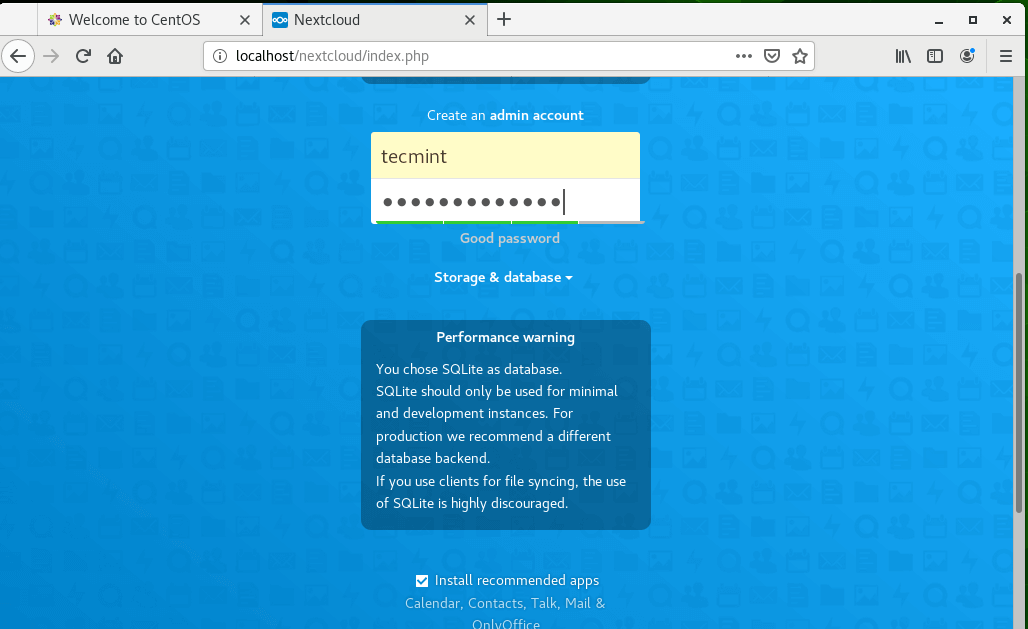
Create an Admin username and password.
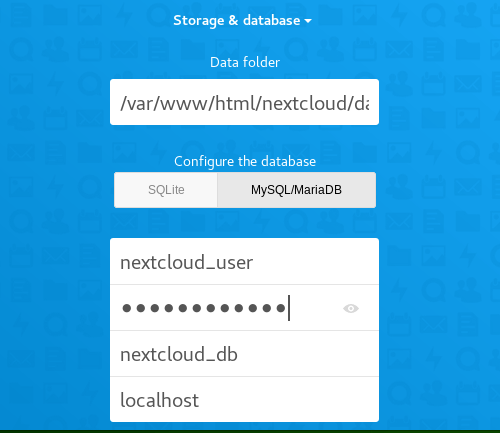
Next, click on ‘Storage and database’. Select ‘MariaDB’ as the preferred database engine and fill in the database details.
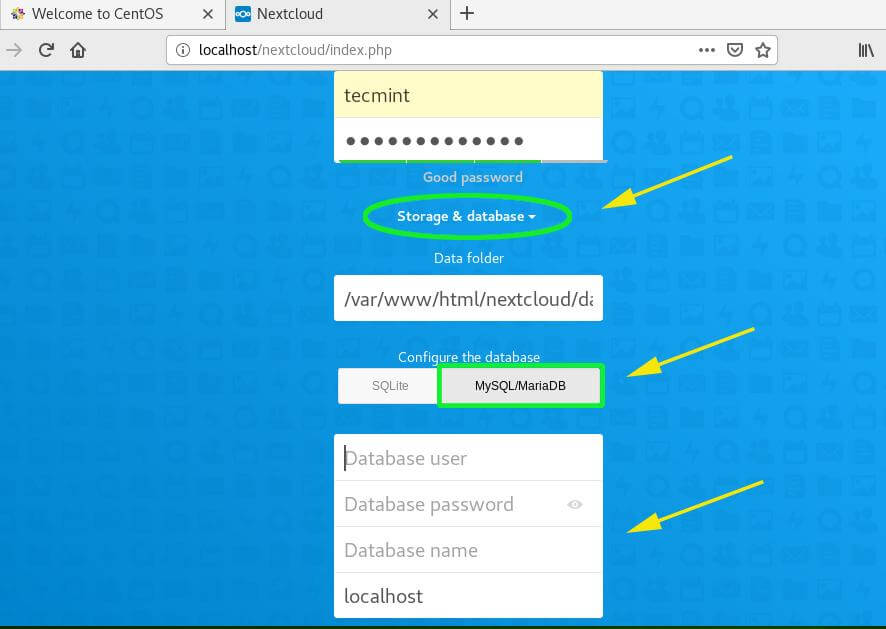
The database details have been filled as shown below.
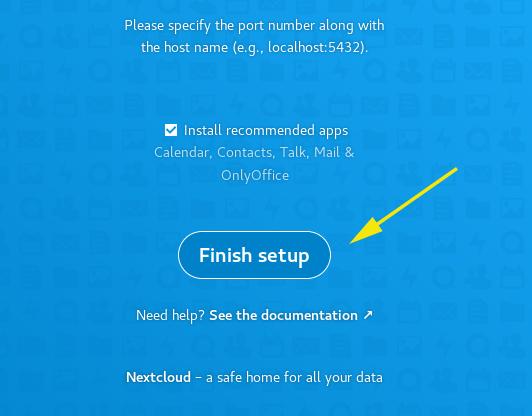
Finally, click on the ‘Finish’ button to complete the setup.
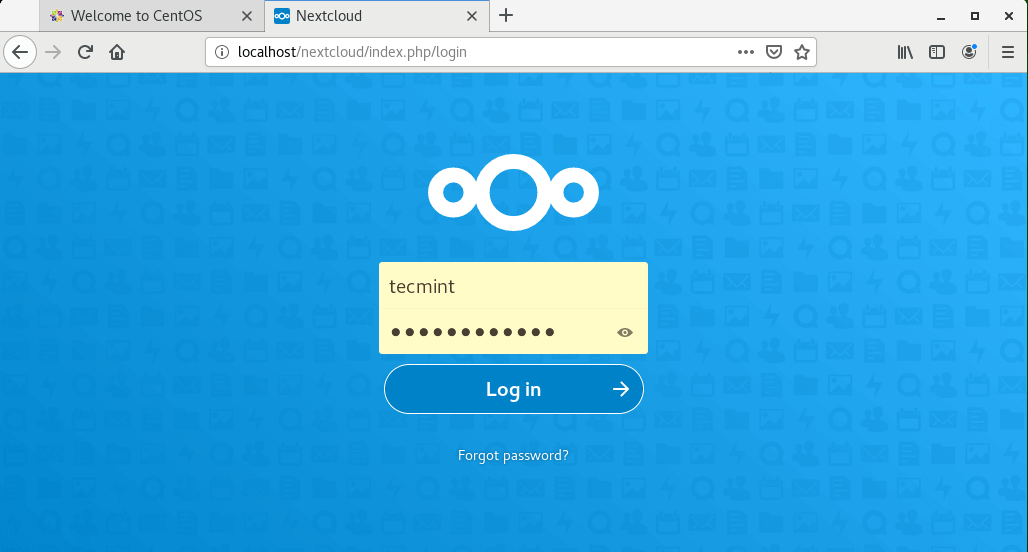
This takes you to the login page. Provide the username and password and hit ‘ENTER’ or click on the ‘Login’ button.
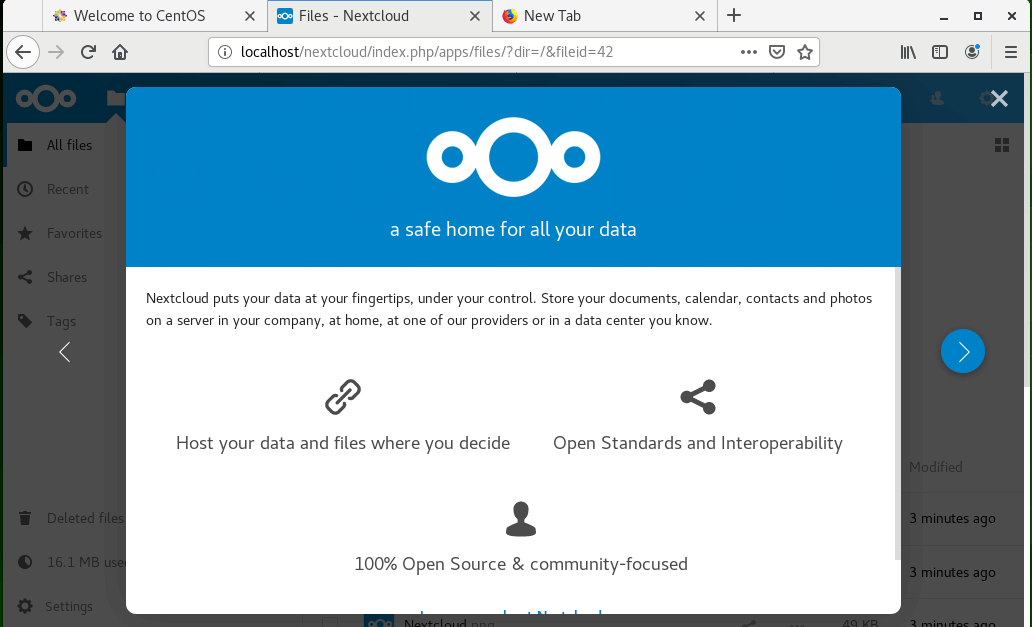
A brief walkthrough about NextCloud will be given in a slide format if you are logging in for the first time. Feel free to scroll to the right for more tips.
And finally, close the window to give you access to the dashboard.
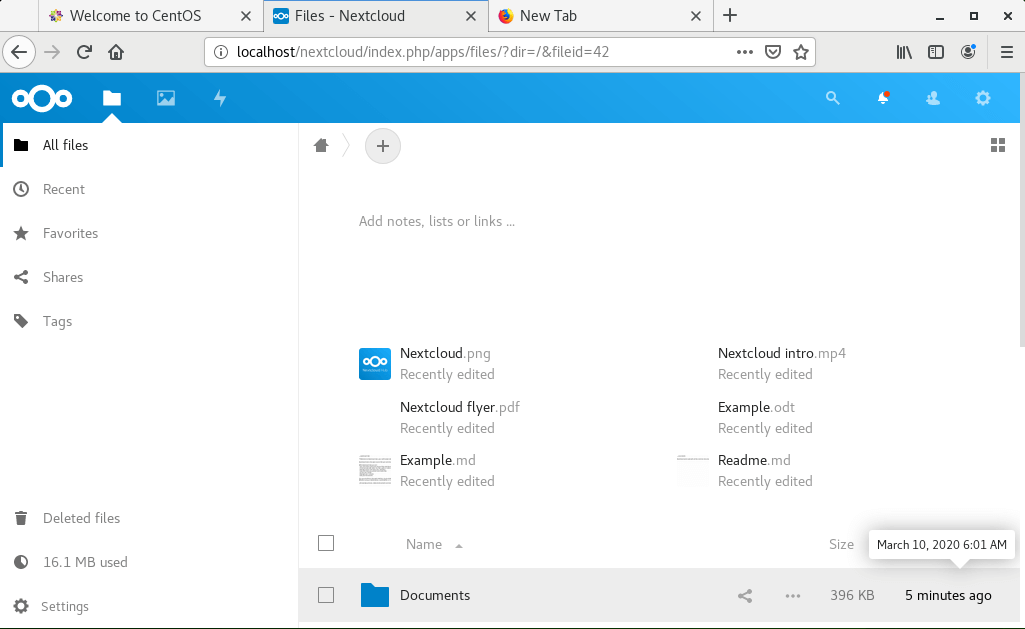
And this brings us to the end of this guide. You can now backup, sync and share files with your friends and colleagues on NextCloud. Thanks for coming this far. We hope this guide was inspiring.


Hi,
After installed in my rhel 8.x machine not able to load the login page, coming plain text only.
Thanks for reporting this. A plain-text login page usually indicates that CSS/JavaScript files aren’t loading, often due to a web server, PHP, or file permissions/configuration issue. Please share your Nextcloud version, web server (Apache/Nginx), PHP version, and any error logs so we can help troubleshoot.
You should add the following command to the selinux section for users with remote databases.