PostgreSQL is an immensely popular open-source relational database management system (RDBMS) that has been around for over 30 years. It provides SQL language support which is used for managing databases and performing CRUD operations (Create Read Update Delete).
[ You might also like: 10 Useful Websites for Learning PostgreSQL Database System]
PostgreSQL has earned itself a solid reputation for its robustness, flexibility, and performance. It’s the primary data store for numerous web and analytical applications. Global giants that rely on PostgreSQL include Spotify, Instagram, Trivago, Uber, and Netflix.
At the time of writing this guide, the latest version is PostgreSQL 15 and in this article, we demonstrate how to install PostgreSQL on Rocky Linux and AlmaLinux.
Step 1: Add the PostgreSQL Repository
The default version of PostgreSQL on Appstream repositories is PostgreSQL 10.
$ sudo dnf module list postgresql
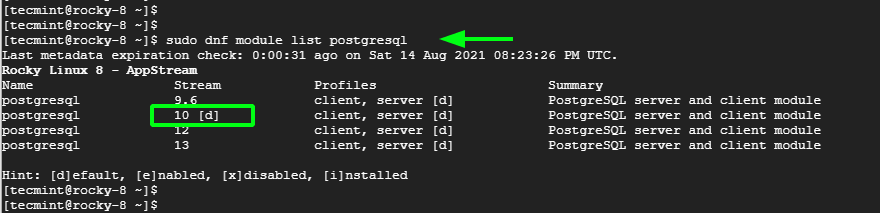
From the output, we can clearly see that the default PostgreSQL stream – marked with [ d ] is PostgreSQL 10.
To install the latest PostgreSQL version, we need to, first, install the PostgreSQL YUM repository on our system as shown.
--------------- Rocky & AlmaLinux 9 ---------------
$ sudo dnf install https://download.postgresql.org/pub/repos/yum/reporpms/EL-9-x86_64/pgdg-redhat-repo-latest.noarch.rpm

--------------- Rocky & AlmaLinux 8 ---------------
$ sudo dnf install -y https://download.postgresql.org/pub/repos/yum/reporpms/EL-8-x86_64/pgdg-redhat-repo-latest.noarch.rpm
Step 2: Install PostgreSQL 15 on Rocky/Alma Linux
With the PostgreSQL YUM repository in place, the next step is to update repositories. Simply run the following command to achieve this:
$ sudo dnf update -y
Next, disable the default module which, as we saw earlier, is PostgreSQL 10.
$ sudo dnf -qy module disable postgresql
Once the default module is disabled, proceed and install PostgreSQL 15 client and server as shown.
$ sudo dnf install -y postgresql15-server
Type 'Y' and hit ENTER every time you are prompted to import the GPG key.
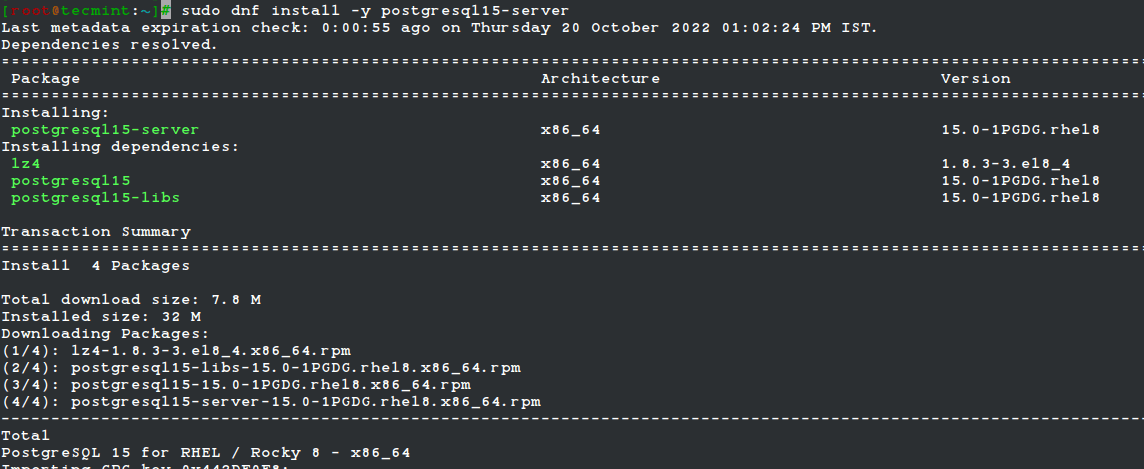
The command installs the PostgreSQL server and client alongside other dependencies. At the very end of the installation, you should have the output displayed which indicates that all the packages were successfully installed.

You can confirm the version of PostgreSQL installed using the command:
$ psql -V

psql (PostgreSQL) 15.0
Step 3: Initialize the PostgreSQL Database
Before proceeding further, we need to initialize the initdb database which is responsible for creating a new PostgreSQL cluster. A cluster is a group or collection of several databases that are managed by a cluster.
So, to initialize the database, run the command:
$ sudo /usr/pgsql-15/bin/postgresql-15-setup initdb

Step 4: Start and Enable PostgreSQL Service
Once PostgreSQL is installed and initialized, the next step is to start the service and ensure the database server is running. But before that, enable PostgreSQL to start on boot time.
$ sudo systemctl enable postgresql-15
Thereafter, start the PostgreSQL database server.
$ sudo systemctl start postgresql-15
To confirm that PostgreSQL is up and running, execute:
$ sudo systemctl status postgresql-15
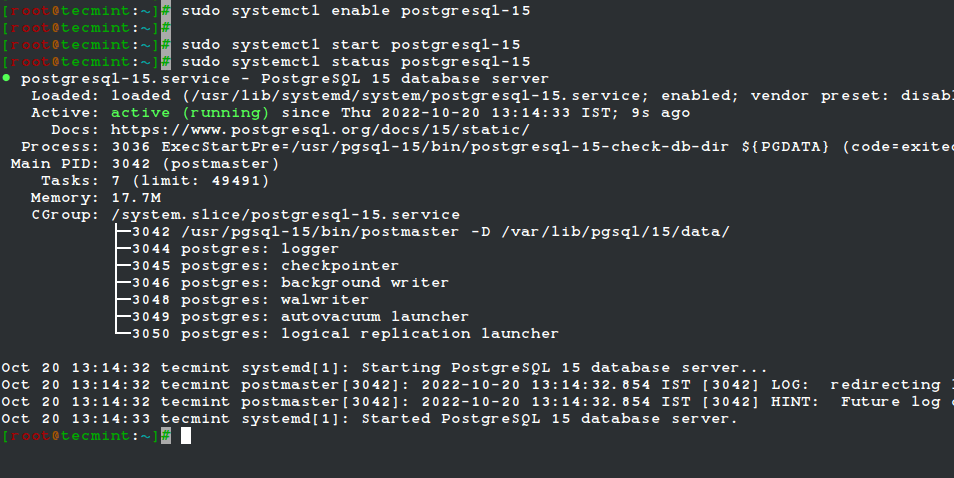
From the output, it’s clear that our database server is running as we would expect.
Step 5: Connect to PostgreSQL Database
When PostgreSQL is installed, a default database user called postgres is created. It does not require any authentication and a password is therefore not required to log in. In the next step, we shall create a password for the postgres user for security reasons.
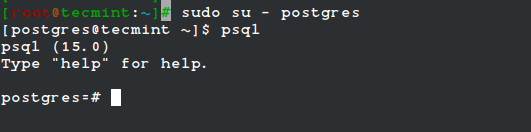
For now, we are going to log in to the PostgreSQL shell by first switching to the postgres user.
$ sudo su - postgres
Once you have switched to the postgresql user, access the database prompt using the command:
$ psql
Step 6: Set Password for Postgres User
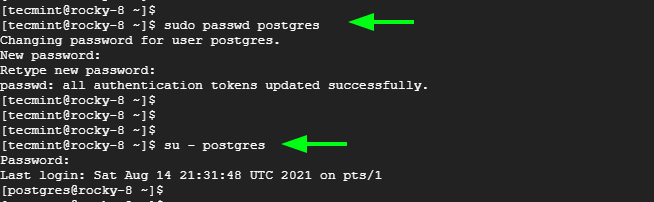
Finally, we are going to secure the postgres user with a password for security reasons. As a sudo user, run the command:
$ sudo passwd postgres
Provide a new password and confirm. Now log in again as a Postgres user.
$ su - postgres
And run the command shown.
psql -c "ALTER USER postgres WITH PASSWORD 'your-password';"

The next time you try logging in using the postgres user, you will be required to authenticate.
$ su - postgres

[ You might also like: How to Backup and Restore a PostgreSQL Database ]
And that’s just about it. We have walked you through the installation of PostgreSQL on Rocky Linux and AlmaLinux


