ProFTPD is an Open Source FTP Server and one of the most used, secure, and reliable file transfer daemons on Unix environments, due to its file configurations simplicity speed, and easy setup.

Requirements
- Installation of “CentOS 8.0″ with Screenshots
- Installation of RHEL 8 with Screenshots
- How to Enable RHEL Subscription in RHEL 8
- CentOS 7.0 Minimal System Installation
- RHEL 7.0 Minimal System Installation
- Active RHEL 7.0 Subscriptions and Functional Repositories
This tutorial will guide you on how you can install and use ProFTPD Server on CentOS/RHEL 8/7 Linux distributions for a simple file transfer from your local system accounts to remote systems.
Step 1: Install Proftpd Server
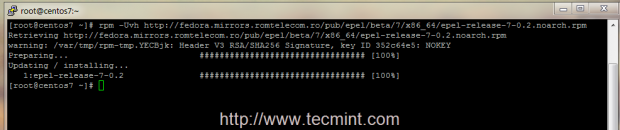
1. Official RHEL/CentOS 8/7 repositories doesn’t provide any binary package for ProFTPD Server, so you need to add extra package repositories on your system provided by EPEL Repo, using the following command.
# yum install epel-release
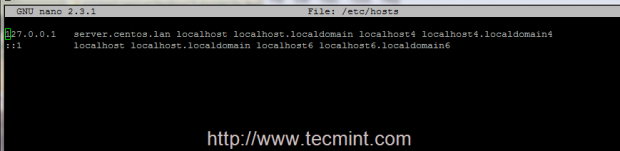
2. Before you start installing ProFTPD Server, edit your machine hosts file, change it accordingly to your system FQDN and test the configurations to reflect your system domain naming.
# nano /etc/hosts
Here add your system FQDN on 127.0.0.1 localhost line like in the following example.
127.0.0.1 server.centos.lan localhost localhost.localdomain
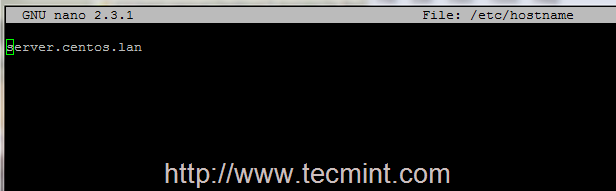
Then edit /etc/hostname file to match the same system FQDN entry like in the screenshots below.
# nano /etc/hostname
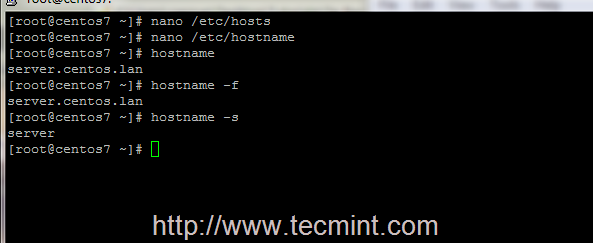
3. After you have edited the host files, test your local DNS resolution using the following commands.
# hostname
# hostname -f    	## For FQDN
# hostname -s    	## For short name
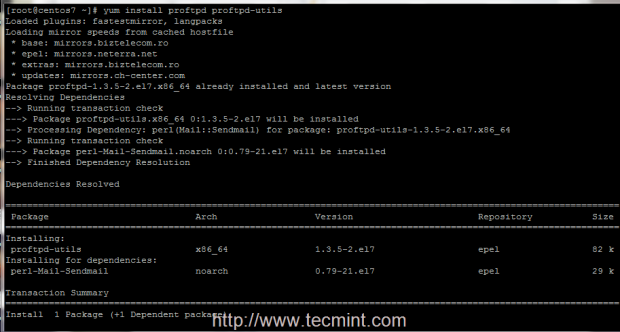
4. Now it’s time to install ProFTPD Server on your system and some required ftp utilities that we will be using later by issuing following command.
# yum install proftpd proftpd-utils
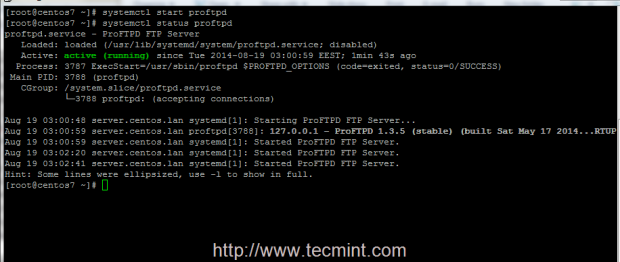
5. After the server is installed, start and manage Proftpd daemon by issuing the following commands.
# systemctl start proftpd
# systemctl status proftpd
# systemctl stop proftpd
# systemctl restart proftpd
Step 2: Add Firewall Rules and Access Files
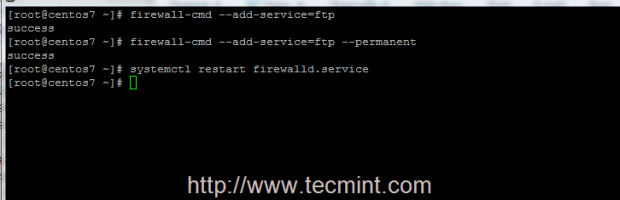
6. Now, your ProDTPD Server runs and listen for connections, but it’s not available for outside connections due to Firewall policy. To enable outside connections make sure you add a rule which opens port 21, using firewall-cmd system utility.
# firewall-cmd –add-service=ftp   ## On fly rule
# firewall-cmd –add-service=ftp   --permanent   ## Permanent rule
# systemctl restart firewalld.service
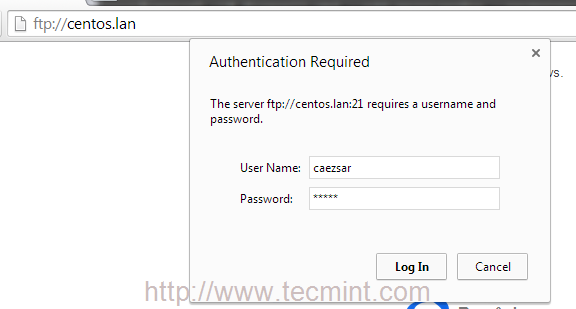
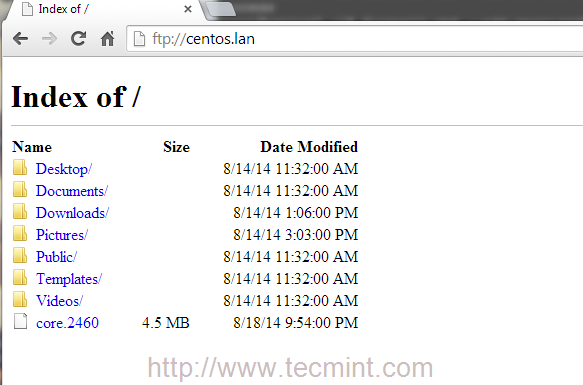
7. The most simple way to access your FTP server from remote machines is by using a browser, redirecting to your server IP Address or domain name using ftp protocol on URL.
ftp://domain.tld

OR

ftp://ipaddress
8. The default configuration on Proftpd Server uses valid system local accounts credentials to login and access your account files which is your $HOME system path account, defined in /etc/passwd file.
9. To make ProFTPD Server automatically run after system reboot, aka enable it system-wide, issue the following command.
# systemctl enable proftpd
That’s it! Now you can access and manage your account files and folders using FTP protocol using whether a browser or other more advanced programs, such as FileZilla, which is available on almost any platforms, or WinSCP, an excellent File Transfer program that runs on Windows based systems.
Suggested Read: How to Install, Configure and Secure FTP Server in CentOS 7
On the next series of tutorials concerning ProFTPD Server on RHEL/CentOS 8/7, I shall discuss more advanced features like enabling Anonymous account, use TLS encrypted file transfers and adding Virtual Users.


I want to change the FTP port number from 22 to 2216
@Ramkrish,
Check this article to change FTP Port – https://www.tecmint.com/change-ftp-port-in-linux/
Hi,
I wanted to add configuration settings that proftpd authenticates using openLDAP and creates a chroot directory for each user, can any one direct me in this regards. You help would be much appreciated.
Thanks,
Sai
How to give ftp users access to /var/www?
Thanks
Create user with home directory in /var/www system path by issuing the below command:
Or setup /var/www for already existing users with the same home as above with:
Thanks you, after some edits I now have a working proftpd server with TLS support.
Hi,
after rebooting I have:
proftpd.service never wrote its PID file. Failing.
It seems that the dir /var/run/proftpd is destroyed at rebooting!
Ho can I solve this?
Hi Matei,
Thanks for such a short and easy tutorial on installation of ProFTPd. I like it and try it out on my CentOS7 for sure.
However, I suggest two minor editing points in the tutorial writeup:
1. In Point 3, I think there is a misplaced space character between ‘-‘ and ‘s’ in a command-
# hostname – s ## For short name
Please remove this space character, if it is not intended.
2. In Point 6, the parameter in the last command has different names as in code block and screenshot.
Please make the command consistent across the two illustrations.
Again thanks for keeping Linux community encouraged and engaged.
Thanks Rishi, for pointing our erros, fixed in writeup..
@satish: It’s not sftp that I will use for secure transactions, its Proftpd with TLS (ftpes) for secure transactions.
Hi Team,
Let us now how you execute, both ftp and sftp on same server i.e same proftpd.cof?
Regards
Hi,
I would like to make two remarks:
– with RHEL 7/CentOS 7, there is a new command called “hostnamectl” to rename a host: hostnamectl set-hostname myhostname
– use “firewall-cmd –reload” instead of “systemctl restart firewalld”, you will avoid stopping all your current connections which is one of the advantages of the new firewalld component.
Regards.