Seafile is an open source, cross-platform high-performance file syncing and sharing and cloud storage system with privacy protection and teamwork features. It runs on Linux, Windows and Mac OSX.
It allows users to create groups and easily share files into groups. It supports Markdown WYSIWYG editing, Wiki, file label and other knowledge management features.
Under Seafile, files are organized into collections known as “libraries” and each library can be synced separately. You can upload a single file or a folder into a library. Importantly, to ensure security, a library can also be encrypted with a user-chosen password when creating it.
In this article, we will describe instructions on how to install the latest version of Seafile – File Hosting and Sharing Software on CentOS 7 distribution.
Requirements:
- A CentOS 7 Minimal installation only.
- At least 2GB of RAM
- Root user access or use sudo command.
Installing Seafile Community Edition on CentOS 7
The easiest way to install Seafiles is using the auto-installer script, which will install the latest version of Seafile Community Edition along with MariaDB, Memcached and NGINX HTTP server.
Important: This installer is intended to run on a fresh CentOS 7 minimal installation only. Do not run it on a production server, otherwise, you’ll lose valuable data!
Download the Seafile Community Edition installer script using the following wget command and install it as shown.
# cd /root
# wget --no-check-certificate https://raw.githubusercontent.com/haiwen/seafile-server-installer/master/seafile_centos
# bash seafile_centos 6.1.2
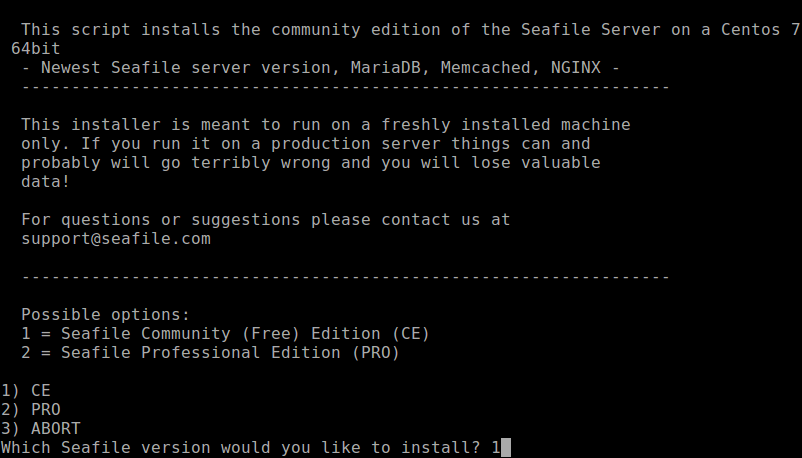
After running the script, select option 1 to install Community Edition (CE) and then wait for the installation to finish.
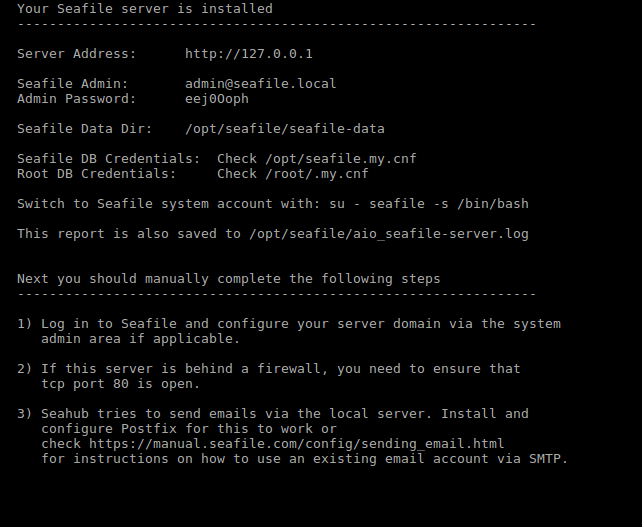
Once the installation process is complete, you will see the message in the screenshot. Read through it to proceed.
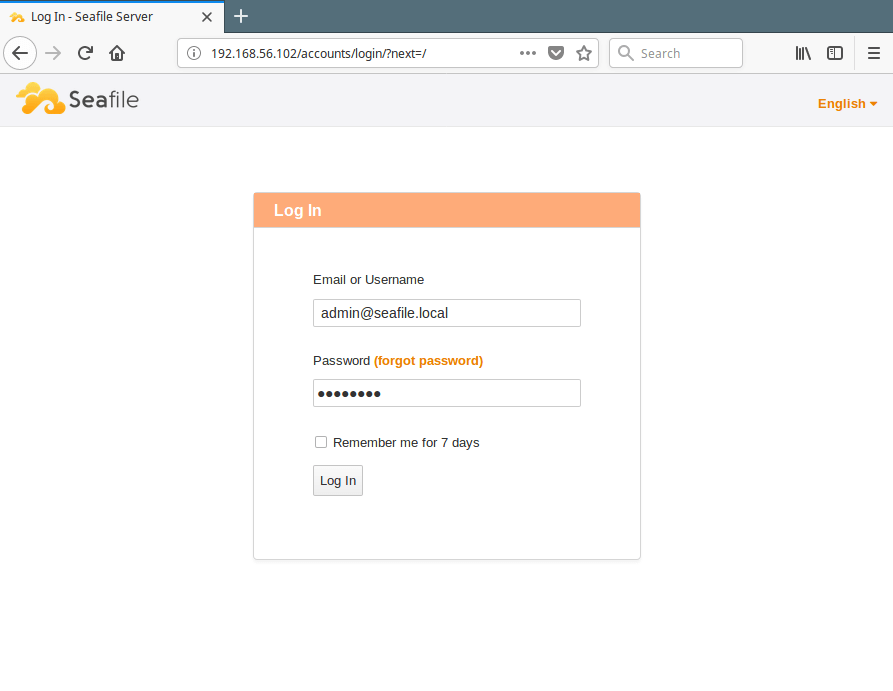
To access the Seafile web admin dashboard, open a web browser and type in your server IP address to navigate: http://SERVER_IP. You will land in the login page as shown in the following screenshot.
Enter the Admin username and password.
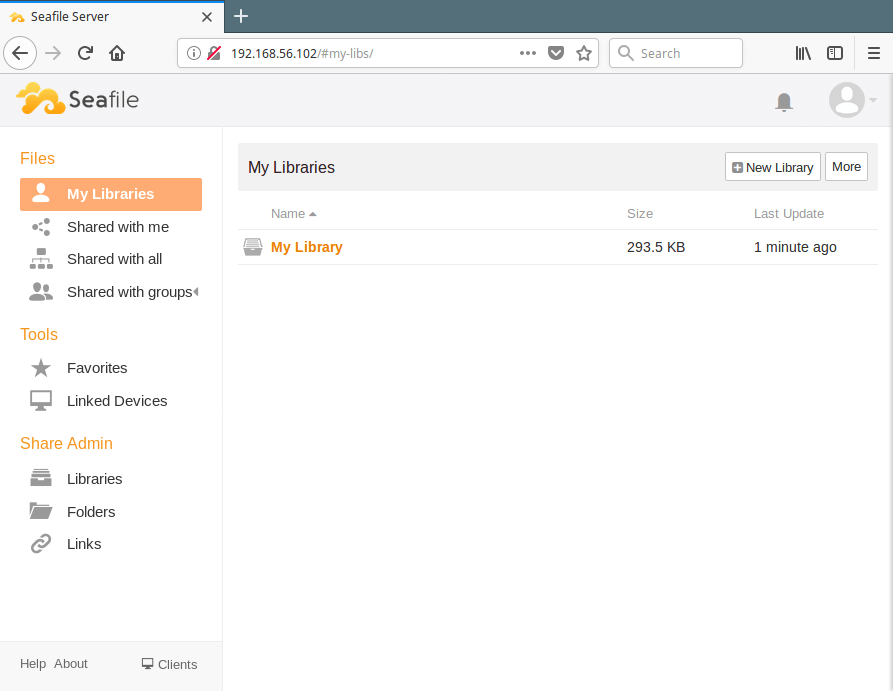
After login, you will encounter the dialog box showed in the following screenshot. Click close to go to the My Lib page.
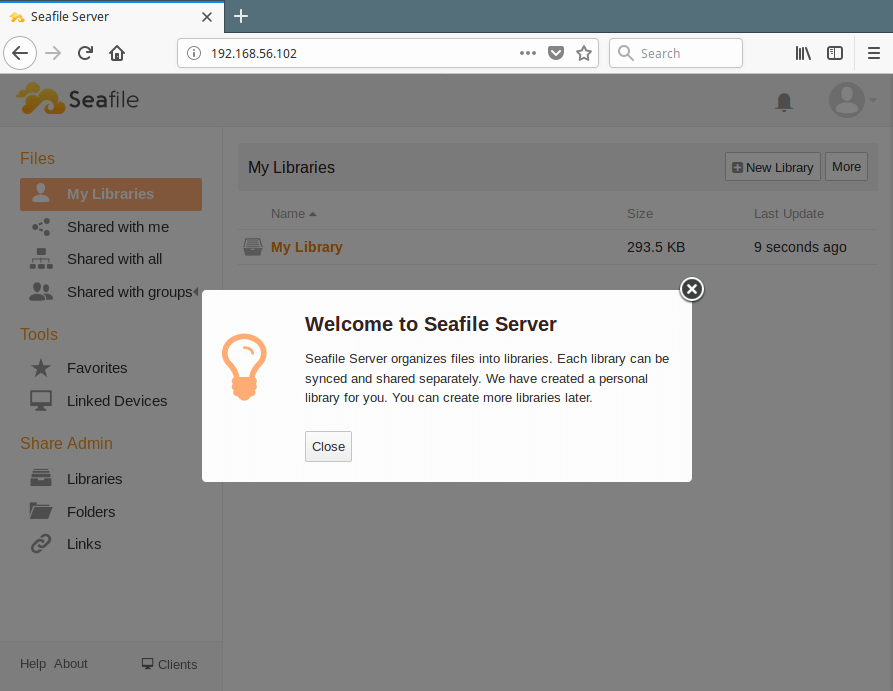
At the My Lib page, you can create a new library, enter into it, upload your files and share them. You can share with all users or share with a specific group.
Seafile is an open source high performance cloud storage system with privacy protection and teamwork features. In this guide, we showed how to install Seafile in CentOS 7.
To ask questions or share your thoughts with us, use the comment form below.


What’s “
http://SERVER_IP” means?I got 127.0.0.1 for server IP but you use 192.168.xxx to access seafile website
@Rizal
SERVER_IP means the IP address the server is listening on for connections. You can use 127.0.0.1 which is the loopback interface IP or a LAN IP such as 192.168.10.20.
Oh, I see, but when I follow this tutor I still can’t access the seafile website through the 127.0.0.1. What’s the problem?
I’m installing CentOS through virtual machine & access the server IP through my main OS (Windows 10).
Sorry, I’m a newbie for this.
The browser always say the site can’t be reached.
@Rizal
Read this guide on how to enable networking between VMs and the host in VirtualBox: https://www.tecmint.com/network-between-guest-vm-and-host-virtualbox/
@Rizal
I see it, it’s an issue of networking since you are running Seafile in a VM. Which virtualization software are you using?
I’m using Virtual Box