WordPress is an immensely popular CMS (Content Management System) that accounts for nearly 43% of all the websites according to W3techs.com.
From powering high-traffic sites such as eCommerce, and news websites to simple blogs, WordPress has remained on top of the perch among its competitors such as Joomla, Shopify, and Wix.
WordPress is open source, and free to use. It provides tons of customizations to help you build anything you want. It allows you to build high-performance, SEO-friendly sites which are mobile responsive and easy to customize.
In this guide, we will demonstrate how to install WordPress on RHEL 8 with an Apache webserver.
Prerequisites:
Before getting started, ensure that Apache, MariaDB, and PHP are installed on RHEL 8, which collectively comprise the LAMP stack.
The latest version of WordPress requires PHP 7.4 or higher. The default AppStream repository only provides PHP 7.2 which is insecure and no longer supported. You can install the latest PHP version using the Remi repository instead. With the requirements out of the way, let us get started!
Step 1: Creating a WordPress Database
We will begin by creating the database for the WordPress installation, which is used to store all the files during and after the installation.
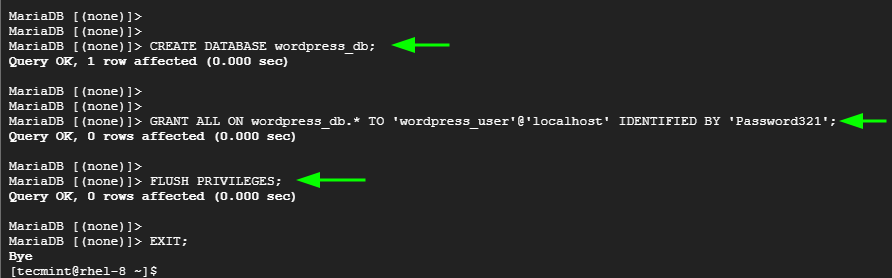
So, log in to the MariaDB database:
$ sudo mysql -u root -p
Once on the MariaDB shell, create the database and database user and grant all the privileges to the database user.
CREATE DATABASE wordpress_db;
GRANT ALL ON wordpress_db.* TO 'wordpress_user'@'localhost' IDENTIFIED BY 'StrongPassword';
Save the changes and exit the MariaDB prompt.
FLUSH PRIVILEGES;
exit;
Step 2: Download and Install WordPress in RHEL
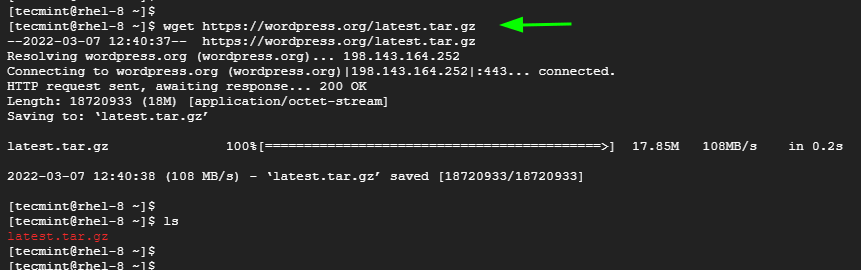
With the WordPress database in place, the next course of action is to download and configure WordPress. At the time of publishing this guide, the latest WordPress version is 5.9.1.
To download WordPress, use the wget command to download the binary file from the official site.
$ wget https://wordpress.org/latest.tar.gz
Next, extract the tarball file:
$ tar -xvf latest.tar.gz
Next, we are going to copy the wp-config-sample.php file to wp-config.php from where WordPress derives its base configuration. To do that run.
$ cp wordpress/wp-config-sample.php wordpress/wp-config.php
Next, edit the wp-config.php file.
$ vi wordpress/wp-config.php
Modify the values to correspond to your database name, database user, and password as indicated in the image shown.
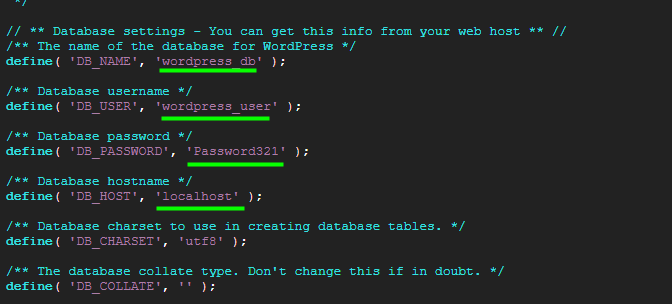
Save the changes and exit the configuration file.
Next, copy the WordPress directory to the document root.
$ sudo cp -R wordpress /var/www/html/
Be sure the assign the necessary directory ownership and permissions as follows:
$ sudo chown -R apache:apache /var/www/html/wordpress
$ sudo chcon -t httpd_sys_rw_content_t /var/www/html/wordpress -R
$ sudo chmod -Rf 775  /var/www/html
Step 3: Create Apache WordPress VirtualHost File
We also need to create a configuration file for WordPress in order to point client requests to the WordPress directory. We will create the configuration file as shown
$ sudo vi /etc/httpd/conf.d/wordpress.conf
Copy and paste the lines below to the configuration file.
<VirtualHost *:80>
ServerAdmin admin@localhost
DocumentRoot /var/www/html/wordpress

<Directory "/var/www/html/wordpress">
Options Indexes FollowSymLinks
AllowOverride all
Require all granted
</Directory>

ErrorLog /var/log/httpd/wordpress_error.log
CustomLog /var/log/httpd/wordpress_access.log common
</VirtualHost>
Save and exit the configuration file.
To apply the changes, restart Apache.
$ sudo systemctl restart httpd
Step 4: Configure SELinux for WordPress
In most cases, RHEL 8 comes with SELinux enabled. This can be a hindrance, especially during the installation of web applications. As such, we need to configure the right SELinux context to the /var/www/html/wordpress directory.
$ sudo semanage fcontext -a -t httpd_sys_rw_content_t "/var/www/html/wordpress(/.*)?"
For the changes to come into effect, execute:
$ sudo restorecon -Rv /var/www/html/wordpress
Then reboot your system.
NOTE: Before you reboot, ensure that Apache and MariaDB services are enabled so that they can start automatically on boot.
$ sudo systemctl enable httpd
$ sudo systemctl enable mariadb
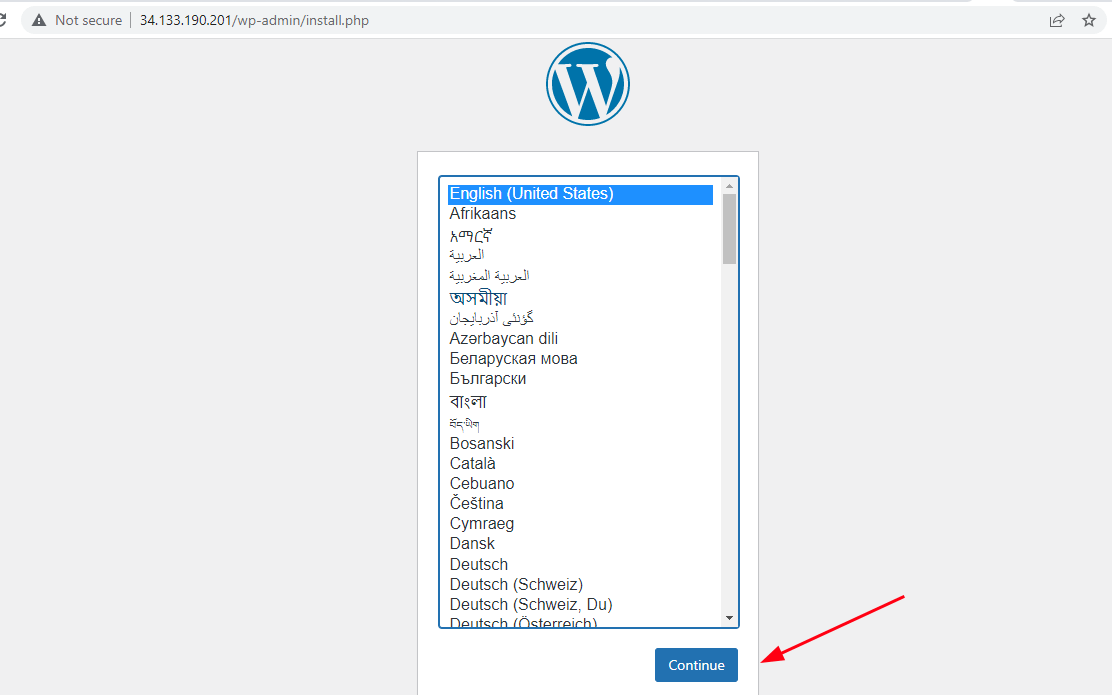
Step 5: Finalize WordPress Installation
The last step is to complete the installation from a web browser. Launch your browser and browse your server’s IP address:
http://server-IP-address
On the first page, select your preferred installation language and click ‘Continue’.
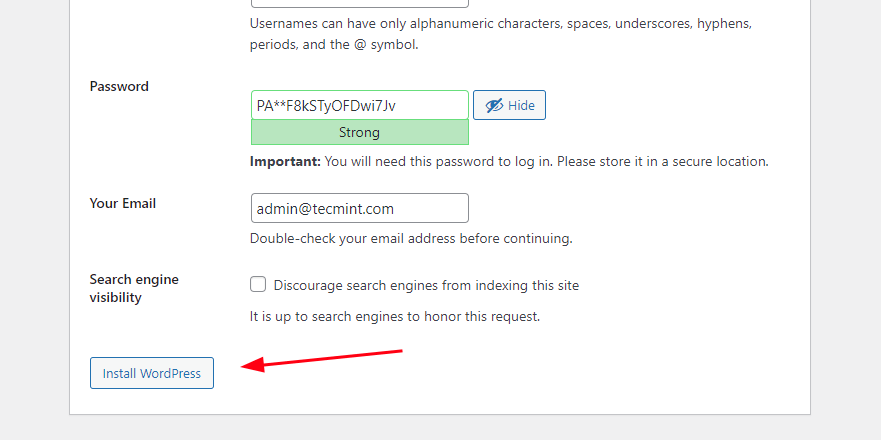
In the next step, fill in your Site’s details.

Then scroll down and click ‘Install WordPress’.
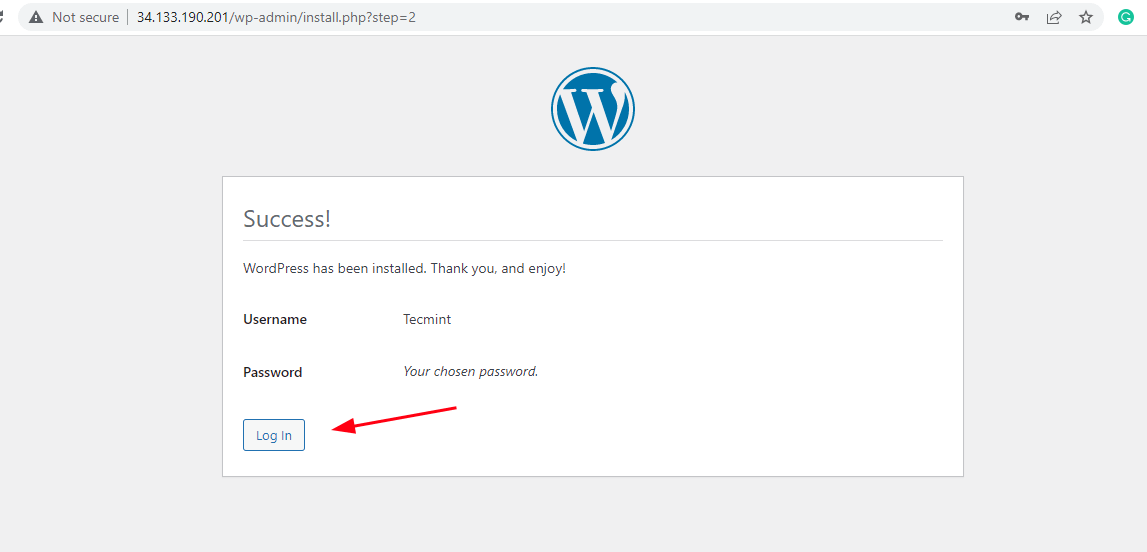
And in flash, WordPress installation will be complete! To log in, click the ‘Login’ button.
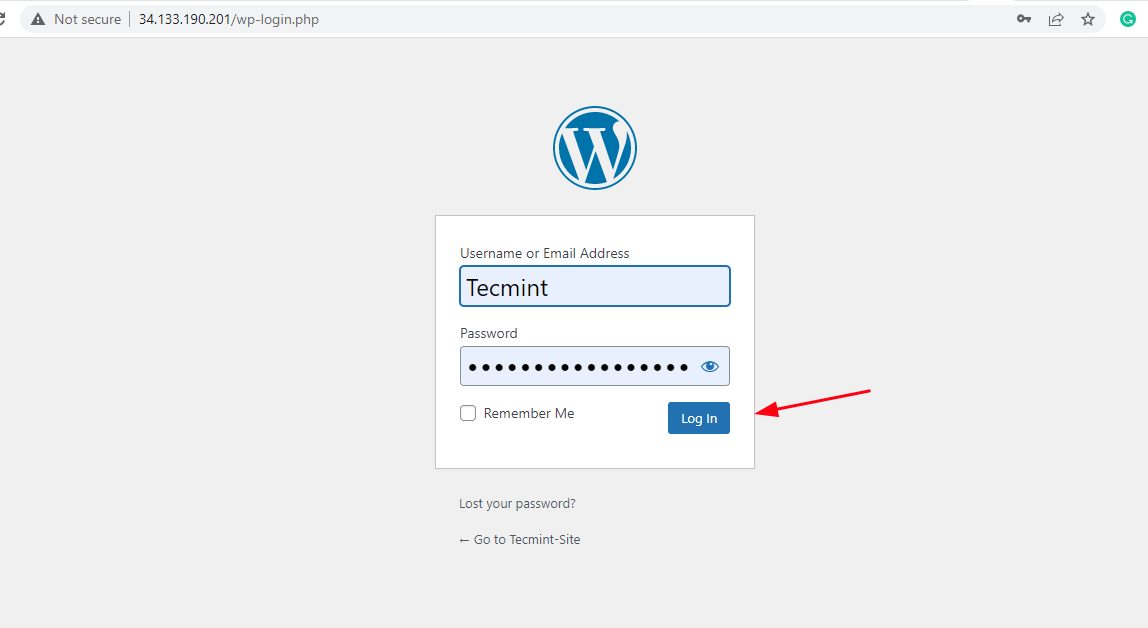
On the login screen, provide the username and password and click ‘Log In‘.
This ushers you to the WordPress dashboard as shown. From here, you can customize your website with rich and elegant themes and plugins.
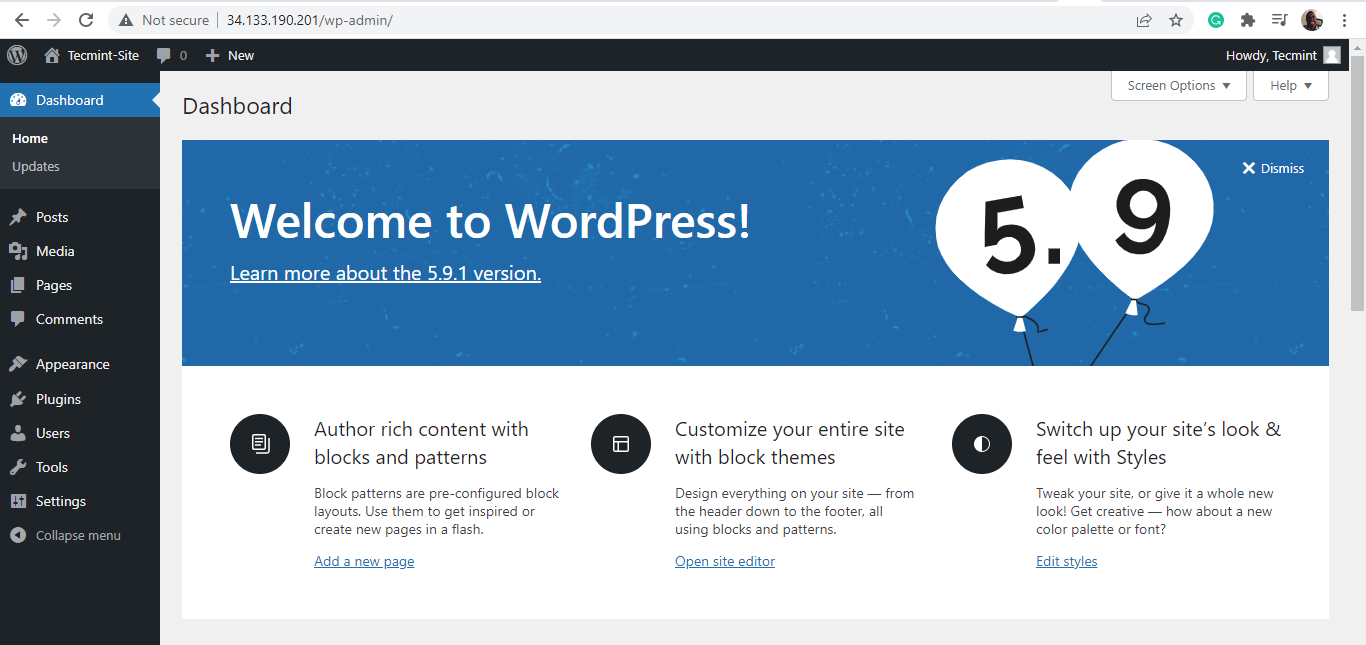
And that’s it! You have successfully installed WordPress on RHEL 8.


Thanks for some helpful info, but overall this goes off the rails really fast. The entire purpose of the new AppStream system introduced in RHEL 8 is that you can easily get a newer branch of PHP and many other things without being forced into 3rd party repos.
This is of critical importance for any other guides that ever deal with RHEL 8 and up because you need to use the AppStream system to maintain any remotely secure and supportable setup.
No one was completely happy with the old model of a specific version branch being forever tied to the RHEL version, but the trade-off that is now a reality is that almost every version branch that was supported at the beginning of the RHEL 8 cycle will be obsoleted before the end of the RHEL 8 cycle. Upgrading between major branches within the same official RHEL repos is now quick and easy.
Fantastic writeup, thank you so much for sharing. This article saved me a LOT of time!
Suggestion: some of these commands were unfamiliar to me as they may be to others. So you might consider using the double-dash like this:
I see where the “restorecon” and the “setsebool” don’t have double-dash switches.
Some other site was using `ls -lZ` instead of using `ls -l –context` — I wonder if you should show `ls –context /var/www/html/wordpress; before and after you do the `chcon` command? it might be useful to those like me who have never even seen these commands before.
Thanks again for sharing.
Thanks, James Kiarie, I installed wordpress in my Centos 8 Stream with MariaDB successfully.
the path should be:
will be