Yii (pronounced Yee or [ji:]) is a free and open-source, fast, high performance, secure, flexible yet pragmatic, and efficient generic web programming framework for developing all kinds of web applications using PHP.
In this article, you will learn how to install the latest version of the Yii framework in Ubuntu LTS (long-term support) releases to start developing modern PHP Web applications.
Platform Support
Yii holds the following Ubuntu LTS (long-term support) releases:
- Ubuntu 20.04 LTS (“Focal”)
- Ubuntu 18.04 LTS (“Bionic”)
- Ubuntu 16.04 LTS (“Xenial”)
Requirements
- A running instance of the Ubuntu server.
- A LEMP stack with PHP 5.4.0 or above.
- A Composer – an application-level package manager for the PHP.
On this page
There are two ways to install Yii, using the Composer package manager or by installing it from an archive file. The former is the recommended way, as it enables you to install new extensions or update Yii by a single command.
Installing Yii Framework via Composer in Ubuntu
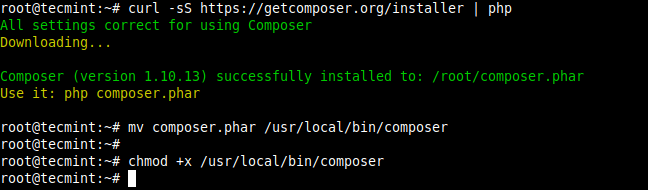
If you don’t have Composer installed, you can install it using the following commands, which will later install Yii and manage its dependencies.
$ curl -sS https://getcomposer.org/installer | php
$ sudo mv composer.phar /usr/local/bin/composer
$ sudo chmod +x /usr/local/bin/composer
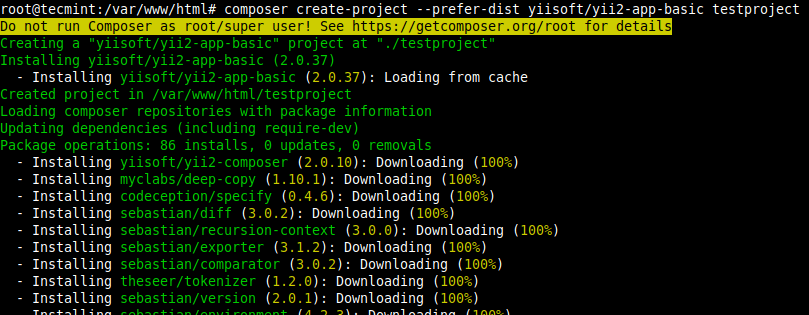
Once you have composer installed, move into the directory /var/www/html/ which will store your web applications or websites files, then install the Yii package using the composer (replace testproject with the name of your web application’s directory).
$ cd /var/www/html/
$ composer create-project --prefer-dist yiisoft/yii2-app-basic testproject
Running Yii Using PHP Development Server
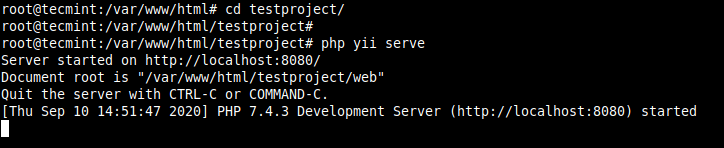
At this point, you are ready to start using the Yii framework for development. To run the PHP development server, move into the testprojects directory (your directory name should be different depending on what you specified in the previous command), then launch the development server. By default, it should run on port 8080.
$ cd /var/www/html/testproject/
$ php yii serve
To run the development server on another port, for example, port 5000, use the --port flag as shown.
$ php yii serve --port=5000

Then open your web browser and navigate using the following address:
http://SERVER_IP:8080
OR
http://SERVER_IP:5000
Running Yii Project in Production Using an NGINX HTTP Server
To deploy and access a Yii application in production, requires an HTTP server such as NGINX, Apache/HTTPD, or any other supported Web server software.
To access the Yii application without typing your port, you need to create the required DNS A record to point your domain to your Yii framework application server.
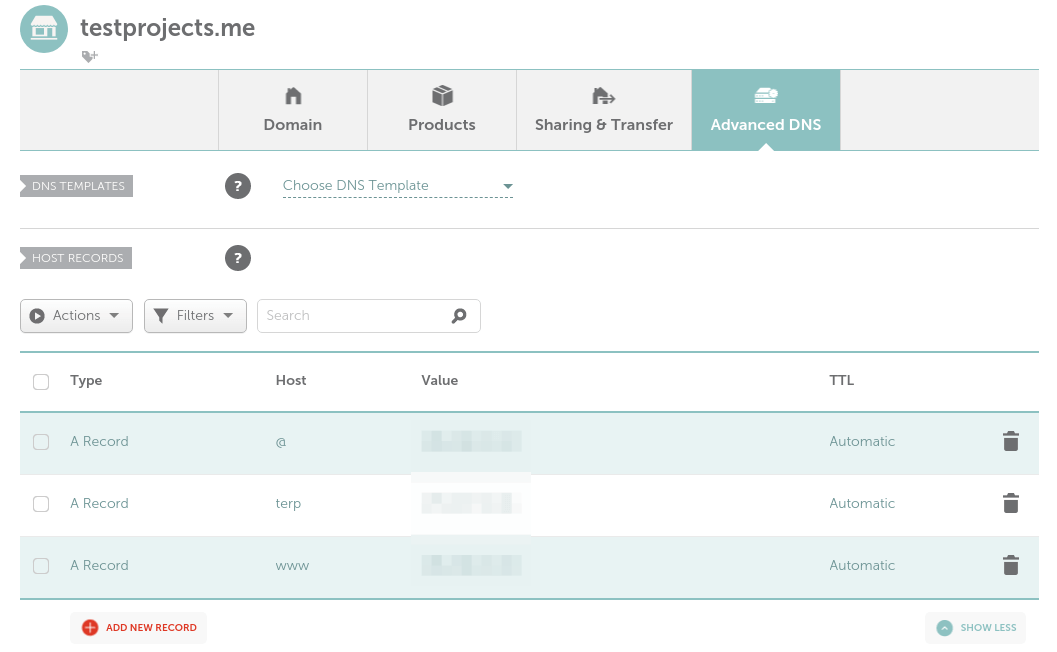
For this guide, we will show how to deploy a Yii application with NGINX. So, you need to create a virtual host or server block configuration file under the /etc/nginx/sites-available/ directory for your application so that NGINX can serve it.
$ sudo vim /etc/nginx/sites-available/testproject.me.conf
Copy and paste the following configuration in it (replace testprojects.me and www.testprojects.me with your domain name). Also specify the means NGINX will pass FastCGI requests to PHP-FPM, in this example, we are using a UNIX socket (/run/php/php7.4-fpm.sock):
server {
    set $host_path "/var/www/html/testproject";
    #access_log  /www/testproject/log/access.log  main;

    server_name  testprojects.me www.testprojects.me;
    root   $host_path/web;
    set $yii_bootstrap "index.php";

    charset utf-8;

    location / {
        index  index.html $yii_bootstrap;
        try_files $uri $uri/ /$yii_bootstrap?$args;
    }

    location ~ ^/(protected|framework|themes/\w+/views) {
        deny  all;
    }

    #avoid processing of calls to unexisting static files by yii
    location ~ \.(js|css|png|jpg|gif|swf|ico|pdf|mov|fla|zip|rar)$ {
        try_files $uri =404;
    }

    # pass the PHP scripts to FastCGI server listening on UNIX socket
    location ~ \.php {
        fastcgi_split_path_info  ^(.+\.php)(.*)$;

        #let yii catch the calls to unexising PHP files
        set $fsn /$yii_bootstrap;
        if (-f $document_root$fastcgi_script_name){
            set $fsn $fastcgi_script_name;
        }
       fastcgi_pass   unix:/run/php/php7.4-fpm.sock;
        include fastcgi_params;
        fastcgi_param  SCRIPT_FILENAME  $document_root$fsn;

       #PATH_INFO and PATH_TRANSLATED can be omitted, but RFC 3875 specifies them for CGI
        fastcgi_param  PATH_INFO        $fastcgi_path_info;
        fastcgi_param  PATH_TRANSLATED  $document_root$fsn;
    }

    # prevent nginx from serving dotfiles (.htaccess, .svn, .git, etc.)
    location ~ /\. {
        deny all;
        access_log off;
        log_not_found off;
    }
}
Save the file and close it.
Then check the NGINX configuration syntax for correctness, if it is Ok, enable the new application as shown:
$ sudo nginx -t
$ sudo ln -s /etc/nginx/sites-available/testprojects.me.conf /etc/nginx/sites-enabled/testprojects.me.conf
Then restart the NGINX service to apply the new changes:
$ sudo systemctl restart nginx
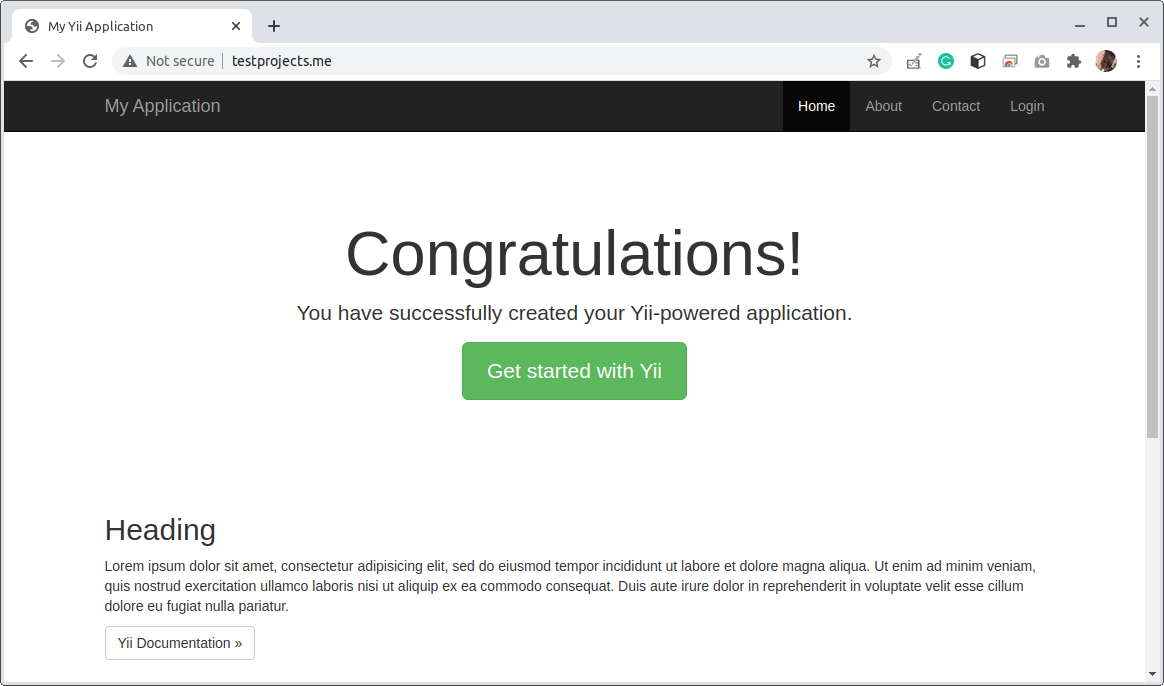
Go back to your web browser and navigate with your domain name.
http://testprojects.me
OR
http://www.testprojects.me
Enable HTTPS on Yii Applications Using Let’s Encrypt
Lastly, you need to enable HTTPS on your website. You can either use a free Let’s Encrypt SSL/TLS certificate (which is automated and recognized by all modern web browsers) or acquire a certificate from a commercial CA.
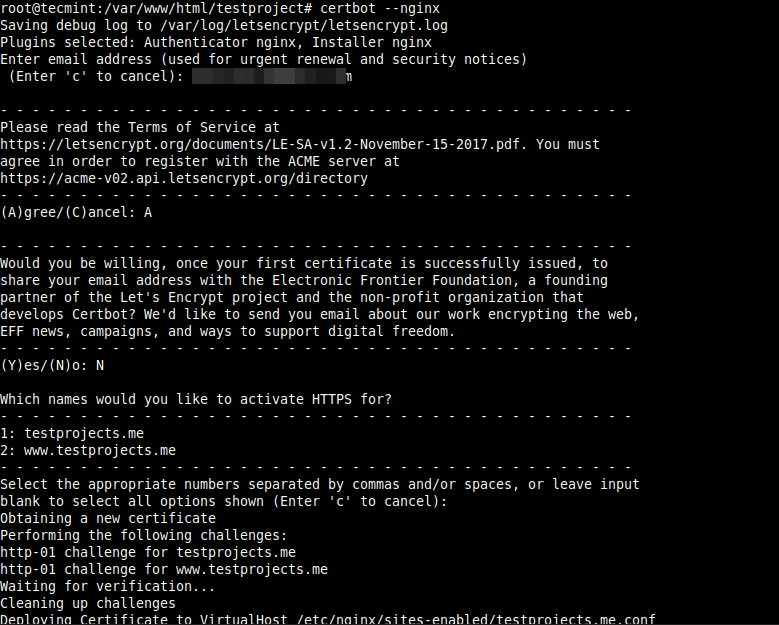
If you decide to use a Let’s Encrypt certificate, it can be automatically installed and configured using the certbot tool. To install certbot, you need to install snapd to install it.
$ sudo snap install --classic certbot
Then use certbot to obtain and install/configure your free SSL/TLS certificate for use with NGINX web server (provide a valid email for renewal and follow the prompts to complete the installation):
$ sudo certbot --nginx
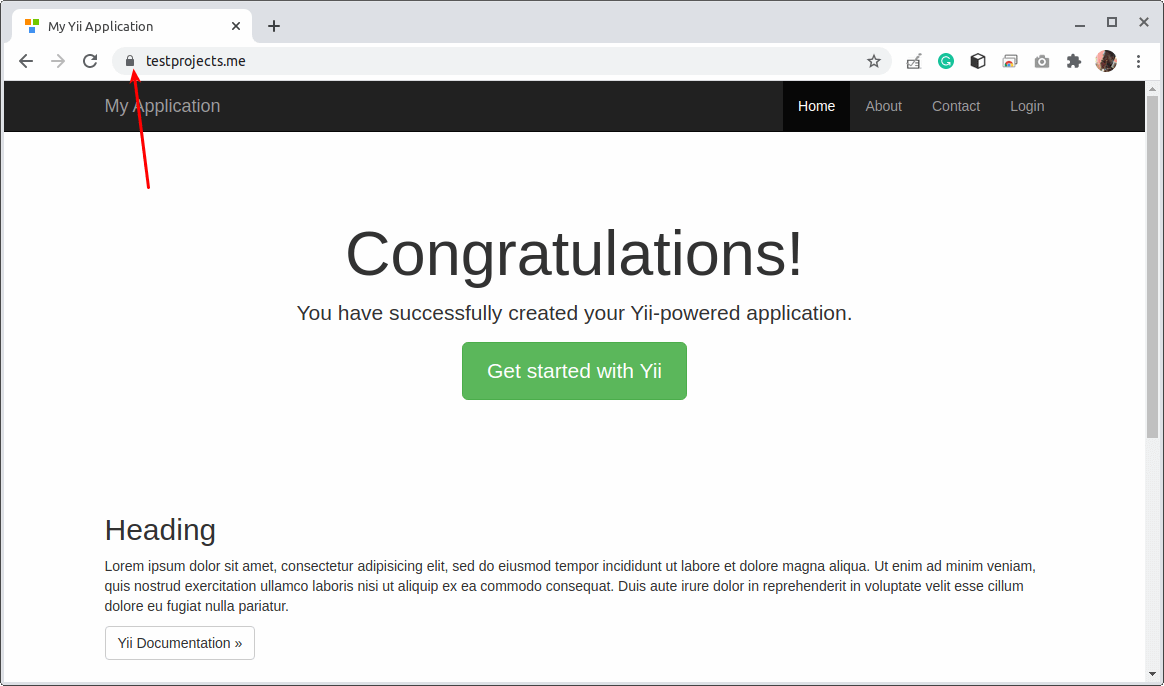
Now go to your web browser once more time to confirm that your Yii application is now running on HTTPS (remember HTTP should automatically redirect to HTTPS).
http://testprojects.me
OR
http://www.testprojects.me
For more information such as connecting your application to a database, see the Yii framework documentation from the official Yii project website. Give it a try and share your thoughts about Yii or ask any questions via the feedback form below.


I use Codelobster IDE for all my Yii projects – http://www.codelobster.com/yii.html.