In the Unix/Linux directory structure, the /etc directory is where host-specific system-wide configuration files and directories are located; it is a central location for all system-wide configuration files. A configuration file is a local file used to control how a program works – it must be static and cannot be an executable binary.
To keep track of changes to system configuration files, system administrators normally make copies (or backups) of configuration files before modifying them. That way if they directly modified the original file and made a mistake, they can revert to the saved copy.
Etckeeper is a simple, easy-to-use, modular and configurable collection of tools to let /etc be managed using version control. It enables you to store changes in the /etc directory in a version control system (VCS) such as git (which is the preferred VCS), mercurial, bazaar or darcs repository. Thus allowing you to use git to review or revert changes that were made to /etc, in case of a mistake.
Its other features are:
- it supports integration with front-end package managers including APT, YUM, DNF, Zypper and pacman-g2 to auto commit changes made to
/etcduring package upgrades. - it tracks file metadata (such as the file permissions) that git does not usually support, but that is important for
/etc, and - it includes both a cron job and a systemd timer, which each can commit exiting changes to
/etcautomatically once per day.
How to Install Etckeeper in Linux
Etckeeper is available in Debian, Ubuntu, Fedora, and other Linux distributions. To install it, use your default package manager as shown. Note that this command will also install git and a few other packages as dependencies.
$ sudo apt-get install etckeeper	#Ubuntu and Debian
# apt-get install etckeeper		#Debian as root user
# dnf install etckeeper			#Fedora 22+
$ sudo zypper install etckeeper	        #OpenSUSE 15
On Enterprise Linux distributions such as RedHat Enterprise Linux (RHEL), CentOS and others, you need to add the EPEL repository before installing it as shown.
# yum install epel-release
# yum install etckeeper
Configuring Etckeeper in Linux
Once you have installed etckeeper as shown above, you need to configure how it will operate and its main configuration file is /etc/etckeeper/etckeeper.conf. To open it for editing, use any of your favorite text-based editors as shown.
# vim /etc/etckeeper/etckeeper.conf
OR
$ sudo nano /etc/etckeeper/etckeeper.conf
The file contains several configuration options (each with a small, clear usage description) that allow you to set the version control system (VCS) to use, pass options to VSC; to enable or disable timer, enable or disable special file warning, enable or disable etckeeper from committing existing changes to /etc before installation.
Also, you can set the front-end or higher-level package manager (such as apt, yum, dnf etc.) and underlying or low-level package manager (dpkg, rpm etc.) to work with etckeeper.
If you have made any change(s) in the file, save it and close the file.
Initializing the Git Repository and Perform Initial Commit
Now that you have configured etckeeper, you need to initialize the Git repository to start tracking any changes in your /etc directory as follows. You can only run etckeeper with root permissions, otherwise use sudo.
$ cd
$ sudo etckeeper init

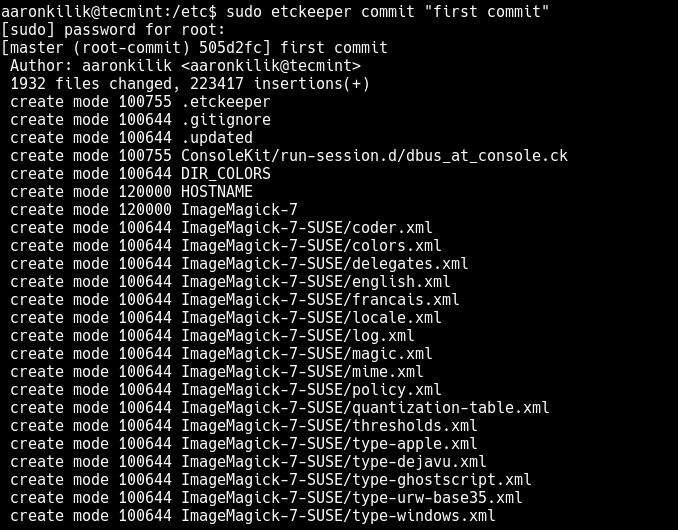
Next, step for etckeeper to be able to work automatically, you need to run the first commit to start keeping track of the changes in /etc, as follows.
$ sudo etckeeper commit "first commit"
Making Changes and Committing
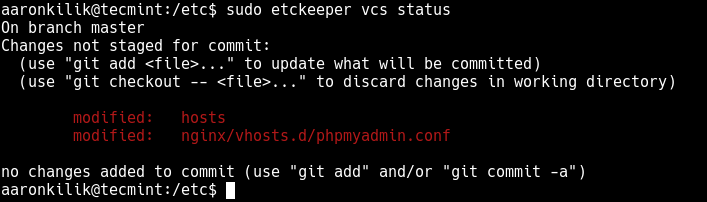
After running your first commit, etckeeper via git is now tracking any changes in the /etc directory. Now try to make any changes in any of the configuration files.
Then run the following command to show files that have changed since the last commit; this command essentially shows the changes in /etc not staged for commit, where VCS means git and “status” is a git sub-command.
$ sudo etckeeper vcs status
Then commit the recent changes as follows.
$ sudo etckeeper commit "changed hosts and phpmyadmin config files"

View Commit Logs
To view a log of all commits (each commit’s id and comment), you can run the following command.
$ sudo etckeeper vcs log
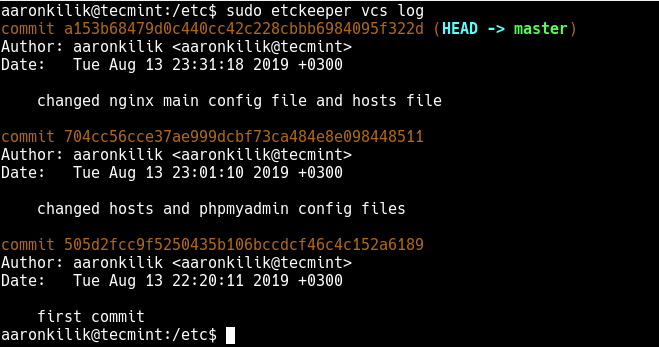
You can also show the details of a commit, simply specify the commit ID (the first few characters can work) as shown.:
$ sudo etckeeper vcs show a153b68479d0c440cc42c228cbbb6984095f322d
OR
$ sudo etckeeper vcs show a153b6847
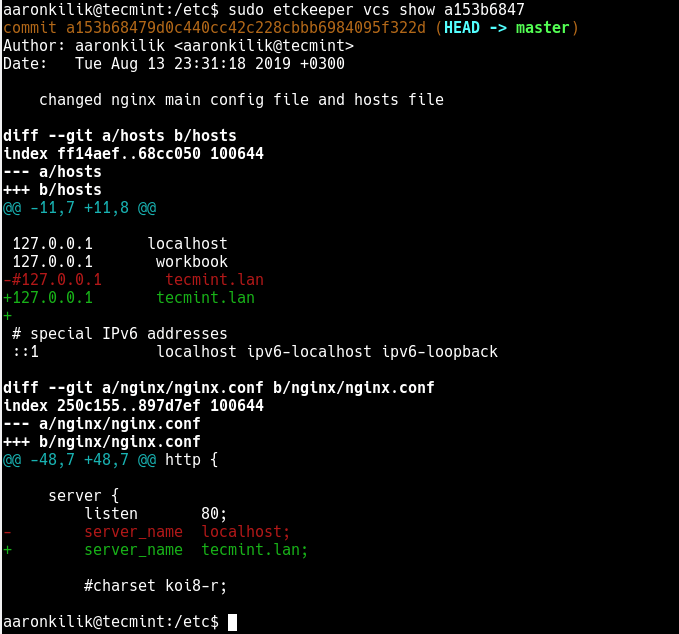
Besides, you can view the difference between two commits as shown. This is especially useful if you want to revoke changes as shown in the next section. You can use the arrow keys to scroll up and down or left and right, and quit by pressing q.
$ sudo etckeeper vcs show 704cc56 a153b6847
How to Revoke Changes
The essence of etckeeper is to help you track changes to your /etc directory and reverse the changes where necessary. Assuming you realize that you made some mistakes in the /etc/nginx/nginx.conf when you last edited it and the Nginx service can’t be restarted because of errors in the configuration structure, you can revert to the saved copy in a specific commit (e.g 704cc56) where you think the configuration was correct as follows.
$ sudo etckeeper vcs checkout 704cc56 /etc/nginx/nginx.conf
Alternatively, you can cancel all changes and revert to versions of all files under /etc (and its sub-directories) stored in a specific commit.
$ sudo etckeeper vcs checkout 704cc56
How to Enable Changes to be Committed Automatically
Etckeeper also ships with a service and timer units for Systemd, included in the package. To launch “Autocommit” of changes in the /etc directory, simply start etckeeper.timer unit for now and check if it is up and running, as follows.
$ sudo systemctl start etckeeper.timer
$ sudo systemctl status etckeeper.timer
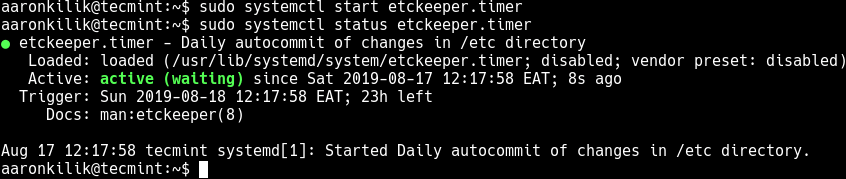
And enable it to auto-start at system boot as shown.
$ sudo systemctl enable etckeeper.timer
For more information, see the Etckeeper Project Page: https://etckeeper.branchable.com/.
Conclusion
In this guide, we have shown how to install and use etckeeper for store changes in the /etc directory in a version control system (VCS) such as git and review or revert changes that were made to /etc, where necessary. Share your thoughts or ask questions about etckeeper via the feedback form below.


Is there a simple way to remove all of just daily commits? If not, how do I start from scratch again?
@Zpg,
If you want to remove all of the daily commits from a Git repository, you can use the following command, which will remove the last 5 commits.
After removing commits, you’ll need to force push the changes to the remote repository.
It is very usefull, although i do not understand.
It show me which files changed:
Ok, thats correct, next if I do agree commit changes
changed hosts? that is the syntax, PHPMyAdmin config files? your example shows other commands: no changes added to commit (use “git add” and/or “git commit -a” )
So, which are command corrects?
Thanks in advanced
Rogelio