How to Install Your Own Cloud Platform with OpenStack in RHEL/CentOS 7

OpenStack is a free and open-source software platform which provides IAAS (infrastructure-as-a-service) for public and private clouds.

OpenStack platform consists of several inter-related projects that control hardware, storage, networking resources of a datacenter, such as: Compute, Image Service, Block Storage, Identity Service, Networking, Object Storage, Telemetry, Orchestration and Database.

The administration of those components can be managed through the web-based interface or with the help of OpenStack command line.
Install OpenStack in CentOS 7
Install OpenStack in CentOS 7 and RHEL 7

This tutorial will guide you on how you can deploy your own private cloud infrastructure with OpenStack installed on a single node in CentOS 7 or RHEL 7 or Fedora distributions by using rdo repositories, although the deployment can be achieved on multiple nodes.

Requirements

  1. Minimal Installation of CentOS 7
  2. Minimal Installation of RHEL 7

Step 1: Initial System Configurations

1. Before you begin preparing the node in order to deploy your own virtual cloud infrastructure, first login with root account and assure that the system is up to date.

2. Next, issue the ss -tulpn command to list all running services.

# ss -tulpn
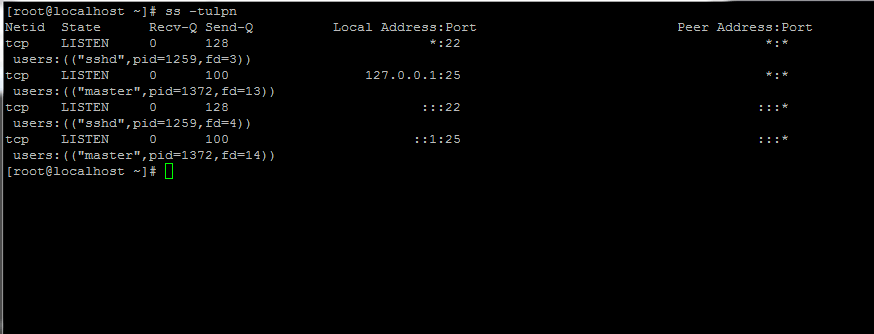
List All Running Linux Services

3. Next, identify, stop, disable and remove unneeded services, mainly postfix, NetworkManager and firewalld. At the end the only daemon that would be running on your machine should be sshd.

# systemctl stop postfix firewalld NetworkManager
# systemctl disable postfix firewalld NetworkManager
# systemctl mask NetworkManager
# yum remove postfix NetworkManager NetworkManager-libnm

4. Completely disable Selinux policy on the machine by issuing the below commands. Also edit /etc/selinux/config file and set SELINUX line from enforcing to disabled as illustrated on the below screenshot.

# setenforce 0
# getenforce
# vi /etc/selinux/config
Disable SELinux
Disable SELinux

5. On the next step using the hostnamectl command to set your Linux system hostname. Replace the FQDN variable accordingly.

# hostnamectl set-hostname cloud.centos.lan
Set Linux System Hostname

6. Finally, install ntpdate command in order to synchronize time with a NTP server on your premises near your physical proximity.

# yum install ntpdate 

Step 2: Install OpenStack in CentOS and RHEL

7. OpenStack will be deployed on your Node with the help of PackStack package provided by rdo repository (RPM Distribution of OpenStack).

In order to enable rdo repositories on RHEL 7 run the below command.

# yum install https://www.rdoproject.org/repos/rdo-release.rpm 

On CentOS 7, the Extras repository includes the RPM that actives the OpenStack repository. Extras is already enabled, so you can easily install the RPM to setup the OpenStack repository:

# yum install -y centos-release-openstack-mitaka
# yum update -y

8. Now it’s time to install PackStack package. Packstack represents a utility which facilitates the deployment on multiple nodes for different components of OpenStack via SSH connections and Puppet modules.

Install Packstat package in Linux with the following command:

# yum install  openstack-packstack

9. On the next step generate an answer file for Packstack with the default configurations which will be later edited with the required parameters in order to deploy a standalone installation of Openstack (single node).

The file will be named after the current day timestamp when generated (day, month and year).

# packstack --gen-answer-file='date +"%d.%m.%y"'.conf
# ls
Generate Packstack Answer Configuration File

10. Now edit the generated answer configuration file with a text editor.

# vi 13.04.16.conf

and replace the following parameters to match the below values. In order to be safe replace the passwords fields accordingly.

CONFIG_NTP_SERVERS=0.ro.pool.ntp.org

Please consult http://www.pool.ntp.org/en/ server list in order to use a public NTP server near your physical location.

Add NTP Server in Packstack
CONFIG_PROVISION_DEMO=n
Add Provision in Packstack
CONFIG_KEYSTONE_ADMIN_PW=your_password  for Admin user
Add Admin Account in Packstack

Access OpenStack dashboard via HTTP with SSL enabled.

CONFIG_HORIZON_SSL=y
Enable HTTPS for OpenStack

The root password for MySQL server.

CONFIG_MARIADB_PW=mypassword1234
Set MySQL Root Password in OpenStack

Setup a password for nagiosadmin user in order to access Nagios web panel.

CONFIG_NAGIOS_PW=nagios1234
Set Nagios Admin Password

11. After you finished editing save and close the file. Also, open SSH server configuration file and uncomment PermitRootLogin line by removing the front hashtag as illustrated on the below screenshot.

# vi /etc/ssh/sshd_config
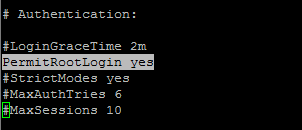
Enable SSH Root Login

Then restart SSH service to reflect changes.

# systemctl restart sshd

Step 3: Start Openstack Installation Using Packstack Answer File

12. Finally start Openstack installation process via the answer file edited above by running the below command syntax:

# packstack --answer-file 13.04.16.conf
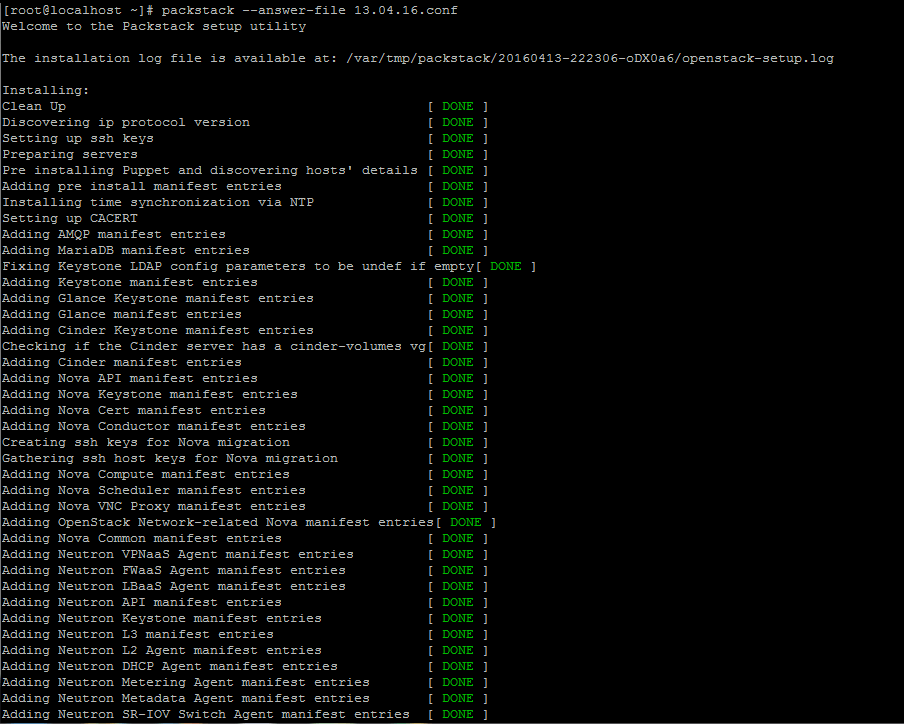
Openstack Installation in CentOS
Openstack Installation in Linux

13. Once the installation of OpenStack components is successfully completed, the installer will display a few lines with the local dashboard links for OpenStack and Nagios and the required credentials already configured above in order to login on both panels.
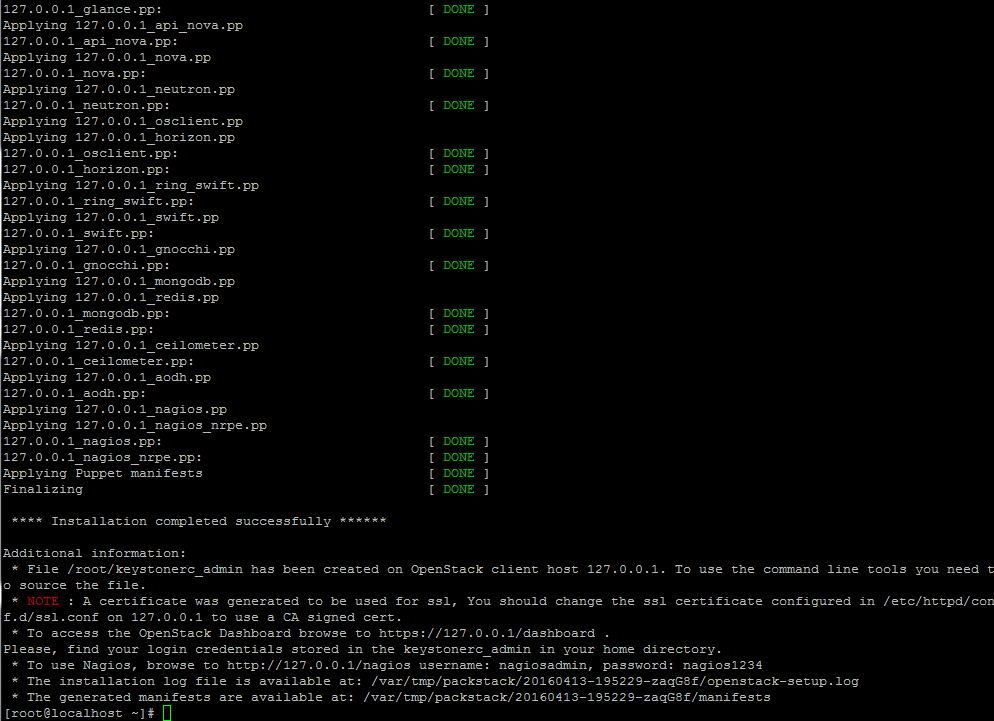
OpenStack Installation Completed

The credentials are also stored under your home directory in keystonerc_admin file.

14. If for some reasons the installation process ends with an error regarding httpd service, open /etc/httpd/conf.d/ssl.conf file and make sure you comment the following line as illustrated below.

#Listen 443 https
Disable HTTPS SSL Port

Then restart Apache daemon to apply changes.

# systemctl restart httpd.service

Note: In case you still can’t browse Openstack web panel on port 443 restart the installation process from beginning with the same command issued for the initial deployment.

# packstack --answer-file /root/13.04.16.conf

Step 4: Remotely Access OpenStack Dashboard

15. In order to access OpenStack web panel from a remote host in your LAN navigate to your machine IP Address or FQDN/dashboard via HTTPS protocol.

Due to the fact that you’re using a Self-Signed Certificate issued by an untrusted Certificate Authority an error should be displayed on your browser.

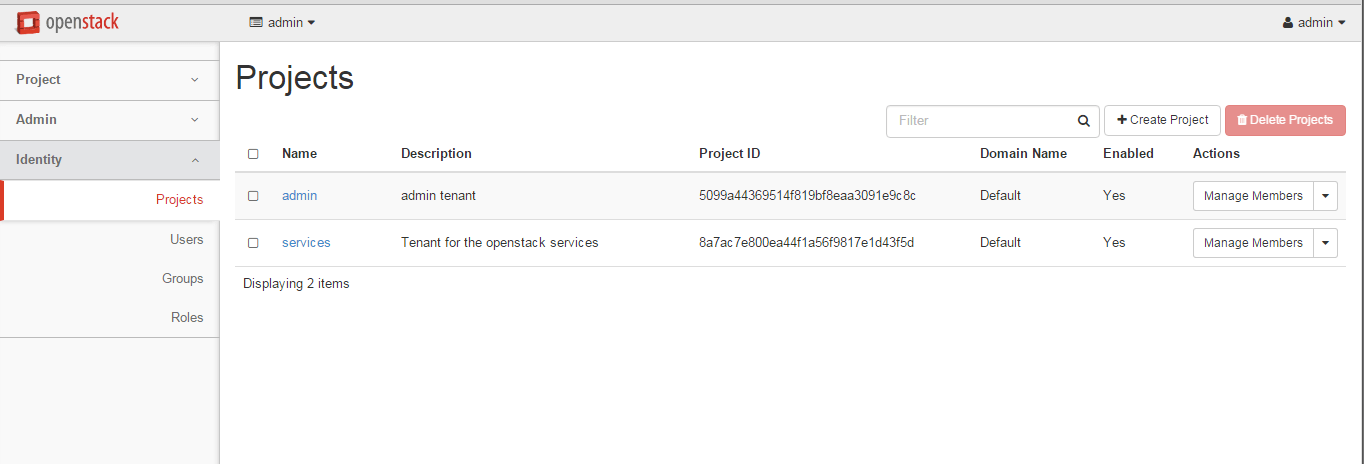
Accept the error and login to the dashboard with the user admin and the password set on CONFIG_KEYSTONE_ADMIN_PW parameter from answer file set above.

https://192.168.1.40/dashboard 
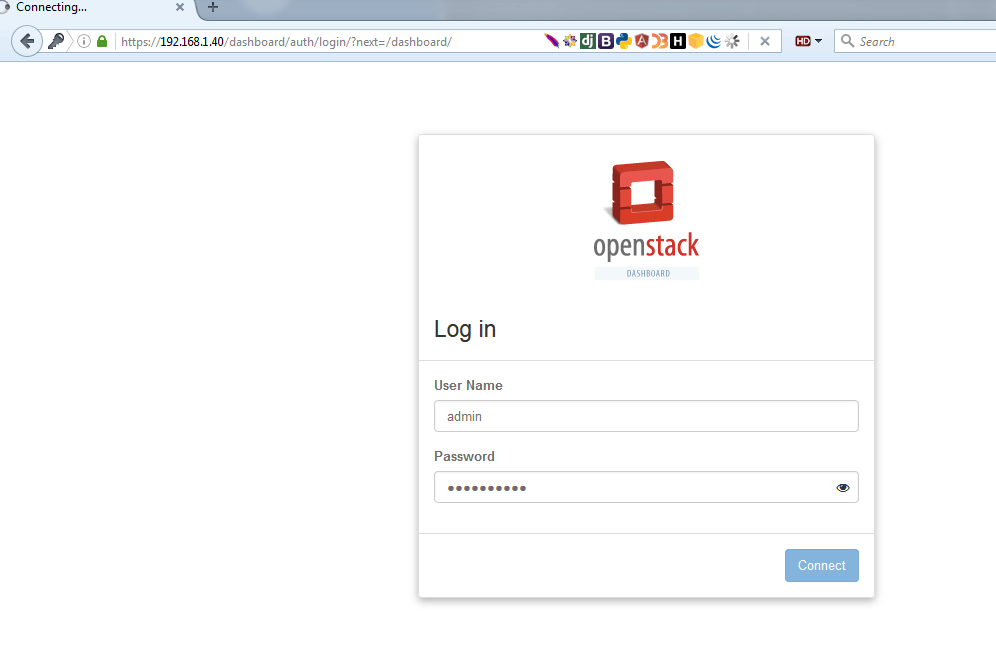
OpenStack Login Dashboard
Openstack Projects
Openstack Projects

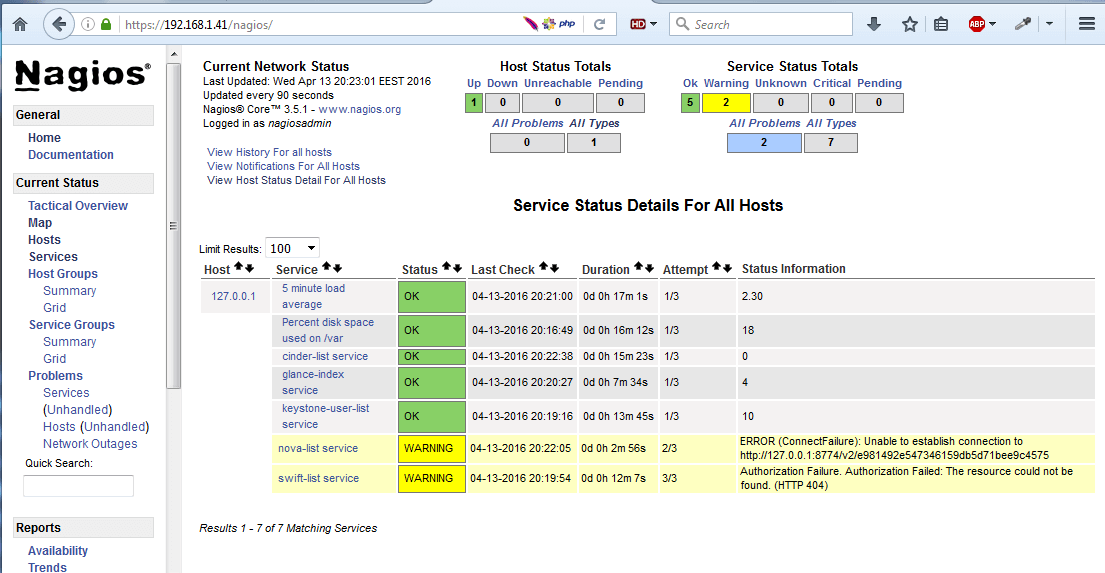
16. Alternatively, if you opted to install Nagios component for OpenStack, you can browse Nagios web panel at the following URI and login with the credentials setup in answer file.

https://192.168.1.40/nagios 
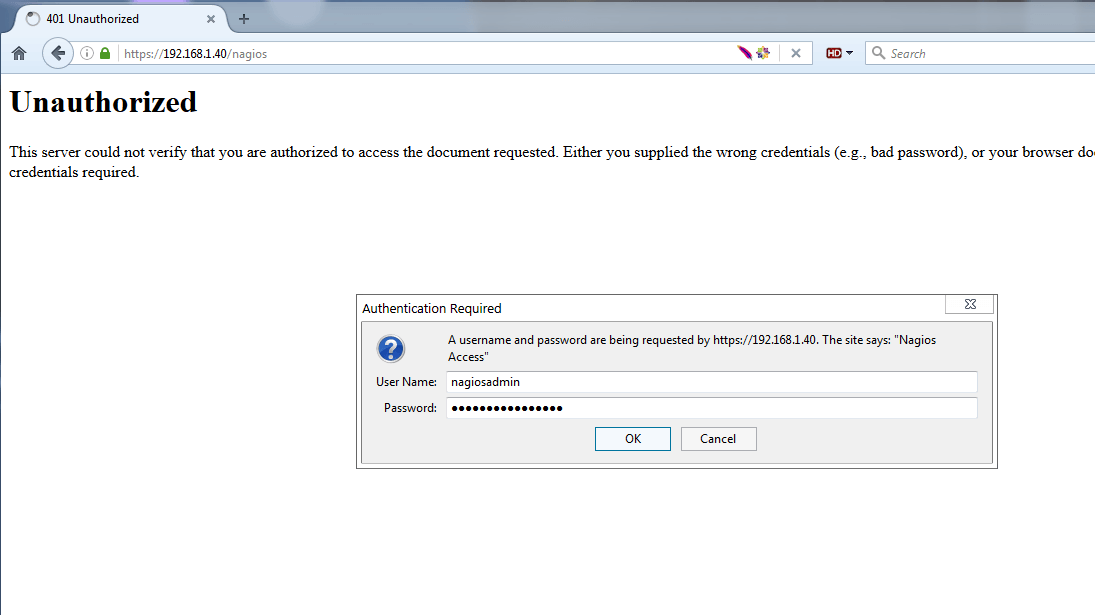
Nagios Login Dashboard
Nagios Linux Monitoring Interface

That’s all! Now you can start setup your own internal cloud environment. Now follow the next tutorial that will explain how to link the server physical NIC to openstack bridge interface and manage Openstack from web panel.


Matei Cezar
I'am a computer addicted guy, a fan of open source and linux based system software, have about 4 years experience with Linux distributions desktop, servers and bash scripting.

Each tutorial at TecMint is created by a team of experienced Linux system administrators so that it meets our high-quality standards.

Join the TecMint Weekly Newsletter (More Than 156,129 Linux Enthusiasts Have Subscribed)
Was this article helpful? Please add a comment or buy me a coffee to show your appreciation.

89 thoughts on “How to Install Your Own Cloud Platform with OpenStack in RHEL/CentOS 7”

  1. Thanks for sharing this great tutorial.

    The OpenStack Mitaka do not list on these repos. When i try “yum install -y centos-release-openstack-mitaka“, they can’t find it.

    Reply
    • @Marcelo,

      Have you enabled the following repository under your CentOS 7?

      # yum install https://www.rdoproject.org/repos/rdo-release.rpm 
      
      Reply
  2. Thanks a lot. I encounter a problem after executing the last command “packstack --answer-file 22.05.19.conf” the error say:

    ERROR: Error appeared during Puppet run:192.168.1.33_controller.pp
    Error:'/usr/sbin/ntpdate time2.aliyun.com' returned 1 instead of one of [0]
    

    I try to change the ntp server, restart ntpdate service, but it doesn’t work.

    Reply
  3. Hi, All,

    After # packstack –answer-file 13.04.16.conf, i have ERROR : Local IP address discovery failed. please set a default Gateway for your system.

    Please need help.

    Reply
  4. ERROR: appeared during puppet run: controller.pp
    error: /stage[main]/Packstack::swift::Storage/Swift::Storage::Loopback[swiftloopback]/Swift::Storage::Ext4[Swiftloopback]/Swift::Storage::Mount[Swiftloopback]/Mount[/srv/node/swiftloopback]: Could not evaluate: Field ‘device’ is required

    getting this error, if anyone can help me out in this.

    Reply
  5. Many Thanks Matei Cezar!

    What a perfect procedure to deploy OpenStack!!! i was trying since last few days as per RDO official documentation and every time my installation was failing due to one or the other reason, unable to start nova scheduler, Nova table not found in DB, unable to download something and what not.

    Just completed installing Queens release on CentOS 7.5 (1804) without a single glitch. Thanks again.

    Keep Rocking!

    Reply
  6. packstack –gen-answer-file=’date +”%d.%m.%y”‘.conf

    ERROR:root:Failed to load plugin from file ssl_001.py
    ERROR:root:Traceback (most recent call last):
    File “/usr/lib/python2.7/site-packages/packstack/installer/run_setup.py”, line 923, in loadPlugins
    moduleobj = __import__(moduleToLoad)
    File “/usr/lib/python2.7/site-packages/packstack/plugins/ssl_001.py”, line 20, in
    from OpenSSL import crypto
    File “/usr/lib/python2.7/site-packages/OpenSSL/__init__.py”, line 8, in
    from OpenSSL import rand, crypto, SSL
    File “/usr/lib/python2.7/site-packages/OpenSSL/crypto.py”, line 13, in
    from cryptography.hazmat.primitives.asymmetric import dsa, rsa
    File “/usr/lib64/python2.7/site-packages/cryptography/hazmat/primitives/asymmetric/rsa.py”, line 14, in
    from cryptography.hazmat.backends.interfaces import RSABackend
    File “/usr/lib64/python2.7/site-packages/cryptography/hazmat/backends/__init__.py”, line 7, in
    import pkg_resources
    ImportError: No module named pkg_resources

    ERROR:root:Traceback (most recent call last):
    File “/usr/lib/python2.7/site-packages/packstack/installer/run_setup.py”, line 988, in main
    loadPlugins()
    File “/usr/lib/python2.7/site-packages/packstack/installer/run_setup.py”, line 931, in loadPlugins
    raise Exception(“Failed to load plugin from file %s” % item)
    Exception: Failed to load plugin from file ssl_001.py

    ERROR : Failed to load plugin from file ssl_001.py
    => Why it show this error?

    Reply
  7. While generating your answer file for packstack you have used single quotations instead of backticks.

    > packstack –gen-answer-file=`date +”%d.%m.%y”`.conf

    Reply
  8. 192.168.16.28_prescript.pp: [ ERROR ]
    Applying Puppet manifests [ ERROR ]

    ERROR : Error appeared during Puppet run: 192.168.16.28_prescript.pp
    Error: Evaluation Error: Comparison of: String >= Integer, is not possible. Caused by ‘A String is not comparable to a non String’. at /var/tmp/packstack/59912c061d894c9e93dfa6af60edca6d/modules/apache/manifests/version.pp:15:118 on node openstack.example.com

    Reply
  9. This is what I got when I tried to install this:

    [root@cfOS4 ~]# packstack --answer-file answers.conf
    Welcome to the Packstack setup utility
    

    The installation log file is available at: /var/tmp/packstack/20170908-034453-M_777s/openstack-setup.log

    Installing:
    Clean Up                                             [ DONE ]
    Discovering ip protocol version                      [ DONE ]
    Setting up ssh keys                                  [ DONE ]
    Preparing servers                                 [ ERROR ]
    
    ERROR : Failed to run remote script, stdout:
    stderr: /etc/ssh/ssh_config: line 40: Bad configuration option: permitrootlogin
    /etc/ssh/ssh_config: terminating, 1 bad configuration options
    

    Please check log file /var/tmp/packstack/20170908-034453-M_777s/openstack-setup.log for more information

    Additional information:
    * Parameter CONFIG_NAGIOS_INSTALL: Nagios installation option is deprecated and will be removed from packstack in Pike.

    Thanks,
    Michael

    Reply
    • Hello,
      Try this:

      1. Installing GNOME-Desktop:

      Install GNOME Desktop Environment on here.

      # yum -y groups install “GNOME Desktop”
      Input a command like below after finishing installation:

      # startx

      Or this:

      2. Installing KDE-Desktop:

      Install KDE Desktop Environment on here.

      # yum -y groups install “KDE Plasma Workspaces”
      Input a command like below after finishing installation:

      # echo “exec startkde” >> ~/.xinitrc
      # startx
      KDE Desktop Environment starts like follows:
      enter image description here

      Or this:

      3. Installing Xfce Desktop Environment:

      Install Xfce Desktop Environment on here.

      # yum -y groupinstall X11
      # yum –enablerepo=epel -y groups install “Xfce”

      # echo “exec /usr/bin/xfce4-session” >> ~/.xinitrc
      # startx

      I prefer Xfce desktop from all above mentioned. It is more simple and good-looking for me. But it is up to you.

      Reply
  10. Kept getting HTTPD service error near end of install using VirtualBox 5.1.6. Tried reinstalling HTTPD service and manual restart but Packstack kept failing around same place.

    Determined error was due to service timeout. Increased VM memory from 2GB to 4GB and clean minimal install from DVD ISO following instructions exactly as noted here = Successful install with NO errors.

    Cheers,
    Scott.

    Reply
    • it works ok with last release https://www.rdoproject.org/install/packstack/
      just need alot RAM and CPU resources in order to speed up the process so as if use only 4GB RAM and 1 Core CPU it takes ages while it is completed. So it looks like that the process is stuck (for not experienced user like me). But when i added 8GB of RAM and all 4 cores then i was able to see that it was completed successfully (it took about 20-30 minutes). I hope that this information will be usefull for someone.

      Reply
    • Openstack is designed to run on powerfull bare-metal machines, so you should experience errors on virtual machies with less resources , such as RAM or CPUs.

      Reply
  11. This does not work at all, many users have errors with certs but author even did not mentioned that it is needed in this tutorial.

    Reply
  12. Please help me;
    >
    10.0.2.15_controller.pp: [ ERROR ]
    Applying Puppet manifests [ ERROR ]

    ERROR : Error appeared during Puppet run: 10.0.2.15_controller.pp
    Error: Execution of ‘/usr/bin/yum -d 0 -e 0 -y install openstack-nova-api’ returned 1: Error: Package: 1:python-nova-15.0.3-2.el7.noarch (openstack-ocata)
    You will find full trace in log /var/tmp/packstack/20170517-071917-wAwg1p/manifests/10.0.2.15_controller.pp.log
    Please check log file /var/tmp/packstack/20170517-071917-wAwg1p/openstack-setup.log for more information
    Additional information:

    Reply
  13. Hello,

    I cannot seem to get the following command to complete:

    [root@cloud ~]# packstack --answer-file 04.11.16.conf
    
    ERROR : [Errno 2] No such file or directory: '/etc/pki/tls/certs/selfcert.crt'
    

    Then I got:

    ERROR : [Errno 2] No such file or directory: '/etc/pki/tls/private/selfkey.key'
    

    I am assuming that I am missing a critical piece to the installation. Perhaps something that is done even before this tutorial can be followed. I tried to follow the following link to fix the certificate issue:

    https://ask.openstack.org/en/question/97645/error-while-installing-openstack-newton-using-rdo-packstack/

    Can you help me figure out what is missing and get through the rest of the install?

    Thanks,

    Alex

    Reply
  14. which ip address is configured here for openstack server 192.168.1.40 or 192.168.1.41 because openstack is being accessed with 192.168.1.40 and nagios from 192.168.1.41 its confusing..

    Reply
  15. Need Help..

    After executing the command "packstack –answer-file 13.04.16.conf" the process asked me for password just after the line "Setting up SSH Keys"
    Please suggest me how to proceed

    Reply
    • Hi Omkar,

      To the best of my knowledge, It will let you to setup a password and this it will ask for each service and DB.

      I think this because of some recent update in openstack-packstack… not sure..

      Regards
      R.Krishnan

      Reply
  16. I’m trying to install the openstack on CentOS running as VM on VMware. I followed the same steps mentioned above, everything is fine but got the following error while updating the answer file with packstack .

    0.77.80.48_amqp.pp:                              [ ERROR ]       
    Applying Puppet manifests                         [ ERROR ]

    ERROR : Error appeared during Puppet run: 10.77.80.48_amqp.pp
    Error: Evaluation Error: Error while evaluating a Resource Statement, Evaluation Error: Error while evaluating a Resource Statement, Class[Rabbitmq]: default expression for $config_management_variables tries to illegally access not yet evaluated $config_management_variables at /var/tmp/packstack/b90de8de0b1a4f3284e1a3e6018fe758/manifests/10.77.80.48_amqp.pp:58:5  at /var/tmp/packstack/b90de8de0b1a4f3284e1a3e6018fe758/manifests/10.77.80.48_amqp.pp:17 on node localhost
    You will find full trace in log /var/tmp/packstack/20170313-025724-8MKHPa/manifests/10.77.80.48_amqp.pp.log

    And also the openstack is not opening in web browser and the keystonerc_admin is not created. could you please provide me a solution?

    Reply
  17. Ok! I appreciate that the guide kinda gave guidelines on the installation, it missed some critical info that would possibly lead to others trying Openstack for the first time to give up.

    1. SSL certs – during installation the users will need to create their own self-signed certs for selfcert.crt, dashboard.crt and ssl_vnc.crt along with the relevant keys. Without this the installation will not continue. On my attempt not to use SSL i did not succeed.

    2. The installation will take some time at _controller.pp (puppet initialization). – the installation will fail without the installation of this package; python2-ryu-4.9-2.el7.noarch.

    This package will not install easily without a dependency called tinyrpc 0.5. I followed a know bugs page which one of the users gave a work around https://bugs.launchpad.net/openstack-manuals/+bug/1666558?comments=all (thanks to Alessandro Pilotti)

    After all those hoops, only then your Openstack will complete installation. I hope the Openstack development team will modify the installation libraries to already include the python package and the automatic creation of SSL certs when a user doesn’t specify in the config file.

    Just my opinion based on my experience!
    Thanks

    Reply
  18. Hi,
    I installed Mitaka using packstack on Centos 7 but facing some issues with the openstack services.

    openstack-nova-api: active
    openstack-nova-compute: active
    openstack-nova-network: inactive (disabled on boot)
    openstack-nova-scheduler: active
    openstack-nova-cert: active
    openstack-nova-conductor: active
    openstack-nova-console: inactive (disabled on boot)
    openstack-nova-consoleauth: active
    openstack-nova-xvpvncproxy: inactive (disabled on boot)
    == Glance services ==
    openstack-glance-api: active
    openstack-glance-registry: active
    == Keystone service ==
    openstack-keystone: failed
    == Horizon service ==
    openstack-dashboard: uncontactable

    How to rectify this.

    Br,
    -Anil Chandy

    Reply
  19. How difficult is it to add another node once the primary node is getting close to capacity ? I am looking to build a cheap cloud solution for my business offering storage / sync backup for clients and would like to use OpenStack, Do you feel this is a good fit?

    Reply
  20. Thanks for tutorial, just followed it and get below message when try to loged in on dashboard

    WARNING openstack_auth.backend The OPENSTACK_KEYSTONE_URL setting points to a v2.0 Keystone endpoint, but v3 is specified as the API version to use by Horizon. Using v3 endpoint for authentication.
    2017-01-12 19:54:05,442 2294 WARNING openstack_auth.forms Login failed for user “admin”.

    Reply
  21. Hi,

    I am unable to complete Step 7.

    It says the error cant open.

    I am trying out this in VMware workstation 12 player.

    Please help.

    Reply
  22. I followed your article, but here is the error that I have

    ERROR : Error appeared during Puppet run: 10.156.41.30_keystone.pp
    Error: Could not start Service[httpd]: Execution of ‘/usr/bin/systemctl start httpd’ returned 1: Job for httpd.service failed because the control process exited with error code. See “systemctl status httpd.service” and “journalctl -xe” for details.

    Help me please

    Reply
  23. Hi,

    Your post was good, here the packstack is using KVM as default Hypervisor.
    Is’t possible to use Xeserver as my backend Hypervisor ?
    If is’t possible kindly share me those steps please.

    Thanks

    Reply
  24. Got this error:
    xx.xxx.xxx.x_controller.pp: [ ERROR ]
    Applying Puppet manifests [ ERROR ]

    Error: Execution of ‘/usr/bin/yum -d 0 -e 0 -y install openstack-gnocchi-metricd’ returned 1: Error unpacking rpm package python-urllib3-1.15.1-2.el7.noarch

    Reply
  25. Hi Sir,
    I have installed openstack successfully and its opened on browser , but when I am trying to providing keystone user name i.e admin and password ..Not able to login.. Please help on this ..

    Reply
    • Completely disable Selinux policy, reboot and trey to login. If this doesn’t work try to change the OPENSTACK_KEYSTONE_DEFAULT_ROLE from “Member” to “admin”, reboot and try login.

      Reply
      • Thanks Sir,

        I have done everything, I was facing issue because of mitaka centos release and clinder=y. Now my openstack interface is working as expected. Thanks for this tutorial. Now I will work on further tasks and if I will get any issue share here, possibly with solution.. Thanks lot of ton again :)

        Reply
  26. Hello,

    I just get the following error while installing via answer file.

    Preparing Nova VNC Proxy entries [ ERROR ]
    ERROR : [Errno 2] No such file or directory: ‘/etc/pki/tls/certs/selfcert.crt’

    Can you help me?

    Thanks a lot
    Michel

    Reply
    • Openstack insights and bugs are beyond my level of experience with software design. I suggest that you register to Openstack Q&A and add a question there in order for Openstack software developers or designers to troubleshoot and debug your this issue (there’s seems to be some already unanswered topics concerning this problem you’re facing) https://ask.openstack.org/en/questions/

      Reply
      • I set the SSL for horizon config to n and my installation completed. I am not sure if this will apply for anyone setting up a production installation, I am doing an installation in a lab. its still installing, will update when done!

        Reply
  27. Hello! i have one error.. :-( i don’t solve this problem. (Same procedure)

    ERROR : Error appeared during Puppet run: 39.193.12.123_keystone.pp
    Error: Could not prefetch keystone_service provider ‘openstack’: Command: ‘openstack [“service”, “list”, “–quiet”, “–format”, “csv”, “–long”]’ has been running for more then 20 seconds!

    Reply
  28. How can you suggest setting SSH config option ‘PermitRootLogin’ to ‘yes’ and disable SELinux when this article ‘https://www.tecmint.com/linux-server-hardening-security-tips/’ clearly state that this is NOT a good idea, if you want a stable and secure server?

    It would be nice if this tutorial was edited so that installation of OpenStack could be done on a secure server :)

    Thanks :)
    Torben G. Hansen

    Reply
  29. Hi guys

    Congratulations Matei wonderful tutorial, I want to share about bug and what I did and works.

    openstack_packstack.conf
    change
    CONFIG_CINDER_INSTALL=n

    enjoy

    Reply
  30. Hello,
    Just a quick question. Shouldnt the # packstack –gen-answer-file=’date +”%d.%m.%y”‘.conf
    actually have backticks to make the com,and produce the date.conf file? Maybe its just a text translation thing.

    Here is what i mean
    # packstack –gen-answer-file=`date +”%d.%m.%y”`.conf

    Reply
    • Yes…it must have backtricks to produce the command output. You can also use command substitution with $(command to execute)

      Reply
    • I see that your Linux knowledge is limited. No offence but you should first start to learn how the system and Linux bash operates and then go to more complicated stages, such as Openstack, which is very hard to be configured for beginners.

      Reply
  31. It seems to be a bug or a compatibility problem with already installed software or libraries on your system. Please consult OpenStack forums for this issue or send the output of the log file to their mail list.

    Reply
  32. I am getting below error after fallowing above steps, can you please help me on this?

    10.192.206.79_nova.pp: [ ERROR ]
    Applying Puppet manifests [ ERROR ]

    ERROR : Error appeared during Puppet run: 10.192.206.79_nova.pp
    Error: Execution of ‘/usr/bin/yum -d 0 -e 0 -y install openstack-nova-compute’ r eturned 1: Transaction check error:
    You will find full trace in log /var/tmp/packstack/20160505-010355-Cu15RF/manife sts/10.192.206.79_nova.pp.log
    Please check log file /var/tmp/packstack/20160505-010355-Cu15RF/openstack-setup. log for more information
    Additional information:

    Reply
  33. trystack.org required you to join using facebook login into trystack website, you will get upto 8gb openstack full setup.

    Reply
  34. Hi thanks for the useful information. If we want to do install in Virtual box, how much the memory minimum this install will require?

    Reply
    • You want to install it on VB only for testing purposes, i guess! Use minimum 6 GB of RAM. OpenStack is a huge RAM resource consuming.

      Reply
  35. Getting this error:

    ERROR : Error appeared during Puppet run: 192.168.122.4_chrony.pp
    Error: /usr/sbin/ntpdate 0.ro.pool.ntp.org 1.ro.pool.ntp.org returned 1 instead of one of [0]

    Any help??

    Reply
  36. It seems to be a bug with this version of OpenStack. Try to issue the packstat command against the answer-file again and see if you get any error this time. If the error persists i suggest you visit OpenStack mail list of forums or fire the bug to them.

    Reply
  37. hello; i tried to install using this guide, but i get the following error :

    0.0.2.15_keystone.pp: [ DONE ]
    10.0.2.15_glance.pp: [ DONE ]
    10.0.2.15_cinder.pp: [ ERROR ]
    Applying Puppet manifests [ ERROR ]

    ERROR : Error appeared during Puppet run: 10.0.2.15_cinder.pp
    Error: Could not prefetch cinder_type provider ‘openstack’: Command: ‘openstack [“volume type”, “list”, “–quiet”, “–format”, “csv”, “–long”]’ has been running for more then 20 seconds!

    Reply
  38. Openstack is real agile. You can choose what component that will be separate. the point is their inter connection between each services.

    Reply

Got something to say? Join the discussion.

Thank you for taking the time to share your thoughts with us. We appreciate your decision to leave a comment and value your contribution to the discussion. It's important to note that we moderate all comments in accordance with our comment policy to ensure a respectful and constructive conversation.

Rest assured that your email address will remain private and will not be published or shared with anyone. We prioritize the privacy and security of our users.